Sallie Jumpsuit | Closet Case Files

5 Aug

IMG_3468

Hi, friends! Did you enjoy the chocolate overload yesterday? I’m back to drinking smoothies and eating kale so I can fit into the clothes I’ve been making. Too bad because those brownies are sooo good and I keep thinking about making another batch!

Here’s another recent make for you — the Sallie Jumpsuit by Heather Lou at Closet Case Files. I bought the pattern and sewed it up not long after it was released. And I’ve even worn it a few times since then but it’s taken me a couple tries to get photos that were good enough to post hence the delay in sharing it with you.

IMG_3475

This pattern is very quick and easy to make up. I think start to finish with assembling the pattern, cutting the fabric, and construction all the way down to the hem took me about four hours. The instructions are good and the methods yield nice results with a clean finished top.

I found certain parts were easier to do on my standard machine rather than my serger. For instance, the neckline seam and the side seams of the bodice were easier to construct with the sewing machine. I did go back over the neckline with the serger to add the clear elastic for stability since my standard serger foot has a nifty little slot for guiding in elastic and I think this is so much easier than adding it with the regular sewing machine, but I do think it is hard to get into the V exactly with the serger.

IMG_3477

I finished the waist and pants with the serger. I fused the hems with Emma Seabrooke fusible tape and didn’t bother stitching them. I used 1/2″ knit elastic for the waistband and it is very comfortable. My fabric is a cheap lightweight ITY knit from Hancock’s.

As for the fit, I selected a 12 at the bust and graded down to a 10 at the waist then back out to a 14 at the hips. I eliminated the pockets because I don’t really use them in lightweight knit garments. I measured the rise on the pattern and found it would be too short on me and that’s not a good look in a jumpsuit. So I added 1″ to the top of the center back and 1/2″ to the inner leg of the back piece, tapering to nothing down the inseam. I also scooped out the curve a little bit. I then shortened the front rise by about 1/2″.

IMG_3482

This all helped and the front rise is great but I need more length in the back rise on my next version as I still feel like my butt is eating the pants a little. I also plan to differentiate a front and back bodice piece on my next version as I need more ease to go over my chest. It doesn’t blouse at the center front like it does at the center back. And I think a forward shoulder adjustment would be helpful. Finally, I find the armhole to be very tight and restrictive, so next time I will lower that a bit.

IMG_3451

But overall, my jumpsuit is very wearable and I think I will definitely try the pattern out again (or maybe I already have…).

My Favorite Brownies | Foster’s Market Cookbook

4 Aug

IMG_3304

Saying I have tested a lot of brownie recipes looking for the best one would be an understatement. I have tried at least 8 versions claiming to be the world’s best brownies but none of them lived up to the hype in my book.

IMG_3379

I want a brownie that is chocolatey without being too gooey but still has a nice moist and tender crumb. Basically, I wanted the brownies from the local bakery. I’m not naming any names because I didn’t specifically ask permission, but if you live around here, you know where I’m talking about if you’ve ever eaten one. They are thick and chocolatey and the size of your head. Basically heaven in brownie form.

IMG_3374

So one day I asked for the recipe and the owner shared her source, the Foster’s Market Cookbook. I ordered it from Amazon and made the brownies immediately. They are perfection!

IMG_3375

My only modification to the recipe was to scale it down by 50% and add some toffee chips (as the bakery owner mentioned she did). Plus, I substituted pecans for the walnuts because that’s what I always have on hand since my family owns a small pecan orchard.

I love this recipe because it is quick to throw together and doesn’t require any exotic ingredients. Plus there are no tedious steps and you can even use your hand mixer. And clean up is a breeze, especially when there is a teenage boy hovering waiting to lick the beaters and bowl 🙂

I hope you give this recipe a try. Let me know what you think!

My Favorite Brownies

  • 1 cup all-purpose flour
  • 2/3 cup unsweetened cocoa powder (Dutch processed is best but natural, like Hershey’s, works too)
  • 1/2 teaspoon salt
  • 4 large eggs
  • 2 cups granulated sugar
  • 2 sticks unsalted butter, melted
  • 2 1/2 teaspoons vanilla extract
  • 1 cup coarsely chopped pecans
  • 1 cup semisweet chocolate chips
  • 1/2 cup toffee chips

Preheat the oven to 325 degrees. Line an 8″x8″ square pan with parchment paper or spray it with nonstick cooking spray (I think lining it makes it easier to remove and cut the brownies).

Sift together the flour, cocoa, and salt and set aside. In a medium bowl, cream the eggs, sugar, butter, and vanilla with an electric mixer until well blended.

Add the flour mixture and mix until all the dry ingredients are moist and blended but do not overmix. Fold in the pecans, chocolate chips, and toffee chips and stir to blend evenly.

Spread the batter into the prepared pan. Bake in the preheated oven for 45-55 minutes, or until the brownies are firm to the touch and a toothpick inserted in the center comes out mostly clean.

Remove from the oven and cool on a rack for 30-40 minutes before cutting into 16 squares.

Enjoy!

Adapted from The Foster’s Market Cookbook.

IMG_3309

Vogue 1353 | Pleated Poppies Dress

22 Jul

IMG_3282

Hello, again! I am on a roll lately!! I’m back today to share with you my completed Vogue 1353, a great pleated fit-and-flare dress with a full lining by Kay Unger. I was inspired by Margo’s recent review of this pattern (isn’t she gorgeous?!?), and bought it next time Hancock’s had a sale and started sewing almost immediately.

V1353

The pattern is the perfect silhouette for an everyday, ladylike dress. And when you make it up in a washable fabric, it works well in your day job as a pediatrician. Where, yes, sometimes you do get peed on but thankfully not often — happened for the first time in ages this week just not to this dress :)-

IMG_3286

I made this beauty up in a great poppy print stretch cotton sateen from Sawyer Brook Fabrics.

V1353 poppies lining

I lined it with a creamy yellow polyester pongee from Fabric Mart Fabrics that I think I paid $1/yd for… Cotton sateen is a dream to sew with after you’ve been doing nothing but knits and silks. It actually does what you ask it to!

IMG_3291

I started with a straight size 14 then I made a few alterations:

  • 3/4″ FBA
  • lowered bust dart 5/8″
  • lowered bust point of princess seam 5/8″
  • lengthened bodice 1/2″
  • took it in a smidgen in the princess seam above the bust
  • added 1/4″ under the arm at the bust front and back tapering to nothing at the waist
  • 1/2″ forward shoulder adjustment
  • took it in 3/4″ on each side of the zipper tapering to nothing at the waist for a gaping back neckline
  • reduced the width of the pleats because my fabric wasn’t 60″ wide

V1353 Poppies Hanging Detail

I strayed from the instructions only so far as to avoid hand sewing. I lined it completely by machine, including stitching the lining to the invisible zipper by machine with my invisible zip foot. I did hand sew the hook and eye in place as I couldn’t find any way around it. 🙂

IMG_3298

V1353 Poppies Hem

My favorite part of the dress is the hem with its facing and topstitching. I used the chainstitch function on my Juki MO-735 5-thread serger to create the textured line of stitching instead of the handstitching that is prescribed in the pattern instructions. I stitched with the hem facing up so the “wrong” side of the stitching shows on the outside of the dress, creating a nice, visible line of thread. I love finding new uses for my serger!

IMG_3293

The pattern calls for a purchased belt and here I’ve accessorized it with a cute little aqua leather belt with a silver buckle that I picked up at Gus Mayer department store in Birmingham. I think this is probably the only thing (at $38) that I could ever afford from that store but I do love it! I have also paired the dress with a bead necklace from Kluster Shop and some Franco Sarto strappy heel sandals.

This is my new favorite dress pattern and I think there will be another one soon. Stay tuned!

In-House Patterns | Chelsea Blouse in Blue Georgette

19 Jul

IMG_3254

Here we are again, on the eve of another work week, and I have another productive sewing session to tell you about. I have completed a Vogue 1353 which turned out great and I will share once I get photos. I have also made another Closet Case Files Sallie Jumpsuit trying to perfect the fit. And I made another McCall’s 7121 that just needs a hem. Spoiler alert — no crazy stripe matching in this version.

IH3012-ViewA_sketch_grande

But what I am going to share with you today is this sheer, swingy blue blouse made up with the hot-off-the-presses In-House Patterns Chelsea Blouse. It’s no secret that I love Alexandra Morgan’s skills as a designer, pattern drafter, and conveyor of streamlined and industry-style sewing techniques. You can see some of my previous In-House makes here and here (I think there is going to be another Belle Blouse in my future soon). There are others that have never made it onto the blog (my sister loves the Jenny Tee that I made and gifted to her).

IMG_3256

This top is trendy but basic enough that you could make it up in a crazy fabric to wear now or in a nice neutral solid to keep in your wardrobe for many years. The pattern also provides the option for color blocking or mixed media (think lace or chiffon back panel). I love the way the side seams swing forward toward the front as they head down to the hemline. I think this makes the silhouette more slimming. What do you think?

IMG_3250

I chose to make mine up in a royal blue polyester georgette by J. Crew ($3.50/yard), one of a few pieces in a recent Fabric Mart Fabrics acquisition. While this wasn’t the easiest fabric to work with, by taking my time getting the fabric on grain, cutting it out with a rotary cutter, and carefully pinning and stitching, I think I was able to achieve a satisfactory garment.

IMG_3262

Now, don’t get me wrong, this isn’t my best work ever. My rolled hem foot gave me fits and my neck binding refused to be stitched in the ditch so I had to resort to handstitching it. But the casual observer will never notice these things.

IMG_3259

For sizing I chose a large with D cup and I added 5/8″ width to each shoulder as well as making a 1/2″ forward shoulder adjustment. I chose these adjustments based on the fit of my Blossom Blouse but I feel like the width I added to the shoulders was unnecessary and makes me look even broader than I am. Based on prior experience, In-House Patterns are drafted with very little ease so I don’t try to fudge on choosing my size. But I think in this pattern I could have gone with the medium.

IMG_3266

As far as construction goes, I used French seams for everything, including the armscyes. As mentioned above, the French binding on the neckline was stitched down by hand with a fell stitch.

IMG_3252

The body and sleeves of the blouse are hemmed with the rolled hem foot on your machine. From prior experience, I knew this would be tricky but I forged ahead. I had to adjust my needle position to get the stitching to hit in the right spot. And some places aren’t rolled right but it’s not obvious from the outside. It got a little easier as I went along, though, and the sleeves aren’t too bad.

IMG_3248

The Chelsea Blouse from In-House patterns is another solidly drafted pattern by Alexandra Morgan. I would love to see your version if you decide to sew it up!

Finished Knit | Aures Lace Yoke Tee

12 Jul

IMG_3234

Happy Sunday, friends! I am so excited to share this most recent finished object with you today! Let the record show that this is my first official presentation of a completed, truly wearable, hand-knitted garment!!

DSC_0519_medium2

The pattern is the Aures Lace Yoke Tee by Rhiannon Owens and I knitted it up in some gorgeous azalea-colored silk-tencel blend yarn that I picked up at my local yarn shop (Zitron Glanz Punkt in color 8028). The finished product is not perfect but it is close enough for me to be happy to wear this tee out of the house proudly. It fits well thanks to the thoughtful sizing of the pattern designed for hourglass shapes and the color goes with several things already in my wardrobe (Gabriola maxi case-in-point). Win-win!

IMG_3243

The construction is nice because it is knit all in one piece from the bottom up, even the little cap sleeves are knit in unison with the body of the sweater. I was able to try it on as I went to make sure the circumference of the hip was going to be adequate. I included the short row bust dart for a D cup (my first time to do this in a knitting pattern), but I think it may have provided a little bit too much length in the front. I used the Icelandic bind off for the neckline as I read it was supposed to be a stretchy bind off for garter stitch but I don’t find it to stretch very well.

IMG_3239

My critiques of the pattern are few and minor and may result from my relative inexperience with knitting. First, I would prefer to have the pattern designer include what she considers A, B, C, D, and DD cup sizes. Sometimes cup sizes for patterns are different than bra sizes and bra sizes can vary depending on which country you buy your bra from… I would also like to see a diagram with finished garment measurements like many other patterns include. Finally, because I am super OCD, I would like to have stitch counts included for the final row when you begin the neckline binding to make sure I have done all my decreases correctly. I know I could do the math myself but having the designer include it is an extra safety measure.

IMG_3244

For my next version of this top, I would make it a little longer. Maybe my row gauge is off but I would like an extra 2″ in length to cover my hips. I would also make the neckline a little deeper. As it sits now, it is a little tight, both while wearing and when putting it on/taking it off. I think I would stop the lacework one repeat down and begin the binding at that point. I might also try a different bind off to see if something is stretchier than the Icelandic. Finally, I think I would only include a C-cup bust dart as I find the D-cup dart a little long and I think the front of the sweater is a little longer than the back. Or maybe that’s because of my swayback? Maybe some more experienced knitters can chime in here…

Overall I am tickled pink with my new sweater and can’t wait to get started on my next knitting project. What have you been crafting?

IMG_3241

McCall’s 7121 | Stripe Matching Victory!

5 Jul

IMG_3215

Happy Sunday, friends! I hope you are all rested and ready for the week ahead. I have taken advantage of this long holiday weekend to catch up on my never-ending list of things I would like to sew. I have made a simple knit sheath dress from some floral print scuba knit, a psychedelic Closet Case Files Sallie Jumpsuit, a Watson bra, started on the Maison Fleur Halterneck Swimsuit, and just finished this cute little dress — McCall’s 7121.

M7121

Hopefully I will get around to sharing those other things with you but if I don’t, at least you know I’m back to sewing! And now that my knit fest is over, I have plans to start on some woven items like a dress and some blouses. I will keep you posted.

IMG_3213

Y’all know I love a good knit dress. Exhibits 1 and 2. And there are more that I haven’t even shown you but that make regular appearances in my wardrobe. So it’s not a surprise that I picked up this pattern when they went on sale for $1 at Hancock’s. But I think I love this one a little more because it has a waist seam and the skirt is a little more A-line. And since the front bodice is not cut on the fold, McCall’s added a little bit of bust shaping there in the front for you.

IMG_3214

And the stripes make it so fun and flattering. Plus, I get to show off my stripe matching skills! What, you thought I was hiding something under the belt? BAM!

IMG_3341

I chose my size based on the finished measurements, not the size chart, and I selected sizes that would yield zero to a little negative ease in the bust and waist. I made my standard adjustments of 1/2″ forward shoulder and 1″ swayback and I also decided to raise the neckline by 1.5″. After I stitched this up, I realized the armholes and back neckline were gaping and the waist was a little low so I pinched up the shoulder by 1.5″ and stitched a new shoulder seam, effectively fixing all three problems. I think using neck and armhole bindings would prevent the gaping but this pattern just calls for turning and stitching.

IMG_3345

Which, of course, I didn’t do! I decided to self-line the bodice for a clean finish at the neck and armscye. I did sew some clear elastic into the neckline and after I raised the shoulder seams, it lies smoothly. Finally, I serged some clear elastic into the waist seam and hemmed with a twin needle.

IMG_3212

Easy peasy for a great wardrobe builder. I think my next version will be hacked into a peplum top with some great black floral scuba knit that is calling to me from my fabric stash…

Thirsty Thursdays | Bailey’s Banana Colada (aka BBC)

4 Jun

IMG_3290

Howdy, Friends! I hope your summer is getting off to a good start. We have been very busy in this neck of the woods and computer problems have kept me from chatting with you as regularly as I would like. But I’m back today to get caught up and to share a delicious frozen drink recipe I discovered on a recent Caribbean vacation. Sound like a plan?

As you may remember, we sold our house and moved into a small condo 6 months ago while we build a new home. The new home building is going very slowly as we had to work many kinks out of the plans and we are now waiting on bids to come in from the contractors. Hopefully once that is done we can get the ball rolling a bit faster.

On the computer front, my iMac died and I had to get a new one. In the process, the Apple store caused me to lose everything on my hard drive when they told me they had performed a back up to my external drive (which I paid them to do), then turns out the external drive was empty and they had deleted the old hard drive trying to repair it. So I have been trying not to focus on all the lost pictures and such and come up with a game plan to salvage as much as possible from Flickr, old phones, old PCs, etc.

On the sewing front, remember me telling you that I submitted my Bombshell dress for the Butterick pattern contest? Well, I came in 3rd place and won several Gertie patterns. Some of them are duplicates of ones I already own so we will have a giveaway the next time I post a finished sewing project (of which there are a few).

I have continued to receive a few Stitch Fix boxes because I have found that to be fun (thanks to those of you who have signed up with my link!). If anyone is interested, I will post another review or two, although some of my pictures may have been lost…

IMG_3226

In beautiful St. Lucia

And on a happy note, Mr. Homemaker and I went on a week long cruise through the Southern Caribbean a couple weeks ago and it was divine! While we were in St. Thomas, we took a private charter boat out for the day and did some snorkeling in St. John then headed over to Jost Van Dyke in the British Virgin Islands for some R&R. We shared our boat with a few other passengers who ended up being some fellow southerns! And the youngest of the group was even a student at the University of Alabama. Small world!

We loved making new friends and spending the day with Carol, Ruth, and Trey and our captain Kevin. Ruth grew up in St. Thomas and in her youth spent some time as a bartender, during which time she invented the drink, the Bailey’s Banana Colada, or BBC for short. I had tried this drink before on a prior cruise but meeting it’s inventor made me even more keen to recreate it at home. Turns out my existing pina colada base made for a great starting point!

I chatted with Ruth once we got home and she gave me her original recipe which I hope she doesn’t mind me taking the liberty to tweak just a bit for my taste and to present to you here.

Thanks for the recipe, Ruth, and we look forward to seeing you, Carol, and Trey again soon!

IMG_3289

Bailey's Banana Colada (aka BBC)

  • Crushed ice
  • 2 ounces gold rum
  • 2 ounces Bailey’s Irish Cream
  • 1 ounce coconut rum
  • Homemade pina colada mix
  • 1 ripe banana, peeled

Fill two glasses with crushed ice. Divide rums and Irish Cream evenly between the two glasses. Top both glasses with pina colada mix just to the top of the ice. Pour contents of both glasses into a blender container and toss in the banana. Blend on high power until smooth and the outside of the blender container is frosty.

Pour back into the glasses and garnish as desired. Enjoy immediately and responsibly.

Courtesy of my friend Ruth.

Front Door Fashion | A Sewist’s Review

13 Mar

Hi, friends! I’m back today with another installment in my series of online personal styling service reviews.

I would like to change the pace for a minute and have you close your eyes and think back to the last time you remember really experiencing Christmas with childlike excitement. The last time you struggled to fall asleep and your eyes popped open at 4 AM but you waited until the sun came up to get out of bed because your parents had threatened you. The last time you tore excitedly into your gifts, finally getting to find out what had been waiting for you under the tree.

For me, that was probably my mid teens. Once I got my drivers license, I started doing my own Christmas shopping for my mother. Before you say that sounds awful, we actually preferred it that way. I loved shopping and my mother hated it. My mom and I had very different taste in clothing. I was/am very picky. My mom would still buy some surprises for me but I would get the things that I really wanted and she would wrap them and make me wait until Christmas to open them.

Then I got married and started a career and usually get what I want when I want/need it so Mr. Homemaker and I don’t typically exchange Christmas gifts. Which is fine but a small part of me misses that pure excitement that only wrapped Christmas gifts with your name on them can bring.

Enter Front Door Fashion, a Dallas-based company that provides online and in-the-flesh personal styling services. Simply put, Front Door Fashion is the closest I will come to experiencing that childlike Christmas morning excitement as an adult.

FDF is different from Stitch Fix, which I reviewed here, and I have to admit FDF suits me a lot better. Not that I don’t enjoy Stitch Fix (I have more Fixes to share with you), but FDF can provide the more intensive work that my wardrobe needed.

Back when I was in my wardrobe rut, I was looking for something new. I had already placed orders with two of my favorite online stores but I knew my selections there would be within my comfort zone and my closet needed a little something more — a bit of defibrillation if you will. When I came across Front Door Fashion, I loved the look of their site and enjoyed filling out the style questionnaire.

But I have to admit I was a little worried that I would get a box full of clothes that would be out of my price range, but based on their no upfront risk ordering policy, I went ahead and clicked. And I actually forgot I signed up for the box until I got an email from my stylist asking for a few more details about my style and clothing preferences. And then forgot again until I got the tracking number.

FDF Intro

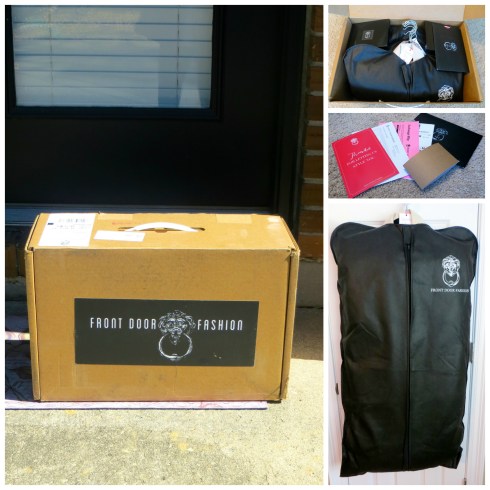
Then I got excited. And even more excited when I saw the sturdy, fashionable box the UPS man dropped off at my office. I ran home during my lunch break and quickly broke open my present to myself. Folded neatly inside was a black garment bag bursting at the seams. I took a quick assessment of what was inside. My stylist, Morgan, had grouped outfits into different categories based on outfits on my Pinterest page. Each set of garments contained coordinating accessories to compete the looks.

FDF1 Pants

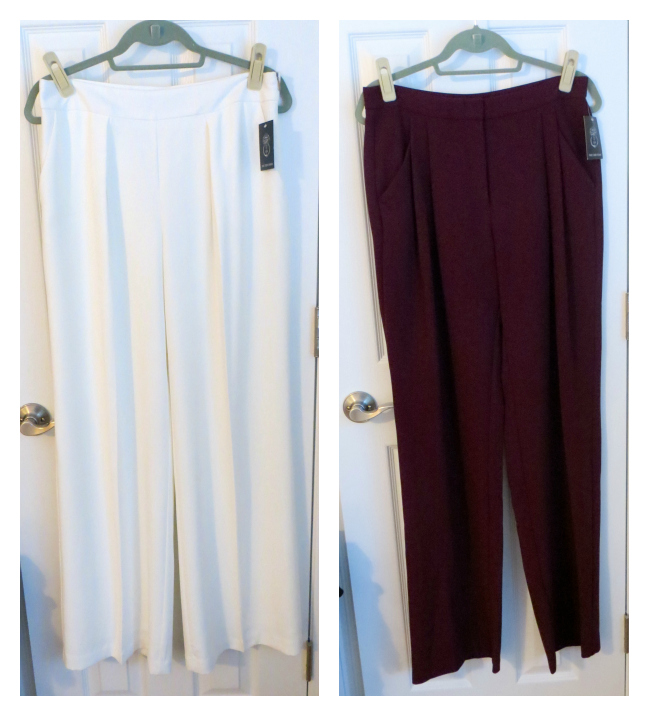
First up, I had asked for some wide leg, pleated slacks. I got two wonderful pairs that were both keepers. The pair on the left is the Trina Turk Saniya Pant ($266) and is a gorgeous white poly crepe with a side zip and full lining. They will have to be nipped in about 1/2″ in the back waist and hemmed a little before I can wear them but overall the fit is divine for a RTW pant — a near priceless find in RTW slacks!

The other pair is the BCBGeneration Pleat Front Pant ($118) and is a machine washable merlot poly. They were very long so I was able to get them hemmed with a cuff added. I love these because of their menswear style.

FDF1 Blouses

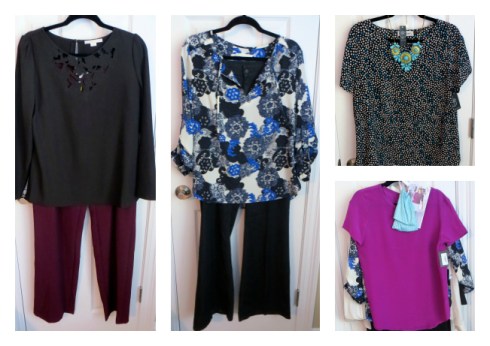
Next, I asked for blouses for work and I let Morgan know that I love silk tops. On the left is the Cooper and Ella Jade Embroidered Blouse ($121) in a black poly with cut out detail at the neckline. This top was returned because it was too restrictive in the shoulders.

Cooper and Ella Ava Tie Front Blouse ($124) was a beautiful silk blouse with a great cobalt, navy, and black pattern. Unfortunately, it was also too snug in the shoulders.

Veronica M Rita Dot Top ($58) was a simple poly shell in a cute fabric but was also too snug in the shoulders.

Lavender Brown Boxy Crew Neck Blouse ($123) was made from a gorgeous plum silk with a tad bit of stretch. Also too tight in the shoulders and strangely fit my shoulders better when I put it on backwards. What does that say about my body??

FDF1 Classic White Blouses

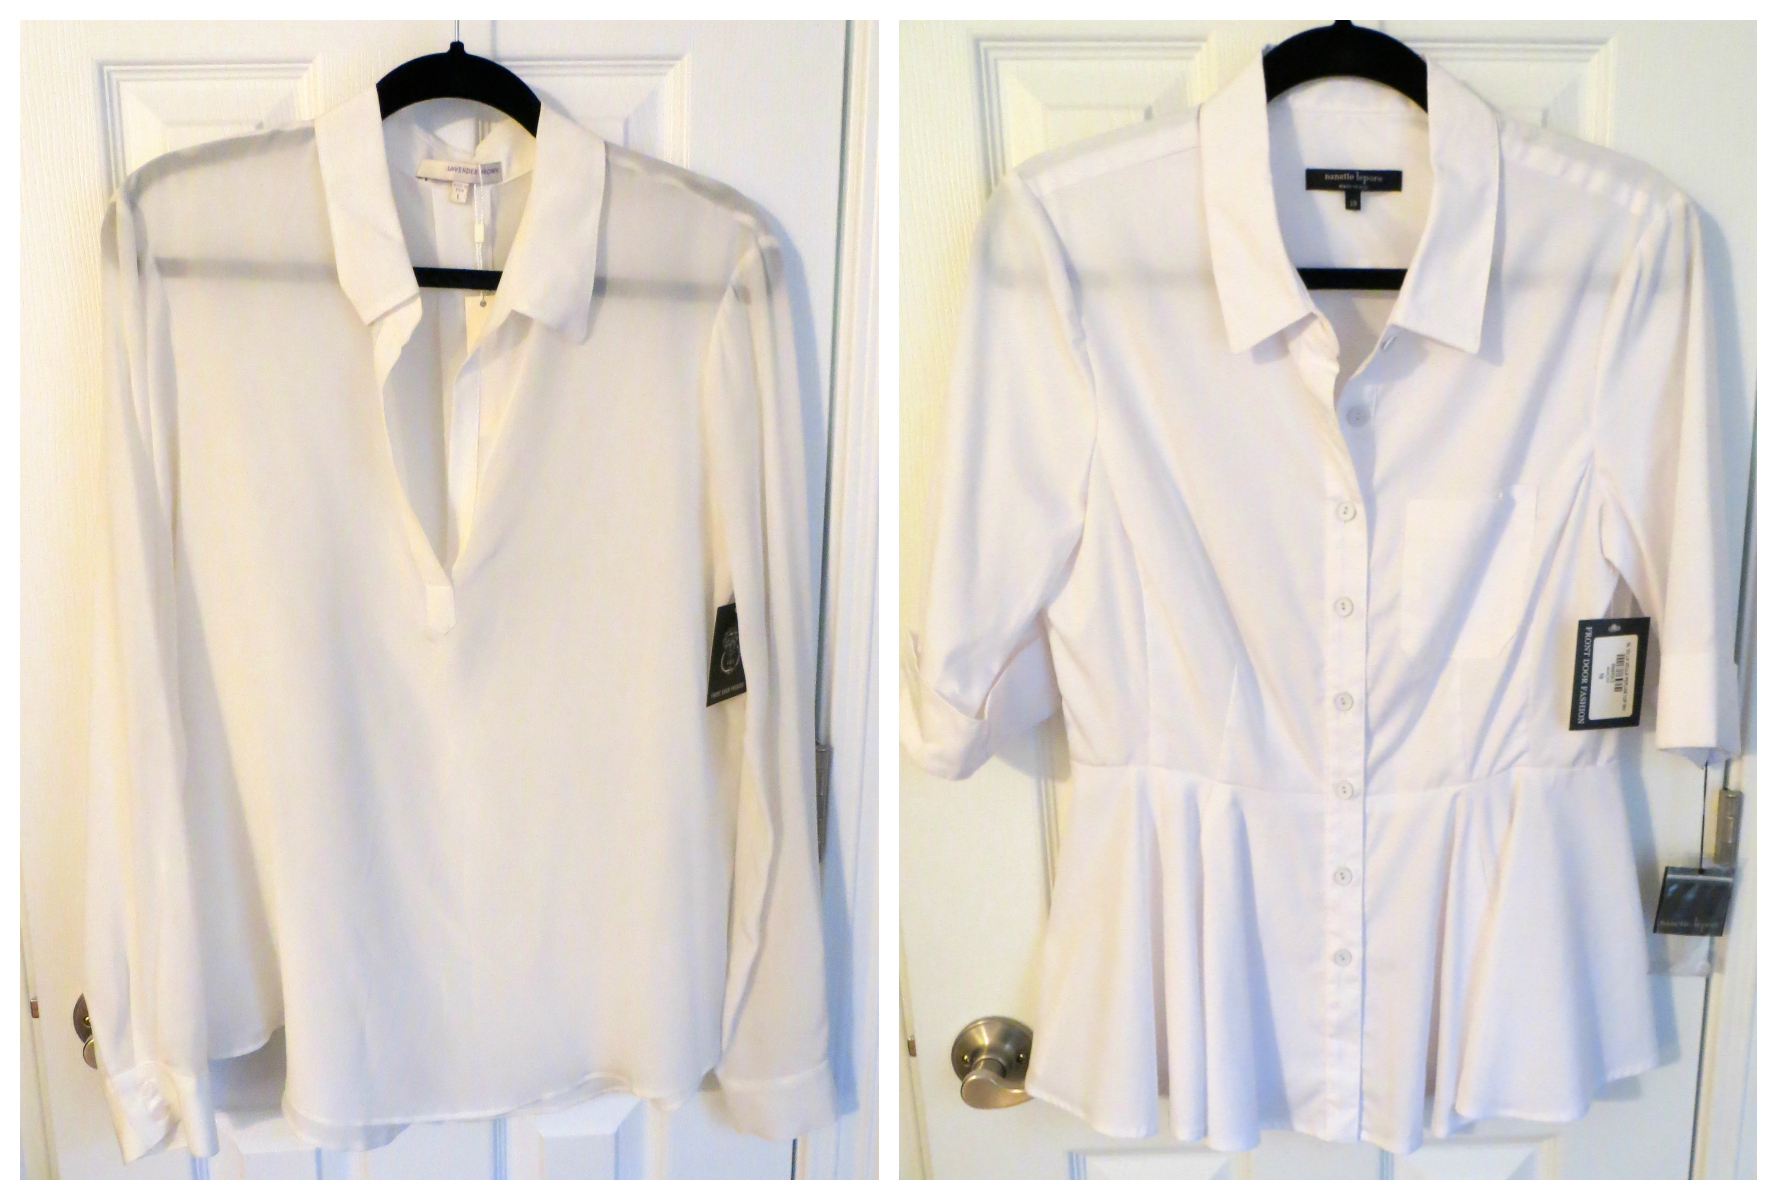
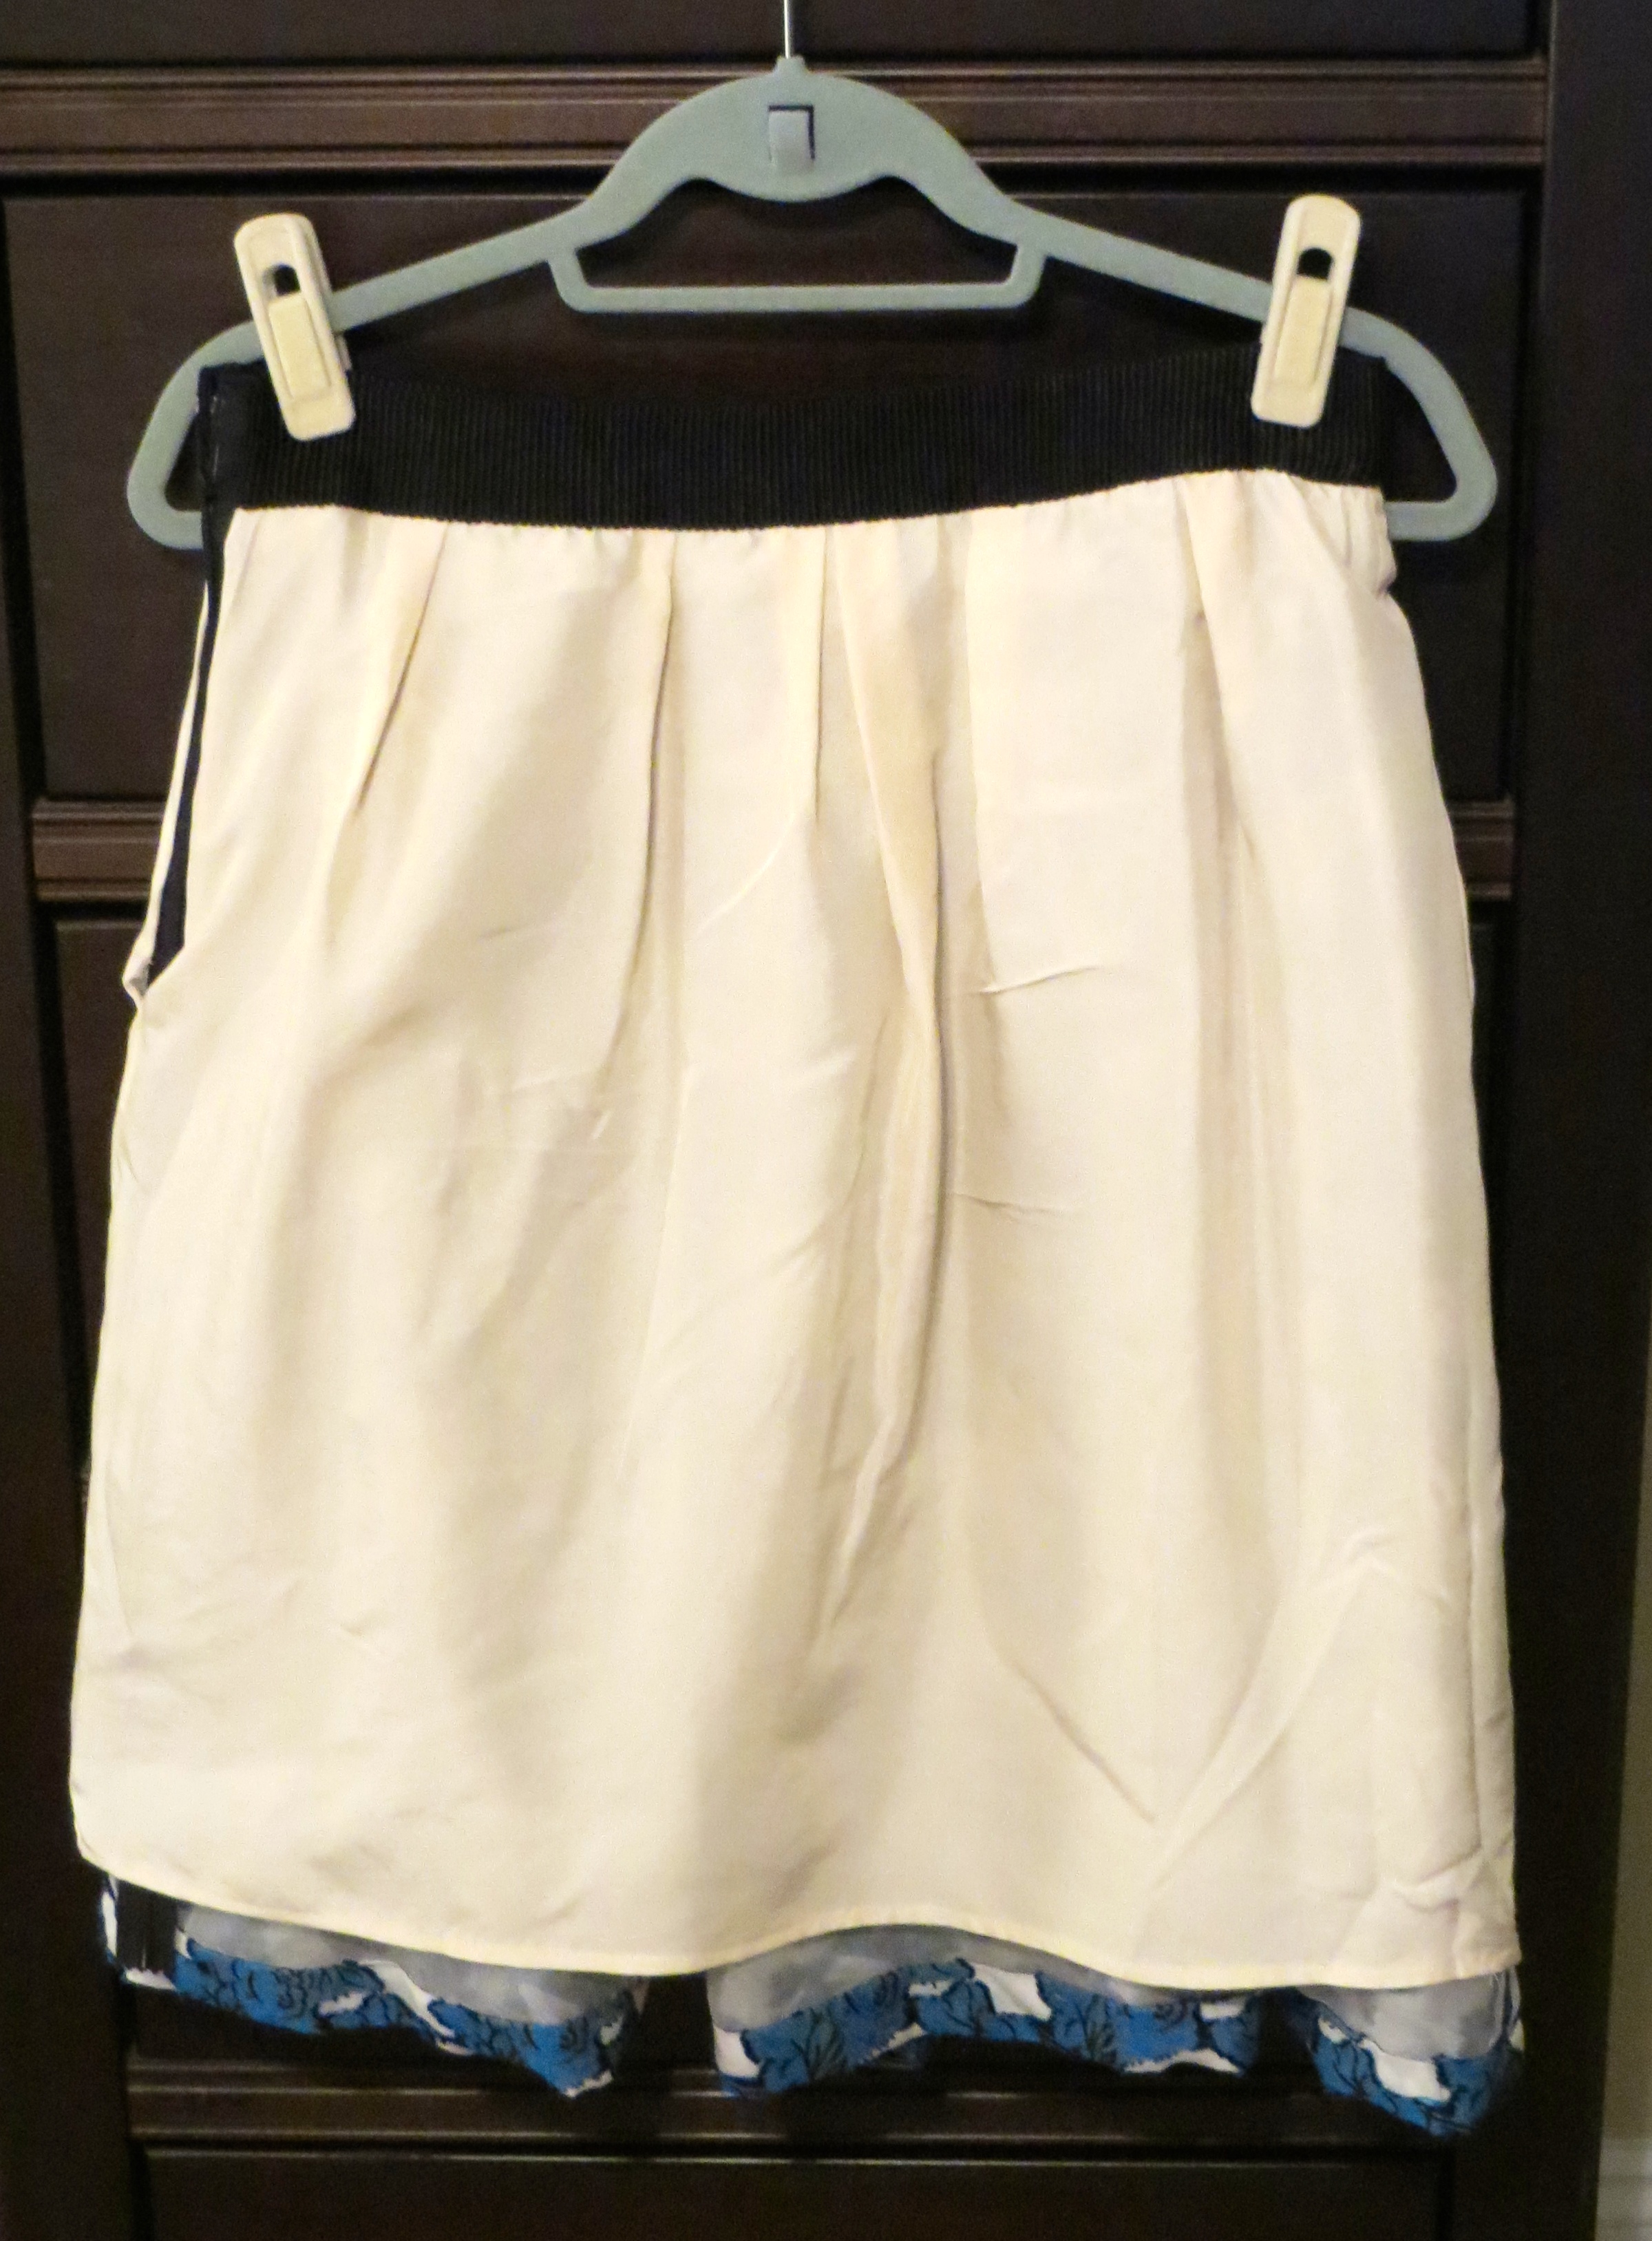
Next up are the classic white shirts I asked for. On the left is the Lavender Brown Long Sleeve Hi-Lo Collared Blouse ($178) in a fabulous ivory silk. The fit was off just a little in the shoulders and the price made me a little uneasy. For a lower price I could have lived with the fit issues but I am too close to perfecting my Granville…

On the right is the Nanette Lepore Villa Vella Peplum Top ($115) in a stretch cotton shirting. The fit was great and I love Nanette Lepore so it was a keeper.

FDF1 Knit tops

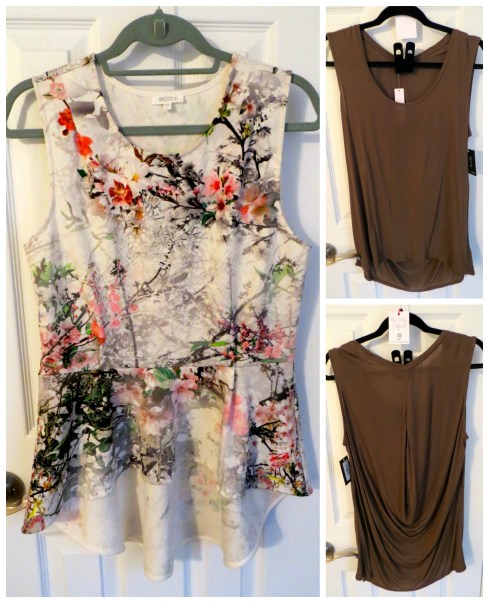
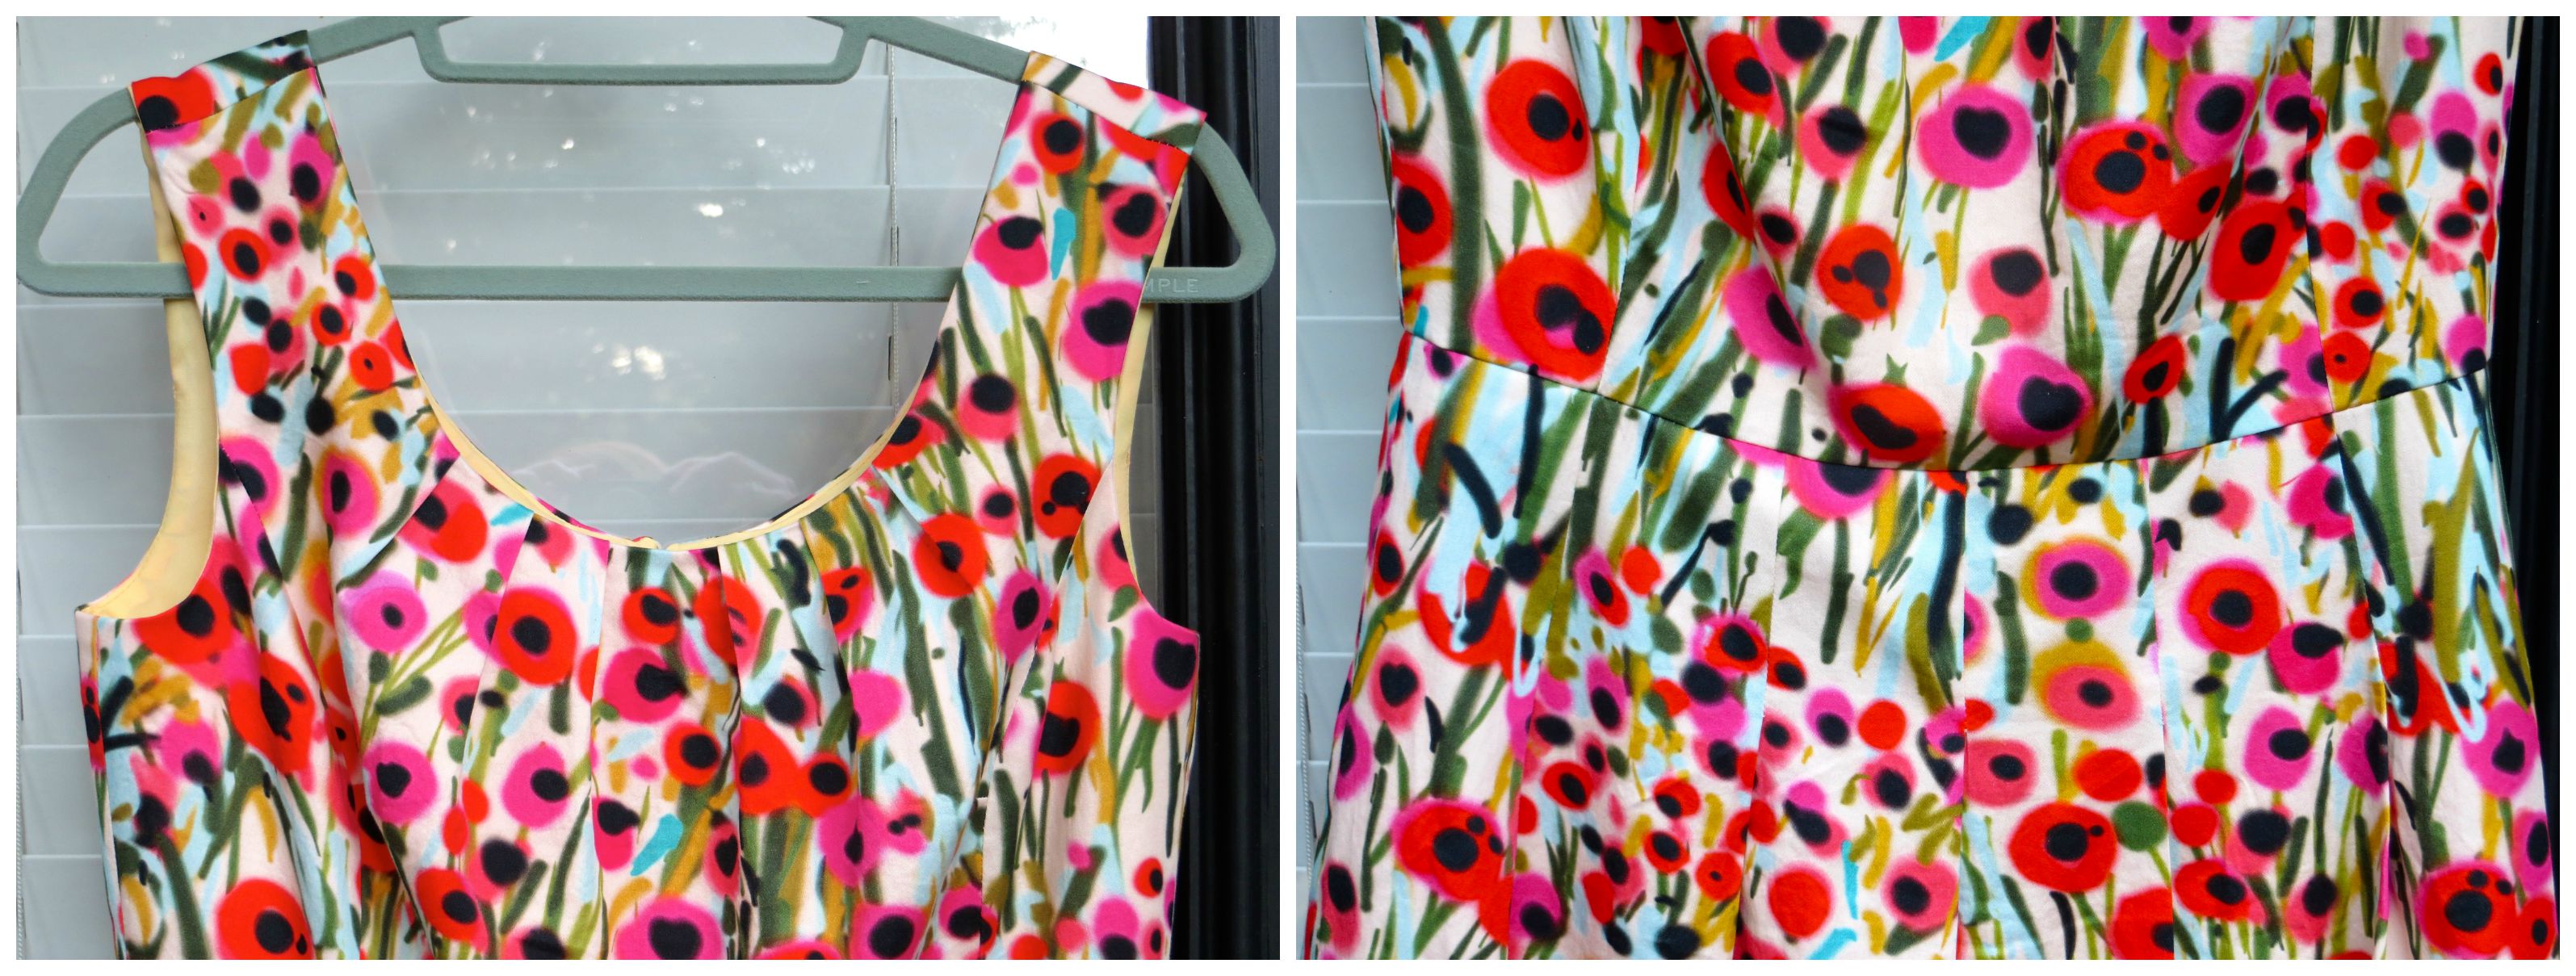
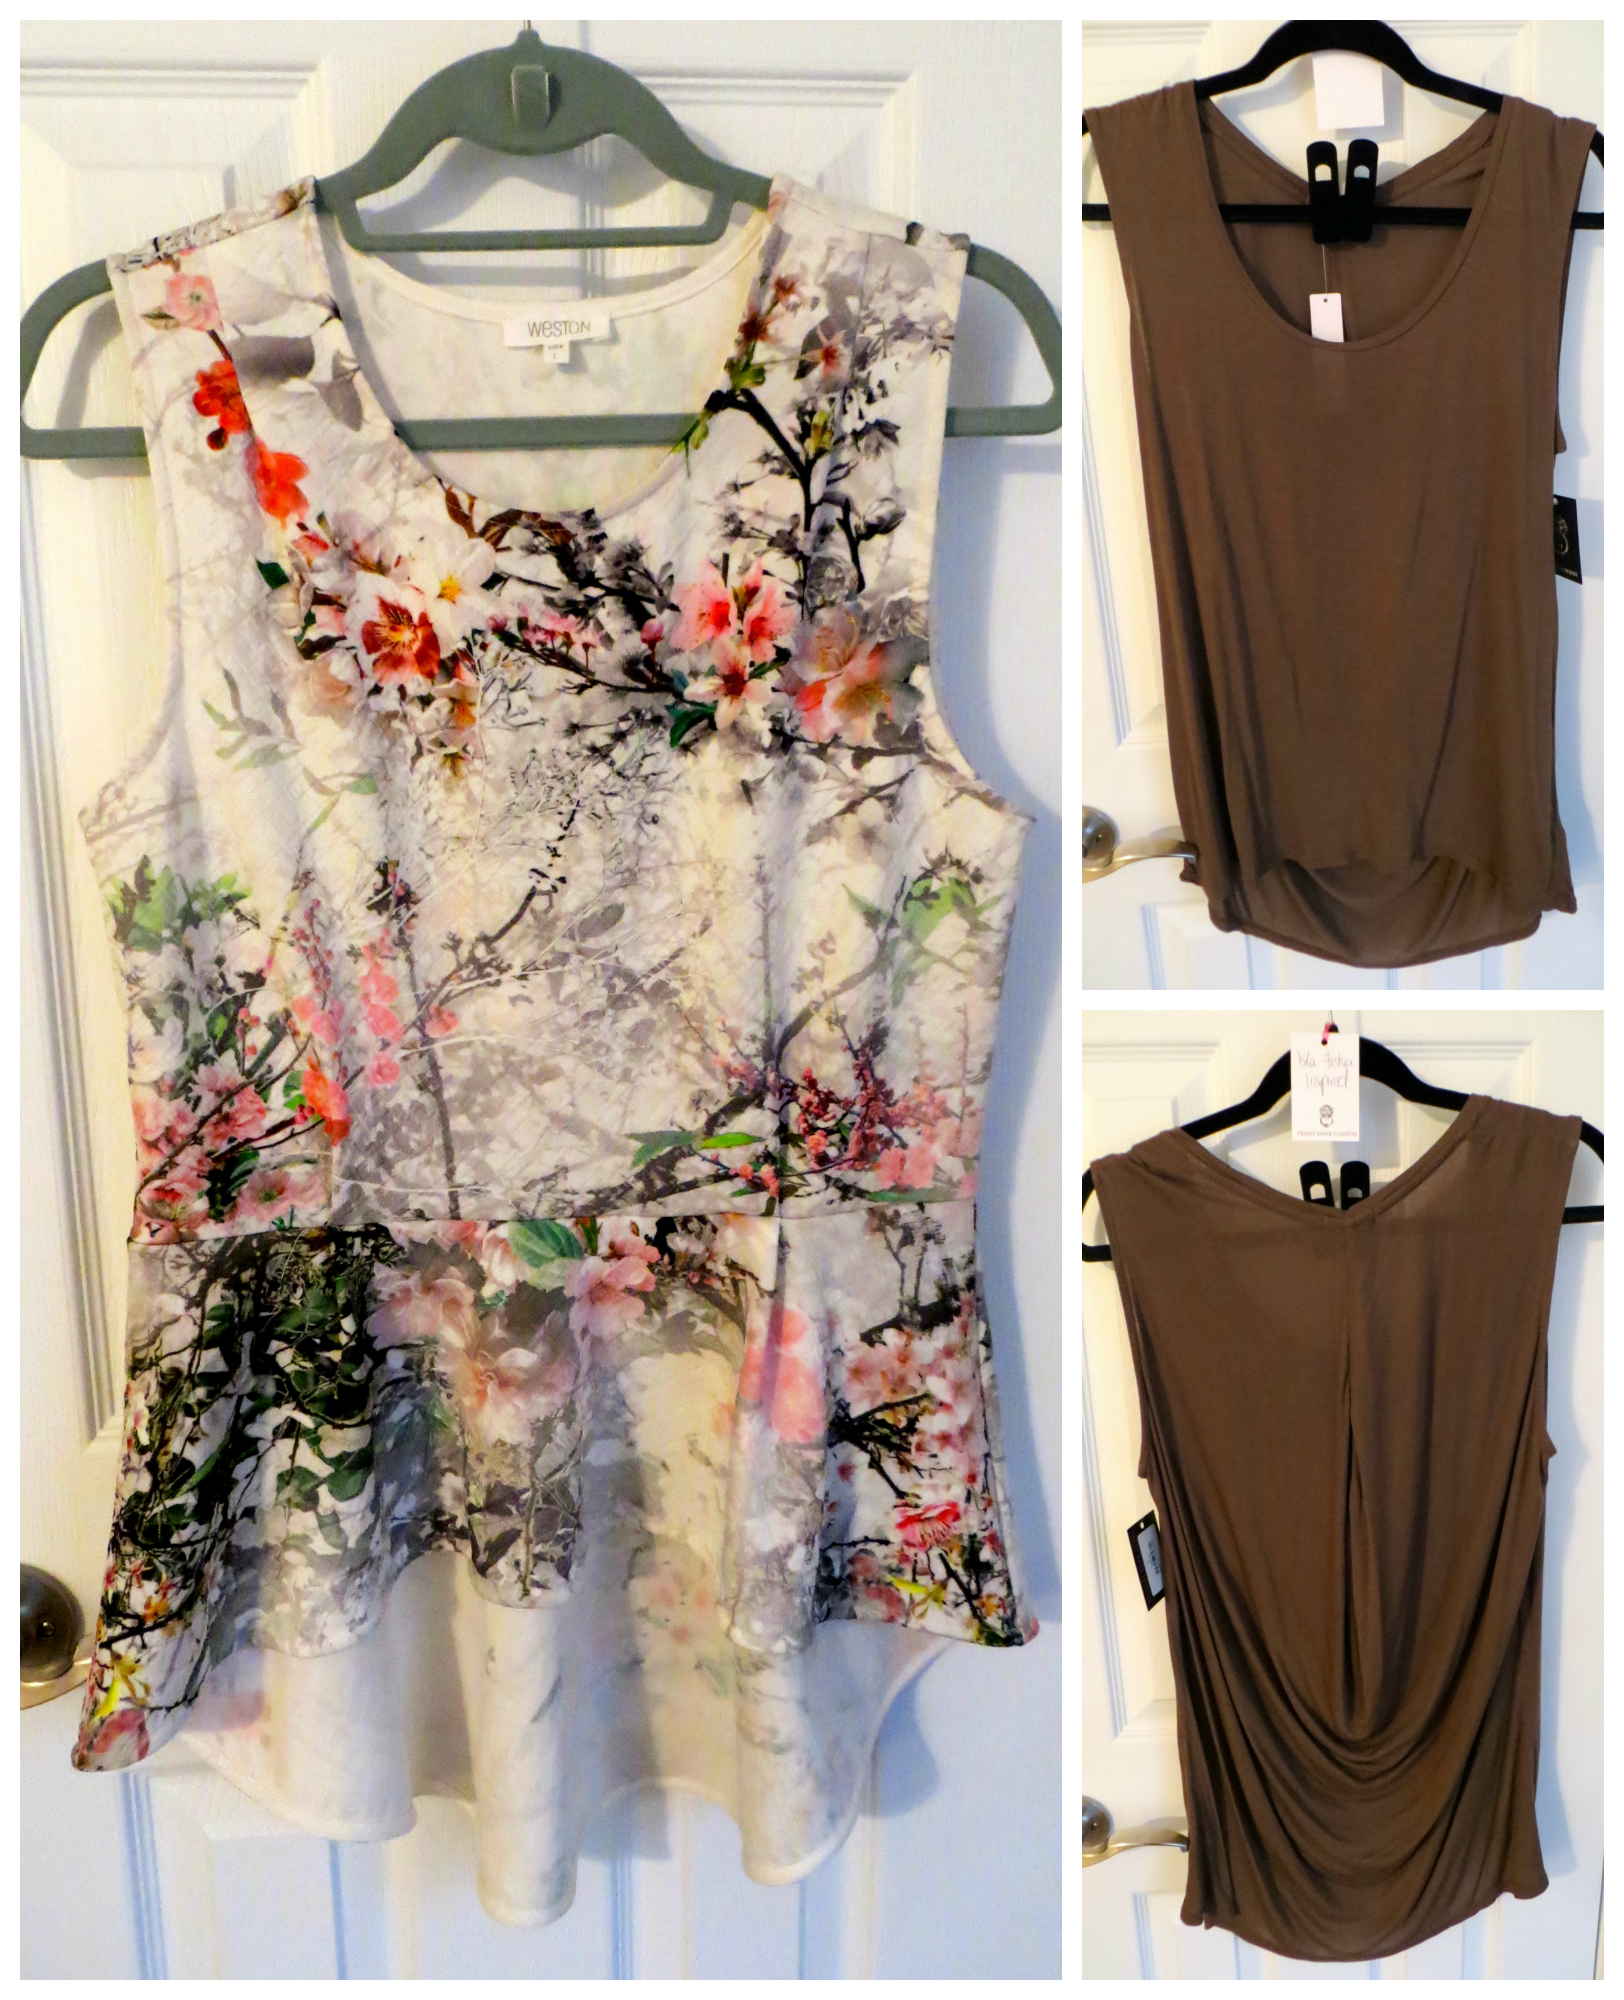
These tops are my favorites from the box. The one on the left is the Abbie Hi-Lo Peplum Top by Weston ($118). It is a great sturdy textured knit with an awesome cherry blossom design. The peplum has small pleats in the front and back and is lower in back than front. It looks great with jeans or pencil skirts. I get tons of compliments every time I wear this shirt.

On the right is the LA Made Fleur Top ($58), a simple taupe tank with an interesting cowl design feature in the back. I am wearing this as I type.

IMG_3142

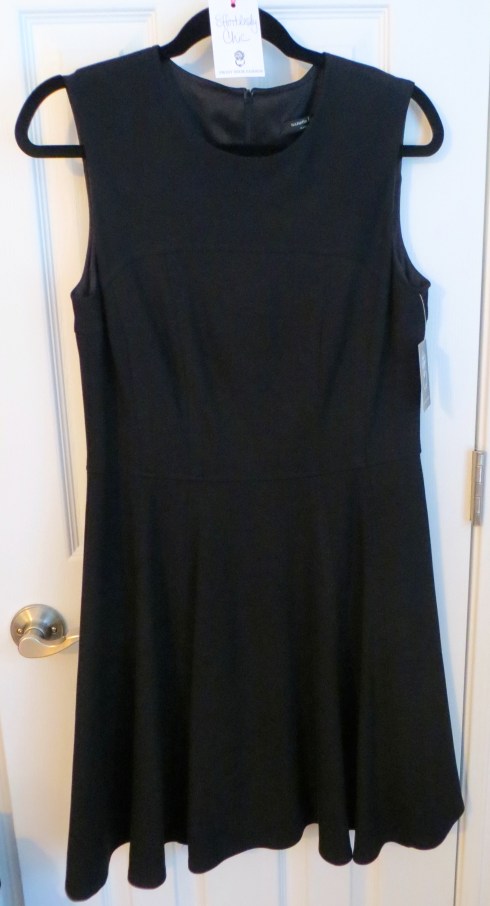
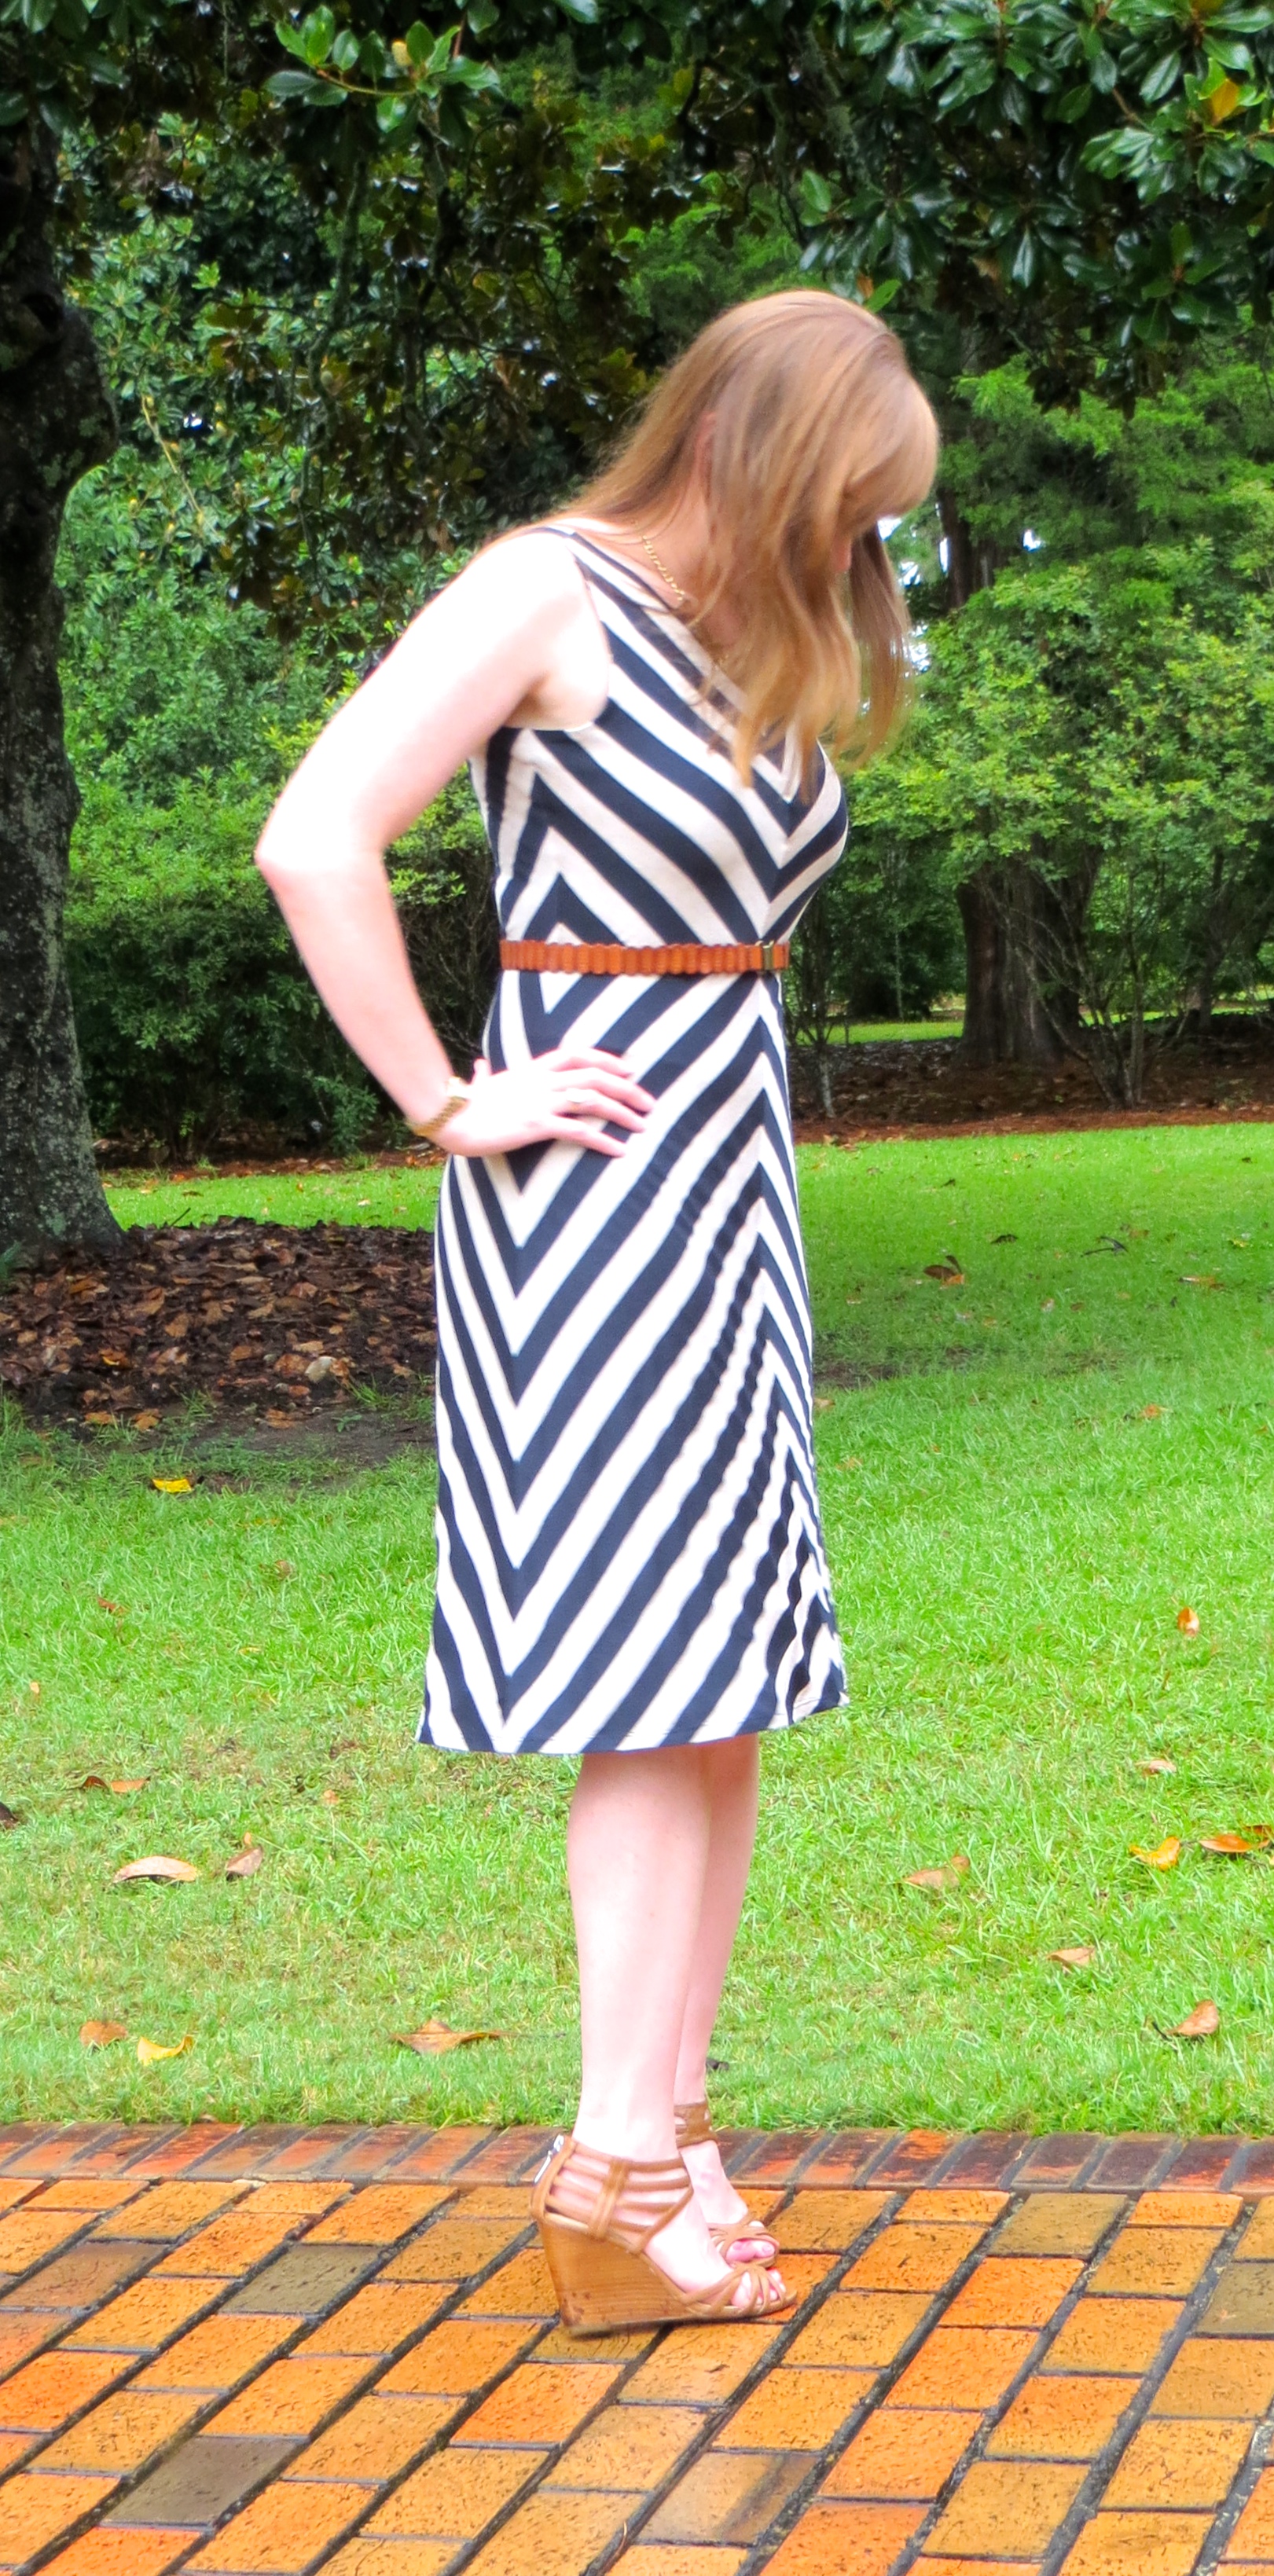
Next, I asked for a nice knit dress. This Nanette Lepore Superslide Dress ($148) fit the bill perfectly with its modest neckline and flattering princess seams and flared skirt. It is also fully lined making it feel as good as it looks.

FDF1 Accessories

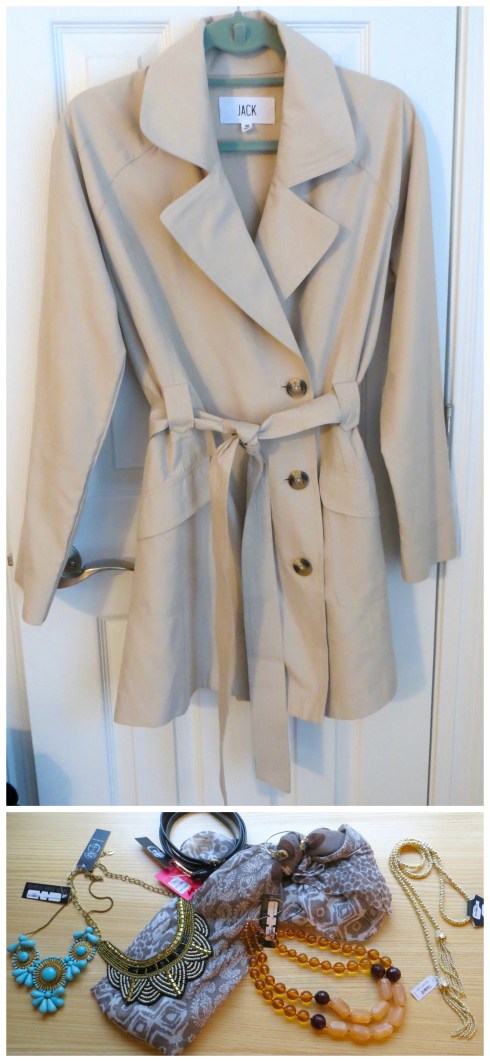
Finally, here are all the accessories Morgan sent in my box. Up top is a cute, lightweight trench coat, the Jack Brydon Trench Coat ($90), that will be a great transitional piece in our temperate climate.

For the accessories, here’s a rundown:

  • Turquoise Medallion Necklace ($44), kept
  • Black and Gold Bib Necklace ($45), kept
  • Elise M Charlize Belt ($40), returned
  • Kendra Scott Andy Bracelet ($50), kept
  • Kendra Scott Jackie Necklace ($140), returned
  • Amber Beaded Layer Necklace ($40), kept
  • Mixed Motif Scarf ($21), kept

I also received two pairs of jeans, Level 99 Tanya High Rise Trouser ($140) and Citizens of Humanity Avedon Ultra Skinny ($178). I didn’t keep either pair and I forgot to snap pictures. Finally, there was a great little Tees By Tina nude camisole ($30) that I kept.

The grand total for this box of goodies was $2205 with 21 awesome items inside. The nice think about FDF is that you don’t actually spend $2205 when you order the box. In fact, you have 5 business days to try on the items with things already in your closet before you decide what you want to keep. Once you return your box, they only charge you for what you keep (in my case, a little less than half after I used a coupon code I had received in a prior order).

Most boxes contain 4 styled looks and range from $1500 to $2300 with a discount for keeping all the items. According to the company, clothing ranges from $100-450 and accessories from $25-300, but I found quite a few items in both of my boxes to fall below this range (yes, I did have a second box — actually before this one).

FDF0 Haul

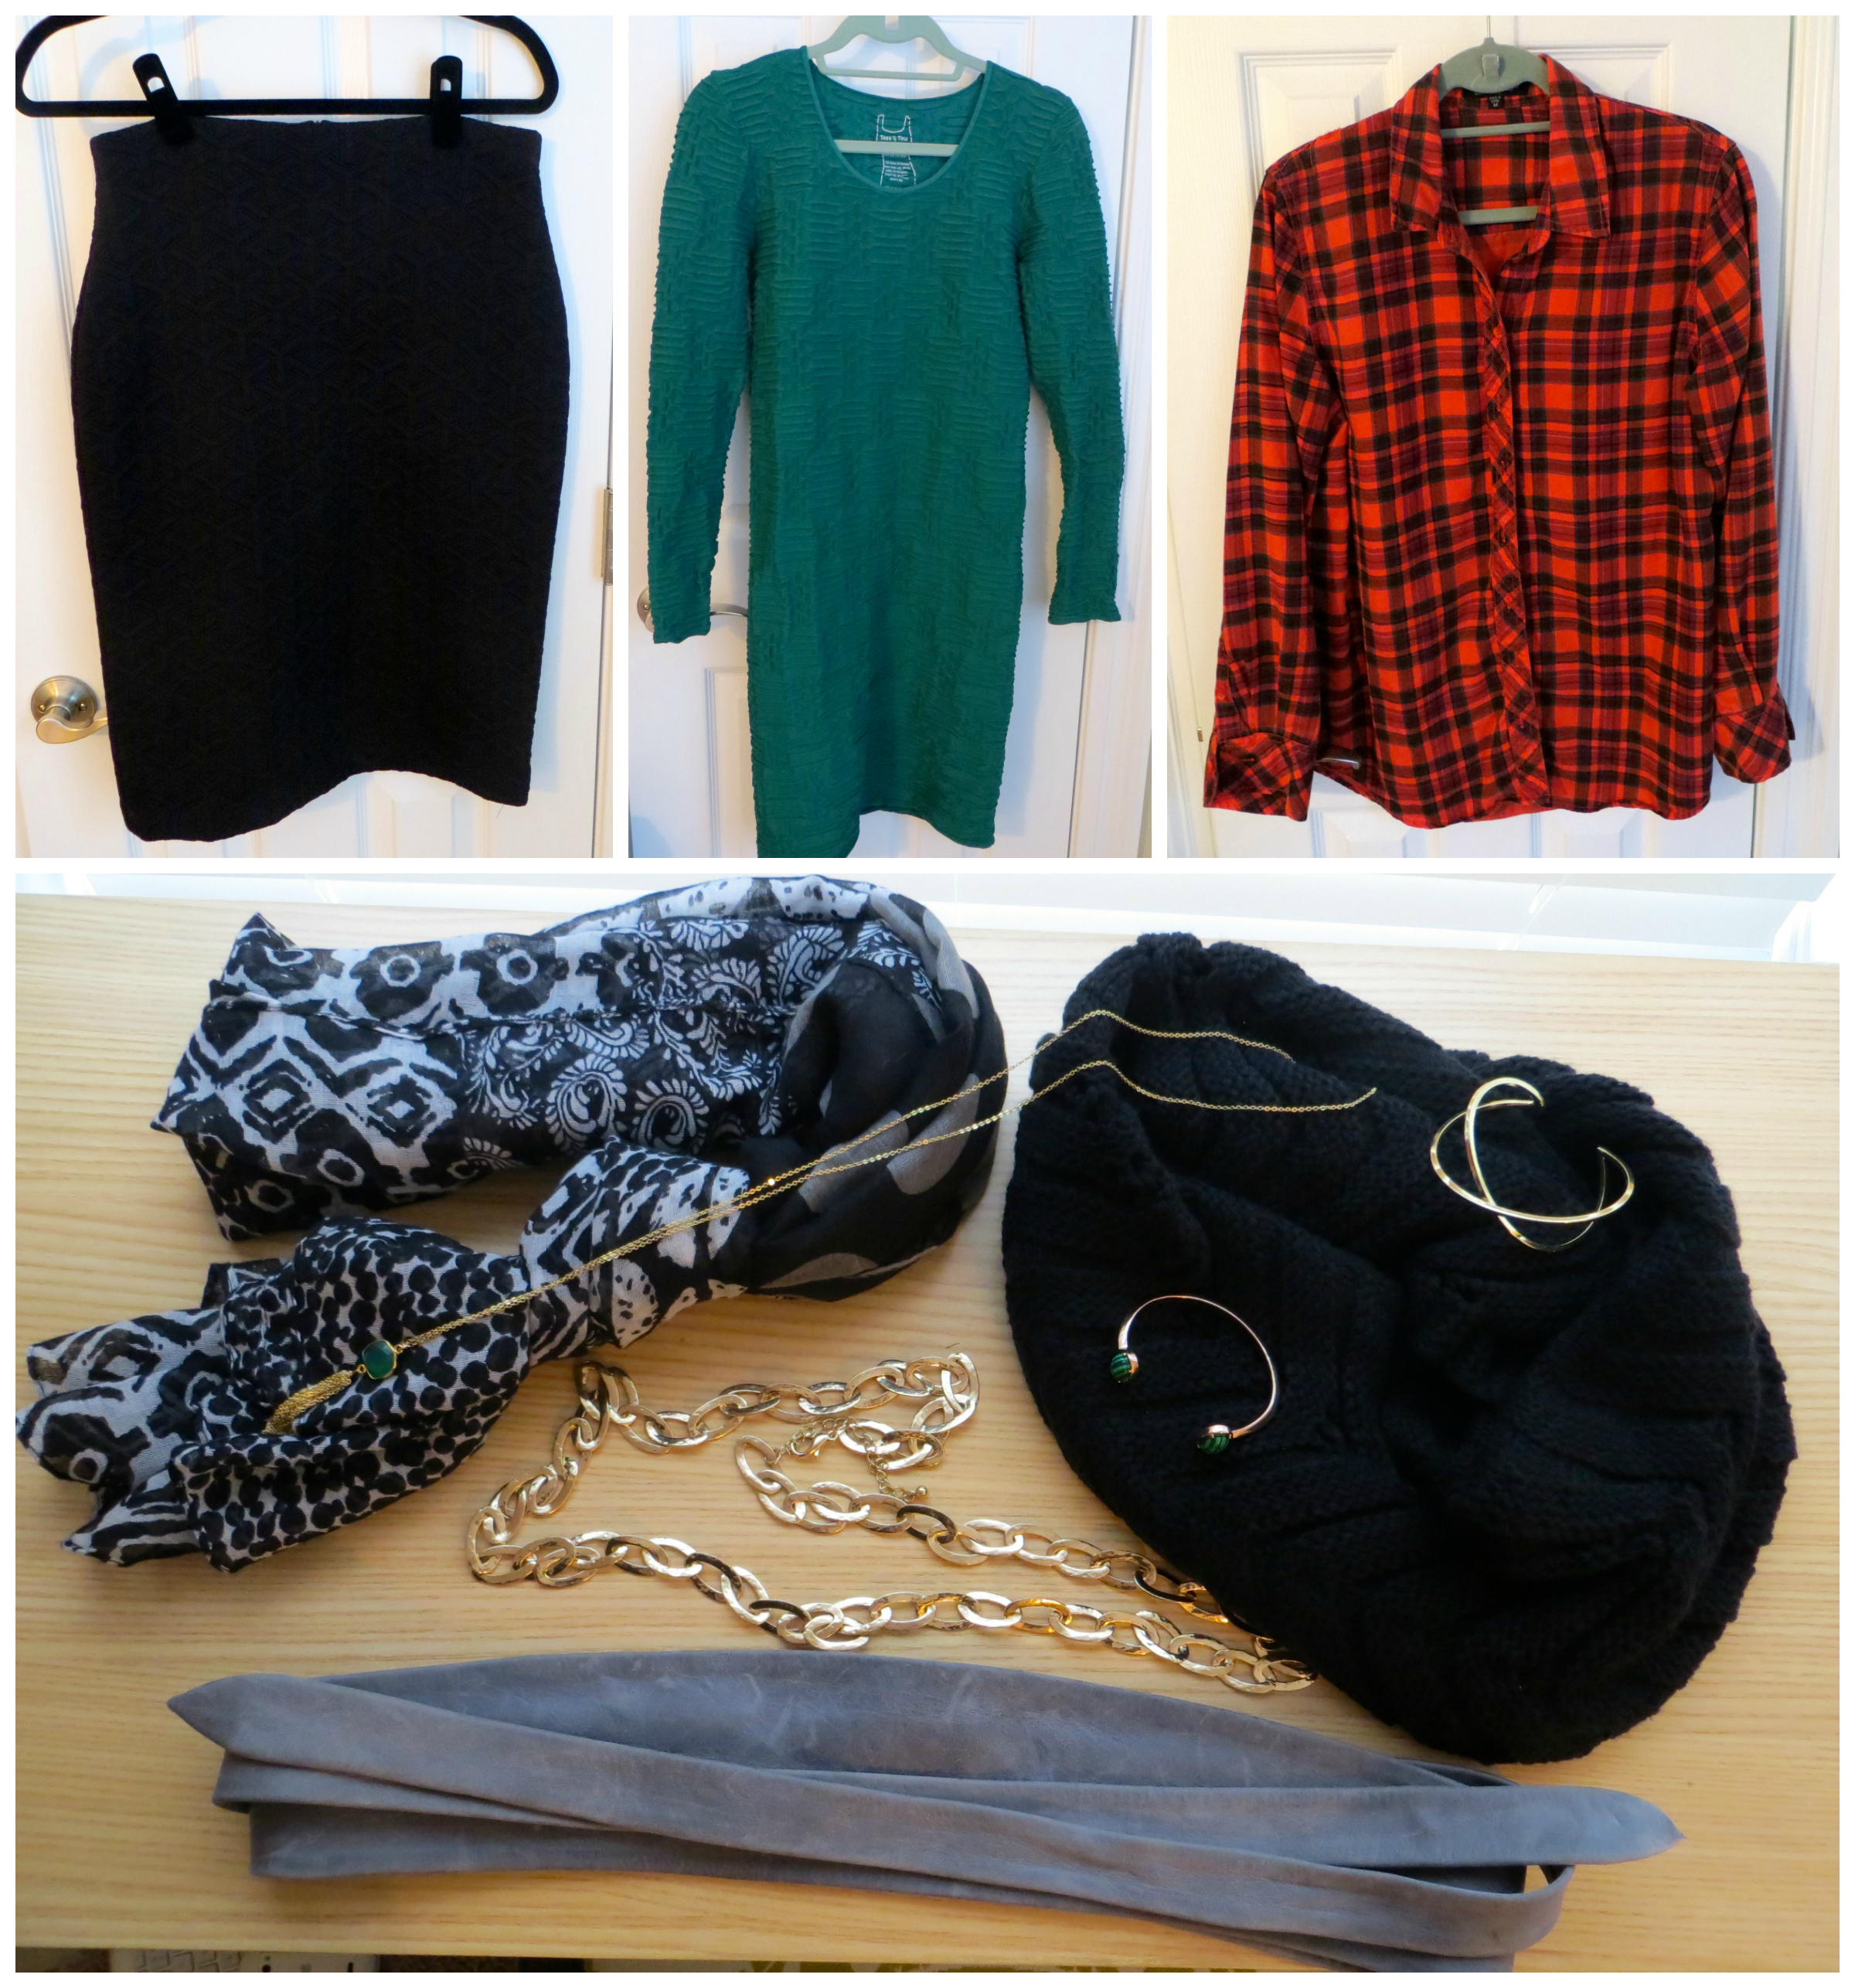
Original box keepers:

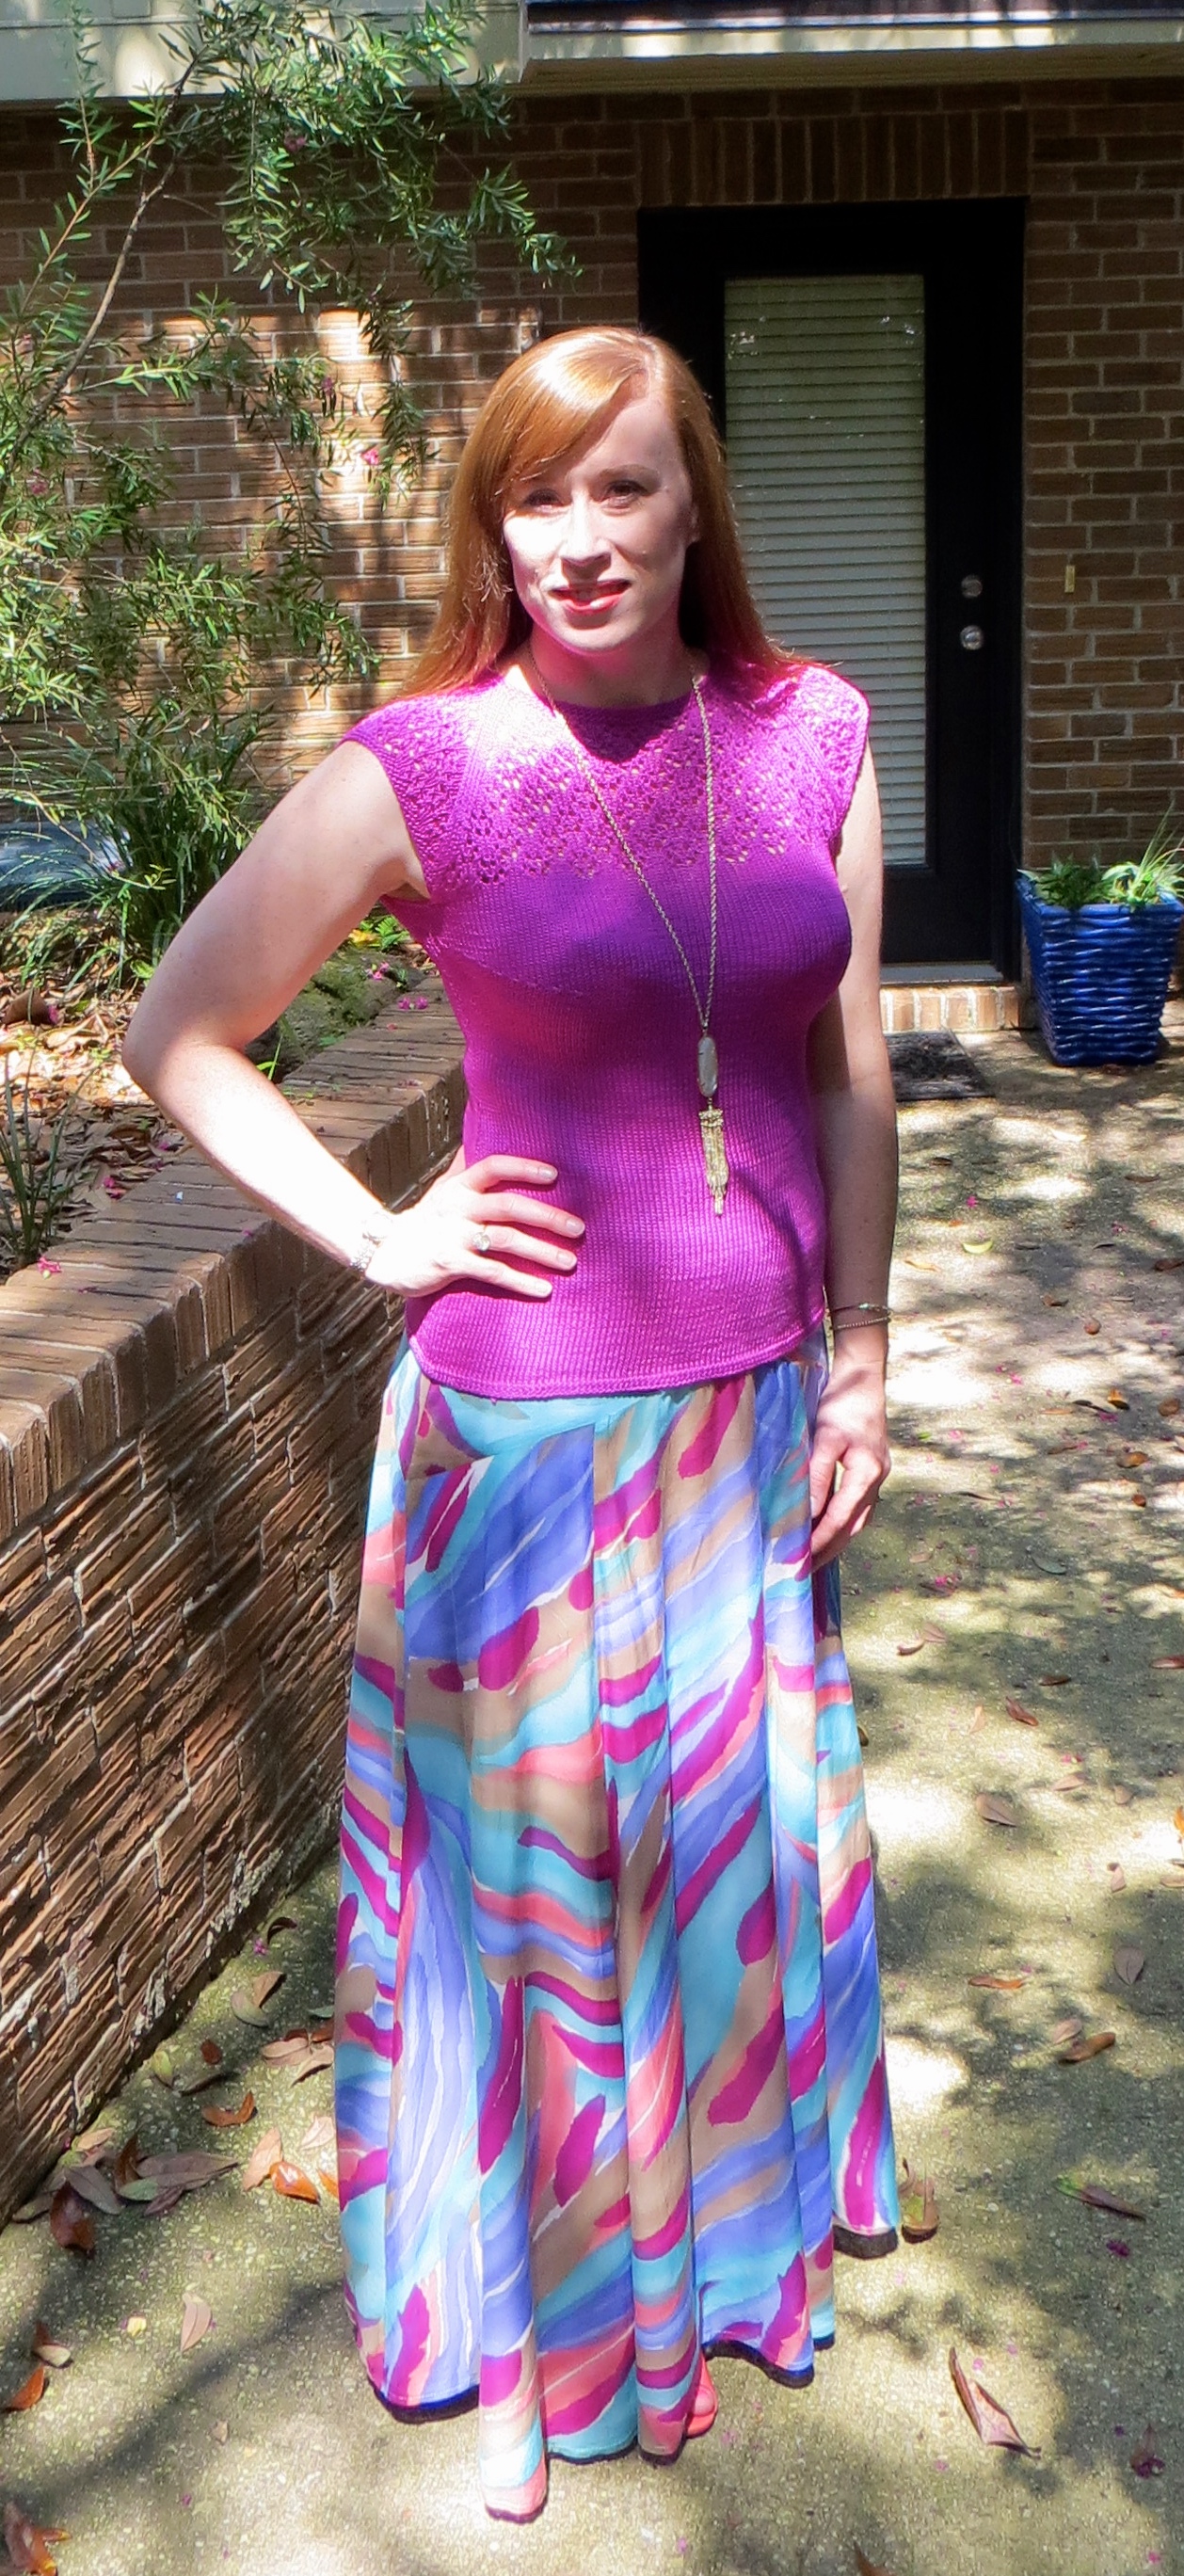
  • Amanda Uprichard fabulous high waist knit pencil skirt ($150)
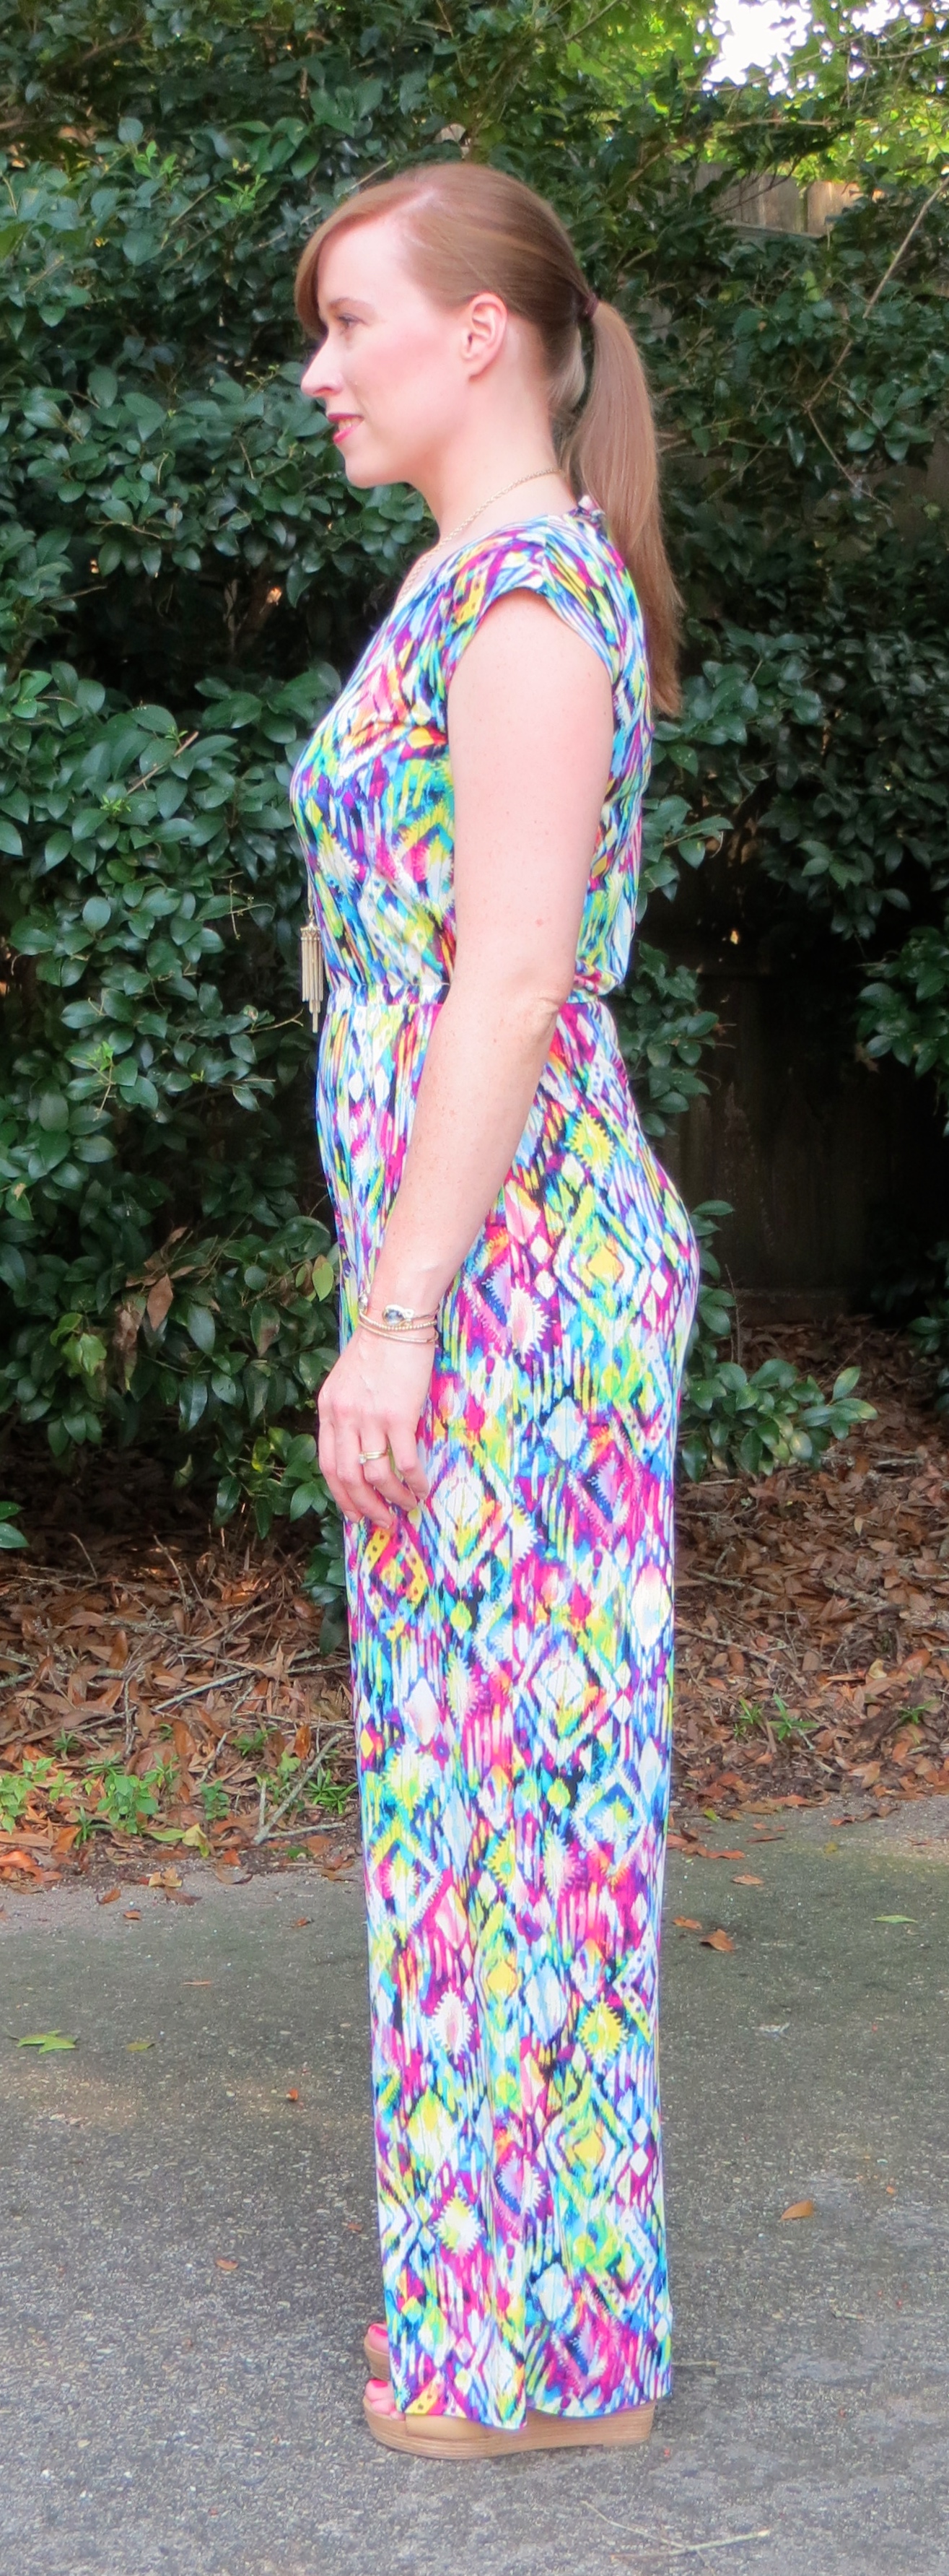
  • Tees By Tina Paris Dress ($84)
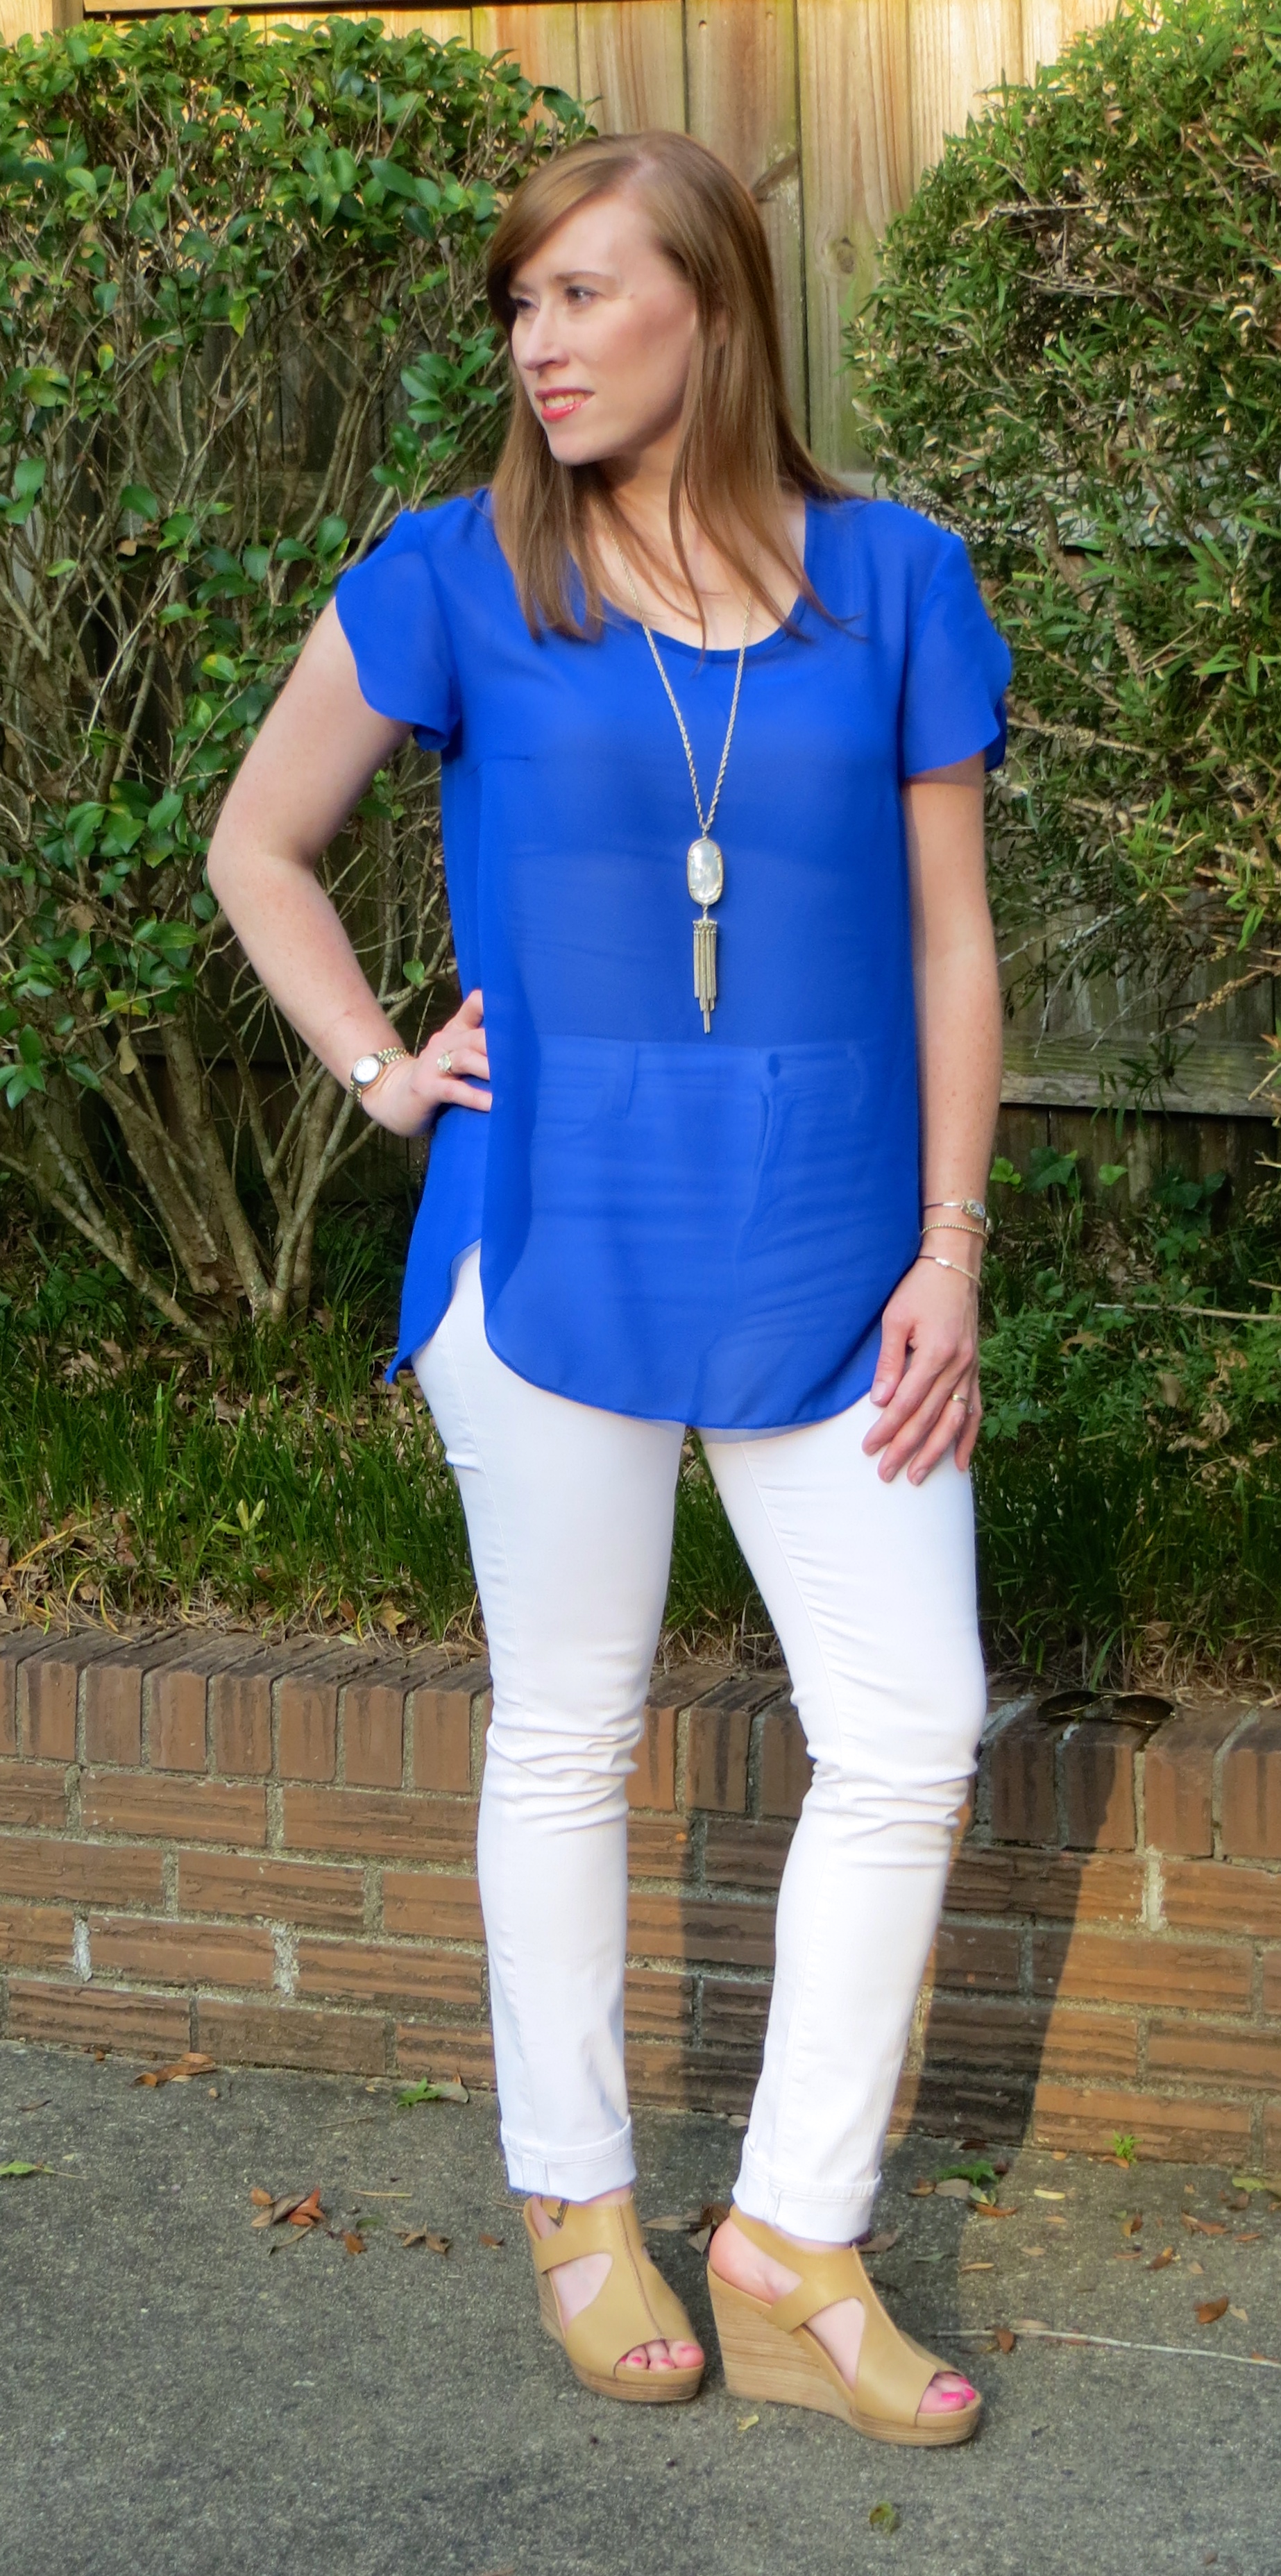
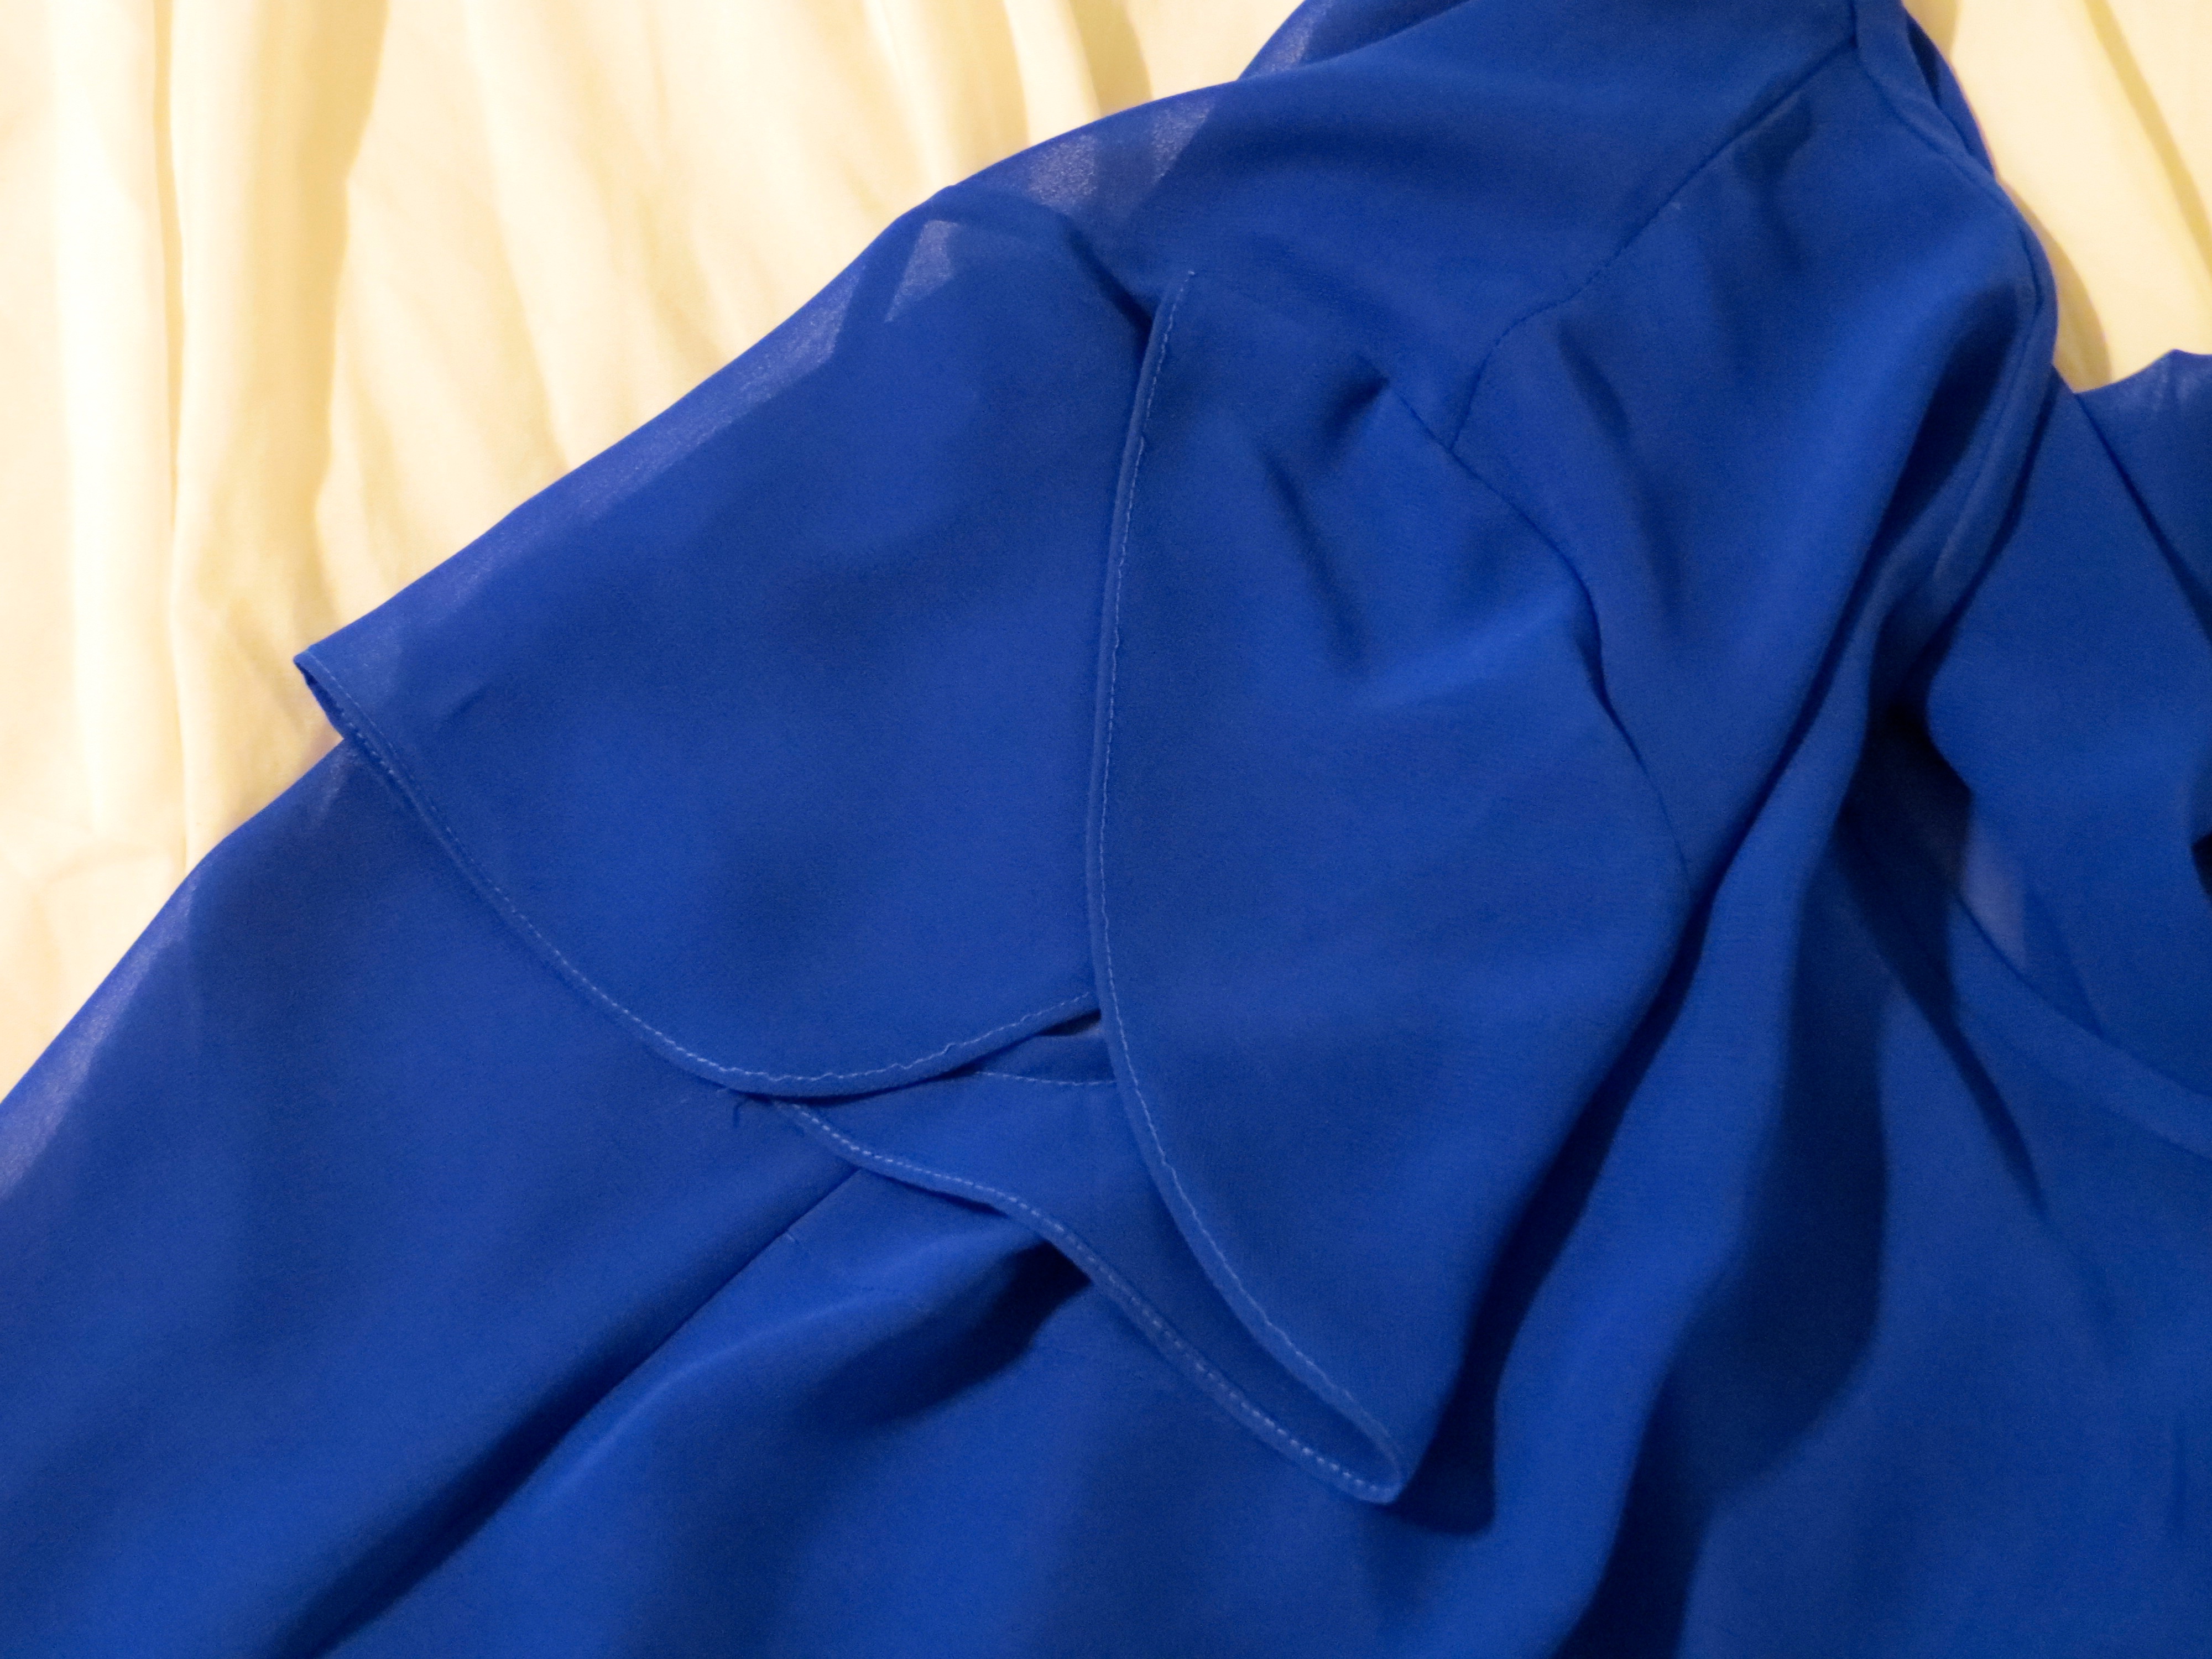
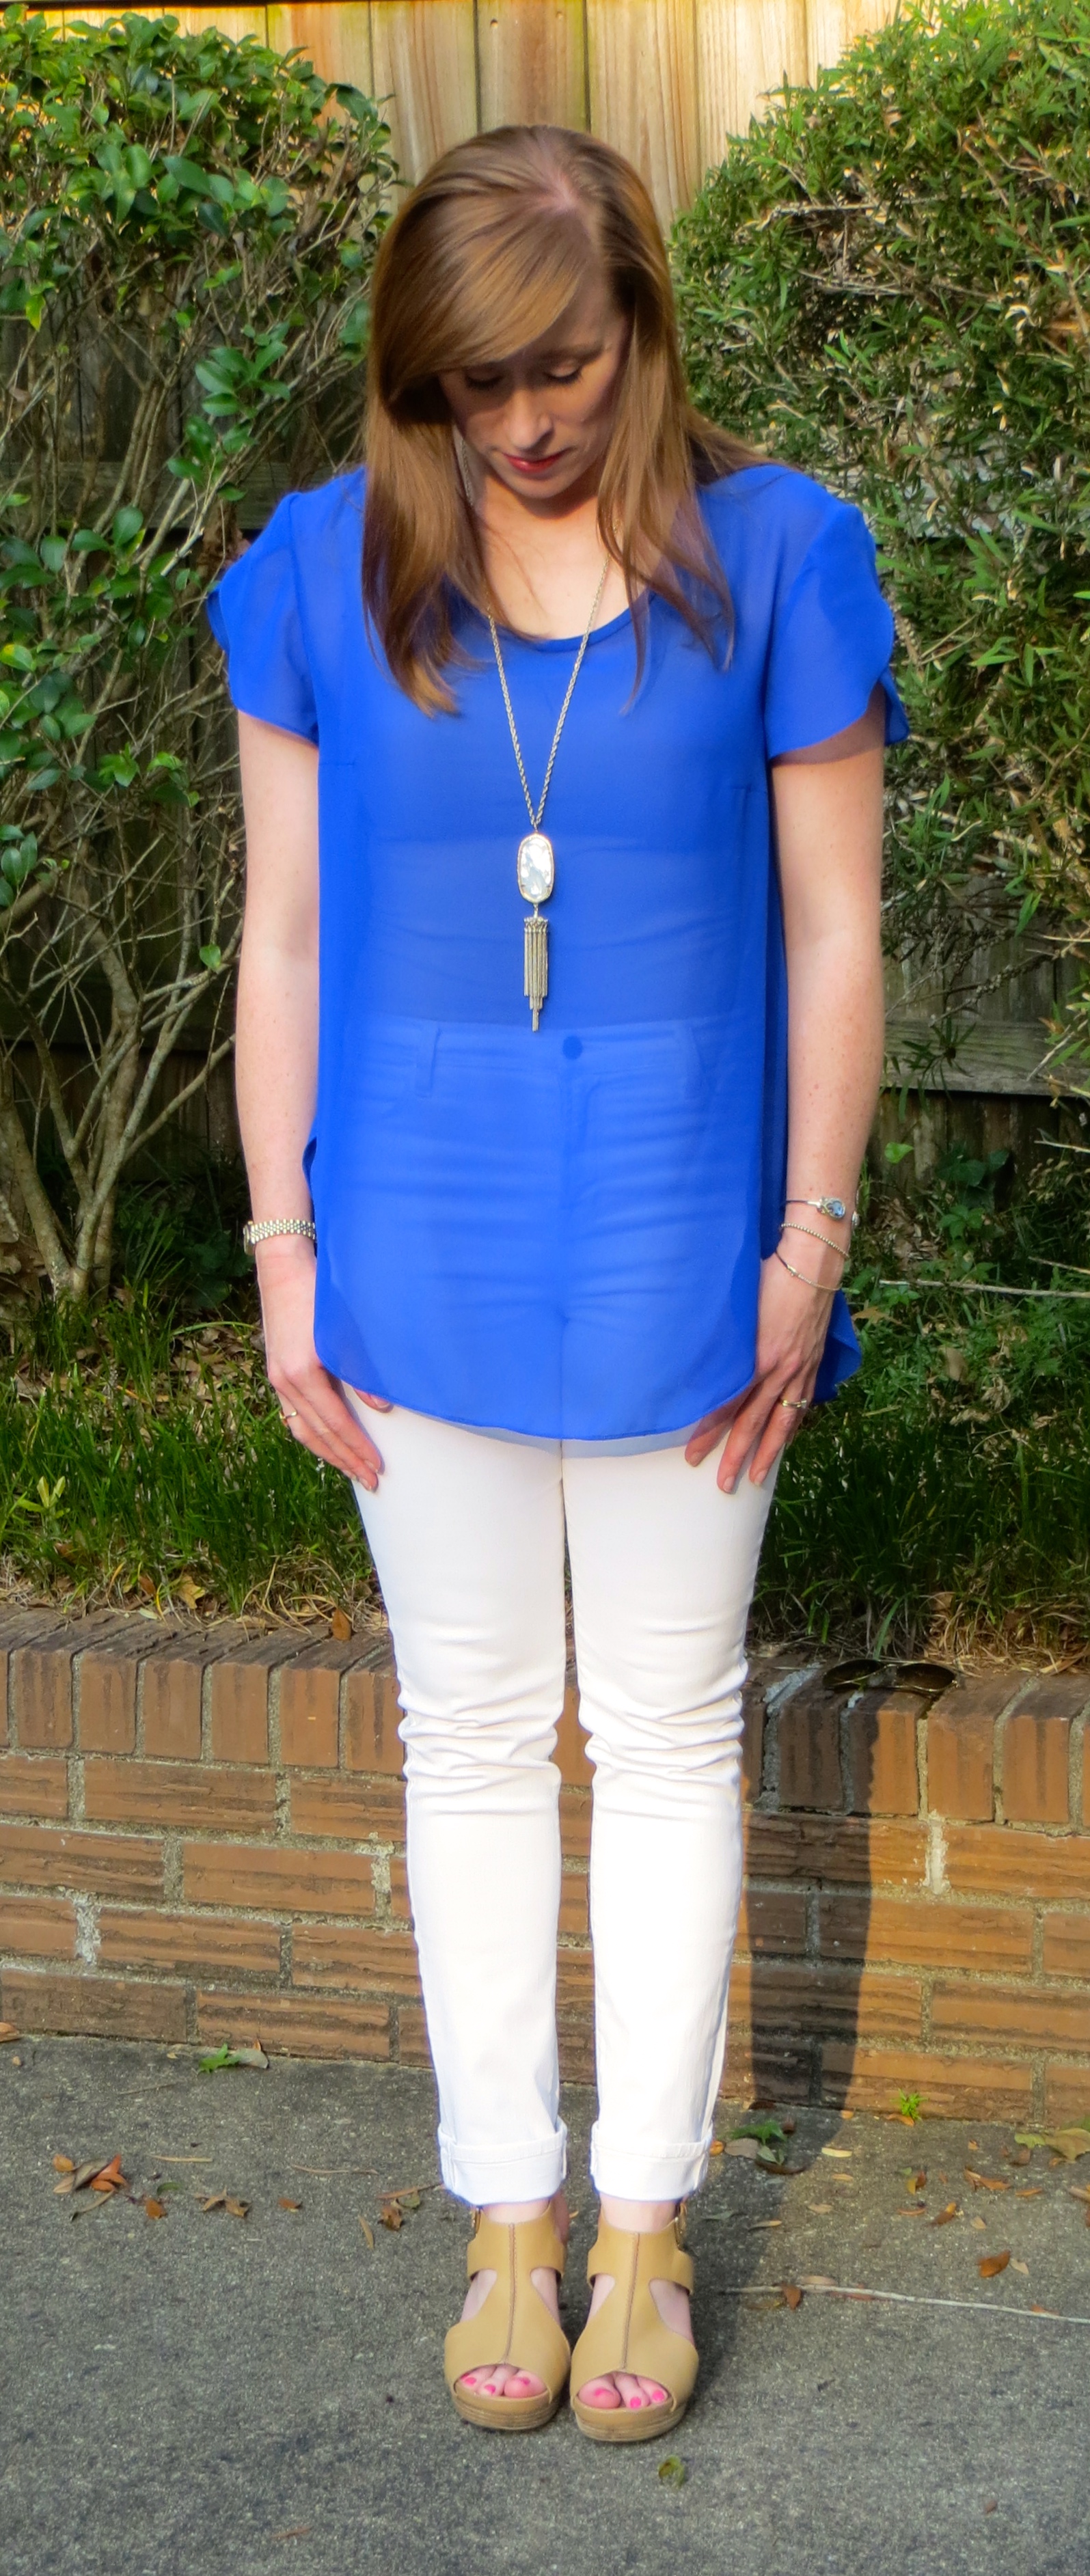
  • Velvet Heart Jamie Shirt ($84)
  • Print Scarf ($21)
  • Sonya Renee Green Pendant Necklace ($70)
  • Green Scarab Cuff Bracelet ($12)
  • Sonya Renee Infinity Cuff Bracelet ($36)
  • Black Knit Infinity Scarf ($22), love this thing!
  • Flat Chain Necklace ($38)
  • Ada Wrap Belt ($77), love this thing, too!
  • Tees By Tina Nude Tank ($38), not shown

Front Door Fashion is a great service for women who don’t have time to shop and who need to update their wardrobe in a major way — new job, upcoming interviews, life change (post-baby, weight loss/gain), etc. It’s also great for women who need some help getting out of their comfort zone and getting a little guidance on styling and accessorizing. My FDF boxes have been great at rekindling my love for dressing every day.

For me as a pediatrician, I think dressing nicely helps convey a message to my patients that taking myself seriously and caring about my presentation means that I will take them seriously and care about their well-being.

FDF Outfits

But the best thing about FDF? Having a real-life stylist who spends actual hands-on time selecting things that will look good on you and be fashionable all while taking your lifestyle and taste into consideration. Basically, someone who can deliver authentic Christmas morning excitement right into your ho-hum adult life 🙂

So, if this sounds like something that would work for you, give it a try and tell them I sent you. I don’t get any compensation but I would love to know that other women could enjoy this service as much as I have. In fact, you can read about my friend Lynn’s experience here. Have you tried any online personal styling services yet? What do you think?

I had previously alluded to trying a third services (which I did — Tog + Porter), but it has not been much to write home about so I will not be doing a separate post about it. If you are looking for true personal styling, Front Door Fashion is the way to go. If you just want to add a few fun new pieces and get a little surprise every month, definitely try Stitch Fix. Hope that helps. Now back to the sewing and cooking!

McCall’s 6706 | Carolina Herrera Skirt

12 Mar

Howdy, friends! I have another completed sewing project for you today! But before you get too excited, this is a project I completed sometime last year (probably Summer 2014), and just never got a chance to get good enough photos to blog.

Luckily, we finally had some pretty weather this past Sunday and there is a cute spot outside our new condo, so I took advantage and enlisted my handsome stepson to play photographer. Unfortunately, I didn’t realize until after the photo shoot that there was a large smudge on the lens so you will have to excuse the blur around my feet 🙂

IMG_3170

This skirt started with the fabric. I found it at Promenade Fine Fabrics in New Orleans, one of my favorite fabric haunts. It was milled for Carolina Herrera and is a silk organza with blue flowers with black outlines embroidered on it. Maybe there’s a better term for the way this fabric is embellished but I don’t know it. The black outline appears to be clipped to have exposed threads, kind of reminds me of velvet, but the blue looks like embroidery. Any info on this type of fabric would be appreciated. The fabric was very pricey ($58/yd) so I knew it had to become something that didn’t require much yardage and that I could make without any errors.

M6706

I decided on McCall’s 6706 (rendered once before in a drapey rayon challis), to create a simple, elegant, pleated knee-length skirt.

carolina-herrera-bal-harbour-shops-boutique-opening-carolina-herrera3-photo-by-manny-hernandez

Then I found this photo of the designer herself wearing a very similar skirt in an almost identical fabric. I never could find any garments in the exact fabric.

IMG_3201

I decided to underline the fashion fabric with plain silk organza so I could finish the raw edges like I did in my red Hollyburn skirt and to give it a little more opacity and body.

IMG_3200

I also lined the skirt with a bone colored silk crepe de chine from Promenade. At first I thought I would line it with black, but the neutral silk really made the white of the organza stand out.

IMG_3199

Finally, I decided to use some fabulous, authentic Petersham ribbon for the waistband. This notion also came from Promenade and Herbert says that it is some of the only truly legit Petersham that is still made. I wish you could feel it through the computer — it is so thick and luxurious. Another pricey option ($32/yd), I purchased just enough to go around my waist twice for the waistband and facing.

IMG_3177

Construction was pretty straightforward. As I mentioned above, I underlined the skirt panels with organza then hand basted the pleat lines and lightly pressed the pleats into place then machine basted them across the top.

IMG_3179

For the lining, I basted it to the skirt along the top then treated it and the outer skirt as one piece when applying the waistband. I laid the Petersham ribbon directly on the waist seam line and used my edgestitch foot to stitch just inside the outer border of the ribbon. Then I matched the other piece of ribbon (the waistband facing) up with the top and edgestitched along the top border to connect the two. The I did one final row of stitches to secure the bottom of the facing to the bottom of the waistband. Fortunately, these stitches just melt right into the ribbon and you can’t see them, otherwise I would have been doing a lot of handstitching!

IMG_3174

I finished the lining with a 1/4″ machine hem and the outer skirt is finished with a 1″ hand stitched hem, catching my stitches in the organza underlining.

All in all, I love this skirt even though it was not the cheapest project. It is one of a kind and I feel like it looks like a designer piece. I think I will be able to enjoy wearing it for many years so I don’t mind the little splurge to create it.

What about you, my fair readers, have you ever splurged a little bit on a project? Did you play it safe with a pattern you knew would sew up well or did you do something more daring? I would love to hear in the comments!

I hope to be back soon 🙂

A Sewing Update

11 Feb

Lest you all start to worry that I have sold my sewing machine to pay for all my new clothes, I have been slowly getting my Sew-jo back. It was temporarily interrupted by selling our home and moving into a much smaller condo. I don’t really have a dedicated sewing space anymore so that has made me reevaluate my sewing methods. But I will not be deterred and I have been slowly but steadily making my flat pattern adjustments to the new Sewaholic Granville shirt pattern. So far, I have done my full bust, forward shoulder, short waist, swayback, and uneven shoulder adjustments. Now all I have left to do is trace and cut the pattern pieces that didn’t have to be altered and make a muslin. I am feeling a little brazen and may forego the actual muslin and cut into a real fabric for this test run. The flat pattern adjustments are looking pretty good when I hold them up against my body in the mirror — ha!

I have also solved the dilemma about where to put my sewing machine. If you remember in a prior post, I was debating about what small space sewing solution to use to set up my work area. Well, I didn’t go with any of those options because my grandmother reminded me that I was supposed to take her 1960s Kenmore that is built into a cute little wooden cabinet. I picked up the machine a few weeks ago but knew it wasn’t in working order — I don’t remember my grandmother ever really sewing anything although there are rumors of her sewing prom dresses for my mom and aunt. You can guess how out of shape that machine was! I called my friend and trusty sewing machine doctor, Richard Givens, and he came and picked it up.

When I dropped by his shop today, he showed me pictures of all the work he had to do to get her back in serviceable condition — basically a complete overall with the machine torn totally apart. Almost every gear was locked up. But now that he has worked his magic, she is humming a sweet, sweet song, and I can’t wait to sew that Granville on her. Poor little Janome is going to get so jealous when I stash her in the closet for the time being. But she’ll come back out when the new house is finished. Mr. Givens says sewing machines aren’t manufactured like this Kenmore anymore — all precision metal parts, etc. And that if it were to be manufactured today, it would cost over $1000. Luckily the repairs weren’t quite that much but I can understand why many of us today don’t invest in repairing the things we have (as I could have easily bought a decent cheap machine — like my current Janome — for the cost of the repairs). But I would gladly spend it again to be able to sew dresses for myself on the machine that my grandmother and possibly mother once spent hours in front of creating the frocks of their dreams.

photo 1[1] Here’s a picture of Mr. Givens with my little Kenmore. You can start to get a glimpse of all the sewing machines that were laying around everywhere.

Sewing Machines

He let me snap some more pictures to show you all the different types of machines he works on. I don’t think there is a machine he couldn’t fix. The button machine does nothing but sew on buttons. And it does it in about 2 seconds. How awesome is that?!?

The last really cool bit of news is that I entered my Butterick 6019 bombshell dress into Gertie’s Grand Giveaway and I was selected as a finalist! Now I have to mail my dress off to NYC to be inspected by the judges — yikes! There is only a 20% chance I will win, but if I do, what will I do with 17 bolts of fabric??? We will have a big giveaway here on the blog! Cross your fingers, say your prayers, and send good thoughts my way!