Tag Archives: couture

Pattern Review Sewing Bee Round 1 | 80s Inspired Floral Peplum Blouse

7 Sep

IMG_3552

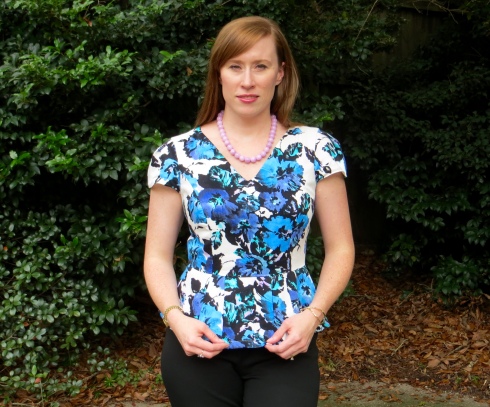
Howdy, friends! I hope you had a nice Labor Day. While I had to go in to the office for a while today, I did get lots of sewing in this weekend. Have you heard about the Sewing Bee going on over at Pattern Review? I didn’t think I would enter but then at the last minute, I decided I would move one of my to-sew objects up the queue and enter it in the contest.

1425

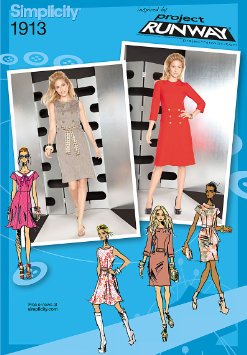
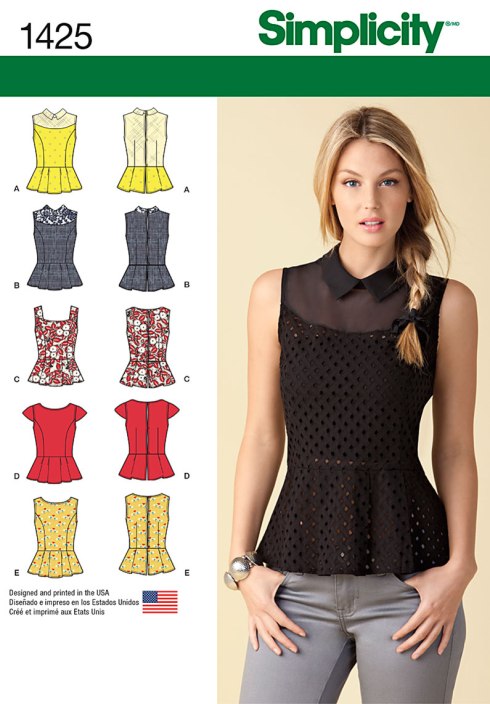
Let’s talk pattern first. I purchased Simplicity 1425 a while back. So long ago that I bought the wrong size pattern. Since I didn’t feel like going to Hancock for this project I decided to see if I could find another pattern to help me hack the over all look. Enter Simplicity 1913. The bodice of this dress has similar princess seams and neckline as well as offers a choice of sleeve options (a requirement of the Sewing Bee).

71aJp91MHhL._SY355_

So first up, I made a few standard adjustments to the bodice pieces — 1″ FBA and added 3/4″ to the shoulder width. Then I graded out the peplum pieces from S1425 to a size 14 to match my bodice pieces. Next, I made a muslin and checked the fit. I needed to lower the bust point 1″ and add 1/8″ of width under the arm at the side seam tapering to nothing at the waist. I also needed to readjust the pleat placement a little bit. Other than that, the fit was good.

IMG_3528

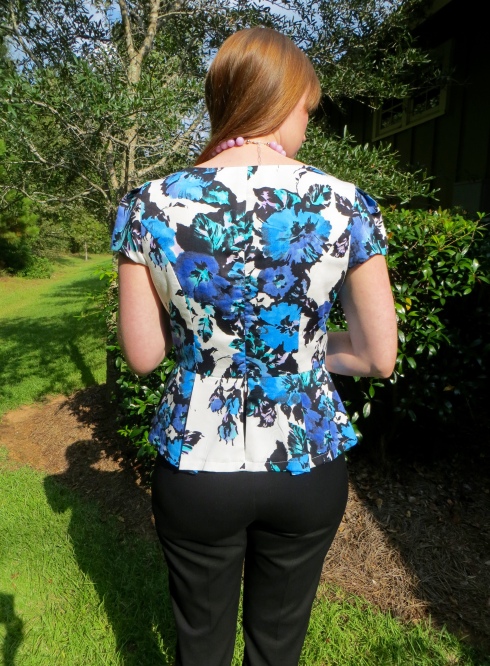
Next, I used my muslin to determine how I was going to get in and out of this top. The original pattern called for just three little buttons spaced down the back of the blouse. I don’t know about you, but I am not keen on the idea of exposing my entire back and bra to the world. So I contemplated using a full button placket, side zip, center back zip, etc. I finally decided that an upside down center back zipper would be best. I started the zipper at the waist seam and extended it up 7″ (it ends a little above my bra strap). This makes it easy to get on and off over my head but still keeps the zipper pull within easy reach when trying to operate the zipper.

IMG_3554

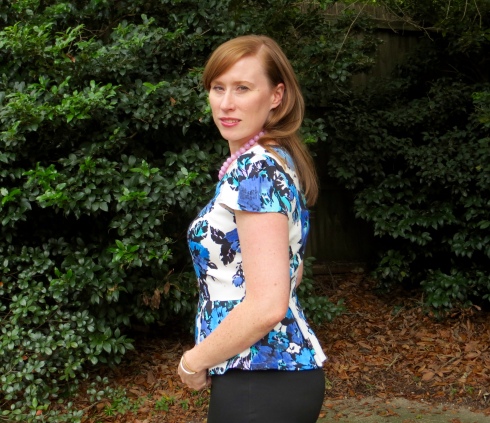
Finally, I made a few style changes from the original pattern. I cut a V neckline instead of the high round neckline because I felt like I needed to break up my floral fabric. I also added some pleats to the sleeves to echo the peplum pleats and to add a little more ease to the sleeve.

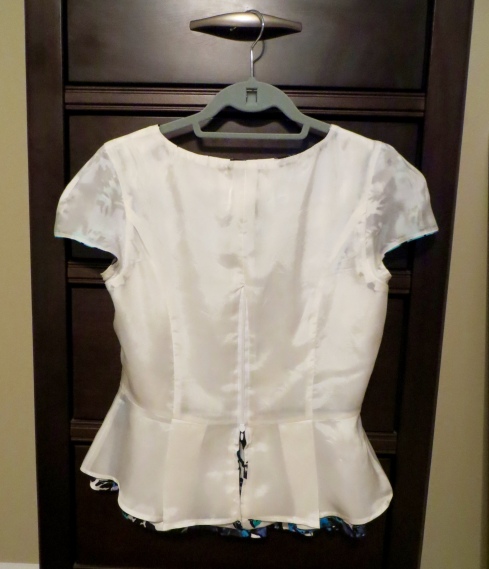
For my fabric I chose a rayon satin from Sawyer Brook (P. S. it’s now on sale!). It has the most luscious feel but is a little on the flimsy side so I decided to underline it with white cotton batiste which gave it the perfect hand. I lined the entire top in white rayon Bemberg. I love the colors in this top and I have a coordinating fabric picked out for the pencil skirt that I finally got the pattern worked out on.

IMG_3566

While sewing this top, I was methodical about grading, clipping, and pressing my seams and that was therapeutic for me. But I think the most rewarding part of sewing this blouse was the fact that I got it fully lined (even the peplum and sleeves), completely by machine. There was no hand sewing involved. I have always machined my lining to sleeveless blouses and dresses but my Google search was coming up empty on how to machine the armscye lining seam in a sleeved garment.

IMG_3568

But after sleeping on it and brainstorming about it while working on the other construction of the top, I figured out a way to do it very neatly and cleanly. I can’t wait to test my method out on something with a longer sleeve to see if it will still work. If it does, I will post a tutorial.

IMG_3544

I am tickled pink with my top. I wore it to work today styled like the photos but I can also see myself wearing it with a black pencil skirt and heels or with jeans and booties.

Keep your fingers crossed that I will make it to the next round of the sewing bee. If I do, we’ll have a giveaway here to celebrate! 🙂
McCall’s 6706 | Carolina Herrera Skirt

12 Mar

Howdy, friends! I have another completed sewing project for you today! But before you get too excited, this is a project I completed sometime last year (probably Summer 2014), and just never got a chance to get good enough photos to blog.

Luckily, we finally had some pretty weather this past Sunday and there is a cute spot outside our new condo, so I took advantage and enlisted my handsome stepson to play photographer. Unfortunately, I didn’t realize until after the photo shoot that there was a large smudge on the lens so you will have to excuse the blur around my feet 🙂

IMG_3170

This skirt started with the fabric. I found it at Promenade Fine Fabrics in New Orleans, one of my favorite fabric haunts. It was milled for Carolina Herrera and is a silk organza with blue flowers with black outlines embroidered on it. Maybe there’s a better term for the way this fabric is embellished but I don’t know it. The black outline appears to be clipped to have exposed threads, kind of reminds me of velvet, but the blue looks like embroidery. Any info on this type of fabric would be appreciated. The fabric was very pricey ($58/yd) so I knew it had to become something that didn’t require much yardage and that I could make without any errors.

M6706

I decided on McCall’s 6706 (rendered once before in a drapey rayon challis), to create a simple, elegant, pleated knee-length skirt.

carolina-herrera-bal-harbour-shops-boutique-opening-carolina-herrera3-photo-by-manny-hernandez

Then I found this photo of the designer herself wearing a very similar skirt in an almost identical fabric. I never could find any garments in the exact fabric.

IMG_3201

I decided to underline the fashion fabric with plain silk organza so I could finish the raw edges like I did in my red Hollyburn skirt and to give it a little more opacity and body.

IMG_3200

I also lined the skirt with a bone colored silk crepe de chine from Promenade. At first I thought I would line it with black, but the neutral silk really made the white of the organza stand out.

IMG_3199

Finally, I decided to use some fabulous, authentic Petersham ribbon for the waistband. This notion also came from Promenade and Herbert says that it is some of the only truly legit Petersham that is still made. I wish you could feel it through the computer — it is so thick and luxurious. Another pricey option ($32/yd), I purchased just enough to go around my waist twice for the waistband and facing.

IMG_3177

Construction was pretty straightforward. As I mentioned above, I underlined the skirt panels with organza then hand basted the pleat lines and lightly pressed the pleats into place then machine basted them across the top.

IMG_3179

For the lining, I basted it to the skirt along the top then treated it and the outer skirt as one piece when applying the waistband. I laid the Petersham ribbon directly on the waist seam line and used my edgestitch foot to stitch just inside the outer border of the ribbon. Then I matched the other piece of ribbon (the waistband facing) up with the top and edgestitched along the top border to connect the two. The I did one final row of stitches to secure the bottom of the facing to the bottom of the waistband. Fortunately, these stitches just melt right into the ribbon and you can’t see them, otherwise I would have been doing a lot of handstitching!

IMG_3174

I finished the lining with a 1/4″ machine hem and the outer skirt is finished with a 1″ hand stitched hem, catching my stitches in the organza underlining.

All in all, I love this skirt even though it was not the cheapest project. It is one of a kind and I feel like it looks like a designer piece. I think I will be able to enjoy wearing it for many years so I don’t mind the little splurge to create it.

What about you, my fair readers, have you ever splurged a little bit on a project? Did you play it safe with a pattern you knew would sew up well or did you do something more daring? I would love to hear in the comments!

I hope to be back soon 🙂