Archive | Completed Sewing Projects RSS feed for this section

Hot Patterns 1196 | Metropolitan Urban Gypsy Blouse | Or a Tibi Knock-Off

11 Sep

katrina-2

Hi, friends! I’m back with a new top, a new haircut, and some fancy professional photos for you! I’ve had this Hot Patterns Metropolitan Gypsy blouse sewn up for several months but never could coordinate photos of it. When I scheduled a photo shoot for my stepson’s casual senior (!!!) portraits, I had the photographer capture a few of my top to use on the blog. She did such a great job! Any locals looking for great wedding/family/baby/senior photographs, check out Haley Budlong.

katrina-7

I was inspired by Erica Bunker’s version of this top so I just blatantly copied hers — with her permission, of course :-). This pattern is also a pretty accurate ringer for the Tibi off-the-shoulders blouse that retails for around $300. I checked one of these out in Nordstrom last month and I’m happy to report that it wasn’t constructed any better than mine.

katrina-4

I cut a straight size 12 but probably could have gone with the 10. I omitted the shelf bra, although I may try it on the next version to see if it helps to keep the elastic down and prevent it from riding up on my shoulders.

katrina-8

That being said, this top fits way better in the shoulders than any RTW off-the-shoudlers tops I have because I was able to select the right amount of elastic for my broad shoulders — 27″ to be exact, 3/4 of my shoulder circumference.

katrina-10

I opted for the tie detail on the sleeves and next time may try the elasticated sleeve opening. I used my narrow hem foot to finish the sleeves edges and just put a dab of Fray Chek at the very tips as that was a tricky place to get neat (thanks for that suggestion, Erica!)

katrina-9

My fabric was a lovely cotton French dot jacquard from Emma One Sock. I was able to get this shirt out of less than 2 yards, much less than the pattern’s recommended 2 3/4 yards.

katrina-3

The pattern sewed up quickly in a single Saturday and the directions were brief but sufficient. I would definitely make this again and have a gorgeous green snake print silk set aside for just such an endeavor.

katrina-6

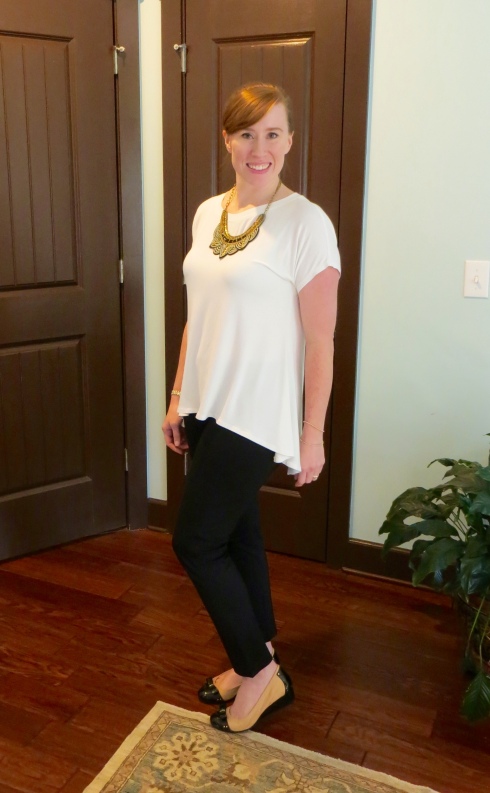
For this photo shoot, I kept my look simple and paired my top with my crisp white slim jeans, a Kendra Scott necklace and bracelet, and some tan platform wedges. What do you think about off-the-shoulders tops? Would you wear or sew one?

katrina-1

In-House Patterns | Chelsea Blouse and a Giveaway

30 Sep

Hi, friends! Happy Hump Day! Just a quick reminder that today is your last chance to enter my giveaway for two Butterick patterns. To enter, leave a comment on my last post here or my Facebook page and tell me your favorite fabric and pattern to work with. I will close the giveaway tonight and announce the winner in a few days.

IMG_3580

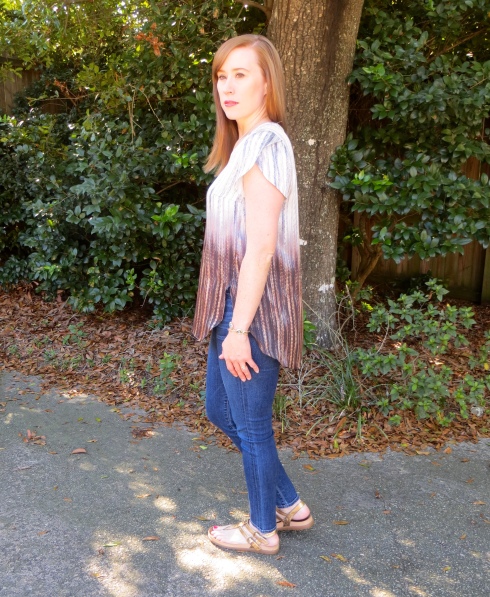
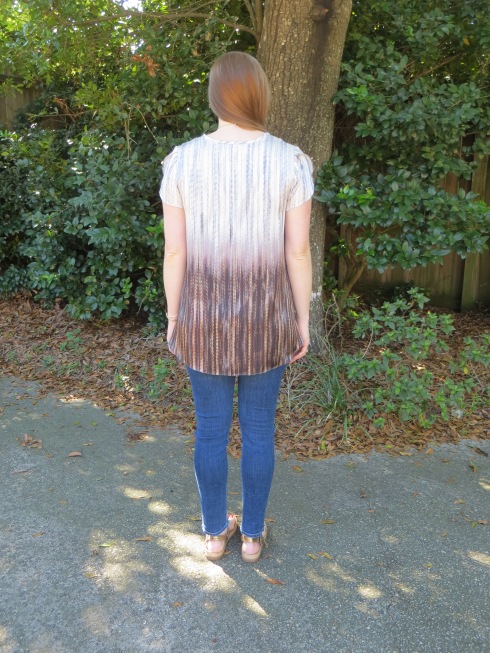
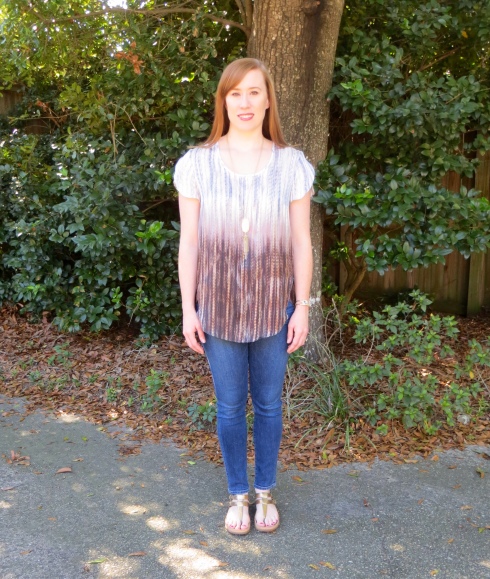
A little while back I shared with you my first version of the In-House Patterns Chelsea Blouse. My love for In-House Patterns is no secret on this blog. In my first version of the top, I told you the shoulders were a little wide, admittedly my fault because I added extra width to the pattern and cut a larger size than was probably needed. I knew I needed to give the pattern a second chance so here we are — take two.

IMG_3582

I sized down to a medium for this version and didn’t add any width to the shoulders. I think this time it is nearly perfect. I have concluded that one of my shoulders is wider than the other so I could probably alter my shirts for that, but on something this loosely fitting, I am not going to bother for now.

IMG_3590

I sewed this up in a Theory silk charmeuse earthtone ombre panel that I purchased from Emma One Sock. The fabric is gorgeous in person and of course feels wonderful against the skin. I cut it out in a single layer so I could place the pattern like I wanted it. My only gripe with sewing it was with the rolled hem foot (again) and you can see how the hemline is a little wavy. I find the rolled hem foot makes my bias edges stretch out some. Is this operator error or just a problem with that hemming method?

IMG_3585

Either way, I will still be wearing my top as we transition from hot hot to less hot here in the Deep South. It pairs well with many of my bottom pieces and I can’t wait until it is actually cool enough to pull out some boots and booties!

IMG_3575

Maria Denmark Rachel Wrap Dress

22 Sep

Howdy, friends! I hope your week is off to a good start. I have a completed sewing project to share with you today but first I want to give you an update to let you know that my entry in the Pattern Review Sewing Bee was selected to move on to the next round! You can see my entry for Round 2 here and I will get a post about it up soon (but I have to do some traveling for work first).

I promised a giveaway if I moved on, so here it is. I have two Butterick patterns — 6019 and 5895 — both Patterns by Gertie. You can see my rendition of 6019 here. If you would like to be considered for the patterns, just leave a comment on this post below or on my Susie Homemaker, MD Facebook page. I will keep the contest open until September 30 at midnight CST. In your comment, tell me your favorite pattern and your favorite fabric to work with — they don’t necessarily have to go together. The contest is open to anyone 18 years of age and older worldwide. I will announce the winner within a few days after the close of the contest.

IMG_3610

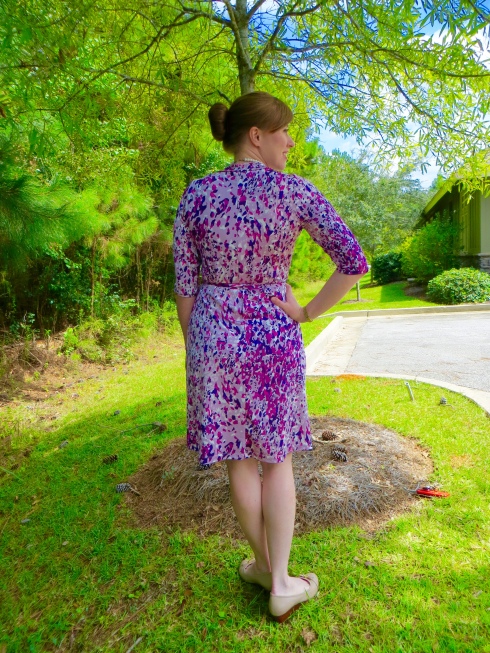
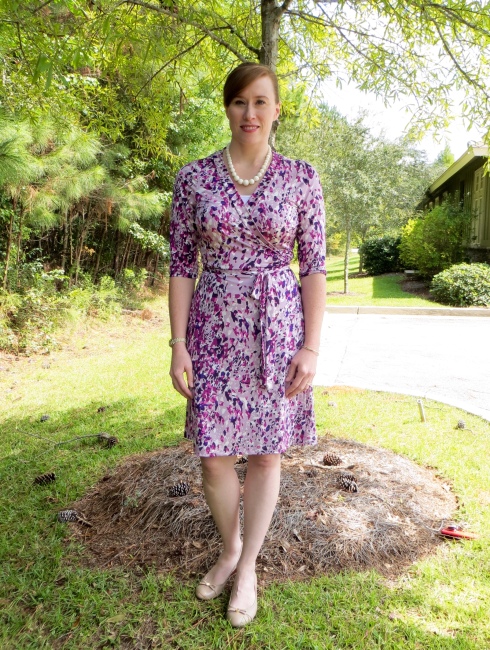
Now on to this garment! I have always been a fan of wrap dresses. I think many of us love the iconic style first brought to popularity by Diane von Furstenberg several decades ago. There is something universally flattering about the forgiving knit dress with a surplice neckline and cinched wrapped waist ties. I have long searched for the perfect pattern or RTW wrap dress. I have even tried on and purchased authentic DVF dresses only to find that they are anything but perfect for my body. They don’t come anywhere near close to covering my bust which isn’t conducive to a flattering look.

405

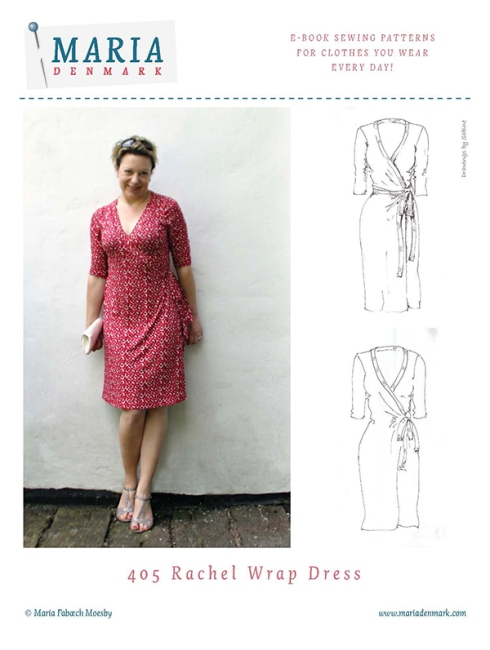
I have mocked up the popular modern Vogue 8379 but found the skirt to be too full. I have several other wrap style patterns in my stash but just haven’t had the gumption to sew any of them up. And a lot of cute indie wrap patterns have popped up on the market, too, but I have managed to resist. Until the Maria Denmark Rachel Wrap Dress came along. I am not sure why this dress won me over but it did and in a very quick fashion. I went from purchasing to printing to taping to cutting to sewing to wearing all in a matter of two days. That is unheard of in my world!

IMG_3614

I chose an inexpensive FabricMart ITY jersey for this first version just in case it was a flop. Thankfully it wasn’t even though my stepson’s first reaction was to tell me that it looked like a nightgown…

For my pattern modifications, I made an FBA since my biggest beef with wrap dresses is the gape-age in the bust. I created a side dart for a better fit and the added waist ease I removed at the side seam to keep the pattern true along the waist (there is no waistline so you have to cut the pattern in two to do the FBA then reattach the top and bottom).

IMG_3612

There is a FBA tutorial on Maria Denmark’s blog specifically for this pattern but I don’t recommend using it. She gives you a method that results in all dart intake being transferred to a waistline seam but since this dress doesn’t have a waistline seam, you end up with a bodice that won’t match back up with the skirt after the FBA. So take my advice, if you want to do an FBA on this dress, do the usual Palmer-Plescht method, not the one on Maria’s website.

My one other gripe with the pattern (well, other than the fact that it doesn’t include seam allowance, GRRRRR!!!), is that the shoulders are cut really narrow. I added 1″ to get to what you see in these photos and I could probably stand to add another 3/4″ to get the seam to fall where it should. My shoulders aren’t that broad!

IMG_3608

But overall I do love this dress. I love the figure skimming skirt and the neckline-hugging wide neckbands. I also love that it only has 4 pattern pieces so it’s easy to cut out and assemble.

I can definitely see myself making this dress up again after I tweak the pattern a little bit more. My goal is to modify it so that a camisole won’t be necessary for modesty at work. Let’s see if I can get the neckline just right! 🙂

Pattern Review Sewing Bee Round 1 | 80s Inspired Floral Peplum Blouse

7 Sep

IMG_3552

Howdy, friends! I hope you had a nice Labor Day. While I had to go in to the office for a while today, I did get lots of sewing in this weekend. Have you heard about the Sewing Bee going on over at Pattern Review? I didn’t think I would enter but then at the last minute, I decided I would move one of my to-sew objects up the queue and enter it in the contest.

1425

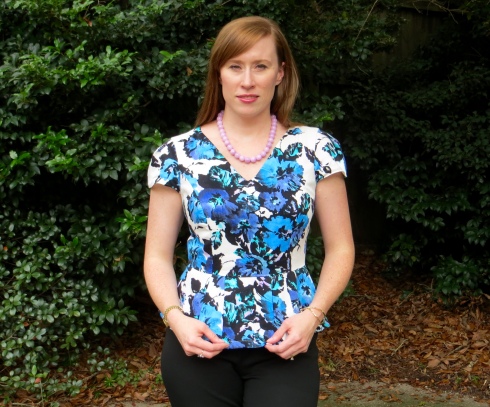
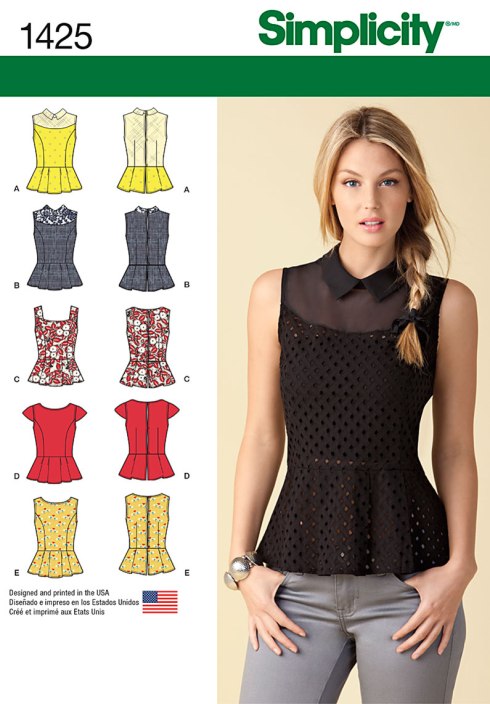
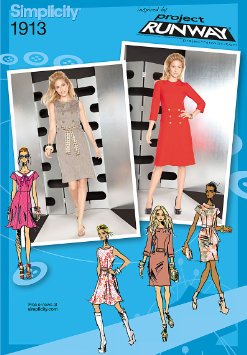
Let’s talk pattern first. I purchased Simplicity 1425 a while back. So long ago that I bought the wrong size pattern. Since I didn’t feel like going to Hancock for this project I decided to see if I could find another pattern to help me hack the over all look. Enter Simplicity 1913. The bodice of this dress has similar princess seams and neckline as well as offers a choice of sleeve options (a requirement of the Sewing Bee).

71aJp91MHhL._SY355_

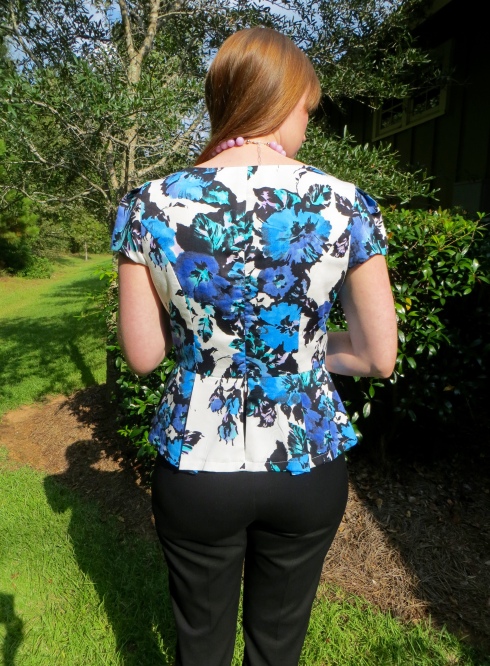
So first up, I made a few standard adjustments to the bodice pieces — 1″ FBA and added 3/4″ to the shoulder width. Then I graded out the peplum pieces from S1425 to a size 14 to match my bodice pieces. Next, I made a muslin and checked the fit. I needed to lower the bust point 1″ and add 1/8″ of width under the arm at the side seam tapering to nothing at the waist. I also needed to readjust the pleat placement a little bit. Other than that, the fit was good.

IMG_3528

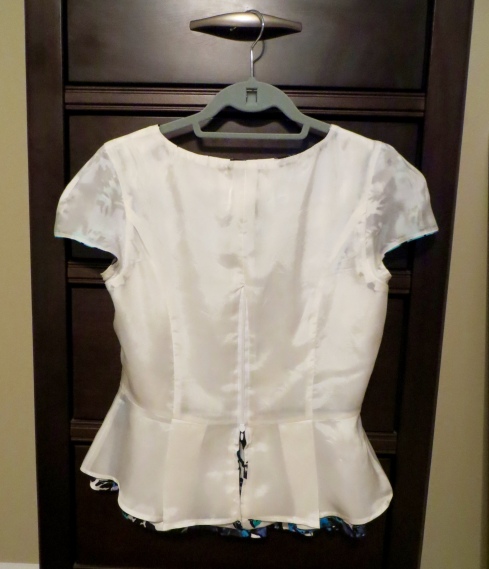
Next, I used my muslin to determine how I was going to get in and out of this top. The original pattern called for just three little buttons spaced down the back of the blouse. I don’t know about you, but I am not keen on the idea of exposing my entire back and bra to the world. So I contemplated using a full button placket, side zip, center back zip, etc. I finally decided that an upside down center back zipper would be best. I started the zipper at the waist seam and extended it up 7″ (it ends a little above my bra strap). This makes it easy to get on and off over my head but still keeps the zipper pull within easy reach when trying to operate the zipper.

IMG_3554

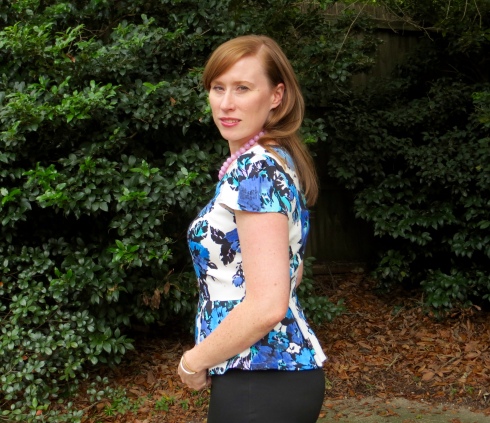
Finally, I made a few style changes from the original pattern. I cut a V neckline instead of the high round neckline because I felt like I needed to break up my floral fabric. I also added some pleats to the sleeves to echo the peplum pleats and to add a little more ease to the sleeve.

For my fabric I chose a rayon satin from Sawyer Brook (P. S. it’s now on sale!). It has the most luscious feel but is a little on the flimsy side so I decided to underline it with white cotton batiste which gave it the perfect hand. I lined the entire top in white rayon Bemberg. I love the colors in this top and I have a coordinating fabric picked out for the pencil skirt that I finally got the pattern worked out on.

IMG_3566

While sewing this top, I was methodical about grading, clipping, and pressing my seams and that was therapeutic for me. But I think the most rewarding part of sewing this blouse was the fact that I got it fully lined (even the peplum and sleeves), completely by machine. There was no hand sewing involved. I have always machined my lining to sleeveless blouses and dresses but my Google search was coming up empty on how to machine the armscye lining seam in a sleeved garment.

IMG_3568

But after sleeping on it and brainstorming about it while working on the other construction of the top, I figured out a way to do it very neatly and cleanly. I can’t wait to test my method out on something with a longer sleeve to see if it will still work. If it does, I will post a tutorial.

IMG_3544

I am tickled pink with my top. I wore it to work today styled like the photos but I can also see myself wearing it with a black pencil skirt and heels or with jeans and booties.

Keep your fingers crossed that I will make it to the next round of the sewing bee. If I do, we’ll have a giveaway here to celebrate! 🙂

Kirsten Kimono Tee HiLo Tunic Hack

19 Aug

IMG_3499

Howdy, folks! I hope you’re having a good Hump Day. Life is busy in these parts with back to school so sewing and knitting has been happening in waves around here. I have been on a mission to finish some knitting UFOs and I am pleased to report some nice progress in that department. I finished my Aiken pullover by Andi Satterlund (c. late 2014) last night and now just need to block it and I am down to the last sleeve on my Hi-Fi Pullover by Ruth Garcia Alcantud (c. late 2013). I find it easier to pull out knitting UFOs than sewing UFOs. What about you?

So for your viewing pleasure today I have another hack on the Kirsten Kimono Tee, a free pattern by Maria Denmark. You may remember my first blogged version here which involved combining a sequined knit fabric with a regular knit.

IMG_3501

That wrinkle is just from movement — it isn’t a dart.

For this version, I was trying to replicate a friend’s top that I liked so I altered the side seams and hemline to give the top a more relaxed fit and a high-low hem. My friend was sweet enough to send me measurements from her shirt so I was able to use that information to decide how much to add to the side seams and how much difference to have between the center front and center back hem. I also lengthened the sleeves some. I think my top turned out similar but not identical — I wouldn’t want her to think I am trying to be her twin 🙂

IMG_3502

I used a silky soft modal knit from my stash. I purchased it at Hart’s Fabric a few years ago and I think this is the one. Please don’t hold me to it because it’s been a while.

I used my serger to sew it up and fused the hems with double sided fusible stay tape from Emma Seabrooke. While I love her tapes in general, I didn’t love it in this application because the hem looks rumpled unless I iron it every time I wear it. It doesn’t have stretch like the body of the garment so it tends to look bad unless pressed thoroughly. Although not necessary, I stitched over the hems with the coverstitch function on my serger.

IMG_3504

I finished the neckline with a wide band that I serged on. Next time I think I would use a binding instead but the band is quick and neat and you can’t beat that!

This is my third version of the Kirsten Tee and the most worn to date. I am not retiring the pattern any time soon but I do think I will move on to trying a new knit top for some variety, maybe the Plantain Tee by Deer and Doe. Do you have a favorite knit top pattern? I’d love to hear about it in the comments!

Vogue 1353 in Silk Twill

7 Aug

IMG_3435

Howdy! I’m back today with the other half of my 2015 Outfit Along post. You can see more details on my cardigan here.

IMG_3419

As I mentioned to you in the first post, I decided pretty last minute to get started on this outfit, July 13 to be exact, and I didn’t start sewing the dress until the 24th. But since I had already made my chosen pattern, Vogue 1353, once before, I knew I could make it up pretty quickly.

silk_pastel

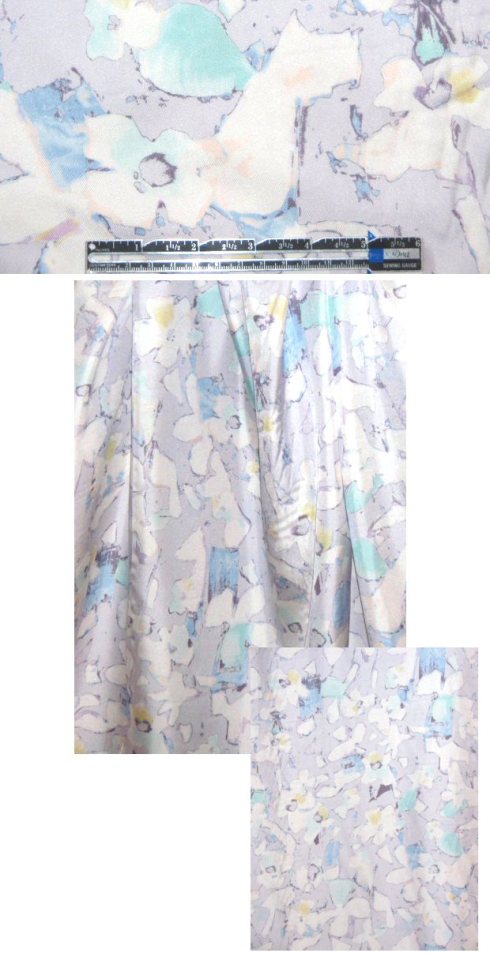
I chose this light purple colorway silk twill from my stash to match the cardigan. From the Emma One Sock website:

A very pretty silk twill print from a NY designer, this blouse/dress weight is opaque with a lovely drape and a pleasing soft sheen. The print is a floral collage with a 21″ repeat, in pastel tones of pale lavender, blue, yellow, pink and cream…

IMG_3439

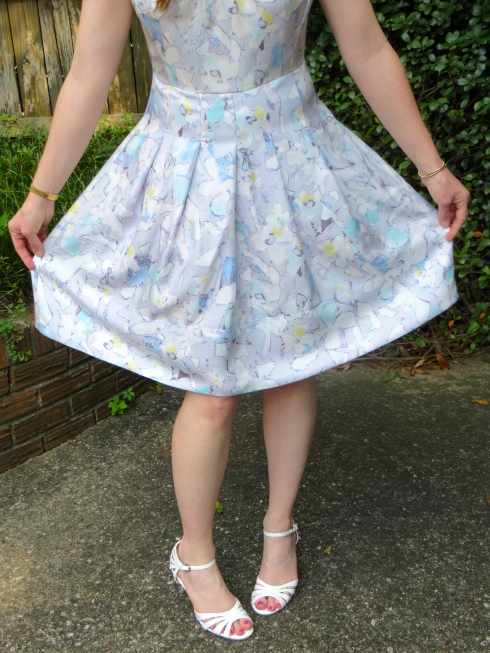
I love the soft purple base with irregular white flowers and splashes of soft blue and yellow. I think it would make a great dress for Easter or a baby/bridal shower. The twill fabrication gives the silk more body than a charmeuse although it is still very “silky” feeling. It is like the fabric of a necktie without all the interfacing. The fabric makes the dress very enjoyable to wear as it swishes really well. However, I do think a sturdier fabric, like the cotton sateen in my original version, is better for everyday interpretations of this dress. I will not wear this silk dress to work — it will be reserved for church, brunch, bridal showers, etc.

IMG_3380

I lined the dress with white rayon Bemberg and used Siri sew in interfacing from Emma One Sock.

IMG_3431

I won’t belabor the alterations as those were covered in my last post. My only additional modifications were to shift the shoulder straps in by 1/2″ and to alter the lining pieces by trimming 1/8″ off the neckline and armhole edges to help the lining roll to the inside (and it did help). I had to draft separate lining pieces for the bodice back and bodice side front to do this but that was as simple as tracing the original piece then trimming the desired edges. I had enough fabric this time to cut the skirt pieces with the pleats full width so I removed the modification I had made last time but I think I may like it better with narrower pleats.

IMG_3443

Next time I will remember to add 1/2″ to the skirt length at center back and taper it to nothing at the side seam. Instead I had to cut 1/2″ off the front of the skirt after the fact before sewing on the hem facing.

IMG_3378

Like last time, I used self-fabric instead of lining to face them hem because I like this look better. I stitched the facing in place with the chainstitch on my coverstitch and let the wrong side of the stitching show on the outside of the dress.

IMG_3374

I used this tutorial on Pattern Scissors Cloth to fully line the dress by machine and I used this tutorial to get a precisely installed invisible zipper that doesn’t require a hook and eye. So this dress doesn’t have any handstitching in it — yay!

I don’t think there’s much else to say so I’ll sign off for today. I’ll be back tomorrow with the promised tutorial on using your sewing machine to make buttonholes in your hand-knit garments!

Sallie Jumpsuit | Closet Case Files

5 Aug

IMG_3468

Hi, friends! Did you enjoy the chocolate overload yesterday? I’m back to drinking smoothies and eating kale so I can fit into the clothes I’ve been making. Too bad because those brownies are sooo good and I keep thinking about making another batch!

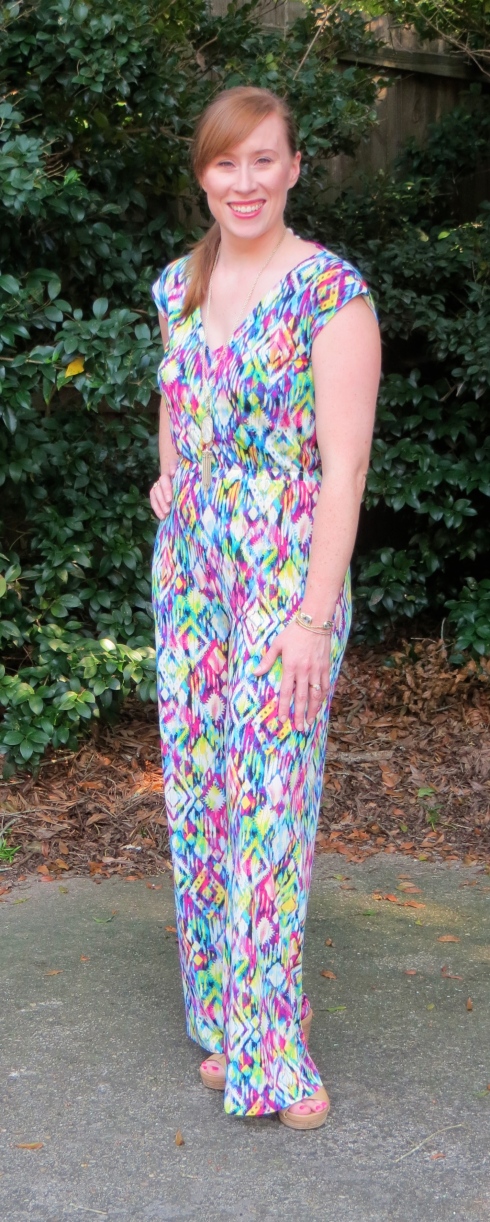
Here’s another recent make for you — the Sallie Jumpsuit by Heather Lou at Closet Case Files. I bought the pattern and sewed it up not long after it was released. And I’ve even worn it a few times since then but it’s taken me a couple tries to get photos that were good enough to post hence the delay in sharing it with you.

IMG_3475

This pattern is very quick and easy to make up. I think start to finish with assembling the pattern, cutting the fabric, and construction all the way down to the hem took me about four hours. The instructions are good and the methods yield nice results with a clean finished top.

I found certain parts were easier to do on my standard machine rather than my serger. For instance, the neckline seam and the side seams of the bodice were easier to construct with the sewing machine. I did go back over the neckline with the serger to add the clear elastic for stability since my standard serger foot has a nifty little slot for guiding in elastic and I think this is so much easier than adding it with the regular sewing machine, but I do think it is hard to get into the V exactly with the serger.

IMG_3477

I finished the waist and pants with the serger. I fused the hems with Emma Seabrooke fusible tape and didn’t bother stitching them. I used 1/2″ knit elastic for the waistband and it is very comfortable. My fabric is a cheap lightweight ITY knit from Hancock’s.

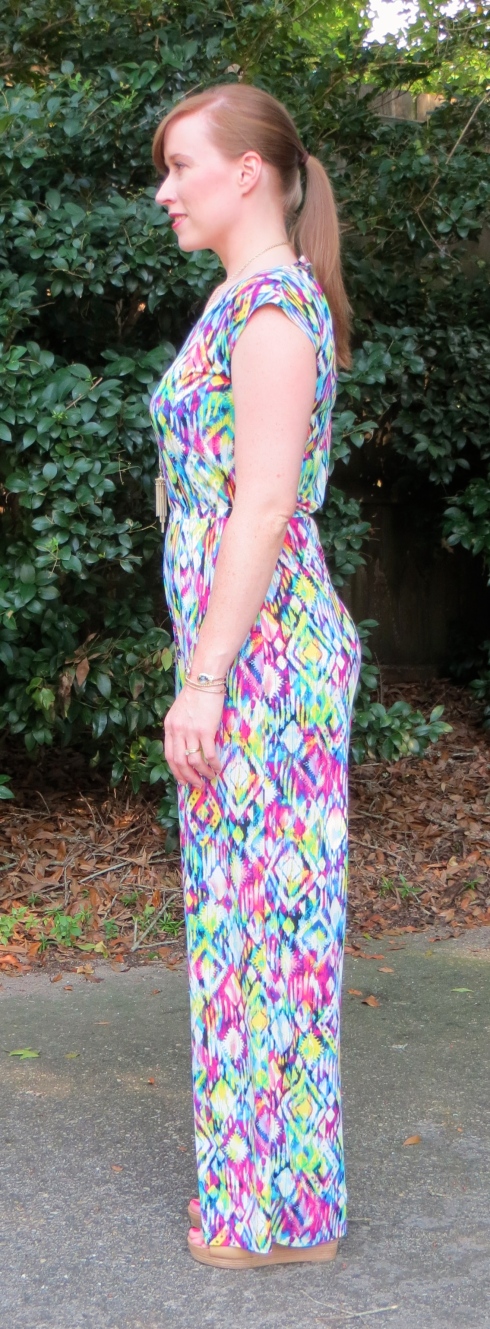
As for the fit, I selected a 12 at the bust and graded down to a 10 at the waist then back out to a 14 at the hips. I eliminated the pockets because I don’t really use them in lightweight knit garments. I measured the rise on the pattern and found it would be too short on me and that’s not a good look in a jumpsuit. So I added 1″ to the top of the center back and 1/2″ to the inner leg of the back piece, tapering to nothing down the inseam. I also scooped out the curve a little bit. I then shortened the front rise by about 1/2″.

IMG_3482

This all helped and the front rise is great but I need more length in the back rise on my next version as I still feel like my butt is eating the pants a little. I also plan to differentiate a front and back bodice piece on my next version as I need more ease to go over my chest. It doesn’t blouse at the center front like it does at the center back. And I think a forward shoulder adjustment would be helpful. Finally, I find the armhole to be very tight and restrictive, so next time I will lower that a bit.

IMG_3451

But overall, my jumpsuit is very wearable and I think I will definitely try the pattern out again (or maybe I already have…).

Vogue 1353 | Pleated Poppies Dress

22 Jul

IMG_3282

Hello, again! I am on a roll lately!! I’m back today to share with you my completed Vogue 1353, a great pleated fit-and-flare dress with a full lining by Kay Unger. I was inspired by Margo’s recent review of this pattern (isn’t she gorgeous?!?), and bought it next time Hancock’s had a sale and started sewing almost immediately.

V1353

The pattern is the perfect silhouette for an everyday, ladylike dress. And when you make it up in a washable fabric, it works well in your day job as a pediatrician. Where, yes, sometimes you do get peed on but thankfully not often — happened for the first time in ages this week just not to this dress :)-

IMG_3286

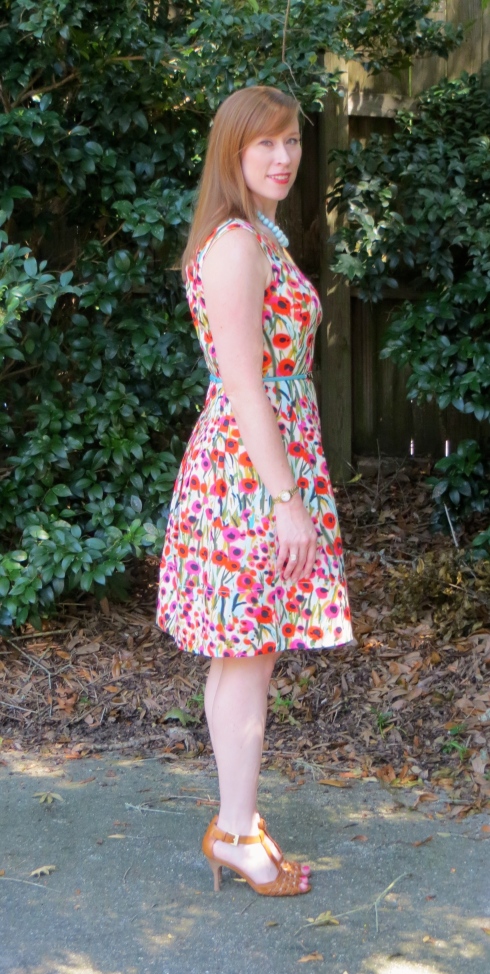
I made this beauty up in a great poppy print stretch cotton sateen from Sawyer Brook Fabrics.

V1353 poppies lining

I lined it with a creamy yellow polyester pongee from Fabric Mart Fabrics that I think I paid $1/yd for… Cotton sateen is a dream to sew with after you’ve been doing nothing but knits and silks. It actually does what you ask it to!

IMG_3291

I started with a straight size 14 then I made a few alterations:

  • 3/4″ FBA
  • lowered bust dart 5/8″
  • lowered bust point of princess seam 5/8″
  • lengthened bodice 1/2″
  • took it in a smidgen in the princess seam above the bust
  • added 1/4″ under the arm at the bust front and back tapering to nothing at the waist
  • 1/2″ forward shoulder adjustment
  • took it in 3/4″ on each side of the zipper tapering to nothing at the waist for a gaping back neckline
  • reduced the width of the pleats because my fabric wasn’t 60″ wide

V1353 Poppies Hanging Detail

I strayed from the instructions only so far as to avoid hand sewing. I lined it completely by machine, including stitching the lining to the invisible zipper by machine with my invisible zip foot. I did hand sew the hook and eye in place as I couldn’t find any way around it. 🙂

IMG_3298

V1353 Poppies Hem

My favorite part of the dress is the hem with its facing and topstitching. I used the chainstitch function on my Juki MO-735 5-thread serger to create the textured line of stitching instead of the handstitching that is prescribed in the pattern instructions. I stitched with the hem facing up so the “wrong” side of the stitching shows on the outside of the dress, creating a nice, visible line of thread. I love finding new uses for my serger!

IMG_3293

The pattern calls for a purchased belt and here I’ve accessorized it with a cute little aqua leather belt with a silver buckle that I picked up at Gus Mayer department store in Birmingham. I think this is probably the only thing (at $38) that I could ever afford from that store but I do love it! I have also paired the dress with a bead necklace from Kluster Shop and some Franco Sarto strappy heel sandals.

This is my new favorite dress pattern and I think there will be another one soon. Stay tuned!

In-House Patterns | Chelsea Blouse in Blue Georgette

19 Jul

IMG_3254

Here we are again, on the eve of another work week, and I have another productive sewing session to tell you about. I have completed a Vogue 1353 which turned out great and I will share once I get photos. I have also made another Closet Case Files Sallie Jumpsuit trying to perfect the fit. And I made another McCall’s 7121 that just needs a hem. Spoiler alert — no crazy stripe matching in this version.

IH3012-ViewA_sketch_grande

But what I am going to share with you today is this sheer, swingy blue blouse made up with the hot-off-the-presses In-House Patterns Chelsea Blouse. It’s no secret that I love Alexandra Morgan’s skills as a designer, pattern drafter, and conveyor of streamlined and industry-style sewing techniques. You can see some of my previous In-House makes here and here (I think there is going to be another Belle Blouse in my future soon). There are others that have never made it onto the blog (my sister loves the Jenny Tee that I made and gifted to her).

IMG_3256

This top is trendy but basic enough that you could make it up in a crazy fabric to wear now or in a nice neutral solid to keep in your wardrobe for many years. The pattern also provides the option for color blocking or mixed media (think lace or chiffon back panel). I love the way the side seams swing forward toward the front as they head down to the hemline. I think this makes the silhouette more slimming. What do you think?

IMG_3250

I chose to make mine up in a royal blue polyester georgette by J. Crew ($3.50/yard), one of a few pieces in a recent Fabric Mart Fabrics acquisition. While this wasn’t the easiest fabric to work with, by taking my time getting the fabric on grain, cutting it out with a rotary cutter, and carefully pinning and stitching, I think I was able to achieve a satisfactory garment.

IMG_3262

Now, don’t get me wrong, this isn’t my best work ever. My rolled hem foot gave me fits and my neck binding refused to be stitched in the ditch so I had to resort to handstitching it. But the casual observer will never notice these things.

IMG_3259

For sizing I chose a large with D cup and I added 5/8″ width to each shoulder as well as making a 1/2″ forward shoulder adjustment. I chose these adjustments based on the fit of my Blossom Blouse but I feel like the width I added to the shoulders was unnecessary and makes me look even broader than I am. Based on prior experience, In-House Patterns are drafted with very little ease so I don’t try to fudge on choosing my size. But I think in this pattern I could have gone with the medium.

IMG_3266

As far as construction goes, I used French seams for everything, including the armscyes. As mentioned above, the French binding on the neckline was stitched down by hand with a fell stitch.

IMG_3252

The body and sleeves of the blouse are hemmed with the rolled hem foot on your machine. From prior experience, I knew this would be tricky but I forged ahead. I had to adjust my needle position to get the stitching to hit in the right spot. And some places aren’t rolled right but it’s not obvious from the outside. It got a little easier as I went along, though, and the sleeves aren’t too bad.

IMG_3248

The Chelsea Blouse from In-House patterns is another solidly drafted pattern by Alexandra Morgan. I would love to see your version if you decide to sew it up!

McCall’s 7121 | Stripe Matching Victory!

5 Jul

IMG_3215

Happy Sunday, friends! I hope you are all rested and ready for the week ahead. I have taken advantage of this long holiday weekend to catch up on my never-ending list of things I would like to sew. I have made a simple knit sheath dress from some floral print scuba knit, a psychedelic Closet Case Files Sallie Jumpsuit, a Watson bra, started on the Maison Fleur Halterneck Swimsuit, and just finished this cute little dress — McCall’s 7121.

M7121

Hopefully I will get around to sharing those other things with you but if I don’t, at least you know I’m back to sewing! And now that my knit fest is over, I have plans to start on some woven items like a dress and some blouses. I will keep you posted.

IMG_3213

Y’all know I love a good knit dress. Exhibits 1 and 2. And there are more that I haven’t even shown you but that make regular appearances in my wardrobe. So it’s not a surprise that I picked up this pattern when they went on sale for $1 at Hancock’s. But I think I love this one a little more because it has a waist seam and the skirt is a little more A-line. And since the front bodice is not cut on the fold, McCall’s added a little bit of bust shaping there in the front for you.

IMG_3214

And the stripes make it so fun and flattering. Plus, I get to show off my stripe matching skills! What, you thought I was hiding something under the belt? BAM!

IMG_3341

I chose my size based on the finished measurements, not the size chart, and I selected sizes that would yield zero to a little negative ease in the bust and waist. I made my standard adjustments of 1/2″ forward shoulder and 1″ swayback and I also decided to raise the neckline by 1.5″. After I stitched this up, I realized the armholes and back neckline were gaping and the waist was a little low so I pinched up the shoulder by 1.5″ and stitched a new shoulder seam, effectively fixing all three problems. I think using neck and armhole bindings would prevent the gaping but this pattern just calls for turning and stitching.

IMG_3345

Which, of course, I didn’t do! I decided to self-line the bodice for a clean finish at the neck and armscye. I did sew some clear elastic into the neckline and after I raised the shoulder seams, it lies smoothly. Finally, I serged some clear elastic into the waist seam and hemmed with a twin needle.

IMG_3212

Easy peasy for a great wardrobe builder. I think my next version will be hacked into a peplum top with some great black floral scuba knit that is calling to me from my fabric stash…