Archive | July, 2014

Bodice Modifications for Butterick 6019

27 Jul

IMG_2835


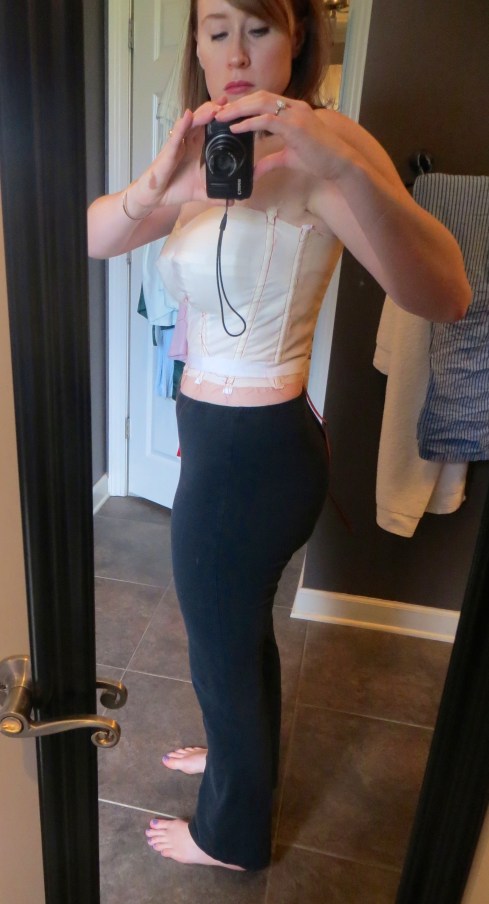
Hi, friends! I am here today with a quick “tutorial” post to address a question that came up about the fitting of my Butterick 6019 bombshell dress. During the muslin-making process, I realized that the bust cups of the dress were all wrong for me. The top of the dress was too low for comfortable decency and the cup seams created an awkward pointy shape over my bust (think bullet bra to the extreme). I also discovered that the under bust seam didn’t hit under my bust and the bodice was overall too long for my figure.

I will warn you in advance, I am going to share some less than attractive photos of myself in this post. But it’s all for the sake of science, right?

I started by pinching out the excess from bodice fabric in the front and back. This helped bring the under bust seam into the correct position. I then pinched and pinned out a little excess in the side seams.


PicMonkey Collage2


Once that had been taken care of, I pinned out the excess in the vertical and horizontal bust cup seams, creating a much more natural shape in this area. Then I checked the location of the horizontal bust cup seams and felt it was too low across my body and raised it across both lower cup pattern pieces (hence the reason it doesn’t look like I took any out in these areas). Hopefully you can see in the photos that the overall effect of these adjustments was to decrease the severity of the curve across the bust. At this point I made new muslin and tweaked all of the previous adjustments by a few more minor amounts.


IMG_2866

You can hopefully see in this photo how my final pattern pieces in white paper compare to the original pattern pieces.


Once all these adjustments had been made, I assessed the location of the top of the bodice all the way around and realized I wanted roughly 1/2″ added in the front and 1″ in the back. I added these amounts to my already modified pattern pieces and tapered the 1/2″ in front around to the 1″ in back.


IMG_2818

Since this layer wouldn’t show in the final dress, I sewed it with leftover bobbins in random colors.


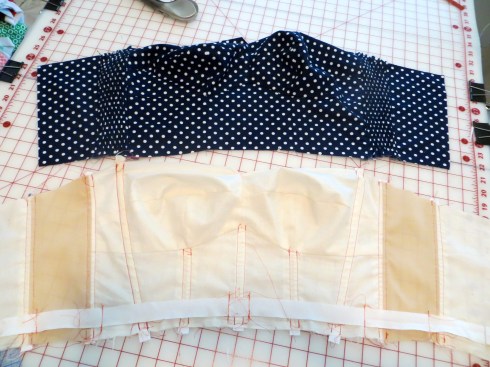
I made my final muslin just to check the fit once more but to also use as the interlining if all my adjustments had been successful.


IMG_2820

You can see I added a lot more boning than suggested in the pattern.


During the earlier muslins, I duct taped cheap boning from Hancock Fabrics into place for fitting but on the final version, I went ahead and sewed my boning channels and added the spiral steel boning. Next time, I think I will lengthen this layer to my high hip (like a corselet) for added wearing comfort. As it is now, the boning ends right at my narrowest point, somewhat cutting into my body when I sit, and also making the skirt portion just below the waist seam blouse out a little bit.


IMG_2522


Here’s the finished dress just waiting on a hem. Please pardon the unattractive setting and the cute socks 🙂

Butterick 6019 — A Polka Dot Bombshell Dress

21 Jul

Howdy, friends! I hope this missive finds you well. I have been doing some sewing and knitting lately and finally have something finished to show you!


IMG_2835


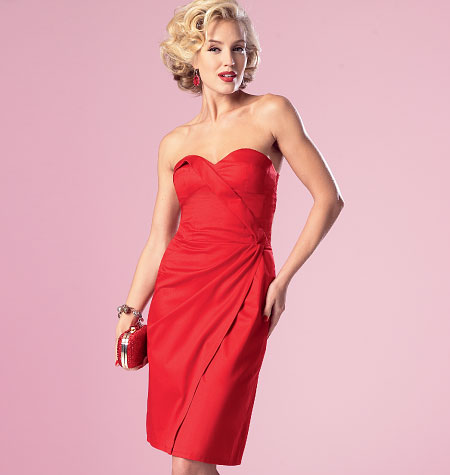
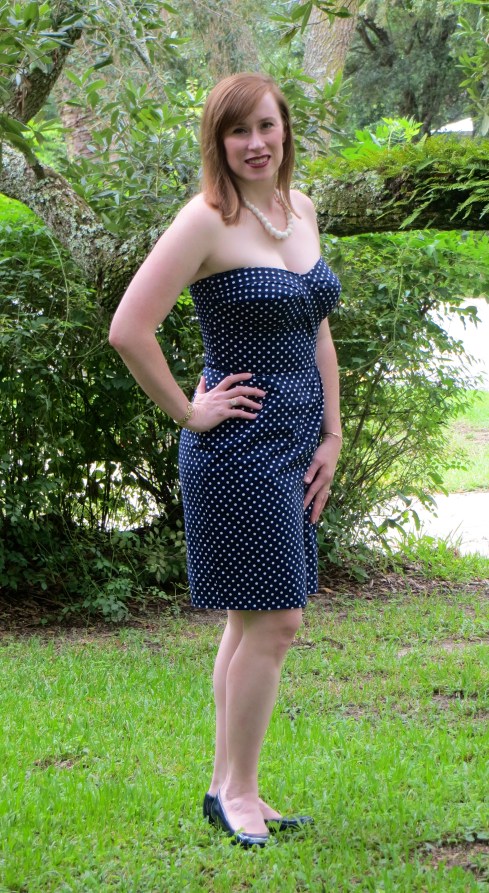
This is Butterick 6019, a bombshell dress by Gretchen Hirsch of Gertie’s New Blog for Better Sewing. I have been muslining a dress like this intermittently for the past 2 years — I finally bit the bullet and finished one!


B6019


I chose this pattern because it has a lot of visual interest with the fitted bodice with sash accent, sarong-style skirt, and shirring on the back bodice. I think the shirring is what attracted me the most.


IMG_2833


Alright, now for some wordy business about the process of creating this dress!

I started with the 14 D-cup pattern and made a muslin of the bodice. I ended up taking it in at the top and letting it out a smidge in the waist. I did a swayback adjustment on the bodice (but should have done one on the skirt, too). I also added about an inch to the bodice height to make the neckline more decent.

I found the cups to be waaaay too pointy for my taste so I tamed that down quite a bit also. I ended up shortening the bodice about an inch under the bust — I am accepting the fact that I am very short-waisted or my boobs are saggy…

That was all pretty straightforward stuff. The project got complicated when I decided to fully line the dress (the pattern only calls for partially lining the bodice — and for good reason I discovered) and then underline the bodice.


IMG_2826


The bodice underlining was simple enough. I just used corset mesh cut a little bigger than the shirred pieces to stabilize that area but still allow for some stretch. I used muslin for the rest of the underlining and added way more boning channels than the pattern’s prescribed two. I sewed a waist stay to a few points on the bodice. Next time I make a dress like this, I will extend the underlining layer down to my high hip to keep it from cutting into my waist.


IMG_2827


I also used bra foam for the cups instead of the batting that was called for.


IMG_2824


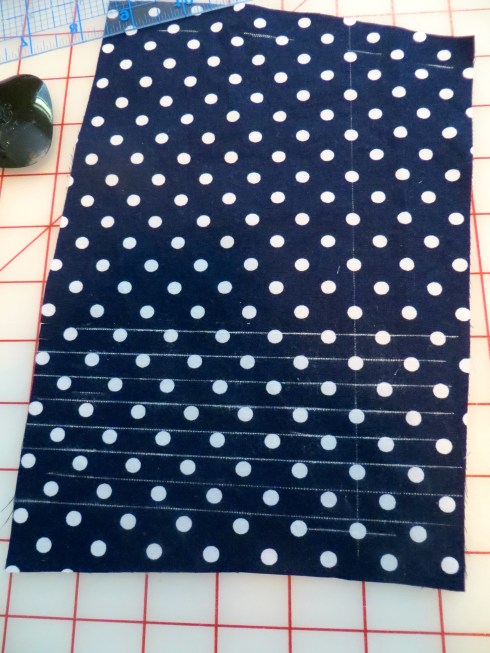
For the shirring, I marked lines perpendicular to the grain at 3/8″ intervals. Sewing all the shirring was one of the most tedious parts of the project but also one of the most rewarding. Look how beautiful!


IMG_2851


My dress is made from a navy and white polka dot silk cotton blend. It has a nice crisp hand but shows lint like it’s going out of style!


IMG_2848


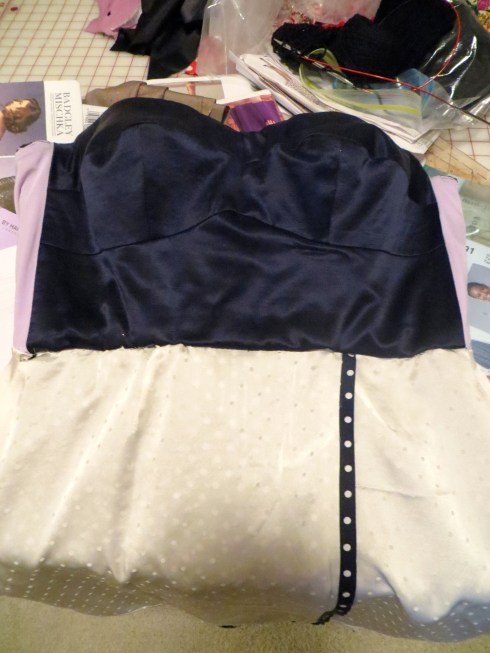
To line the bodice, I used a luscious 4 ply silk satin remnant for the non-stretch sections and a scrap from the Gertie slip kit (not finished yet) for the areas under the shirring. I left small openings in the back bodice lining seams to allow the waist stay to pull through.


IMG_2850


Now, lining the skirt was a whole different monster. Since the skirt has a wrap front, I couldn’t just duplicate it and stick it inside. I decided to have the lining attached at the front vertical edges of both wrap panels which meant that something had to be stitched by hand — yuck! But hand stitch I did and don’t judge my really sloppy work.


IMG_2849


I did a machine hem on the lining and a hand stitched hem on the shell. For my skirt lining, I used a cute ivory polka dot silk charmeuse.


IMG_2846


I used my Threads #171 for inserting the lapped zipper with lining by machine, but as usual, I handpicked the overlap for greater control. Just like the method I used on my Rosy Elisalex.


IMG_2838


I guess that’s about it on this dress. It was definitely a journey as I initially planned to wear it to a wedding a few weeks ago but ran out of time to complete it so let it sit for a few weeks before getting up the gumption to finish it. But finish it I did!


IMG_2830

These photos were taken in the front yard of our eventual new house. I love our huge oak tree!

Spring Sewing Swap 2014

13 Jul

Hi, everyone! I hope your weekend has been fun/relaxing/productive according to your wishes. I’m here with just a quick note to share my Spring Sewing Swap parcel with you. This year I was paired with Jinju over at Toile and Trouble. We were a great match because we have similar (read: expensive) taste in fabric. We chatted via email for a while before selecting and sending our gifts and I really enjoyed making a new sewing acquaintance. And I am very jealous of the Liberty lawn Jinju finds in the $4 bargain bin at her local quilt shop!

So without further ado, here is the wonderful package I received the mail.


IMG_2829


1. New measuring tape, which is great because the measuring tape I got in last year’s swap just broke 😦

2. Vogue 1241

3. Three lengths of fabric: two of cotton lawn/voile and one of a beautiful silk cotton floral print

4. Vintage hand sewing needles

5. Zipper and notions for making included pattern

6. My favorite, homemade green and white polka dot bias tape

7. A sweet handwritten note


I am so grateful for this wonderful package of surprises which suits me perfectly! Thank you, Jinju! And thanks to Kerry for organizing the swap again!