Tag Archives: dress

Maria Denmark Rachel Wrap Dress

22 Sep

Howdy, friends! I hope your week is off to a good start. I have a completed sewing project to share with you today but first I want to give you an update to let you know that my entry in the Pattern Review Sewing Bee was selected to move on to the next round! You can see my entry for Round 2 here and I will get a post about it up soon (but I have to do some traveling for work first).

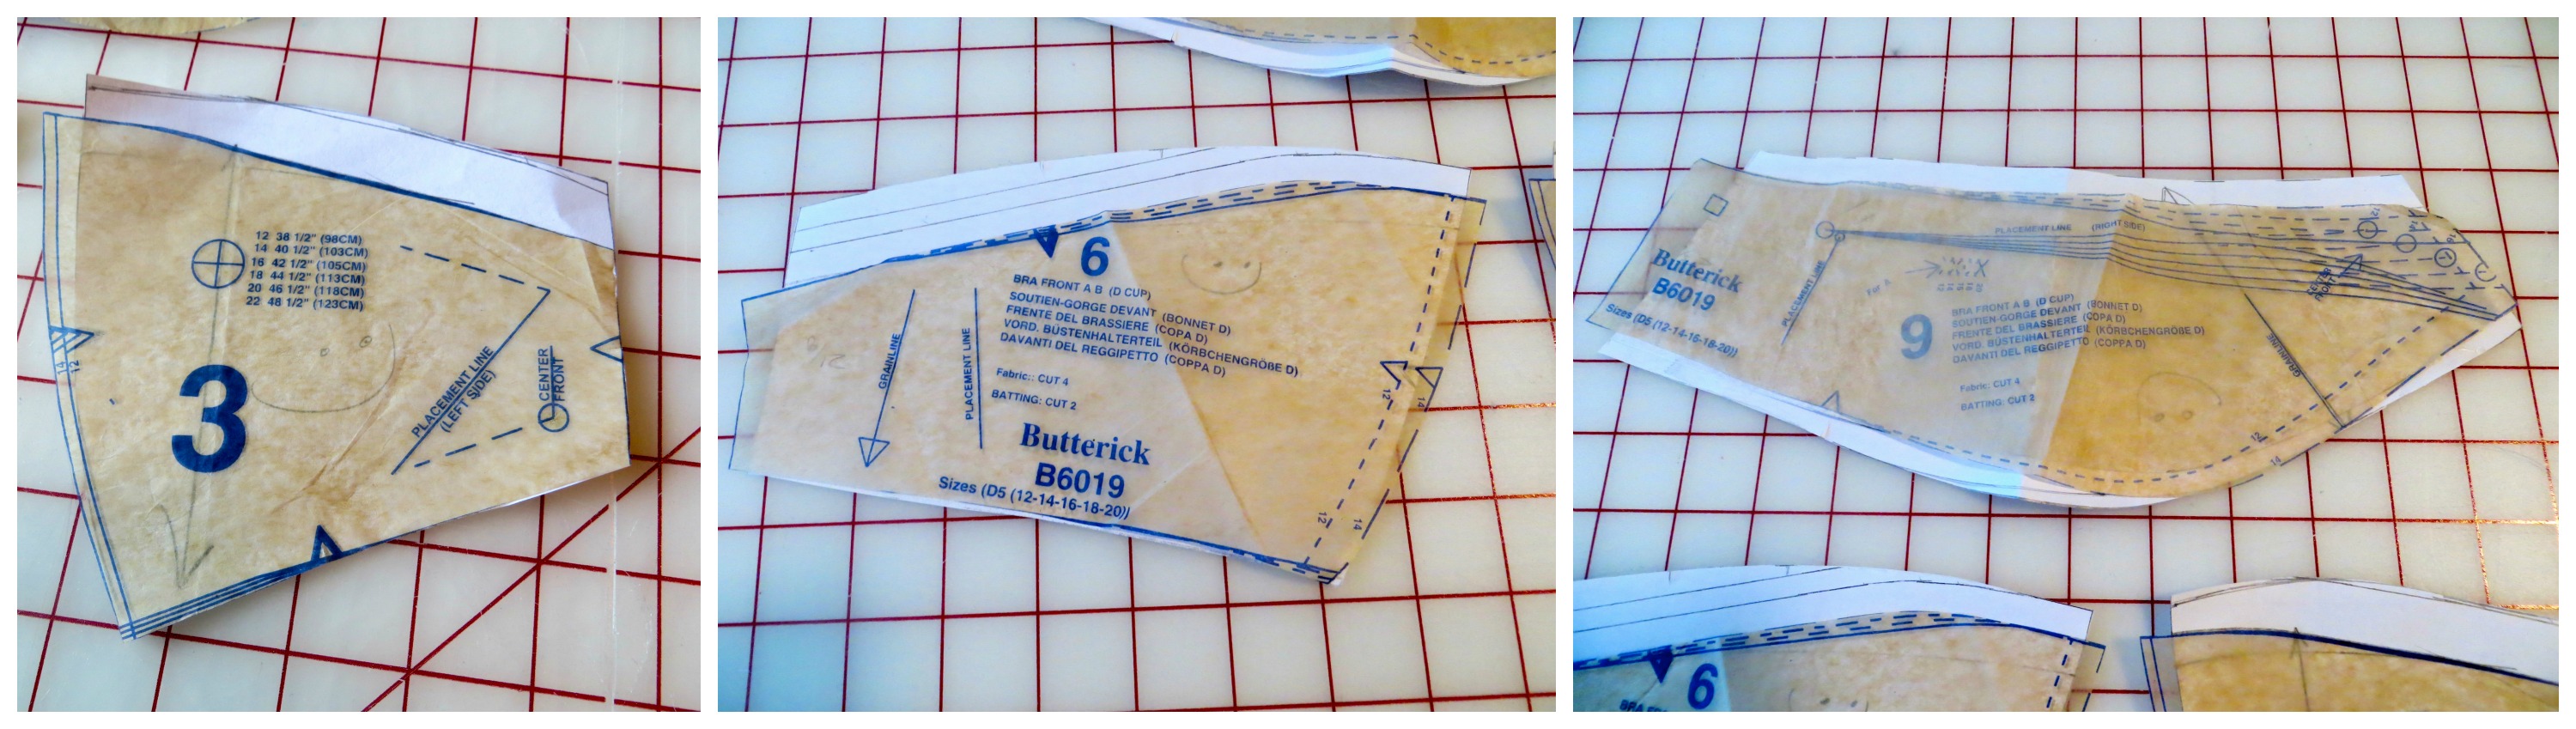
I promised a giveaway if I moved on, so here it is. I have two Butterick patterns — 6019 and 5895 — both Patterns by Gertie. You can see my rendition of 6019 here. If you would like to be considered for the patterns, just leave a comment on this post below or on my Susie Homemaker, MD Facebook page. I will keep the contest open until September 30 at midnight CST. In your comment, tell me your favorite pattern and your favorite fabric to work with — they don’t necessarily have to go together. The contest is open to anyone 18 years of age and older worldwide. I will announce the winner within a few days after the close of the contest.

IMG_3610

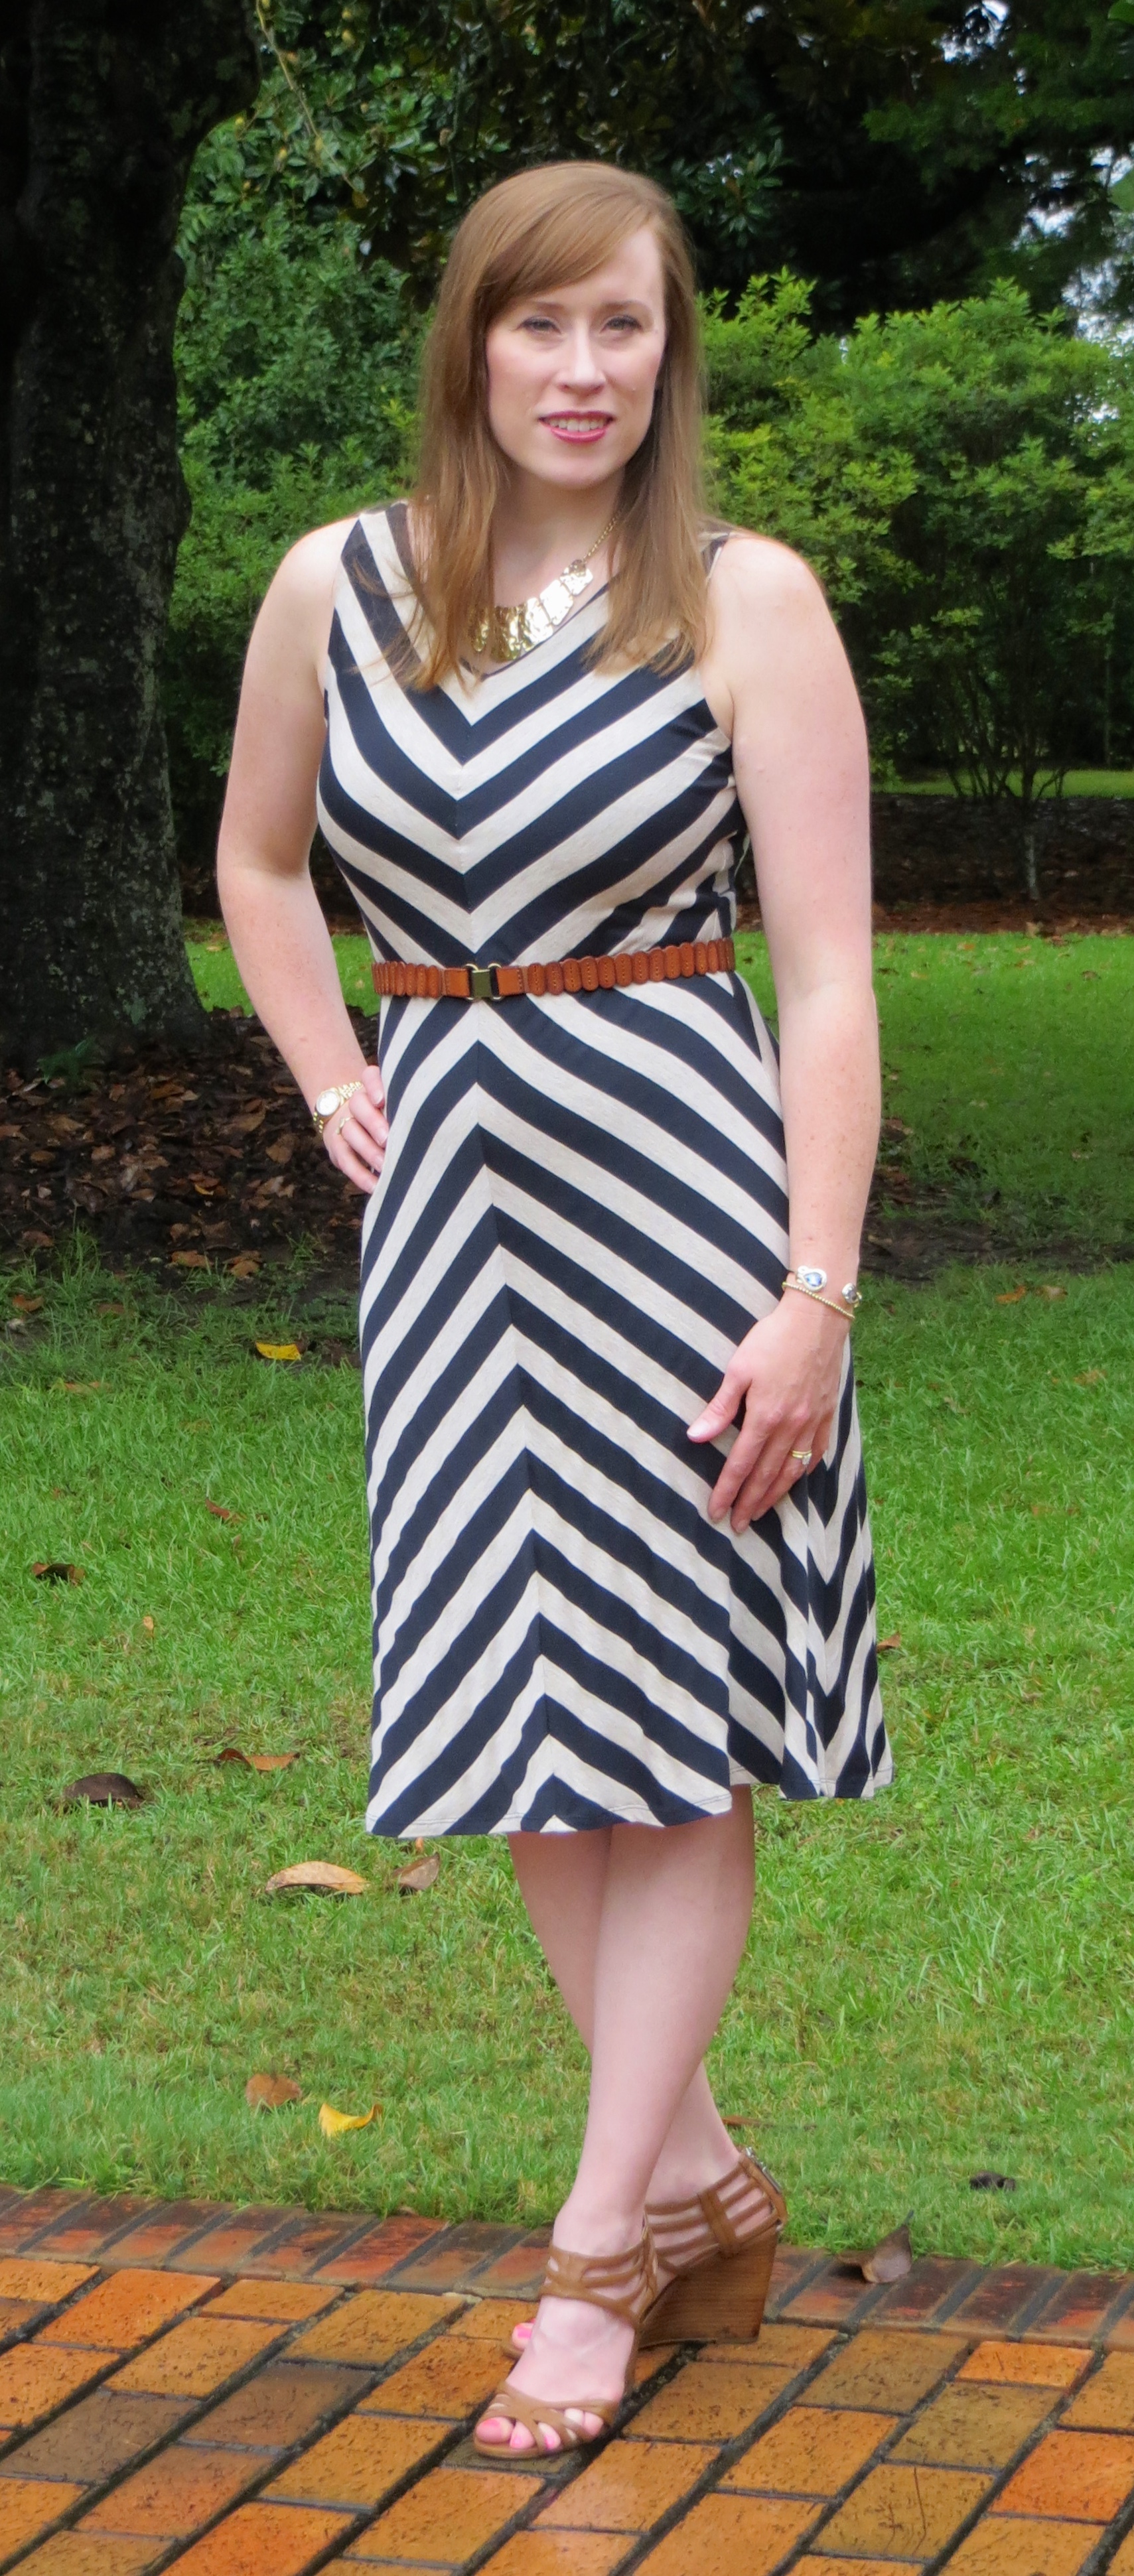
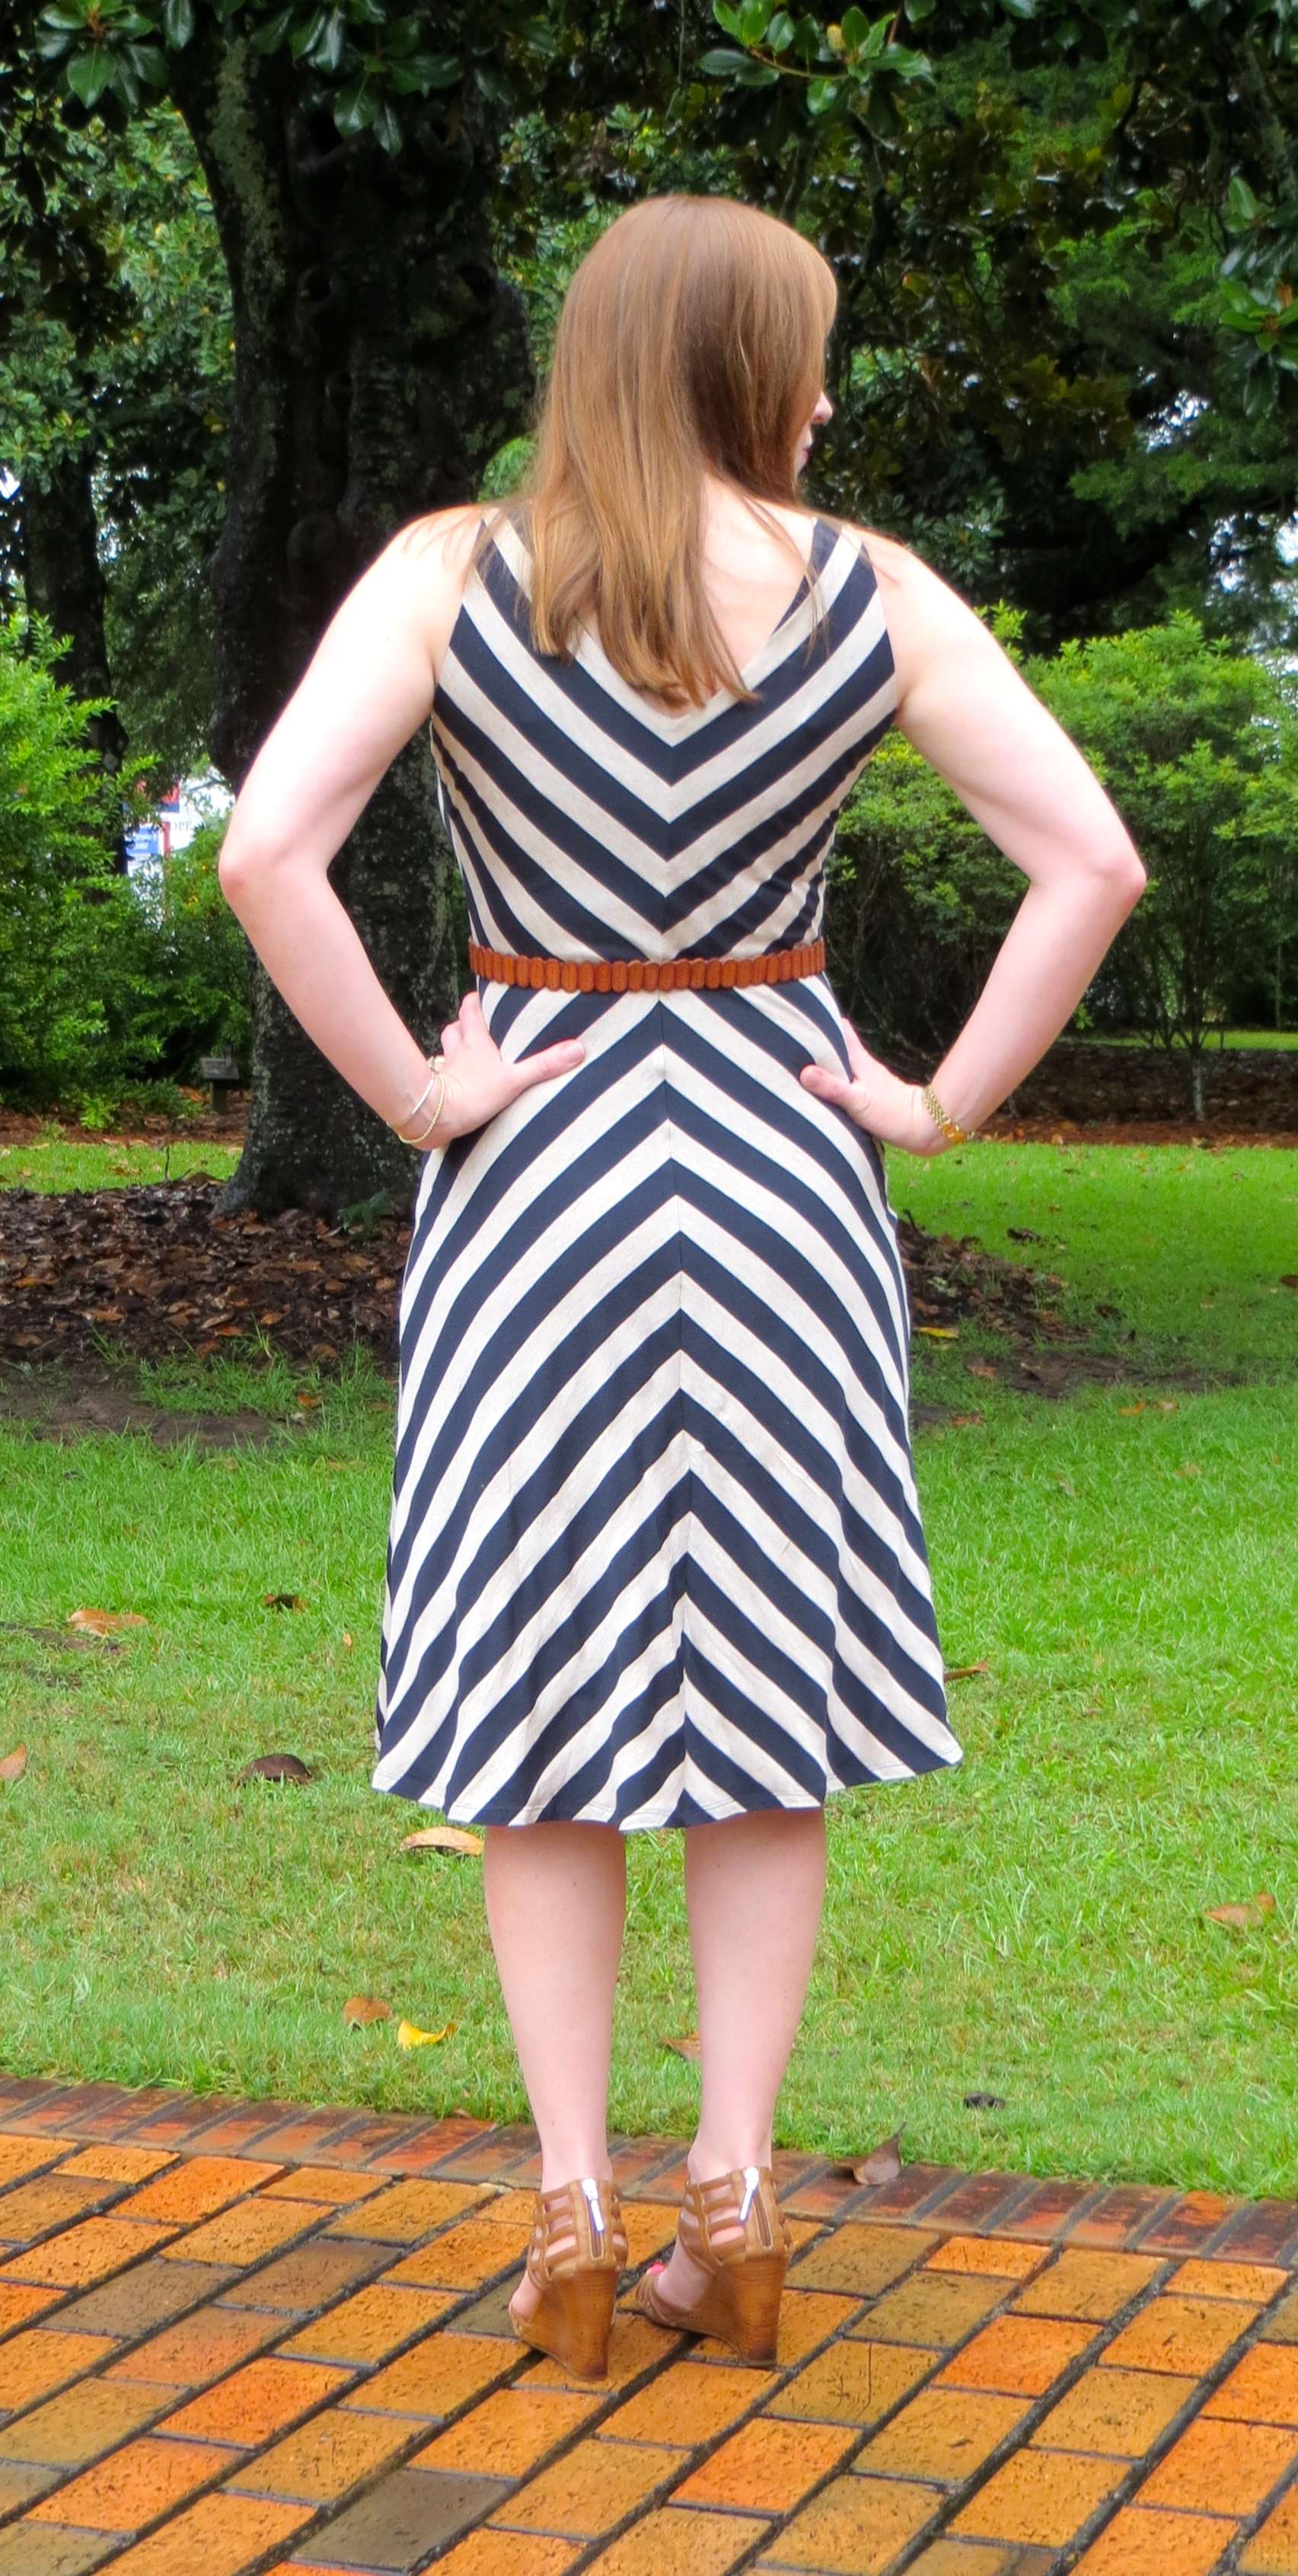
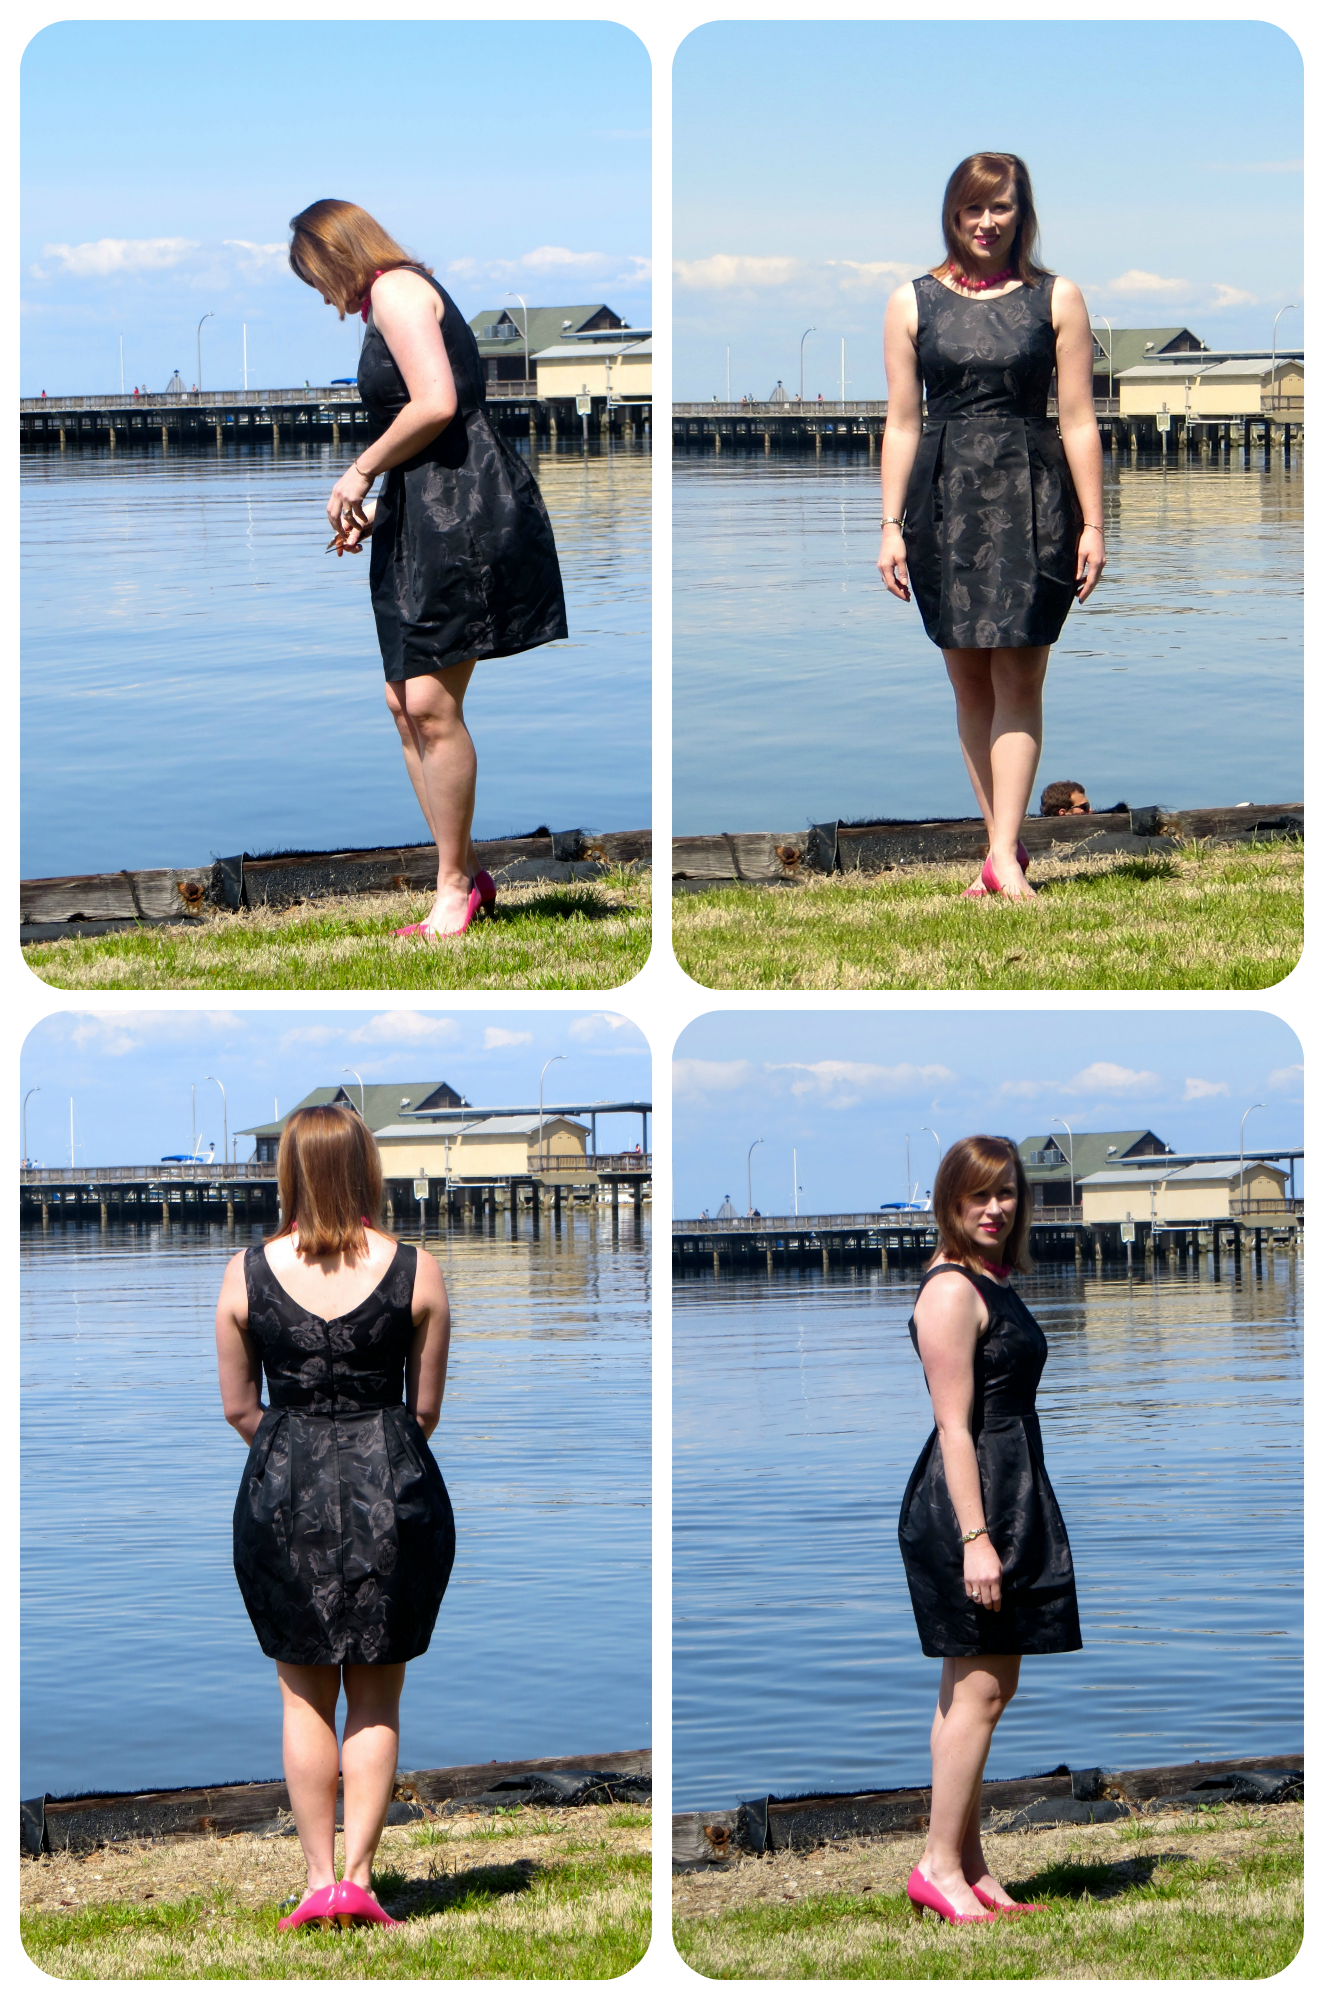
Now on to this garment! I have always been a fan of wrap dresses. I think many of us love the iconic style first brought to popularity by Diane von Furstenberg several decades ago. There is something universally flattering about the forgiving knit dress with a surplice neckline and cinched wrapped waist ties. I have long searched for the perfect pattern or RTW wrap dress. I have even tried on and purchased authentic DVF dresses only to find that they are anything but perfect for my body. They don’t come anywhere near close to covering my bust which isn’t conducive to a flattering look.

405

I have mocked up the popular modern Vogue 8379 but found the skirt to be too full. I have several other wrap style patterns in my stash but just haven’t had the gumption to sew any of them up. And a lot of cute indie wrap patterns have popped up on the market, too, but I have managed to resist. Until the Maria Denmark Rachel Wrap Dress came along. I am not sure why this dress won me over but it did and in a very quick fashion. I went from purchasing to printing to taping to cutting to sewing to wearing all in a matter of two days. That is unheard of in my world!

IMG_3614

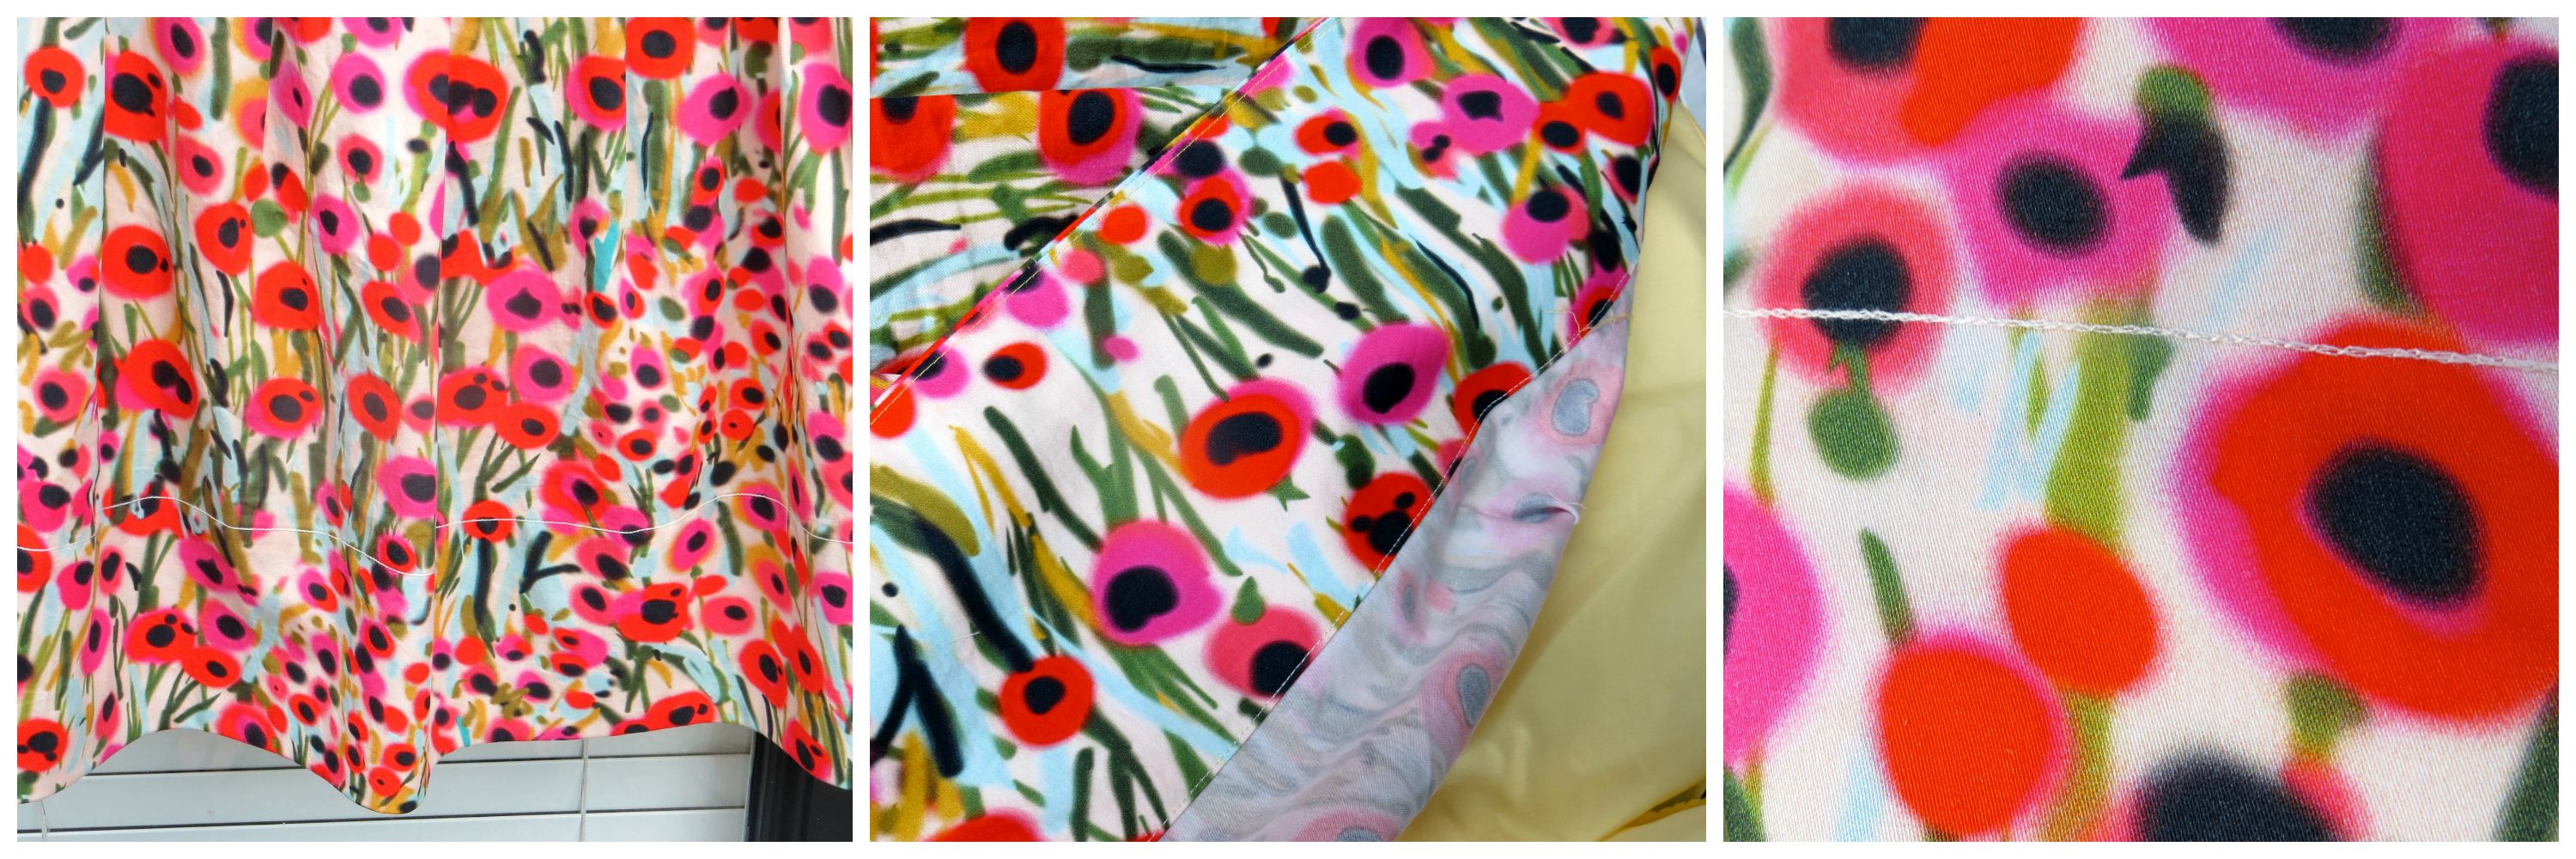
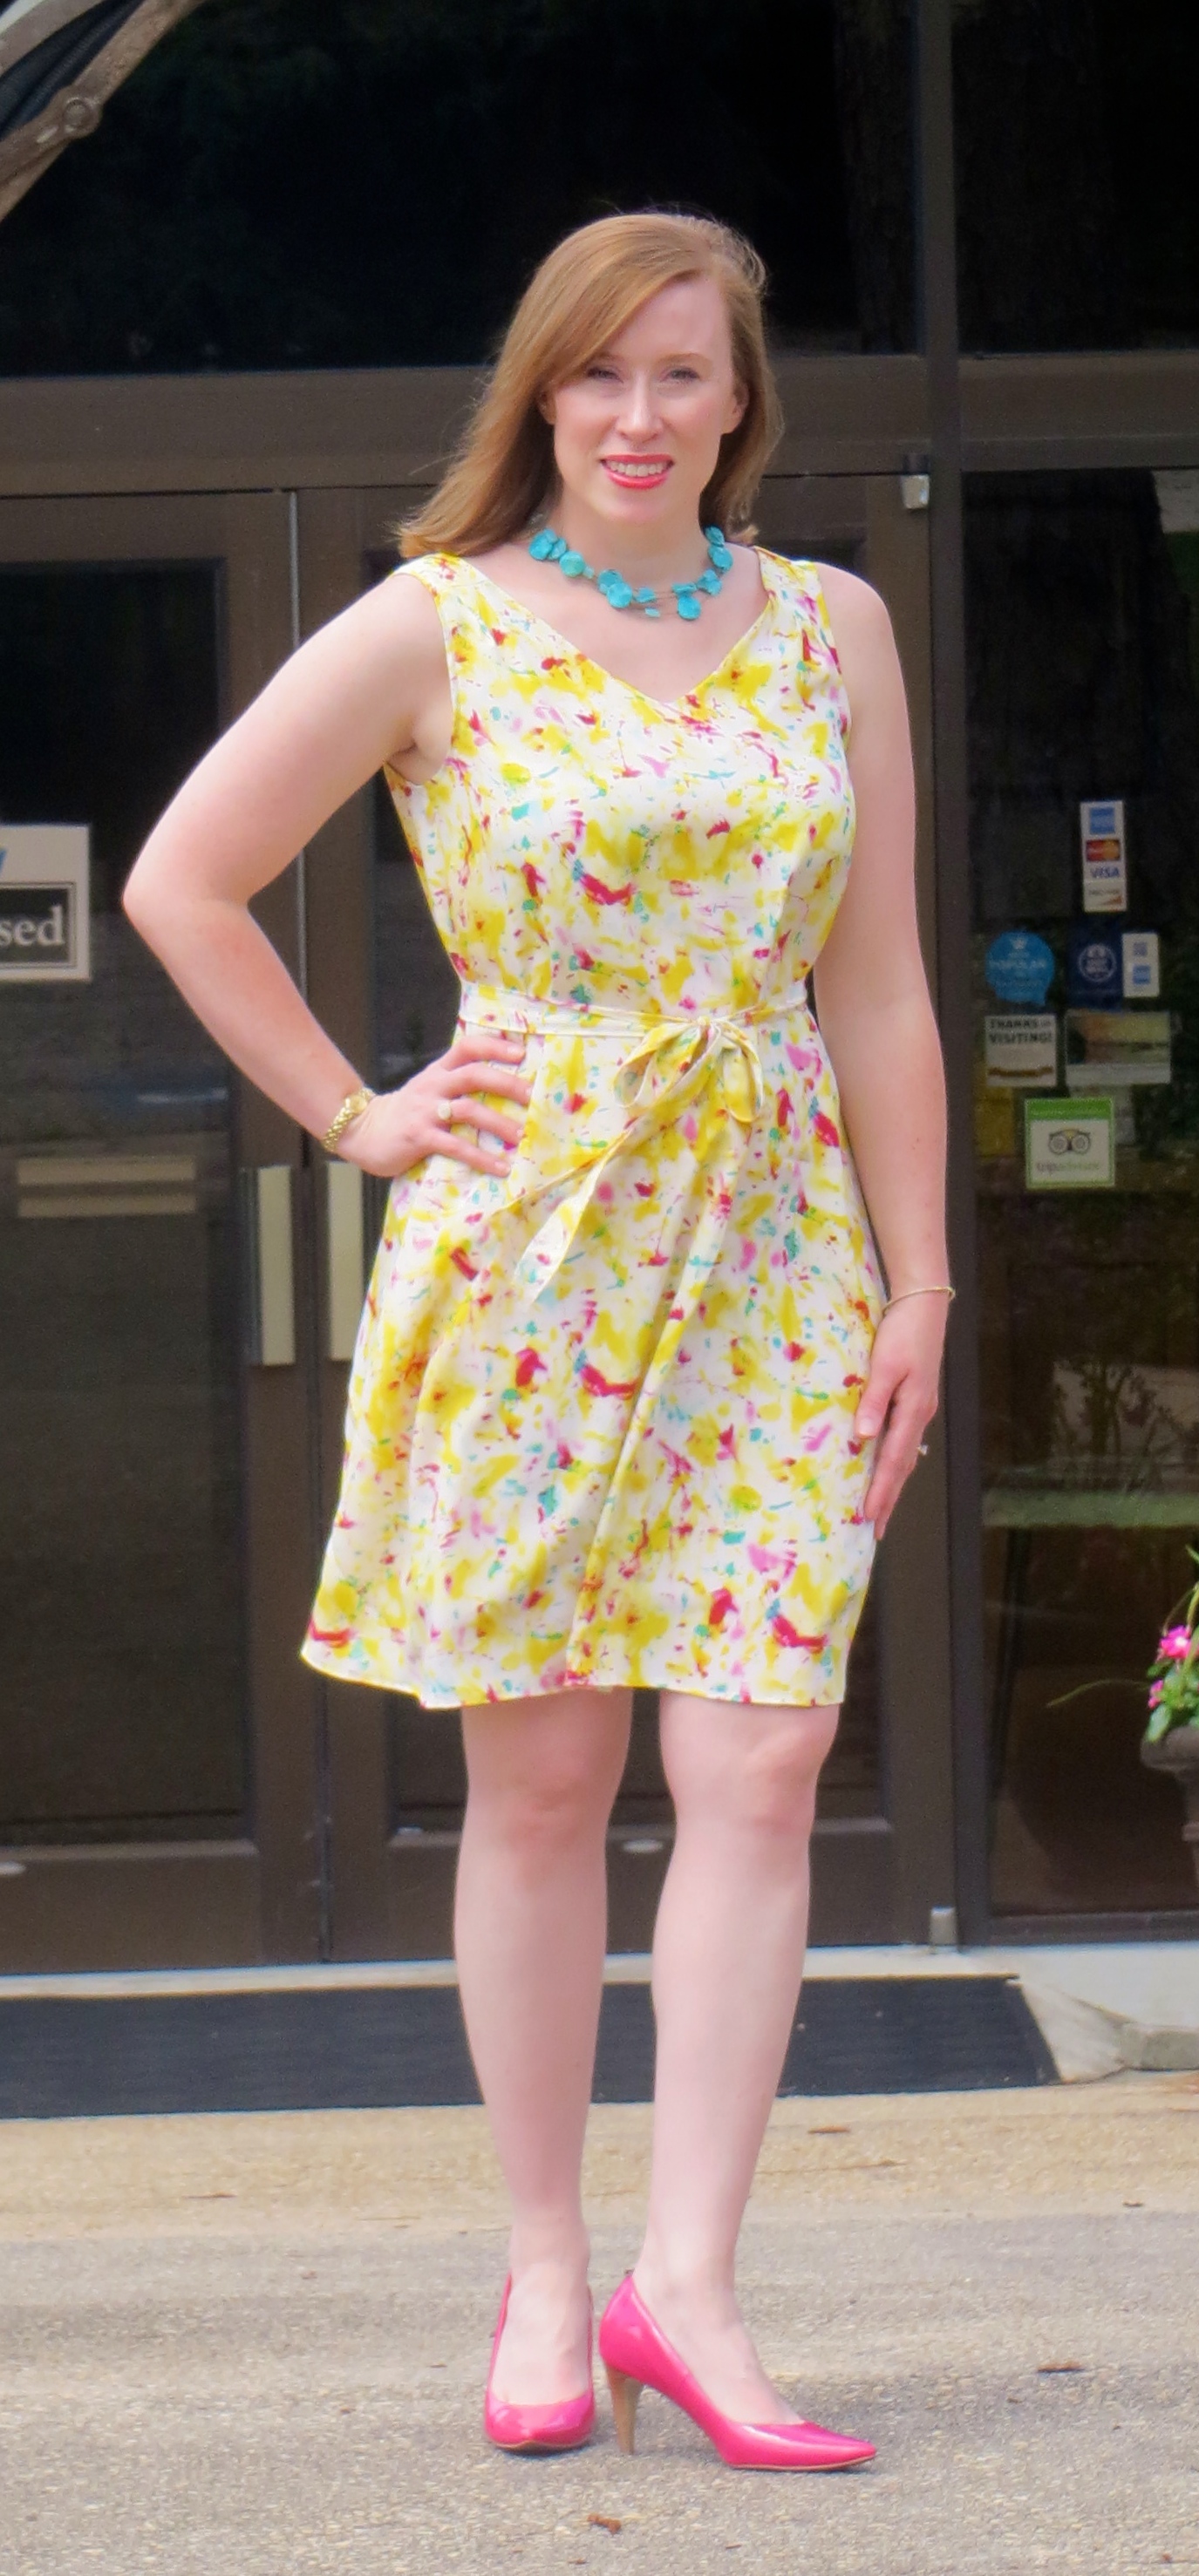
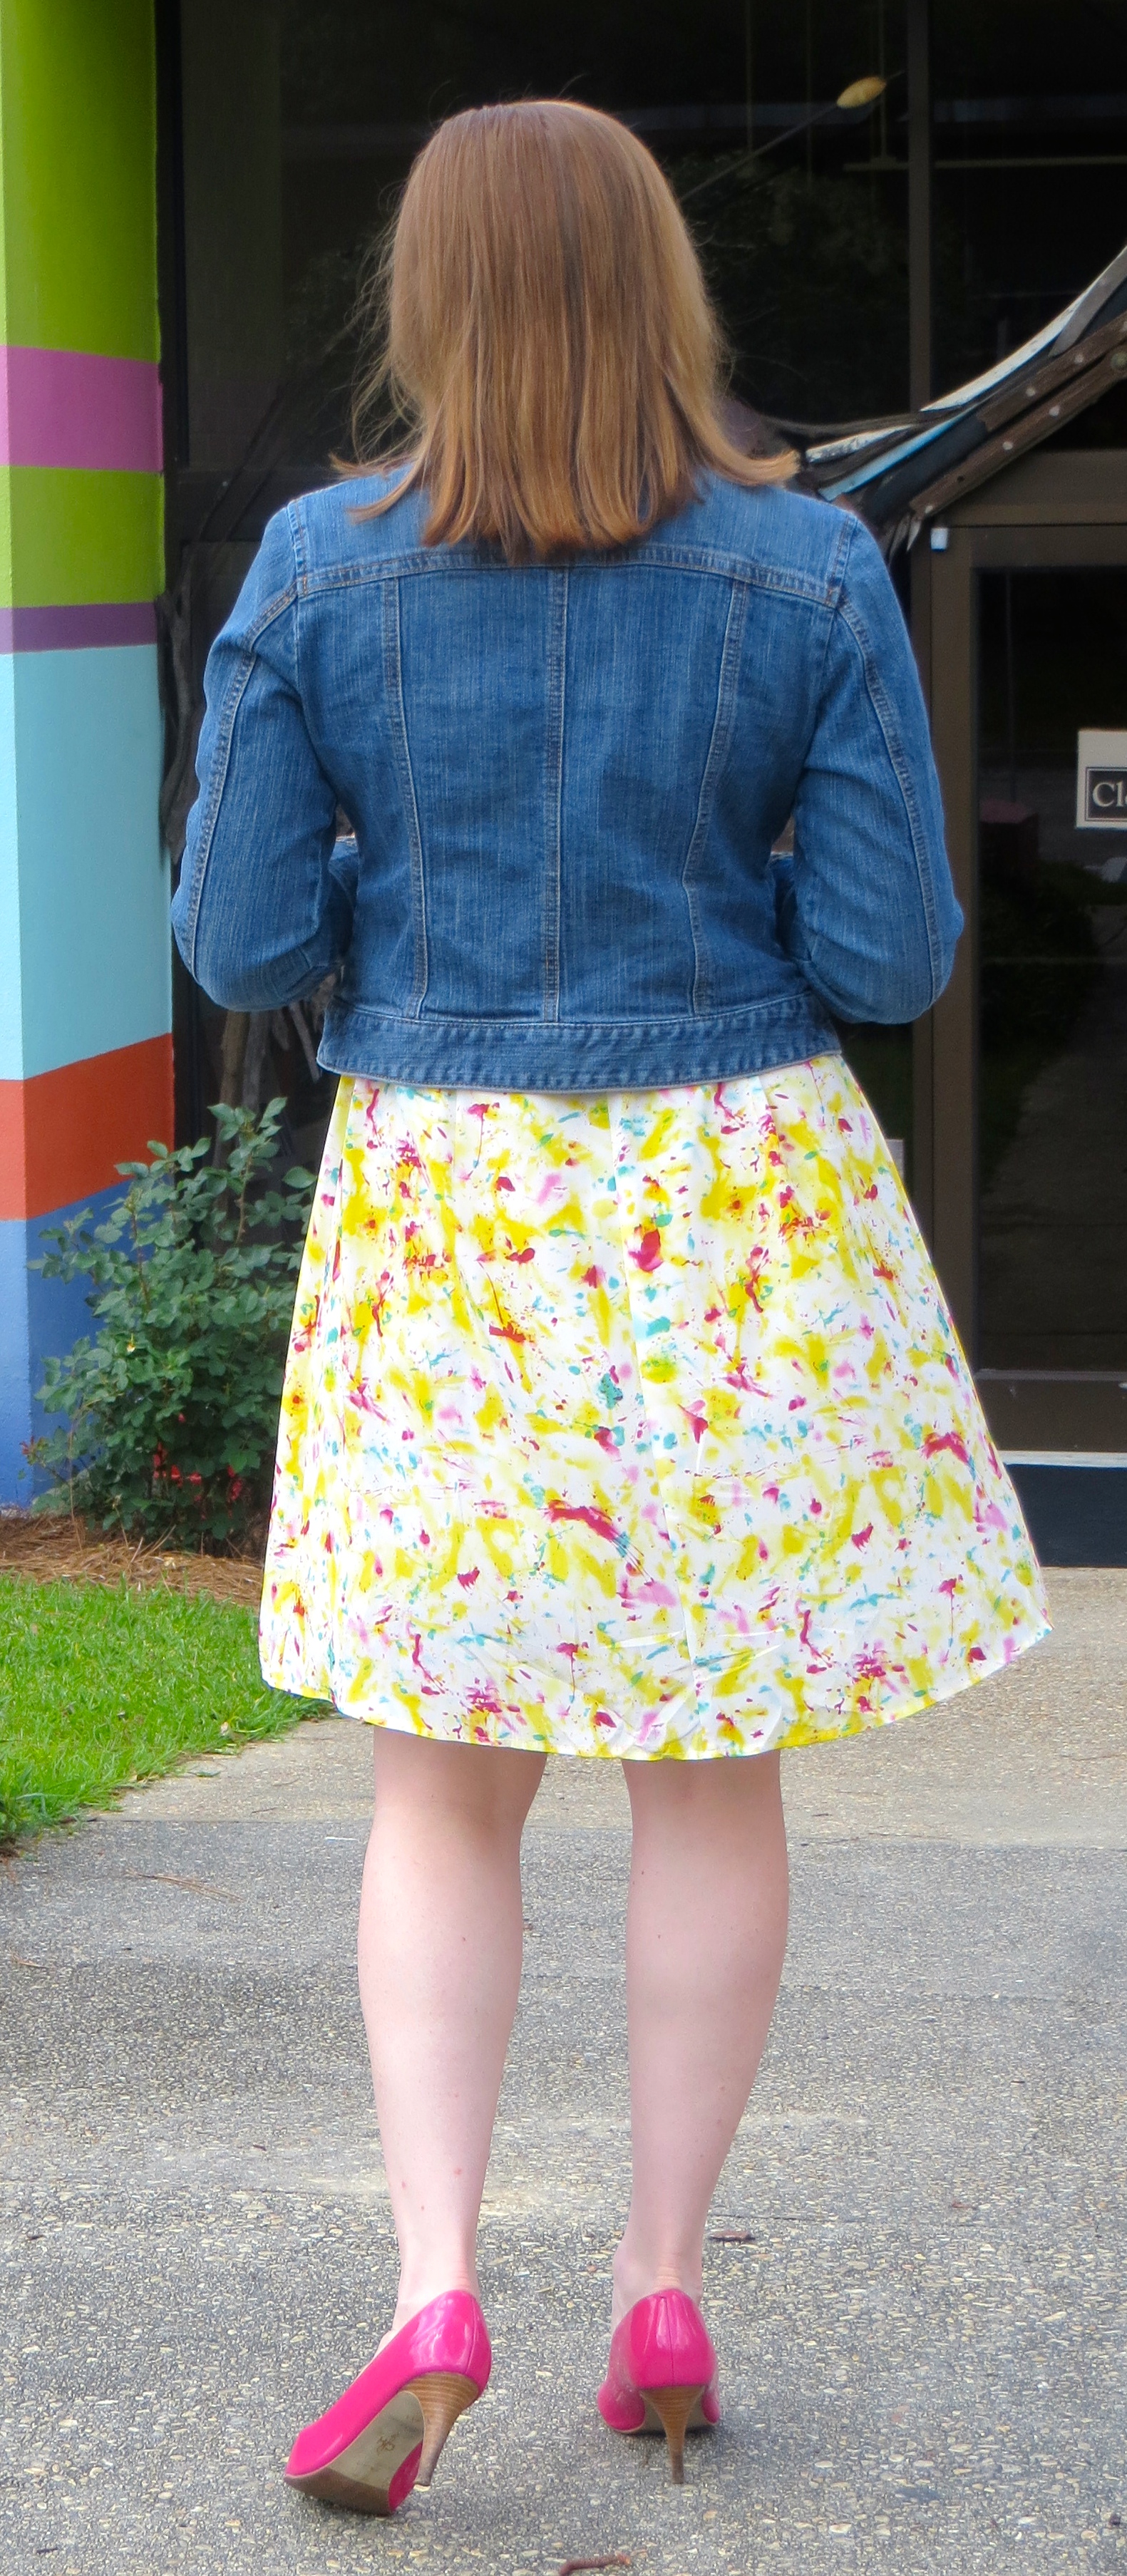
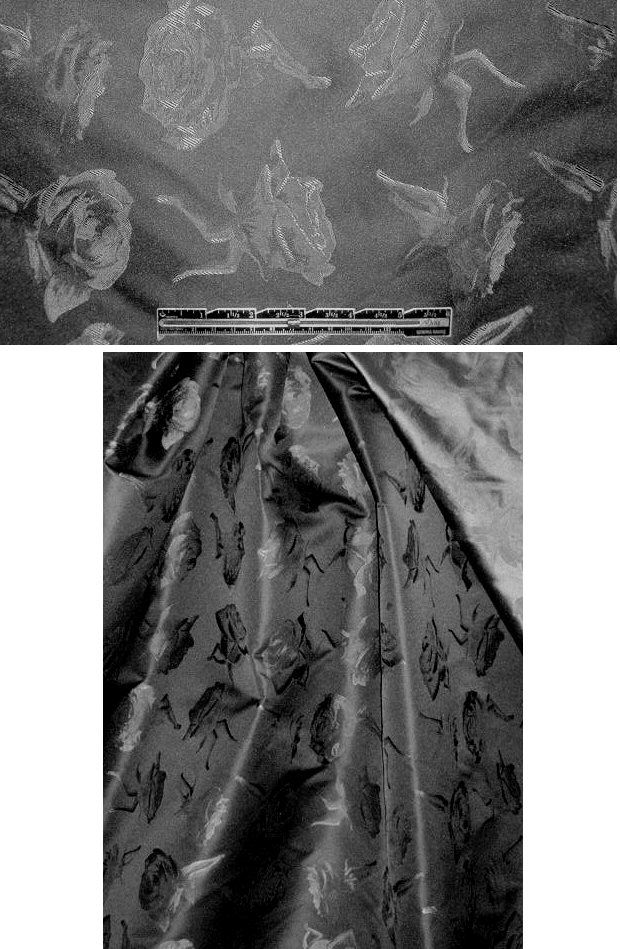
I chose an inexpensive FabricMart ITY jersey for this first version just in case it was a flop. Thankfully it wasn’t even though my stepson’s first reaction was to tell me that it looked like a nightgown…

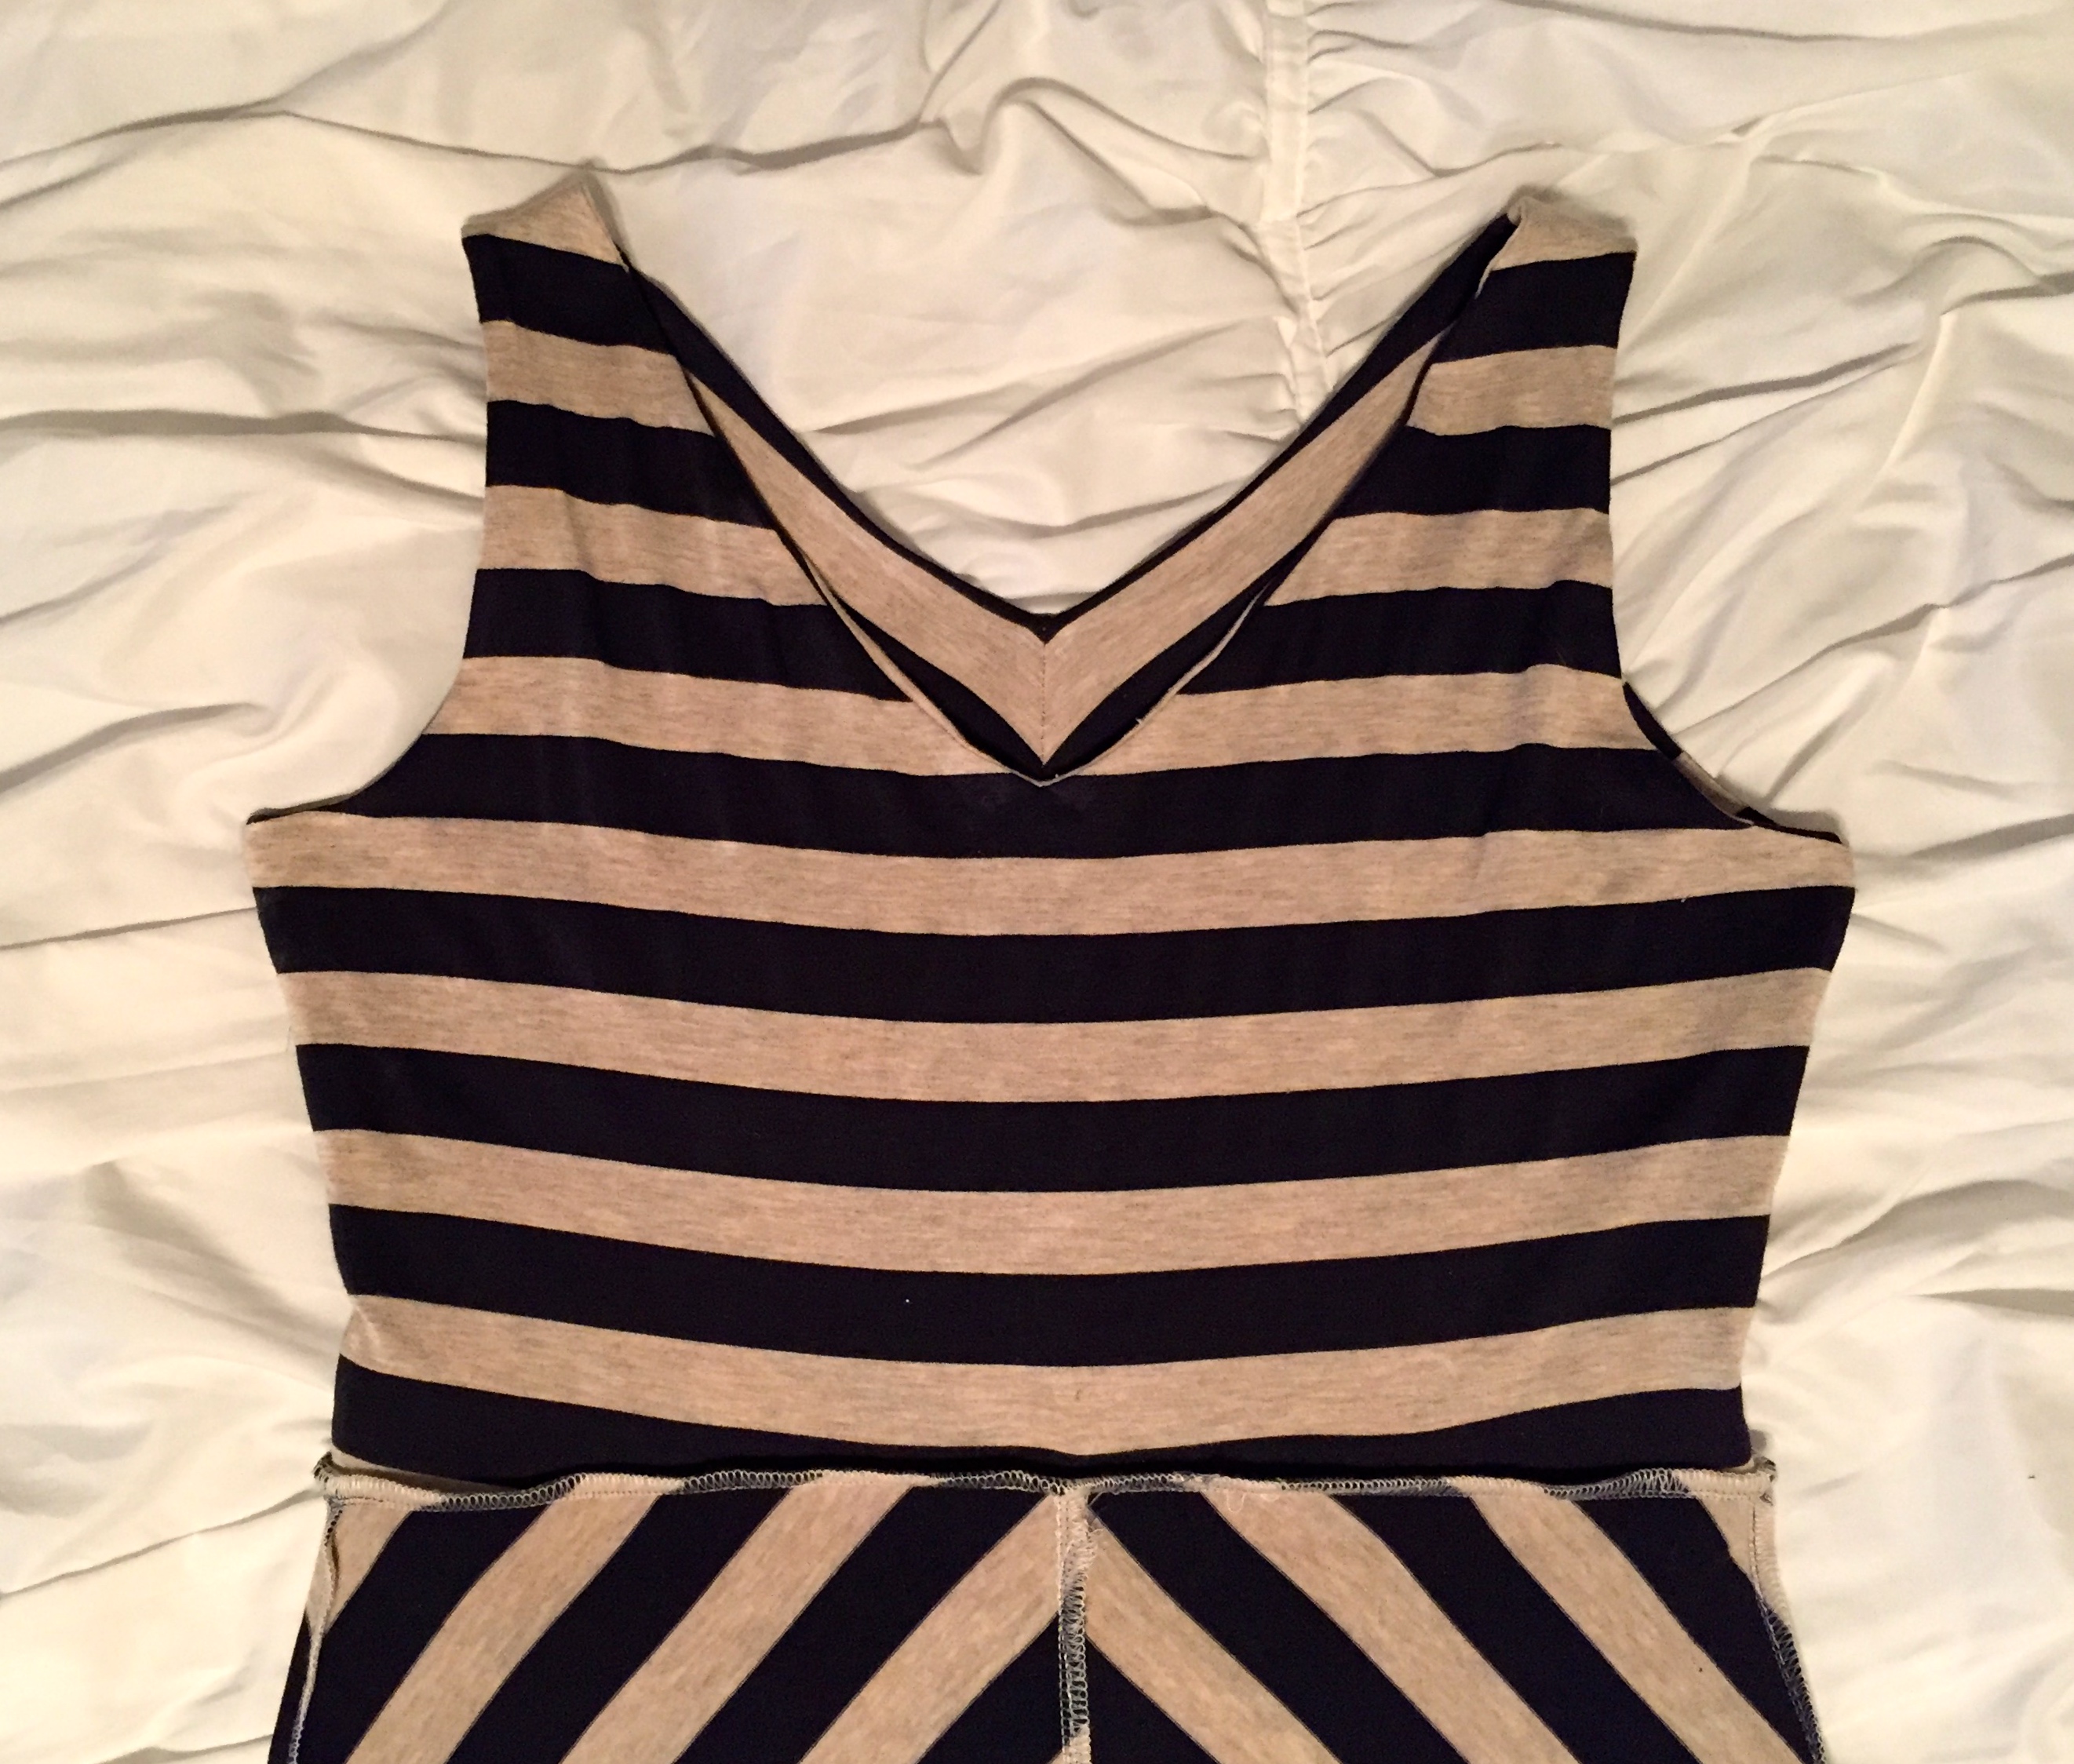
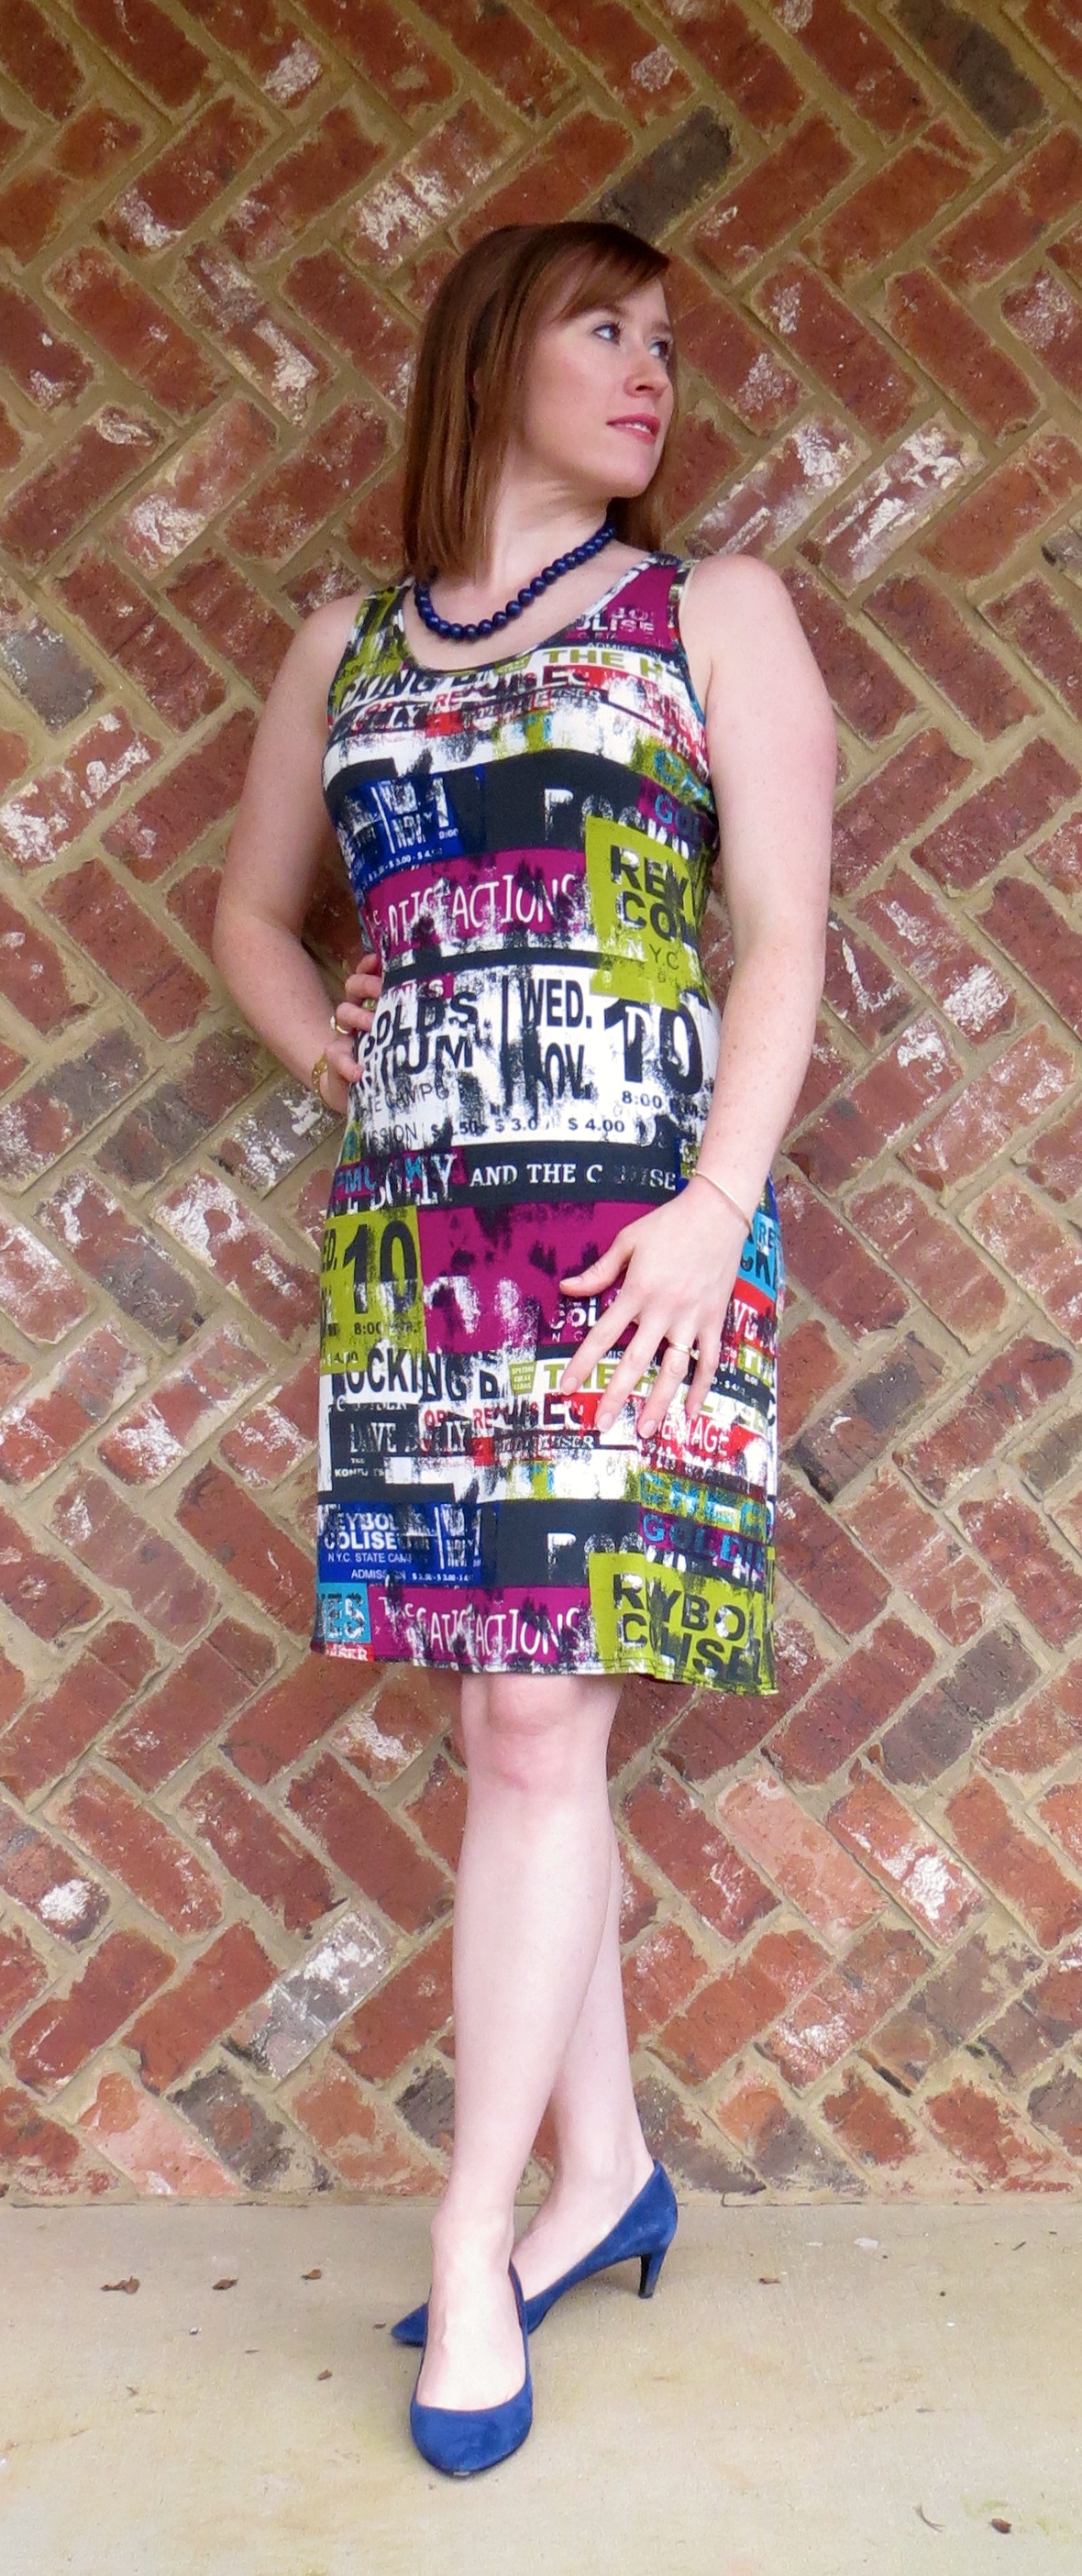
For my pattern modifications, I made an FBA since my biggest beef with wrap dresses is the gape-age in the bust. I created a side dart for a better fit and the added waist ease I removed at the side seam to keep the pattern true along the waist (there is no waistline so you have to cut the pattern in two to do the FBA then reattach the top and bottom).

IMG_3612

There is a FBA tutorial on Maria Denmark’s blog specifically for this pattern but I don’t recommend using it. She gives you a method that results in all dart intake being transferred to a waistline seam but since this dress doesn’t have a waistline seam, you end up with a bodice that won’t match back up with the skirt after the FBA. So take my advice, if you want to do an FBA on this dress, do the usual Palmer-Plescht method, not the one on Maria’s website.

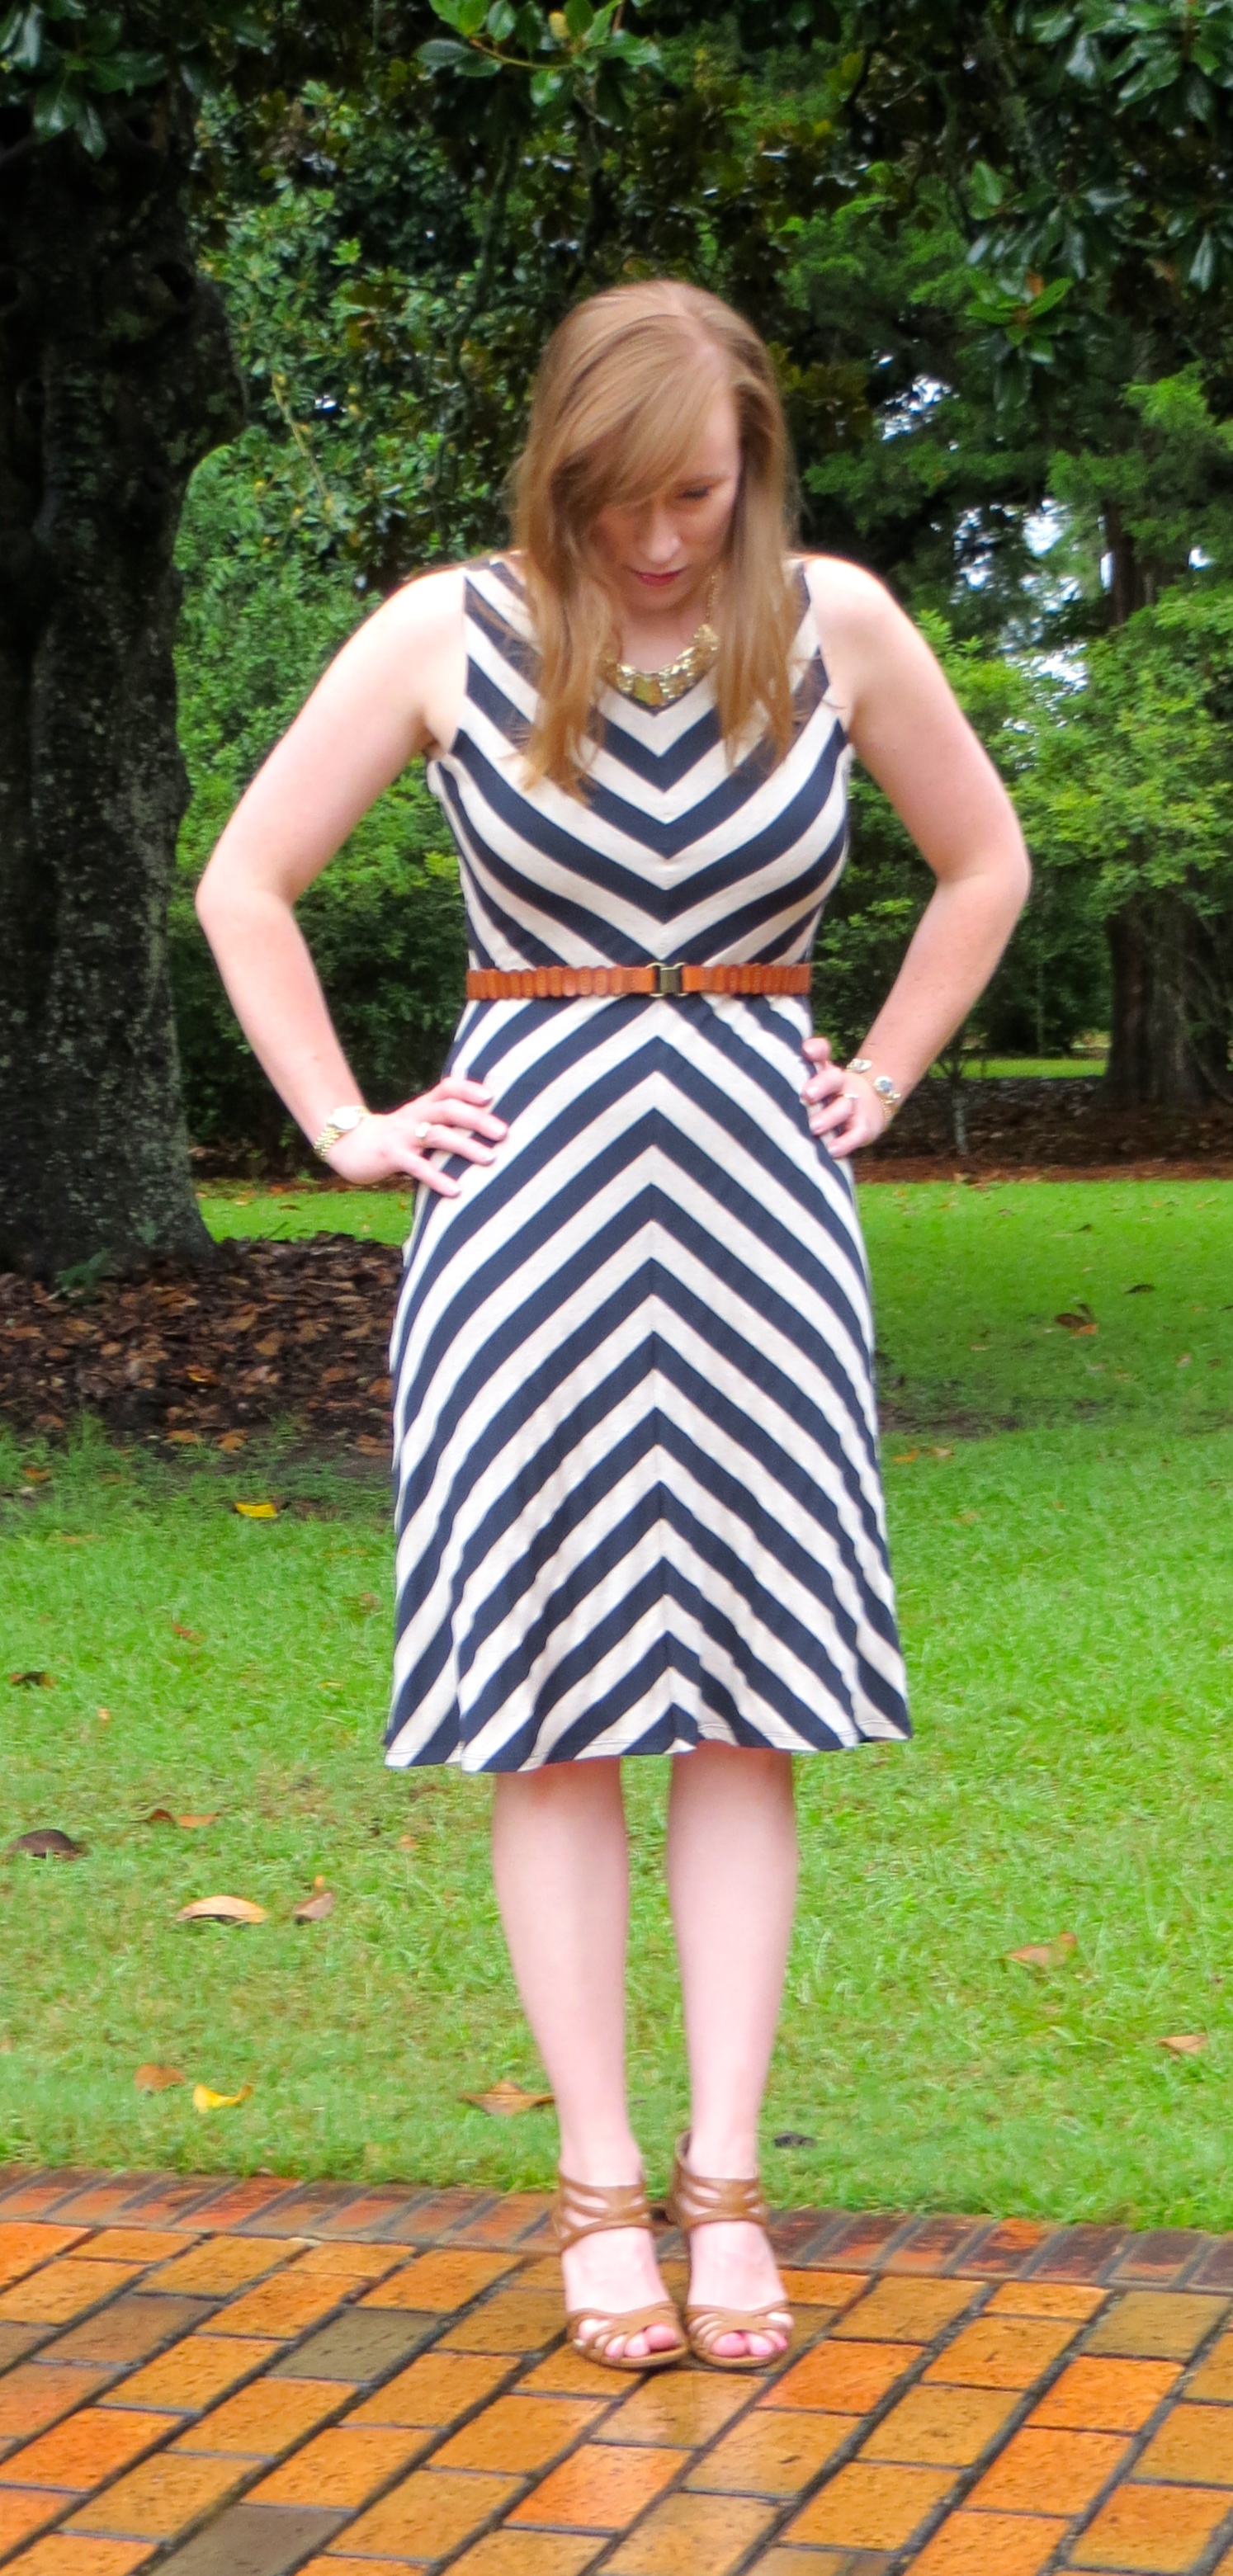
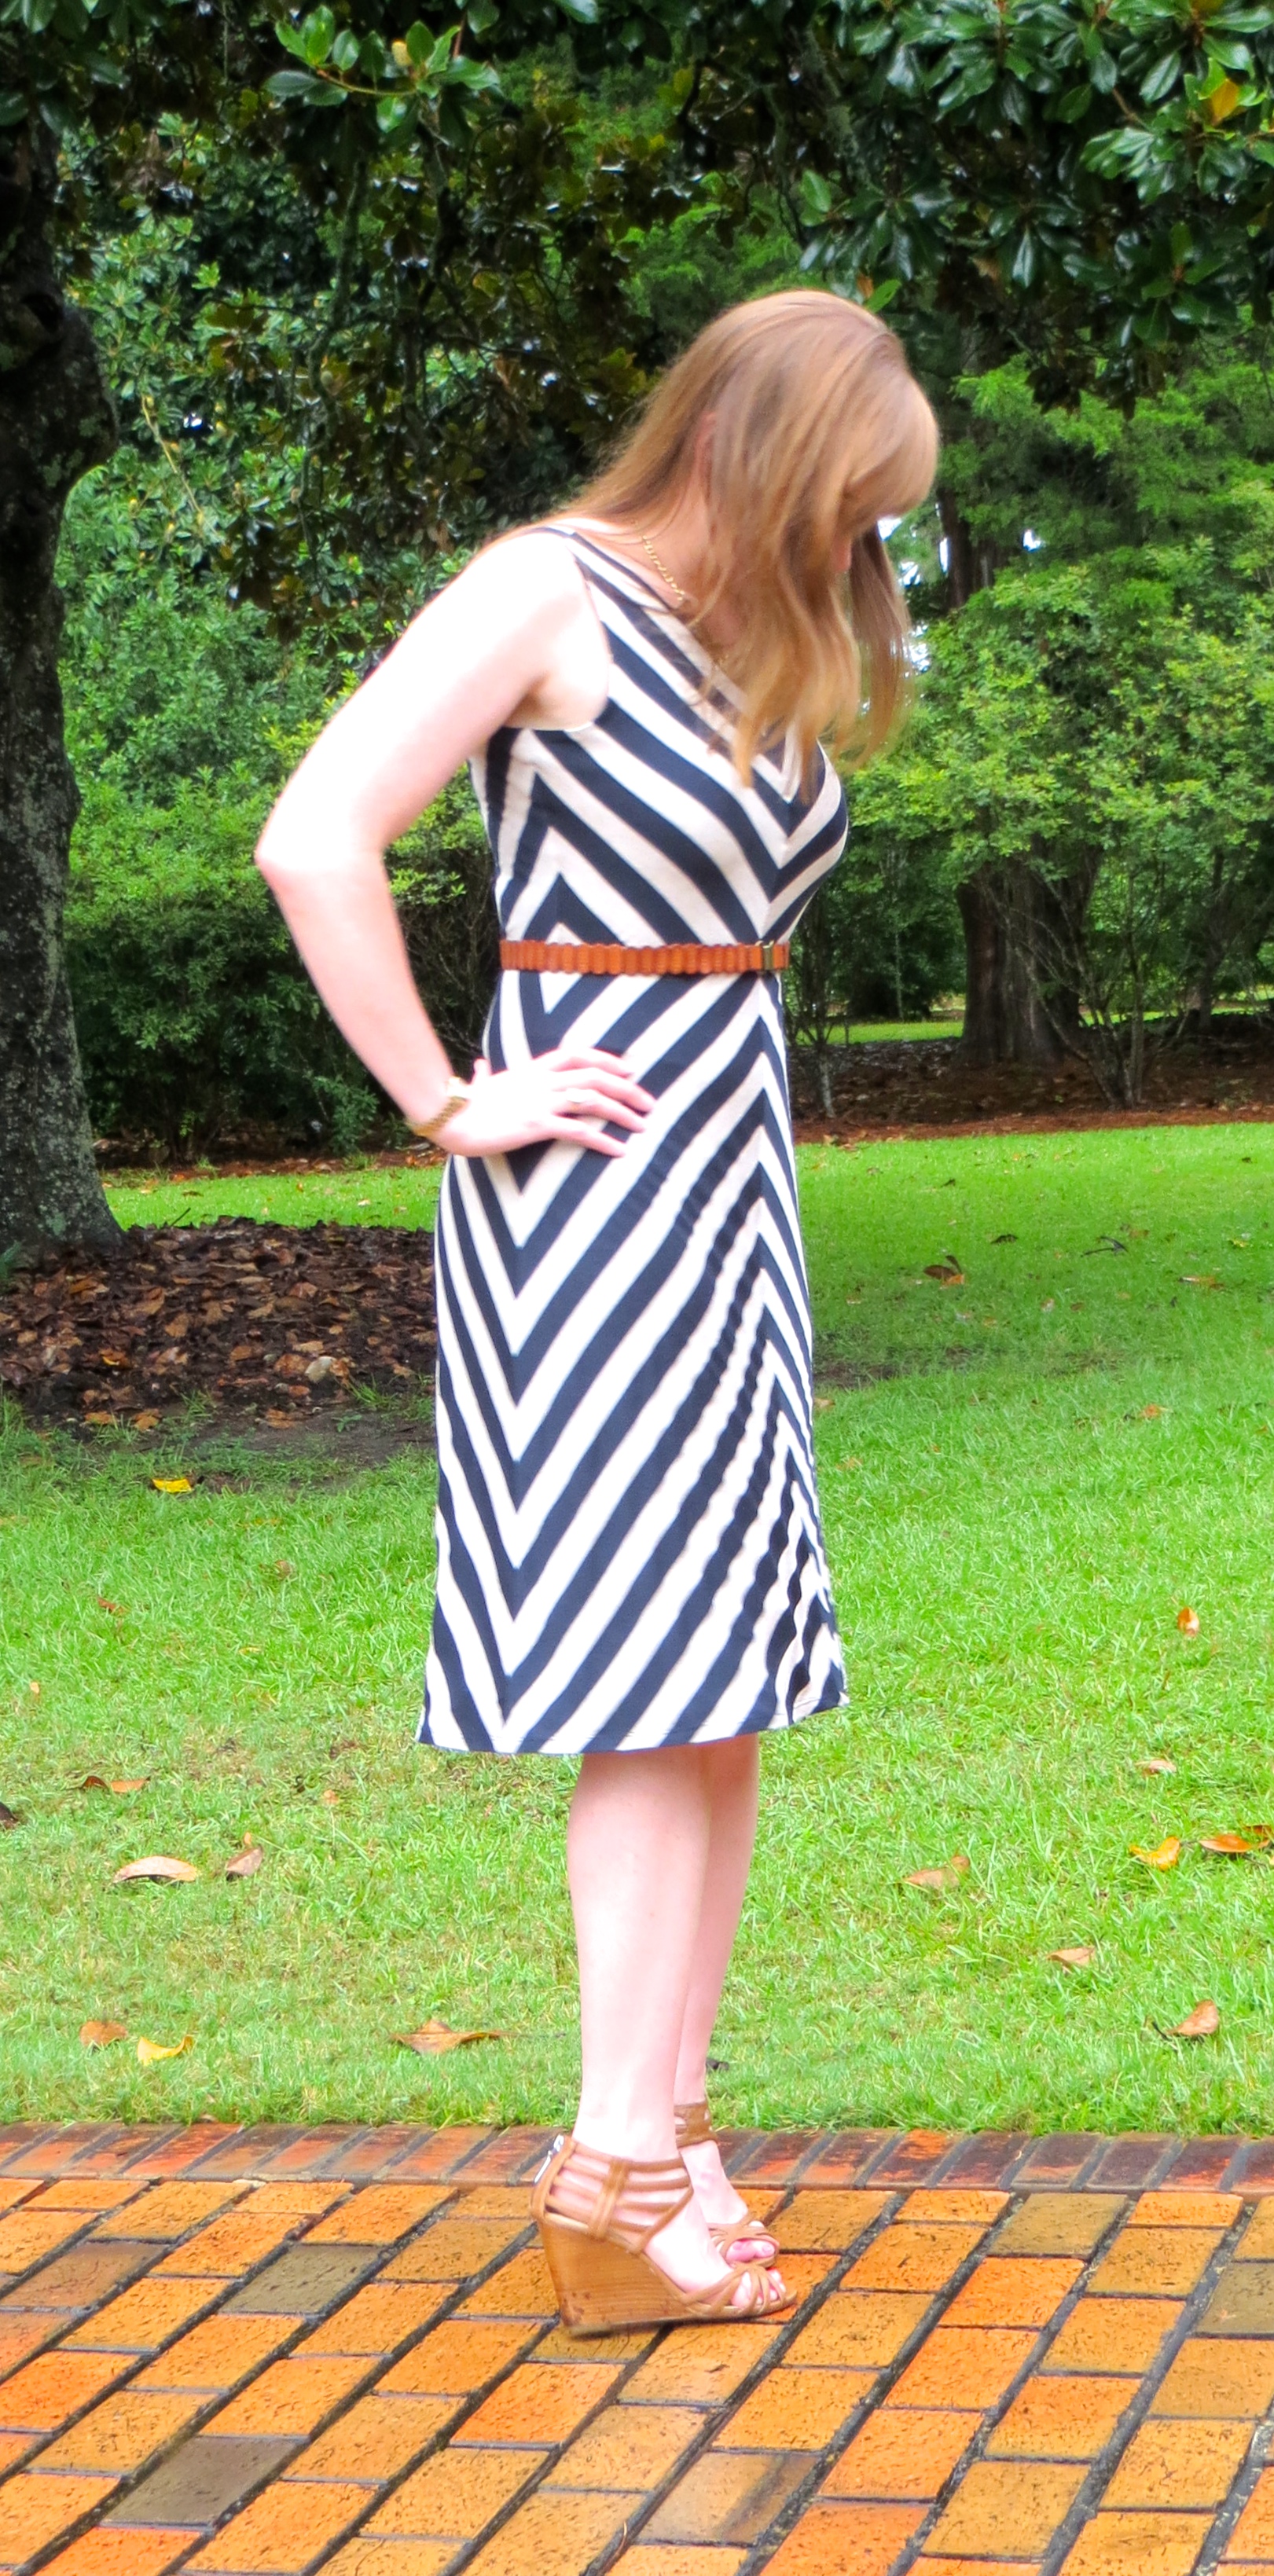
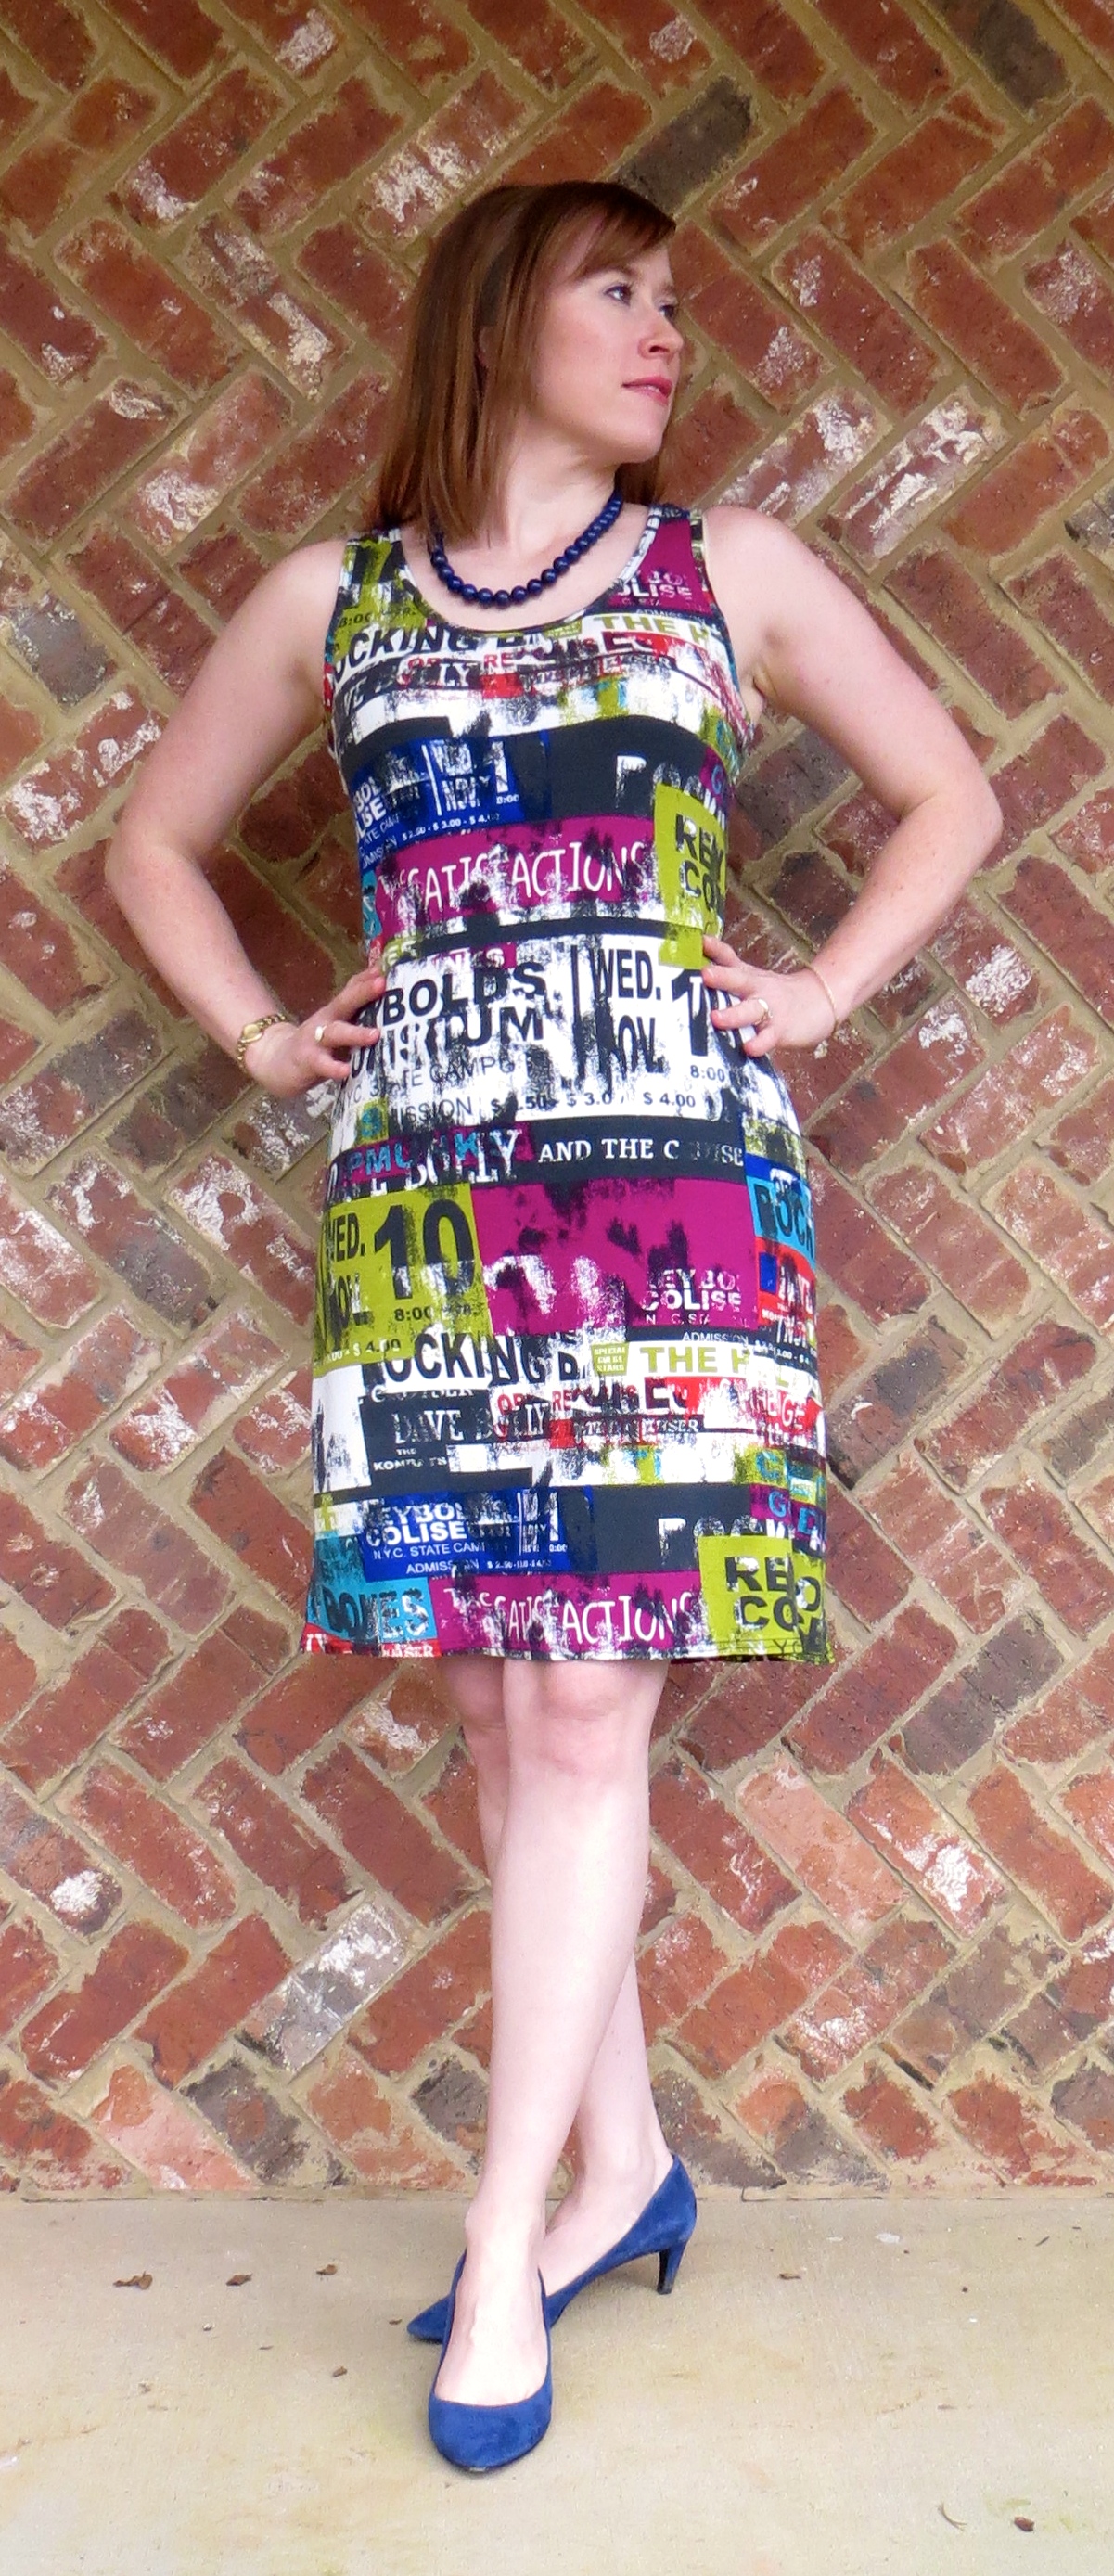
My one other gripe with the pattern (well, other than the fact that it doesn’t include seam allowance, GRRRRR!!!), is that the shoulders are cut really narrow. I added 1″ to get to what you see in these photos and I could probably stand to add another 3/4″ to get the seam to fall where it should. My shoulders aren’t that broad!

IMG_3608

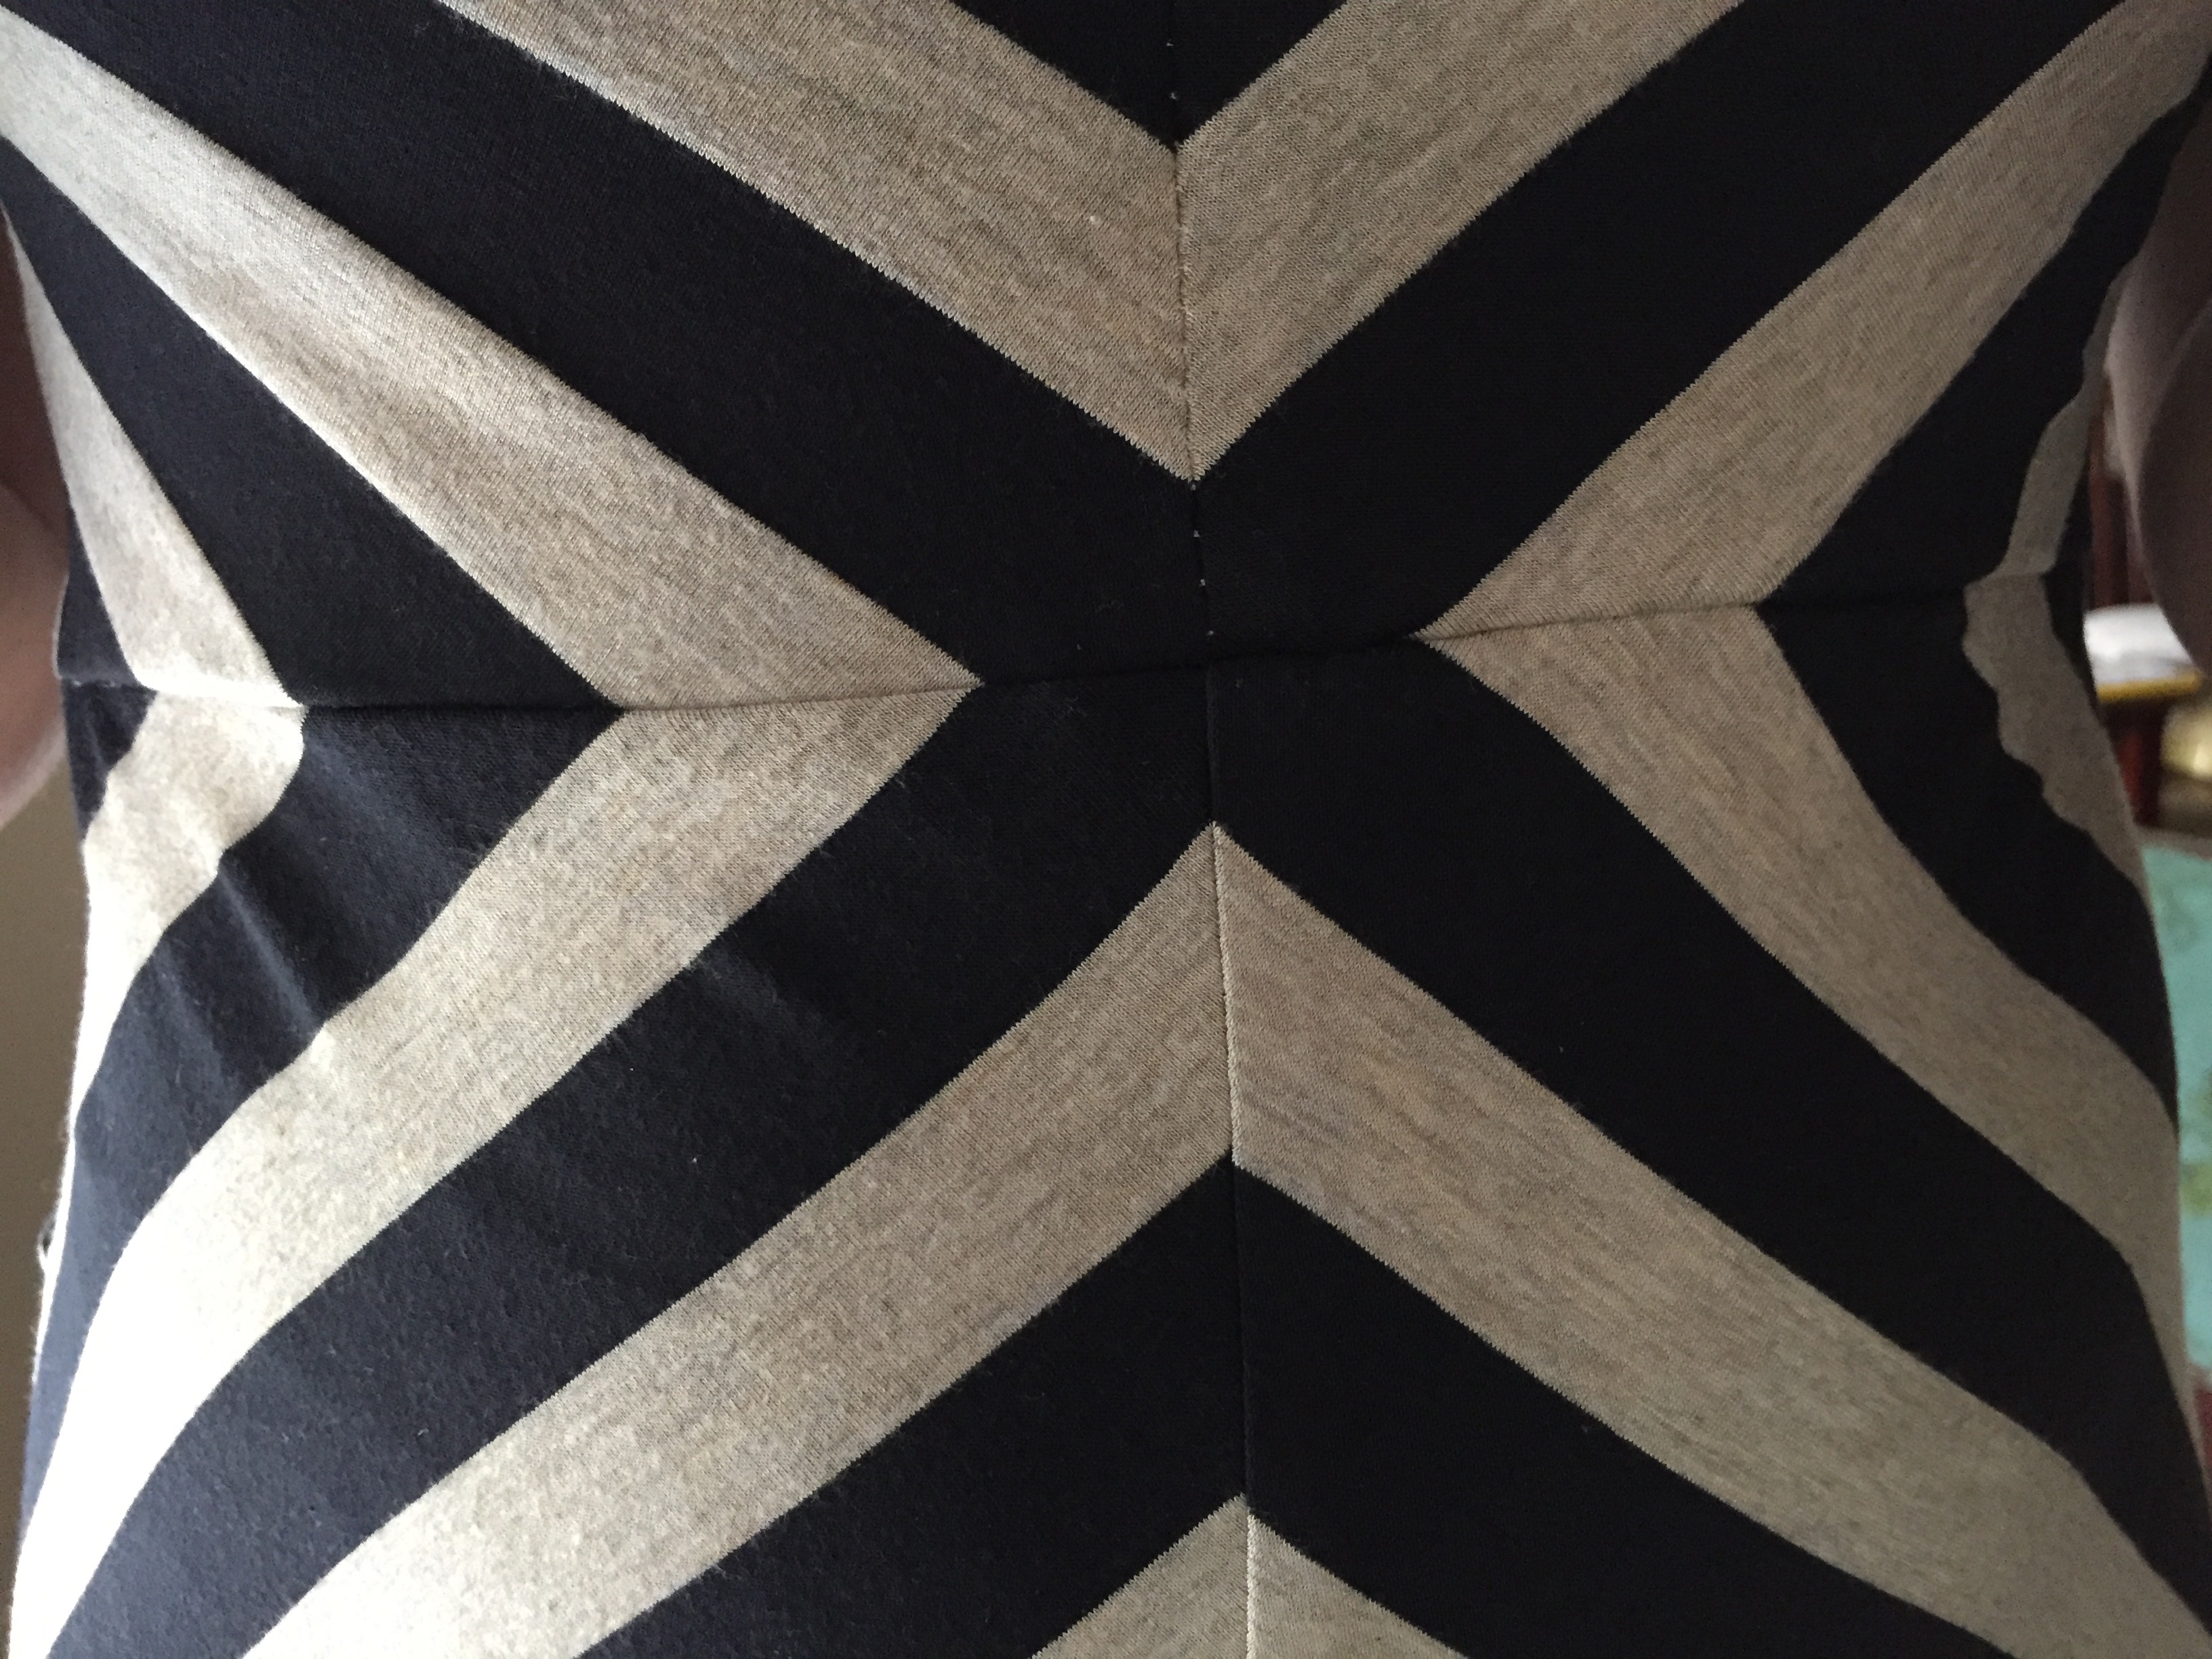
But overall I do love this dress. I love the figure skimming skirt and the neckline-hugging wide neckbands. I also love that it only has 4 pattern pieces so it’s easy to cut out and assemble.

I can definitely see myself making this dress up again after I tweak the pattern a little bit more. My goal is to modify it so that a camisole won’t be necessary for modesty at work. Let’s see if I can get the neckline just right! 🙂

Vogue 1353 in Silk Twill

7 Aug

IMG_3435

Howdy! I’m back today with the other half of my 2015 Outfit Along post. You can see more details on my cardigan here.

IMG_3419

As I mentioned to you in the first post, I decided pretty last minute to get started on this outfit, July 13 to be exact, and I didn’t start sewing the dress until the 24th. But since I had already made my chosen pattern, Vogue 1353, once before, I knew I could make it up pretty quickly.

silk_pastel

I chose this light purple colorway silk twill from my stash to match the cardigan. From the Emma One Sock website:

A very pretty silk twill print from a NY designer, this blouse/dress weight is opaque with a lovely drape and a pleasing soft sheen. The print is a floral collage with a 21″ repeat, in pastel tones of pale lavender, blue, yellow, pink and cream…

IMG_3439

I love the soft purple base with irregular white flowers and splashes of soft blue and yellow. I think it would make a great dress for Easter or a baby/bridal shower. The twill fabrication gives the silk more body than a charmeuse although it is still very “silky” feeling. It is like the fabric of a necktie without all the interfacing. The fabric makes the dress very enjoyable to wear as it swishes really well. However, I do think a sturdier fabric, like the cotton sateen in my original version, is better for everyday interpretations of this dress. I will not wear this silk dress to work — it will be reserved for church, brunch, bridal showers, etc.

IMG_3380

I lined the dress with white rayon Bemberg and used Siri sew in interfacing from Emma One Sock.

IMG_3431

I won’t belabor the alterations as those were covered in my last post. My only additional modifications were to shift the shoulder straps in by 1/2″ and to alter the lining pieces by trimming 1/8″ off the neckline and armhole edges to help the lining roll to the inside (and it did help). I had to draft separate lining pieces for the bodice back and bodice side front to do this but that was as simple as tracing the original piece then trimming the desired edges. I had enough fabric this time to cut the skirt pieces with the pleats full width so I removed the modification I had made last time but I think I may like it better with narrower pleats.

IMG_3443

Next time I will remember to add 1/2″ to the skirt length at center back and taper it to nothing at the side seam. Instead I had to cut 1/2″ off the front of the skirt after the fact before sewing on the hem facing.

IMG_3378

Like last time, I used self-fabric instead of lining to face them hem because I like this look better. I stitched the facing in place with the chainstitch on my coverstitch and let the wrong side of the stitching show on the outside of the dress.

IMG_3374

I used this tutorial on Pattern Scissors Cloth to fully line the dress by machine and I used this tutorial to get a precisely installed invisible zipper that doesn’t require a hook and eye. So this dress doesn’t have any handstitching in it — yay!

I don’t think there’s much else to say so I’ll sign off for today. I’ll be back tomorrow with the promised tutorial on using your sewing machine to make buttonholes in your hand-knit garments!

Vogue 1353 | Pleated Poppies Dress

22 Jul

IMG_3282

Hello, again! I am on a roll lately!! I’m back today to share with you my completed Vogue 1353, a great pleated fit-and-flare dress with a full lining by Kay Unger. I was inspired by Margo’s recent review of this pattern (isn’t she gorgeous?!?), and bought it next time Hancock’s had a sale and started sewing almost immediately.

V1353

The pattern is the perfect silhouette for an everyday, ladylike dress. And when you make it up in a washable fabric, it works well in your day job as a pediatrician. Where, yes, sometimes you do get peed on but thankfully not often — happened for the first time in ages this week just not to this dress :)-

IMG_3286

I made this beauty up in a great poppy print stretch cotton sateen from Sawyer Brook Fabrics.

V1353 poppies lining

I lined it with a creamy yellow polyester pongee from Fabric Mart Fabrics that I think I paid $1/yd for… Cotton sateen is a dream to sew with after you’ve been doing nothing but knits and silks. It actually does what you ask it to!

IMG_3291

I started with a straight size 14 then I made a few alterations:

  • 3/4″ FBA
  • lowered bust dart 5/8″
  • lowered bust point of princess seam 5/8″
  • lengthened bodice 1/2″
  • took it in a smidgen in the princess seam above the bust
  • added 1/4″ under the arm at the bust front and back tapering to nothing at the waist
  • 1/2″ forward shoulder adjustment
  • took it in 3/4″ on each side of the zipper tapering to nothing at the waist for a gaping back neckline
  • reduced the width of the pleats because my fabric wasn’t 60″ wide

V1353 Poppies Hanging Detail

I strayed from the instructions only so far as to avoid hand sewing. I lined it completely by machine, including stitching the lining to the invisible zipper by machine with my invisible zip foot. I did hand sew the hook and eye in place as I couldn’t find any way around it. 🙂

IMG_3298

V1353 Poppies Hem

My favorite part of the dress is the hem with its facing and topstitching. I used the chainstitch function on my Juki MO-735 5-thread serger to create the textured line of stitching instead of the handstitching that is prescribed in the pattern instructions. I stitched with the hem facing up so the “wrong” side of the stitching shows on the outside of the dress, creating a nice, visible line of thread. I love finding new uses for my serger!

IMG_3293

The pattern calls for a purchased belt and here I’ve accessorized it with a cute little aqua leather belt with a silver buckle that I picked up at Gus Mayer department store in Birmingham. I think this is probably the only thing (at $38) that I could ever afford from that store but I do love it! I have also paired the dress with a bead necklace from Kluster Shop and some Franco Sarto strappy heel sandals.

This is my new favorite dress pattern and I think there will be another one soon. Stay tuned!

McCall’s 7121 | Stripe Matching Victory!

5 Jul

IMG_3215

Happy Sunday, friends! I hope you are all rested and ready for the week ahead. I have taken advantage of this long holiday weekend to catch up on my never-ending list of things I would like to sew. I have made a simple knit sheath dress from some floral print scuba knit, a psychedelic Closet Case Files Sallie Jumpsuit, a Watson bra, started on the Maison Fleur Halterneck Swimsuit, and just finished this cute little dress — McCall’s 7121.

M7121

Hopefully I will get around to sharing those other things with you but if I don’t, at least you know I’m back to sewing! And now that my knit fest is over, I have plans to start on some woven items like a dress and some blouses. I will keep you posted.

IMG_3213

Y’all know I love a good knit dress. Exhibits 1 and 2. And there are more that I haven’t even shown you but that make regular appearances in my wardrobe. So it’s not a surprise that I picked up this pattern when they went on sale for $1 at Hancock’s. But I think I love this one a little more because it has a waist seam and the skirt is a little more A-line. And since the front bodice is not cut on the fold, McCall’s added a little bit of bust shaping there in the front for you.

IMG_3214

And the stripes make it so fun and flattering. Plus, I get to show off my stripe matching skills! What, you thought I was hiding something under the belt? BAM!

IMG_3341

I chose my size based on the finished measurements, not the size chart, and I selected sizes that would yield zero to a little negative ease in the bust and waist. I made my standard adjustments of 1/2″ forward shoulder and 1″ swayback and I also decided to raise the neckline by 1.5″. After I stitched this up, I realized the armholes and back neckline were gaping and the waist was a little low so I pinched up the shoulder by 1.5″ and stitched a new shoulder seam, effectively fixing all three problems. I think using neck and armhole bindings would prevent the gaping but this pattern just calls for turning and stitching.

IMG_3345

Which, of course, I didn’t do! I decided to self-line the bodice for a clean finish at the neck and armscye. I did sew some clear elastic into the neckline and after I raised the shoulder seams, it lies smoothly. Finally, I serged some clear elastic into the waist seam and hemmed with a twin needle.

IMG_3212

Easy peasy for a great wardrobe builder. I think my next version will be hacked into a peplum top with some great black floral scuba knit that is calling to me from my fabric stash…

Bodice Modifications for Butterick 6019

27 Jul

IMG_2835


Hi, friends! I am here today with a quick “tutorial” post to address a question that came up about the fitting of my Butterick 6019 bombshell dress. During the muslin-making process, I realized that the bust cups of the dress were all wrong for me. The top of the dress was too low for comfortable decency and the cup seams created an awkward pointy shape over my bust (think bullet bra to the extreme). I also discovered that the under bust seam didn’t hit under my bust and the bodice was overall too long for my figure.

I will warn you in advance, I am going to share some less than attractive photos of myself in this post. But it’s all for the sake of science, right?

I started by pinching out the excess from bodice fabric in the front and back. This helped bring the under bust seam into the correct position. I then pinched and pinned out a little excess in the side seams.


PicMonkey Collage2


Once that had been taken care of, I pinned out the excess in the vertical and horizontal bust cup seams, creating a much more natural shape in this area. Then I checked the location of the horizontal bust cup seams and felt it was too low across my body and raised it across both lower cup pattern pieces (hence the reason it doesn’t look like I took any out in these areas). Hopefully you can see in the photos that the overall effect of these adjustments was to decrease the severity of the curve across the bust. At this point I made new muslin and tweaked all of the previous adjustments by a few more minor amounts.


IMG_2866

You can hopefully see in this photo how my final pattern pieces in white paper compare to the original pattern pieces.


Once all these adjustments had been made, I assessed the location of the top of the bodice all the way around and realized I wanted roughly 1/2″ added in the front and 1″ in the back. I added these amounts to my already modified pattern pieces and tapered the 1/2″ in front around to the 1″ in back.


IMG_2818

Since this layer wouldn’t show in the final dress, I sewed it with leftover bobbins in random colors.


I made my final muslin just to check the fit once more but to also use as the interlining if all my adjustments had been successful.


IMG_2820

You can see I added a lot more boning than suggested in the pattern.


During the earlier muslins, I duct taped cheap boning from Hancock Fabrics into place for fitting but on the final version, I went ahead and sewed my boning channels and added the spiral steel boning. Next time, I think I will lengthen this layer to my high hip (like a corselet) for added wearing comfort. As it is now, the boning ends right at my narrowest point, somewhat cutting into my body when I sit, and also making the skirt portion just below the waist seam blouse out a little bit.


IMG_2522


Here’s the finished dress just waiting on a hem. Please pardon the unattractive setting and the cute socks 🙂

Butterick 6019 — A Polka Dot Bombshell Dress

21 Jul

Howdy, friends! I hope this missive finds you well. I have been doing some sewing and knitting lately and finally have something finished to show you!


IMG_2835


This is Butterick 6019, a bombshell dress by Gretchen Hirsch of Gertie’s New Blog for Better Sewing. I have been muslining a dress like this intermittently for the past 2 years — I finally bit the bullet and finished one!


B6019


I chose this pattern because it has a lot of visual interest with the fitted bodice with sash accent, sarong-style skirt, and shirring on the back bodice. I think the shirring is what attracted me the most.


IMG_2833


Alright, now for some wordy business about the process of creating this dress!

I started with the 14 D-cup pattern and made a muslin of the bodice. I ended up taking it in at the top and letting it out a smidge in the waist. I did a swayback adjustment on the bodice (but should have done one on the skirt, too). I also added about an inch to the bodice height to make the neckline more decent.

I found the cups to be waaaay too pointy for my taste so I tamed that down quite a bit also. I ended up shortening the bodice about an inch under the bust — I am accepting the fact that I am very short-waisted or my boobs are saggy…

That was all pretty straightforward stuff. The project got complicated when I decided to fully line the dress (the pattern only calls for partially lining the bodice — and for good reason I discovered) and then underline the bodice.


IMG_2826


The bodice underlining was simple enough. I just used corset mesh cut a little bigger than the shirred pieces to stabilize that area but still allow for some stretch. I used muslin for the rest of the underlining and added way more boning channels than the pattern’s prescribed two. I sewed a waist stay to a few points on the bodice. Next time I make a dress like this, I will extend the underlining layer down to my high hip to keep it from cutting into my waist.


IMG_2827


I also used bra foam for the cups instead of the batting that was called for.


IMG_2824


For the shirring, I marked lines perpendicular to the grain at 3/8″ intervals. Sewing all the shirring was one of the most tedious parts of the project but also one of the most rewarding. Look how beautiful!


IMG_2851


My dress is made from a navy and white polka dot silk cotton blend. It has a nice crisp hand but shows lint like it’s going out of style!


IMG_2848


To line the bodice, I used a luscious 4 ply silk satin remnant for the non-stretch sections and a scrap from the Gertie slip kit (not finished yet) for the areas under the shirring. I left small openings in the back bodice lining seams to allow the waist stay to pull through.


IMG_2850


Now, lining the skirt was a whole different monster. Since the skirt has a wrap front, I couldn’t just duplicate it and stick it inside. I decided to have the lining attached at the front vertical edges of both wrap panels which meant that something had to be stitched by hand — yuck! But hand stitch I did and don’t judge my really sloppy work.


IMG_2849


I did a machine hem on the lining and a hand stitched hem on the shell. For my skirt lining, I used a cute ivory polka dot silk charmeuse.


IMG_2846


I used my Threads #171 for inserting the lapped zipper with lining by machine, but as usual, I handpicked the overlap for greater control. Just like the method I used on my Rosy Elisalex.


IMG_2838


I guess that’s about it on this dress. It was definitely a journey as I initially planned to wear it to a wedding a few weeks ago but ran out of time to complete it so let it sit for a few weeks before getting up the gumption to finish it. But finish it I did!


IMG_2830

These photos were taken in the front yard of our eventual new house. I love our huge oak tree!

Simplicity 1810 | Paint Splattered Silk Dress

21 May

IMG_2713


Hi, y’all! Do you remember me showing you this dress in my Me Made May roundup? I promised to tell you more about it so here goes:


1810


The pattern is Simplicity 1810, a wardrobe pattern with pieces for a dress, top, and pants. I made the knee-length dress.

I was attracted to this pattern first of all because it looked really easy but also because of the cute yoke and pleat details at the shoulder. I also like the way the waist ties originate from the back darts, ensuring the back of the dress lays smoothly without a bunch of awkward gathers.


IMG_2722


I didn’t make a muslin of this pattern but I did do a really shoddy tissue fitting on my dressform. I cut a size medium and shortened the bodice by 1/2″, took in 1/2″ swayback adjustment, then added 3/4″ back over the hip to account for my booty. It ends up, I probably should’ve only added 1/4″ here but oh well.


IMG_2730


I followed the directions exactly as written with the addition of French seams for the side seams and topstitching on the waist ties.


IMG_2715


My fabric is a luscious silk crepe de chine with a paint splattered print. I picked it up from Sawyer Brook with a simple dress like this in mind.


IMG_2735


As I also mentioned in my MMM post, I rushed to finish this dress to wear to see the Molly Ringwalds. I thought the fabric fit the 80s music theme pretty well. There was some serious Project Runway-style stress going on in my house that evening, and we were *only* 1.5 hours late because of my dress 🙂

If you have been holding this pattern in your stash like I was, pull it out and whip up a dress or top — it only took me about 4-5 hours total.


IMG_2724


Thanks for reading and I’ll be back tomorrow with an exciting new make for you!

Elisalex and The Leggy Roses

10 Mar

IMG_2422

Hi, friends! Ready to see another finished garment? This is one of my favorites so far. The fit is great and I am proud of my construction techniques. I am also entering it in the PatternReview New To Me Pattern Company contest and the Sew Dolly Clackett contest.

I think my version looks very similar to this one on the BHL website.

I think my version looks very similar to this one on the BHL website.

First let’s talk about the pattern — Elisalex dress from By Hand London. This is my first time using a pattern from this company and I was pleased with the experience. I recently got over my worry that the Elisalex dress would make my hips look even more gigantuan. There are a ton of great versions and hacks of this dress around the internet. Dolly Clackett has made 15 versions as of this writing (as best I can tell)! Seeing the dress on women with shapes similar to mine made me feel better about trying the pattern.

brocade_dancingroses

When I got the urge to make a dress a few weeks ago, I started browsing patterns and fabric. I selected a few potential patterns then found the fabric, and knew it would be a perfect match for the Elisalex dress. The fabric is a Thakoon silk/poly blend brocade with a crisp drape. I purchased it as a roll end from EmmaOneSock, which I think has to be my favorite fabric store of all because of the unique and high quality selection she offers as well as her wonderful customer service. The black background is scattered with what appears to be roses on first glance. However, upon closer inspection, you will notice that all the roses have female legs!

For the lining, I chose a hot pink silk charmeuse from my stash. I used a walking foot for the lining construction and this was a lifesaver!

Garnished with a beautiful matching azalea bloom.

Garnished with a beautiful matching azalea bloom.

I had right at 1.375 yards of this 55″ wide fabric and was temporarily disheartened when I saw the Elisalex called for 2.5 yards for the sleeveless version of the dress. After reading lots of reviews and blog posts about the dress, though, I decided I could probably squeeze this dress out with some modifications.

Elisalex bay front

My major modifications were to shorten the skirt by 10″ and to take in the hip seams by 2 sizes, tapering back to my size at the waist. As a result, I was able to get my dress cut out of my length of fabric. Yay!

elisalex tulips

Alright, so for all the alterations I made to get this great fit:

1. There is a helpful sew along for this dress on the By Hand London website. They recommend choosing your size based on your waist measurement then adjusting the bust to fit, if needed. I made a 3/4″ full bust adjustment to the US10. In the final version, I had to let out the side seams 1/4″ each and add 1/2″ to the front bodice length, so I think next time I will make a 1″ FBA and then compare the length to my current pattern. I will also lower the bust point a little next time.

2. I moved the shoulder seams forward by 1/2″ at the armscye and 1/4″ at the neckline.

3. I took a 1/2″ wedge out of the back neckline to prevent gaping. This seems to be a common alteration for most people who make the dress.

Now let’s talk about construction modifications:

1. I drafted a neckline facing because I like the way it looks and it prevents lining from peeking out at the neckline. I finished the edge of the facing with my serger (and hot pink thread), then I edgestitched it on top of my bodice lining pieces and then treated them as one for the rest of construction. Next time I will make an all-in-one facing to include the armholes and I may consider finishing the edge of the facing with bias binding.

Elisalex lining

2. I made a full lining instead of only lining the bodice. I cut the lining skirt a little shorter than the shell skirt and cut it a little more slender at the hips as well. After attaching the bodice lining to the bodice shell, I attached the lining skirt to the bodice lining.

IMG_2452

Look at the matching of the waistline across the zipper and the pleats at the princess seams!

3. I used a tutorial in the recent Threads magazine (#171) to install the zipper — a lapped zipper completely done by machine in a dress with a full lining! This is an awesome technique and I am so glad I found it. I strayed from the directions only in that I hand picked the overlap because I like to give my fancier garments a small element of handwork. And handpicking always works better for me since I can really get the waist seam lined up straight.

IMG_2460

4. I hand stitched a nice blind hem on the shell fabric. If you are making this pattern, add a small allowance at the side seams for the hem. On such a tapered skirt, the turned up portion of fabric is smaller than what you are stitching to so adding a little ease in the hem at the side seams fixes this and prevents puckering.

elisalex hanging

So those are the gory details about my latest project. It was definitely a satisfying make and one I think I will cherish for quite a while.

Like I mentioned before, I have entered this dress into two different contests. If you are a Pattern Review member and would like to vote in that contest, your chance starts on 3/18 and ends on 3/24. As for the Dolly Clackett contest, I think my dress suits Roisin because it is one of her favorite patterns and the fabric is very quirky, like one she would choose.  I also paired the dress with some fun shoes — hot pink heels — another trademark of the aforementioned lady.

Mr. Homemaker prefers the other side of the camera lens :)-

Mr. Homemaker prefers the other side of the camera lens :)-

And just a note on the scenes in my dress photos. All these were taken by my sweet husband at our local bay front park. This is one of my favorite times of year because everything is starting to bloom and the azaleas are coming out. Thanks for reading!

IMG_2431

McCall’s 6559 Again — Poster City

2 Mar

IMG_2122

Hello, again! Are you shocked by my three posts in as many days? Can I just tell you what a backlog of things I have to share — both food and sewing related. But I digress…

This dress is the first installment in my “resort collection,” or the things I sewed up to go on a cruise at the beginning of February (a total of 5 things).

You have seen me in this pattern before but in the maxi length version.

images

I made only minor adjustments to this version beyond what I made in the last one — only widened the back armhole to normal instead of racer-style, raised the neckline 1″, and took another 1/2″ out for a swayback adjustment and added it back in over my derriere to keep the hem level. I also trimmed the seam allowances down to 1/4″ to make it easier to serge.

The fabric is an awesome rayon/lycra 4-way knit that I got from Emma One Sock a little while back — called “Poster City.” And this is your lucky day! She still has some in stock!!

IMG_2118

I constructed the entire thing on my serger, using a 4-thread overlock for the seams and my coverstitch function for the bands and hem. I used the elastic foot to insert elastic into the neckline for stability. This could also be used for the shoulder seam if sleeves were included.

IMG_2126

I don’t guess there’s much else to say about this one other than it won’t be my last!

IMG_2119

Violette Field Threads — Emmaline Dress

25 Nov

Girls at Bayfront


Last month, my sister got married. Being the wonderful sister and loving aunt that I am, I volunteered to make the flower girl dresses for my two nieces. I must say, sewing for someone else was very enjoyable, especially when the someone is kid-sized. Fitting for a child is so much easier than fitting for a grown woman.


Girls by fence

Plus, who wouldn’t want to make something for those two cute girls? They were so excited about their “long” dresses.


Emmaline1_large


The pattern I used was the Emmaline dress by Violette Field Threads. I originally found the pattern via a food blog that I follow (funny, huh?). When I first saw it, I didn’t have a specific plan in mind, other than it would be really cute on Mary Catherine and Sarah. Then my sister announced her engagement and the plan was born.


All the girls


To make matters even more simple, Katie chose navy and pink as her colors and the cover photo for this dress is shown in a cute pink and white chevron, exactly the same fabric Katie wanted (Riley Blake pink chevron fabric here). To tie in the navy, I added a grosgrain ribbon sash to each dress.


Mom and girls

This pattern is very straightforward. The sizes are true and the instructions are very clear with color photo illustrations. My only gripe was with the bulk and weight of all three layers of ruffle. Sewing two rows of basting stitches really isn’t a good method for this much fabric so next time I will zigzag over a piece of floss to gather.

I also found the skirt of the dress to be pretty heavy, pulling down on the bodice and causing the hem to drag. To fix this (partially), I put an elastic stay around the waist by sewing a piece of elastic a little smaller than the waist measurement to the waist seam of the dress. The sash also helped to hold the dress up.

Otherwise, this dress is quick and easy to sew up and little girls love the glamorous long length!

Misc Wedding Collage

I French braided both of my niece’s hair and Katie’s hair stylist added baby’s breath to the braids. I also helped my sister with her party favors — three batches of homemade peach jam in cute 1/4 pint jars, all made in a 3 hour sprint in my kitchen.

Beautiful Bride

And because I have a beautiful sister, a few photos to finish off the post. Don’t you love that dress?!?