Archive | Meat RSS feed for this section

Oven-Roasted Bacon

5 Mar

Or, the only bacon I can cook without burning…

Me cooking bacon had become a joke in our house — it always ended up burned no matter the method I employed. Enter the oven-roasting technique. Now my bacon cooking is no longer a laughing  matter. Instead it is a finger-licking, lip-smacking matter. My husband may never fry bacon in the skillet again, either.

The method is great because it yields consistent results, practically no mess, and — the best part — flat bacon slices!

To get started, line a baking sheet with foil, making sure to completely cover the pan. This step ensures clean up takes about two seconds.

IMG_2320

Next, lay your bacon flat and not overlapping on the baking sheet. We like Wright’s Hickory Smoked Bacon, but you can use your favorite.

Put the sheet in the oven on the center rack and shut the door. Turn the oven on and heat to 400 degrees (you do not have to preheat). At the same time, set your timer for 18 minutes.

IMG_2333

When the time is up, check the bacon. It should be sizzling and just starting to brown/curl around the edges. If it’s not, give it a few more minutes but watch it closely.

IMG_2336

If it is, take it out and transfer the bacon slices to a plate lined with paper towels to absorb the excess oil. Cool briefly then chow down.

IMG_2337

To clean up, drain your bacon grease into a small cup or bowl if you want to save it for future recipes; discard it if not. Next, carefully peel the foil off the pan and throw it in the trash.

Now sit down to your delicious breakfast. And stay tuned, I have another breakfast delicacy coming your way soon!

Adapted from this recipe.

What We’re Eating — Recipe Round-Up

2 Jul

Mr. Homemaker and I have been contemplating buying/building a new house recently so we’ve been trying to save our pennies.  That means we’ve been eating out a lot less and cooking a lot more.  You’d think I would have a lot more recipe posts for you but on weeknights when we both get home at 6:30 or later and dinner isn’t on the table until 8:30 or later, the last think I want to do is arrange food on a plate in a photogenic fashion and take pictures of it.  I mean, we are starving by that point and I think Mr. Homemaker would bite my hand if I told him he had to wait even 2 minutes for me to snap some shots of his plate! 🙂

Being an empty nest part of the week, we tend to eat out a lot.  And even with just a party of two, that can get expensive, especially when you aren’t satisfied with the same few restaurants over and over again.  Mr. Homemaker and I knew transitioning to exclusive at-home dining wasn’t going to be easy for us — sure, having a goal helps — but we knew that we would have to keep the menus fresh and interesting to keep us motivated.  So each weekend we sit down with our bi-weekly produce delivery list and come up with a tentative menu and grocery list.  I use the Epicurious and Food Network websites as well as some of my favorite food blogs for inspiration and recipes.  We also try to recreate some of our favorite restaurant dishes at home.

So far I would say we have been pretty successful.  In the past month, we have only eaten out once, and that was just a shared fajitas for one at the cheap Mexican joint. Compare that to our prior habit of dining out 6-7 meals (lunch and/or dinner) per week! We have also enjoyed spending time together in the kitchen getting back into one of our mutual hobbies.  Each meal inspires us to cook up different menus and dishes for the next week.

So since I don’t have time to do an individual post for each recipe that we have enjoyed, I am giving you a recipe round-up and brief review so you can enjoy these dishes, too.  Please feel free to ask questions in the comments and I will do my best to answer them.  And when we make these things again, I will try to takes pictures and add those to this post. I am also giving each recipe my star rating along with my review and suggested modifications.  Total possible stars = 4. None of the photos are my original photos — they are the property of the recipe source.  Click recipe title for source.

364552

Steak Picadillo Tacos ****

We LOVE these tacos.  We have made them twice now in the span of two weeks.  They are easy and quick to throw together.  We make them exactly as directed (yes, we put in the olives AND raisins), but we do buy a more tender cut of meat since we found the skirt steak to be way too tough on the first round.  We prefer sirloin for this recipe.  It would even be great with left over filet 🙂  I also use mild Rotel as the regular makes the tacos a bit on the spicy side. We top our tacos with a healthy dollop of sour cream to tame the heat.


356790

Pork Meatball Banh Mi ***

These meatball subs were one of our attempts to keep things interesting in the kitchen.  This recipe is another one that is simple to throw together although some of the ingredients can be harder to find (my local Publix did have some Daikon radish). Matt really enjoyed the pickled carrot and radish topping and has eaten it as a side with other dishes since (the recipe makes more than enough). I am giving it three stars because some of the ingredients can be hard to find but I do love the flavor combination that it creates and I think the meatballs would be good served alone as an appetizer (or even in spaghetti).


231348

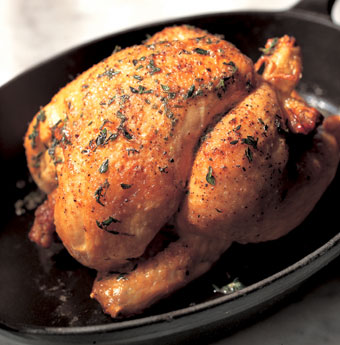
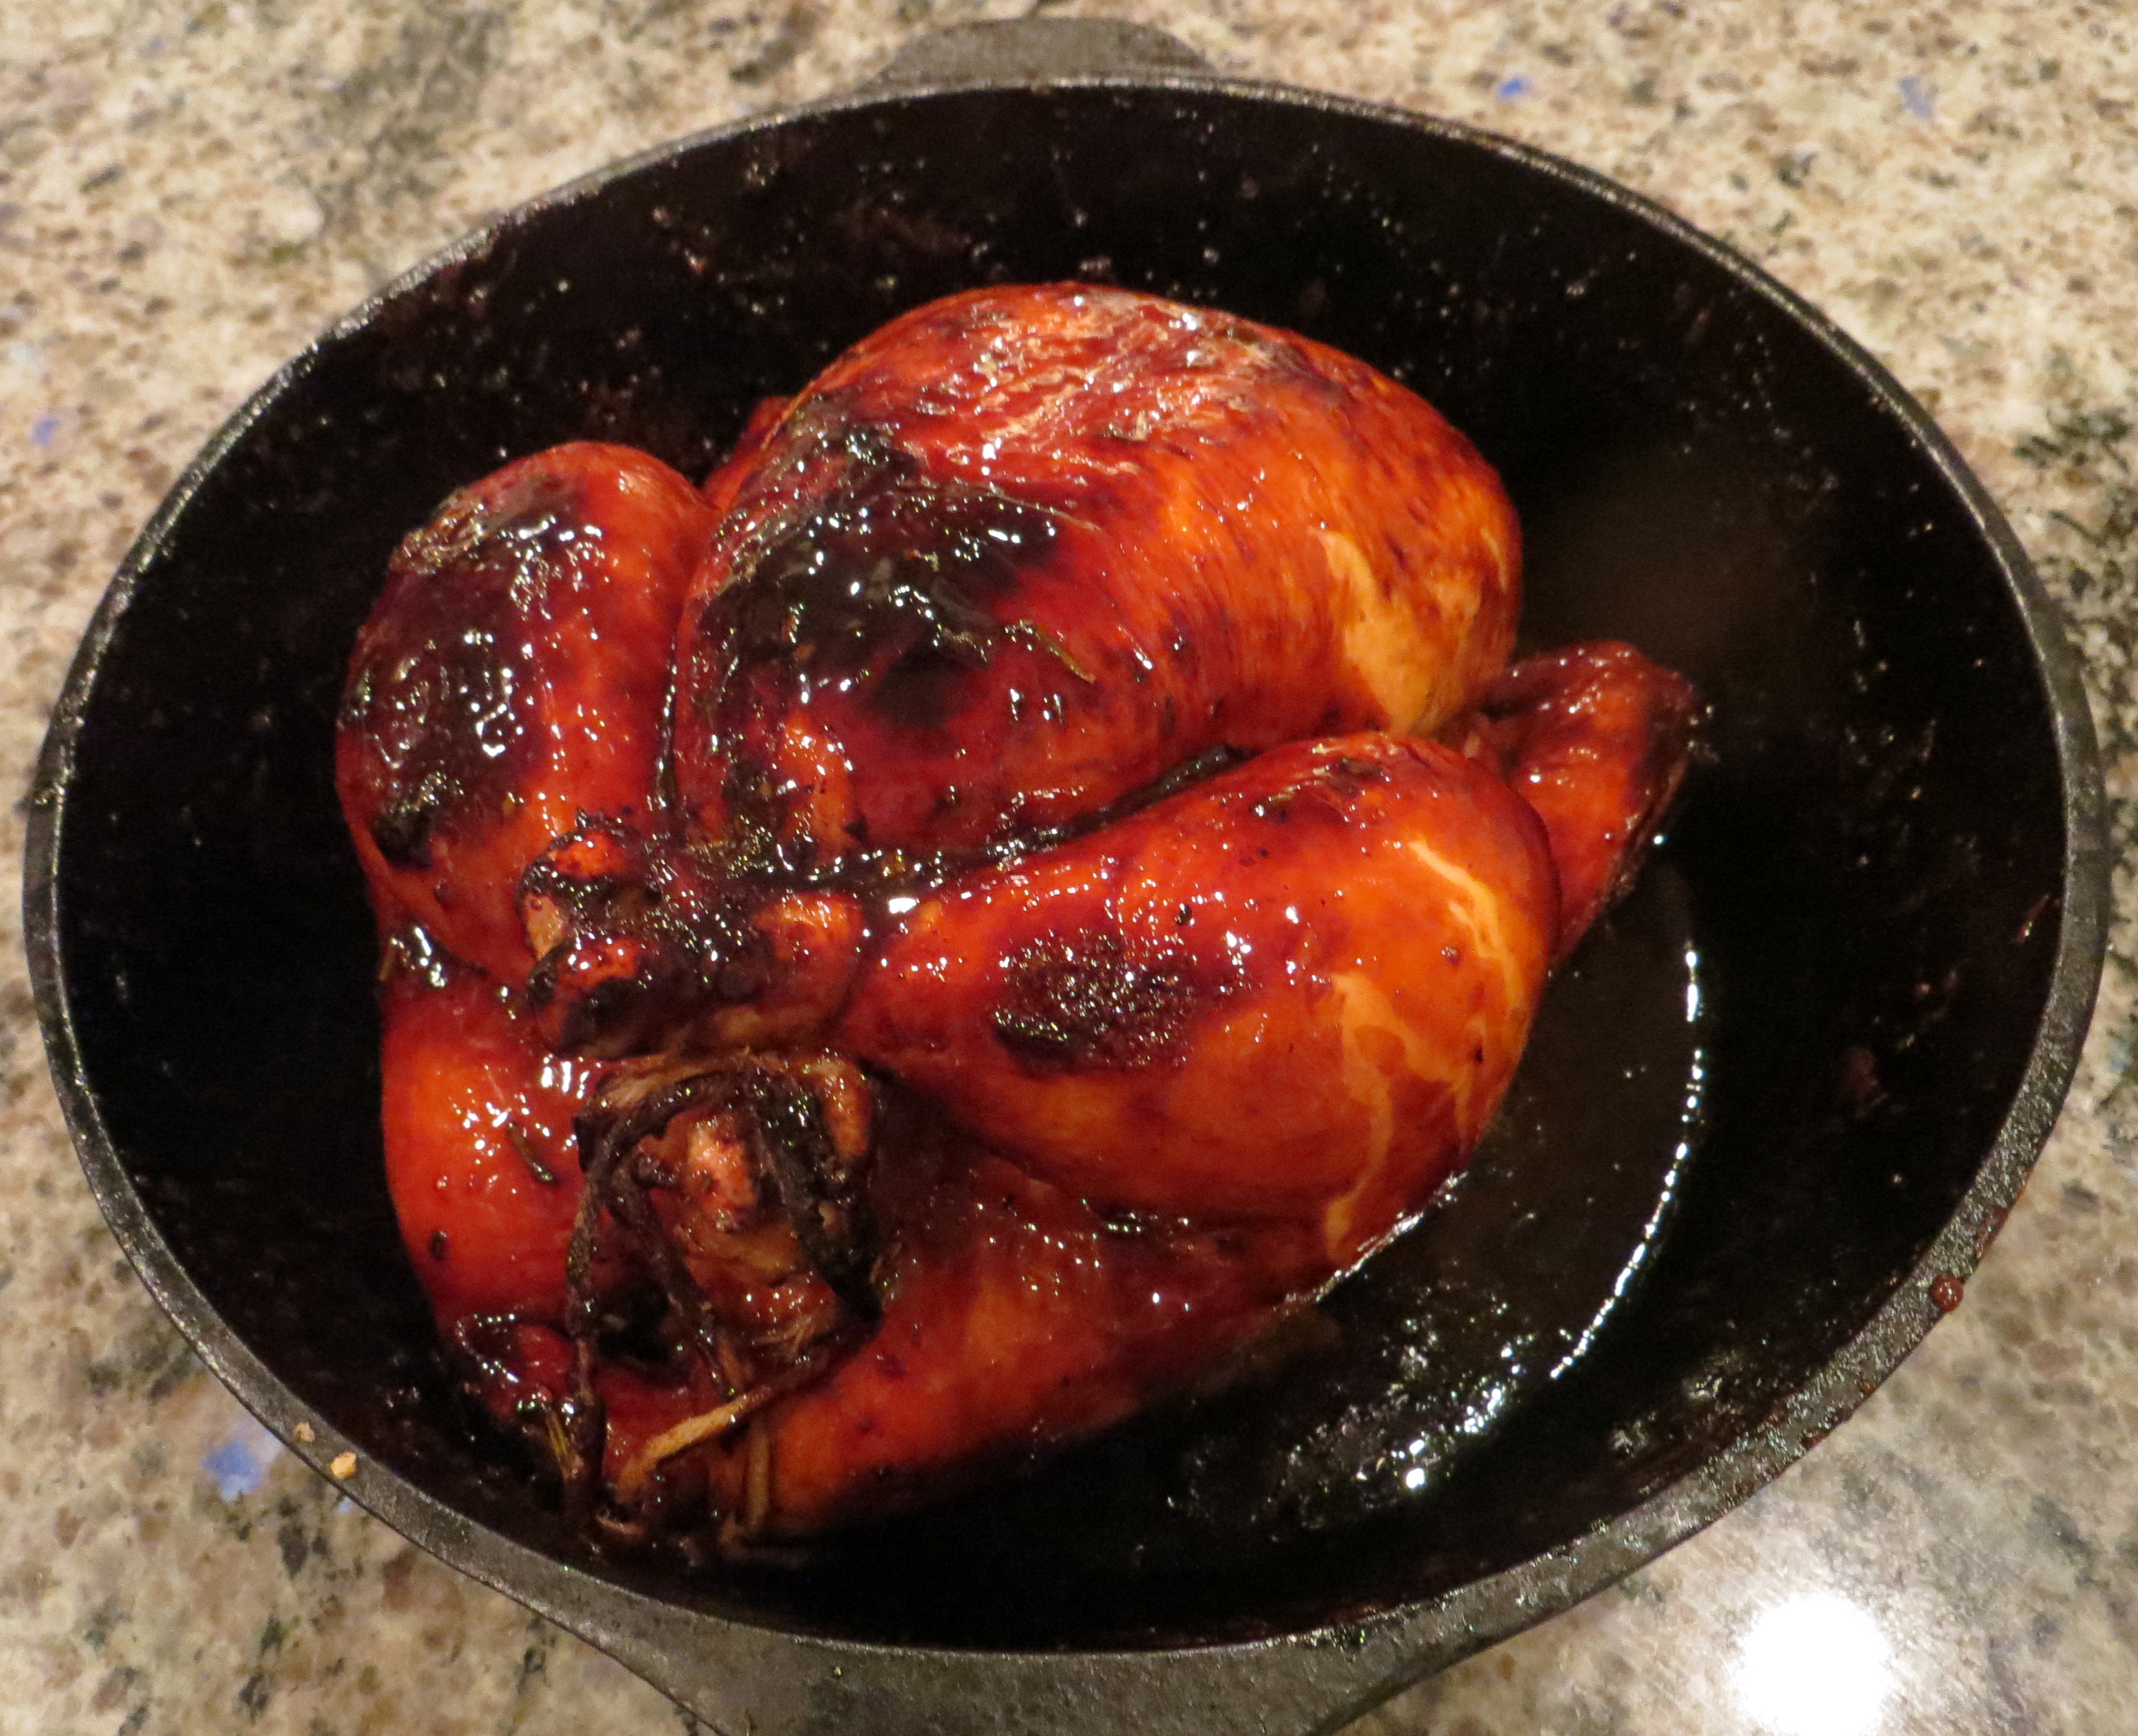
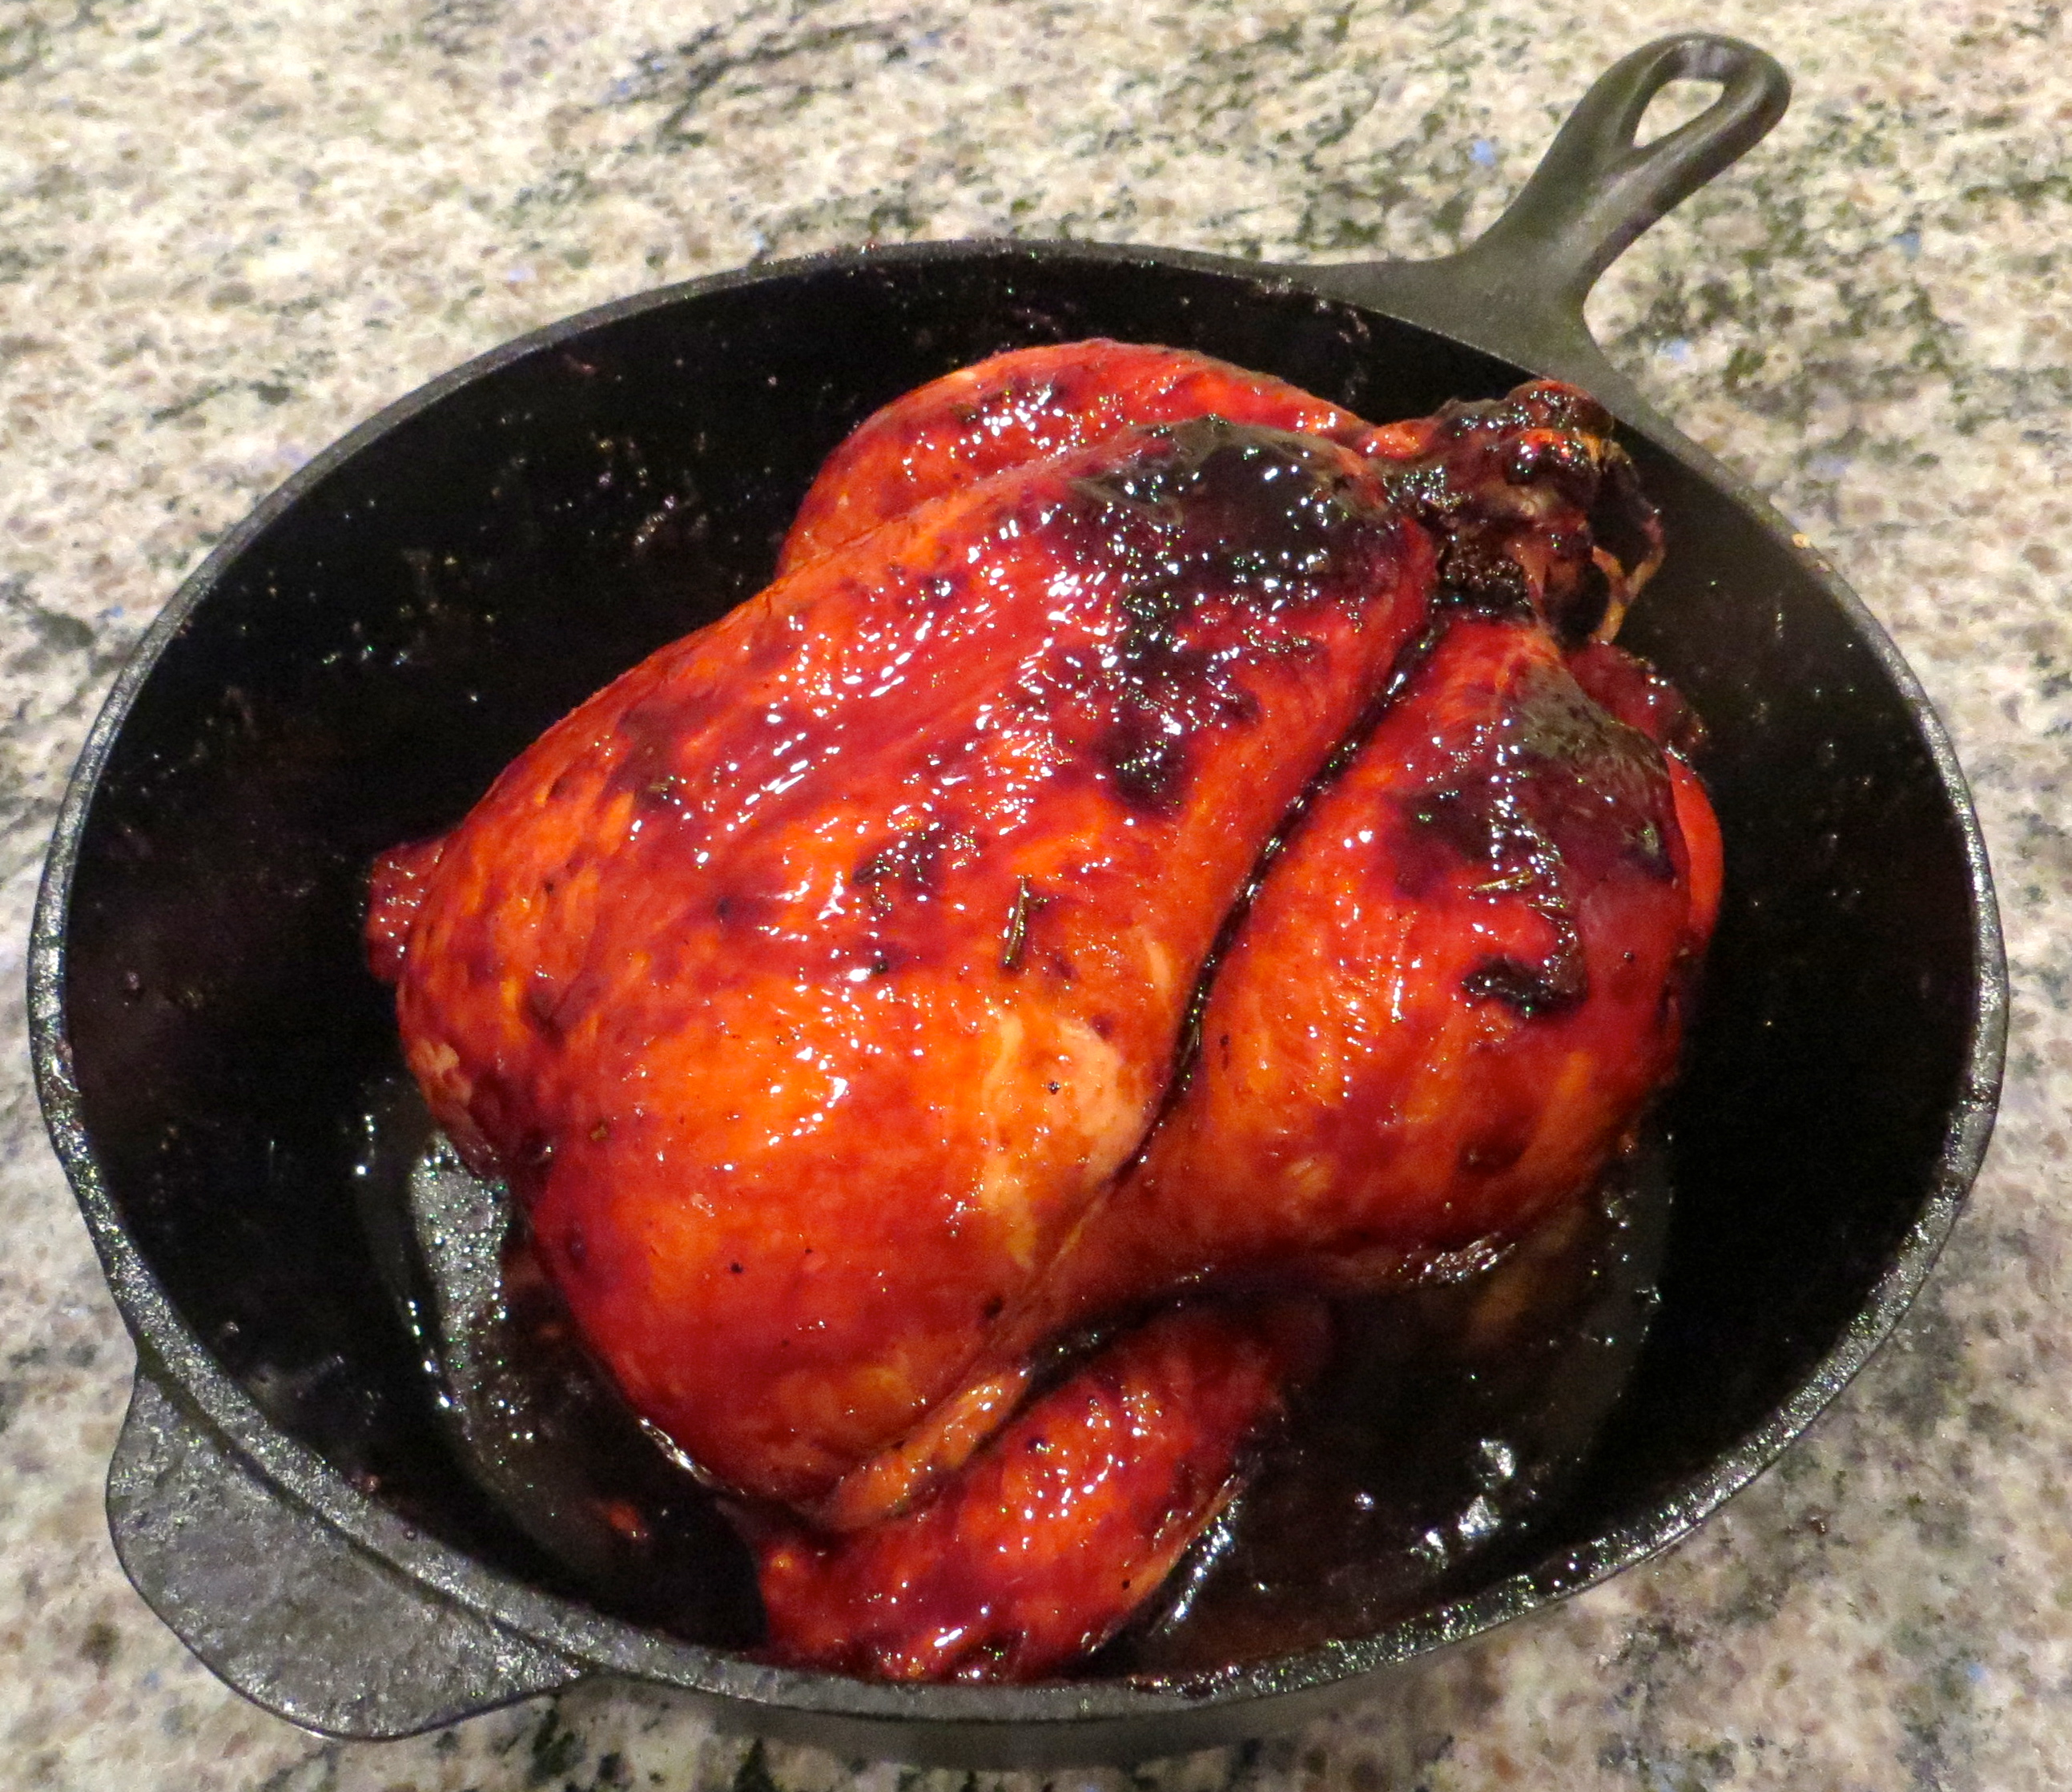
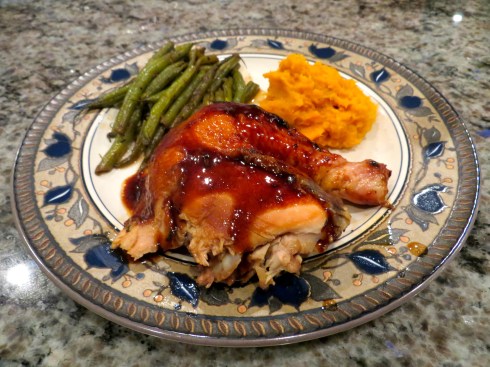
Simple Roasted Chicken *****

Did you notice this one got 5 stars? If you check out the recipe link, you will see that it was created by Thomas Keller, one of my favorite chefs.  I have raved previously about one of his other roasted chicken recipes, and since y’all know I don’t discriminate against a roasted chicken (that’s two already on this blog), I had to try this one.  Funny thing is, I didn’t realize this recipe was by Thomas Keller until the day after I made it.  I have now deemed him Dr. Chicken.

But to get to the point, for no more time and ingredients than this involves, you will never put a better piece of chicken in your mouth.  Like shut up and go slap your momma good kind of chicken.  And so easy you just season the chicken with salt and pepper and throw him in the oven in a skillet.  Then when he comes out, slather him with a little butter and maybe a little thyme if you feel like it.  And his skin will be so crispy and his meat will be so juicy.  And not to mention flavorful!  Please, before I ruin my keyboard drooling all over it, just go make this chicken — you can easily do this on even a tired weeknight!
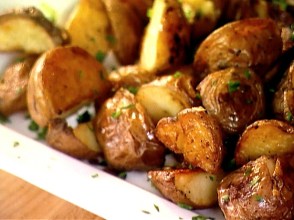
 

ig1a07_roasted_potatoes_lg

Roasted Potatoes ****

Who doesn’t love garlic roasted potatoes?  Enough said.
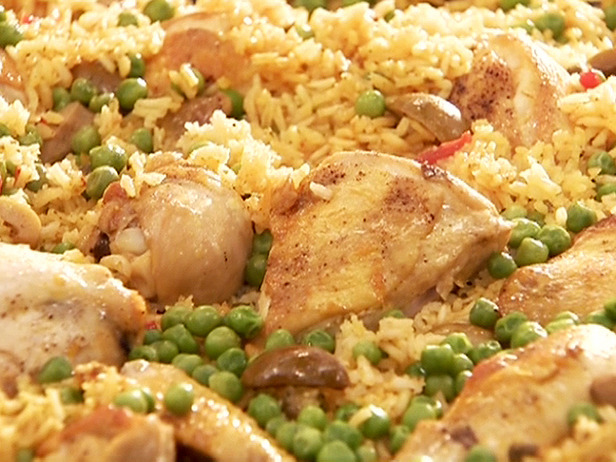
 

VD0106-1_Chicken-with-Rice_s4x3_lg

Arroz con Pollo ****

I referenced a meal in a prior post that my husband deemed one of the best I had ever cooked — this was it.  I woke up on my day off craving something exotic but comforting and for some reason Arroz con Pollo came to mind.  Now, don’t think Arroz con Pollo is something we ever ate as kids — we didn’t even eat the American version of chicken with white rice.  But I have seen it on menus and have seen recipes enough recently that it sounded just exotic enough and just comforting enough to fit the bill.  And boy did it! The smell in the house was incredible and the process to create it was fun and new — I definitely learned some new techniques while preparing this meal.  And sofrito, the seasoning blend used to flavor the rice, has become a staple for us to make various things such as Spanish rice and stuffed peppers. If you have some kitchen skills, I definitely recommend trying this recipe out — it is well-written and if followed, will yield wonderful, flavorful results.


Raspberry Basil Limoncello Cocktail ****

I had a pint of fresh raspberries in the fridge that had gotten a little too soft to eat straight so I went in search of a cocktail recipe.  This one from Bobby Flay was on the top of my to try list and it didn’t disappoint.  The basil is not very strong but does add just a hint of herbal flavor that I found very refreshing. I will definitely be making this one again and maybe it will be a Thirsty Thursday if I can get a photo of it.


roast-beef-po-boy-debris-gravy

Debris Po’Boys ****

So Mr. Homemaker has been craving a New Orleans style roast beef po boy for some time now.  The kind that gets your hands all messy and drips down to your elbows when you eat it.  I don’t know if most people even think of these as po boys because I think most people think of seafood when they think of the traditional New Orleans sandwich.  But nonetheless, the debris po boy is a thing, and a delicious thing at that.  I cooked up a chuck roast according to this recipe then reduced the cooking liquid down to a gravy consistency (had to add a teaspoon or two of cornstarch) to make a delicious meaty mess.  We dressed our sandwiches with mayo and provolone and baby Swiss because that’s how we like them.  I don’t care what any of you Cajun say 😉


Skillet Lasagna ***

Who doesn’t love lasagna?  And lasagna that you don’t have to layer and mess up every dish in the kitchen for?  That’s even better! This lasagna is easy to throw together and tastes great.  I substituted ground beef for the Italian sausage just for personal preference.  I found it to run a little dry so I ended up adding the whole second can of tomatoes and then a little more water as it cooked.  I also reduced the cooking heat a little as it seriously stuck to the bottom of the skillet.  Although the one skillet was a cleanup nightmare, the soul-warming meal was worth it and I will definitely make it again.


Vinaigrette ****

This is another Thomas Keller recipe that I found while browsing the Epicurious site.  I think this recipe is a great base for creating other flavors but I haven’t really had time to experiment yet.  So far we have just put it on basic green salads seasoned with some salt and freshly ground black pepper.


ChocChipsSite

Chocolate Chip Cookies ****

I had a serious craving for chocolate chip cookies last night but didn’t want to be in the kitchen all night changing out batches in the oven and didn’t want the temptation of eating 3 dozen so this little recipe for 12 cookies was perfect. I added a few toasted pecan pieces and they were divine warm out of the oven!


brownies

Mocha Brownies ***

I saw this recipe come up in my blog reader and I was sold on the brownie with frosting.  As a kid my mom always made wonderful brownies but they never had frosting and I always craved brownies with frosting. I guess I now have an unfulfilled desire for frosted brownies because I make/eat them when I can. These brownies were decadent and tasty and the girls in my office RAVED about them. I found the brownie base to be a little bland to stand alone but with the frosting it is just fine (if you are going to make it without frosting, I would add a little salt or vanilla).  My issue was with the frosting.  The recipe calls for too much water.  At the ratio given, the butter separates out and curdles.  I think the recipe should call for 1/2 to 3/4 of the amount of water listed and next time I will stop at that.  Because I wanted to follow the recipe as written (I am a rule follower), I added all the water and I regretted it.  I ended up adding more sugar, butter, and cocoa trying to get the butter to re-emulsify.  I got it to be palatable (based on compliments), but I wasn’t please with the grainy appearance of the frosting.  I will definitely remember this next time I make this recipe.


New York Cheesecake ****

I made this for the Fathers’ Day dinner at my parents’ house. All but 2 slices were eaten that night and everyone said it was the best cheesecake that had ever had — better than New York City’s itself.  I think that’s enough explanation!


5432175175_7bbfac03bc

Vanilla Cupcakes ***

Since I was worried the kids wouldn’t want to eat cheesecake, I also took cupcakes to our Fathers’ Day dinner.  I have made this recipe before and it is a moist and tender cake with a good vanilla flavor.  My only gripe with it in cupcake format is that it doesn’t crown well and it pulls away from the cupcake wrappers.  My suggestion is to fill the cupcake papers closer to 3/4 full and this will help keep them from pulling away. If you are looking for a good basic vanilla cake, though, this is it. I omitted the vanilla bean and doubled the extract.


I hope you have enjoyed my little recipe round-up here.  Let me know if you try any of these recipes or if you have any suggestions for tasty new recipes to try out!


Bourbon and Rosemary Roasted Chicken

2 Jun


IMG_1613


So would you like to add a quick, easy, and tasty chicken dish to your recipe box that you can whip up even on weeknights when you are exhausted? If so, look no further than this delectable specimen from the Garden and Gun blog.  As you may recall, I already have a recipe for what I consider to be the best oven roasted chicken. But if you’ve tried it or read the recipe, you know that it is a little time-consuming. I mean, it can be done on a weeknight but it’s best if you do some of the prep work in advance.

This recipe, though, is so easy, you can get the bird into the oven within about 15 minutes. And you should have most of the ingredients on hand, except maybe the fresh rosemary but that will keep for a while or you could just grow some outside your back door.

I have made this chicken now 3 or 4 times and each time it is moist, tender, and very flavorful.  Mr. Homemaker gives this dish his seal of approval so chances are your hungry man will, too. If you are like me and don’t like bourbon, don’t worry, it isn’t a strong flavor. If you’re like someone else in my house and you like bourbon, you could always increase the amount in the recipe to bring out the bourbon flavor.

As I talked about in my other chicken recipe post, trussing the chicken helps it cook evenly.  Watch this video for a good how-to. This recipe also involves preheating a cast iron skillet in a very hot oven.  Needless to say, this should necessitate care as the chicken and sauce will both sputter when added.  Wear your oven mitts.


IMG_1614


Roasted Rosemary-Bourbon Chicken

Adapted from Garden and Gun blog

1 whole chicken, 3 to 4 pounds, rinsed and patted dry
2 teaspoons kosher salt
½ teaspoon freshly ground black pepper
1 teaspoon olive oil
1 teaspoon minced fresh rosemary
2 tablespoons soy sauce
2 tablespoons honey
2 tablespoons molasses
2 tablespoons bourbon
1 teaspoon Dijon mustard

Place an average-size cast iron skillet on the lowest rack of the oven and preheat to 500F.  Season the chicken all over, inside and out, with the salt and pepper, then rub with the olive oil. Truss the chicken.

Combine the rosemary, soy sauce, honey, molasses, bourbon, and Dijon mustard in a small saucepan. Cook over medium heat until just warm then remove from the heat and set aside.

When the oven and pan are preheated, place the chicken — breast side up — into the skillet and cook at 500F for 10 minutes. Reduce the oven temperature to 350F and pour the prepared sauce all over the chicken.  Be careful because it will sputter. Continue to roast the chicken at 350F, basting with the sauce in the bottom of the cast iron skillet every 10-15 minutes. Cook until the chicken is done, the juices run clear, and a meat thermometer inserted into the breast reaches 160F.  This portion of cooking usually takes 30-45 minutes for me but will vary based on the size of your bird.

Once the chicken is done, remove from the oven and let cool for 10 minutes. Transfer the chicken to a carving board and place the skillet on the stove over medium-high heat.  Heat to a boil and boil for about 1 minute, or until the sauce has thicken slightly.

Cut the chicken into pieces and serve with the sauce. And maybe some Granny-Style Green Beans and mashed sweet potatoes.


IMG_1619


Chicken and Orzo Salad

9 May

IMG_1270


I hope everyone is enjoying their Me Made May so far. I will have an outfit compilation post for you soon. But in the meantime, here’s a delicious, fresh pasta salad for you, perfect for a Mothers’ Day brunch.

This recipe is another favorite from the Junior League of Mobile’s Bay Tables cookbook (click here for other Bay Tables favorites). I made this salad most recently for a friend’s son’s first birthday party. According to my friend, it was a hit. I find it best when made the day before so the flavors have a chance to marry. But it’s also good eaten right away 🙂


Chicken and Orzo Salad

Yield: 20 servings

1 chicken cut into pieces (you can ask the butcher to do this for you)
1 tablespoon Dijon mustard
1/2 cup red wine vinegar
1 cup olive oil
1/4 cup sugar
1 teaspoon salt
1/2 teaspoon pepper
1/2 cup chopped fresh basil
1 pound orzo
2 cups slivered toasted almonds
1 red bell pepper, chopped
1 green bell pepper, chopped
1 cup chopped celery
1 pound cherry tomatoes, cut into halves
Salt and pepper to taste
1 package crumbled feta cheese, optional

Boil chicken in a large stockpot, seasoning as desired. Cook until done. Remove chicken from stock and set aside to cool. Reserve stock for cooking pasta. Once chicken is cool, chop or shred into bite-size pieces.

Combine mustard, vinegar, oil, sugar, 1 teaspoon salt, 1/2 teaspoon pepper, and basil in a bowl and mix well.

Cook the orzo in the reserved stock according to package directions until firm and tender. Drain, then let stand until cool. Toss with 1/3 of vinaigrette.

Toss the chicken with 1/2 of the remaining vinaigrette. Add the orzo, almonds, red and green pepper, celery, and tomatoes. Add the remaining vinaigrette and toss to mix well. Season with salt and pepper to taste. Cover and refrigerate until well chilled. Serve cold.

Crumbled feta cheese can be added to the chilled salad before serving, if desired.


IMG_1268

Fish Tacos

13 Aug


Is all this talk about sewing making anybody out there hungry?  Well, I’ve got the perfect fix for that — these delicious tacos stuffed with honey and cumin glazed crispy fried fish and spicy chipotle slaw.  Mr. Homemaker and I enjoy making these tacos together when we have a little extra time to spend together in the kitchen, usually on a weekend afternoon.  With a little preplanning you could definitely turn this into a weeknight meal as well though.  We discovered these tasty treats a few years ago and have shared the addiction with many of our friends and family since then.

While the recipe calls for tilapia, you can substitute any mild white fish you have on hand.  For this batch, we used some red snapper from our deep freeze that was caught by yours truly last summer.  We have also made them with the day’s fresh catch of bass and bream from the family pond.  Either way they are delicious.


One word of caution, the original recipe, linked here, calls for way more chipotles in adobo than we think is necessary (and we aren’t wimps about spice).  I have modified the recipe I am presenting here but if you are sensitive to heat, please start with 1/2 or 1/3 the amount of chipotle paste and increase it to taste.  It is some pretty spicy stuff!

So gather round your favorite peeps, whip up a batch of refreshing drinks (maybe some of these), and have a fish taco fiesta soon!


Fish Tacos

Serves 4

  • 1 pound tilapia fillets, cut into chunks
  • 1/2  plus 1/3 cup fresh lime juice
  • 2 tablespoons honey
  • 1 tablespoon vegetable oil
  • 1 teaspoon ground cumin
  • 1/2 cup mayonnaise
  • 1 tablespoon pureed chipotle pepper with sauce*
  • 1/4 teaspoon salt
  • 1/8 teaspoon cayenne pepper
  • 1/3 cup all-purpose flour
  • 2 eggs, lightly beaten
  • 2 cups panko crumbs
  • salt and ground black pepper to taste
  • 1 cup vegetable oil for frying
  • 2 cups 3 color coleslaw blend
  • 1 cup minced fresh cilantro leaves
  • 8 (7 inch) flour tortillas, warmed

*I take a whole jar of chipotles in adobo sauce and puree it in the food processor.  I then transfer the puree to a resealable container and keep it in the fridge to use as needed.

Directions

  1. Place the tilapia chunks in a flat dish and pour 1/2 cup lime juice over the fish. Cover, and refrigerate at least 4 hours.  (We have marinated for as little as 30 minutes with good results.)
  2. Meanwhile, make the honey-cumin sauce by whisking together 1/3 cup lime juice, honey, vegetable oil, and ground cumin a small bowl. Set aside until needed.
  3. To make the chipotle mayonnaise dressing, whisk together the mayonnaise, pureed chipotle sauce, 1/4 teaspoon salt, and cayenne pepper. Cover, and refrigerate until needed.
  4. To bread the fish, place the flour, eggs, and panko crumbs in three separate shallow dishes. Season the fish with salt and pepper to taste. Dip the fish pieces first in the four, coating evenly, and shaking off any excess. Dip next in the eggs, and last in the panko crumbs, patting the pieces to help the breadcrumbs hold. Set the fish aside on a plate.
  5. To cook the breaded fish, pour 1 cup vegetable oil into a skillet to 1/4 inch deep. Heat the oil to 365 degrees F (185 degrees C) over medium heat. Cook the fish, turning until all sides are golden brown, and flesh is easily flaked with a fork. Drain on paper towels. Brush the fish with the honey-cumin sauce.
  6. Mix the coleslaw and cilantro together in a bowl. Reserve 1/4 cup of the chipotle mayonnaise dressing, and pour the remaining dressing over the coleslaw mixture. Toss to coat evenly with the dressing.
  7. Place the tortillas on a flat surface, and spread each with a little bit of reserved chipotle mayonnaise dressing. Divide the fish between the tortillas. Top with the cilantro coleslaw.

Impress Your Guests Roasted Chicken

23 Apr

I had planned to give you this recipe before Easter.  Sorry.  I had a crazy number of birthday cakes to bake and numerous other obligations that kept me from typing the last few steps of the recipe and clicking publish.  But better late than never, right?

I thought it would be a good idea to give you a recipe for a showstopping main dish — a dish that will silence your harshest critic, boost your kitchen confidence, and go from oven to table with minimal effort.

The method for this recipe came from one of my favorite cookbooks that I have mentioned before, but I have modified the ingredients to suit my own tastes.  Originally, the chicken was cooked on a bed of root veggies such as rutabagas, parsnips, and turnips.  I have made the original version before, but we prefer my modified version.  So feel free to adapt it as you see fit.

There are a few steps that will ensure your chicken is top-notch.  First, plan ahead and leave your chicken uncovered in the fridge for a day or two.  This will give your chicken nice crispy skin once roasted.  At first you may be repulsed by the idea of leaving a bare chicken in your fridge.  I sure was.  Once you eat the naked chicken, however, you will start advertising your refrigerator as a nudist colony for poultry 🙂

Second, make sure your chicken is at room temperature before you put it in the oven — don’t put it in the oven straight out of the fridge.  Also, truss your chicken to help it cook more evenly.  See this video here for a great demonstration on how trussing is done (but please don’t let your hair hang in your chicken).

Make sure to cook the chicken to the proper temperature.  My chicken was a roaster and came with its own little temperature gauge that popped out when it reached 160 degrees (and it was accurate).  But it is definitely a good idea to invest in a meat thermometer like you see in the top photograph (for around $10).  Finally, be sure to let the chicken rest on the cutting board for 20 minutes before carving to allow the juices to redistribute.  This will ensure that every bite of your bird is extra juicy and moist.


Whole Roasted Chicken on a Bed of Vegetables

One 4- to 4 1/2-pound chicken
Kosher salt and freshly ground black pepper
6 garlic cloves, smashed and peeled
6 thyme sprigs
8 medium carrots, peeled, trimmed, and cut in half
8 cipollini onions, whole (you could substitute 2 or 3 small, quartered yellow onions)
8 small red-skinned potatoes, scrubbed
8 small Yukon gold potatoes, scrubbed
1/3 cup canola oil
4 tablespoons unsalted butter, at room temperature
 
  1. Let chicken stand uncovered in refrigerator for 1 to 2 days to dry out the skin.
  2. Remove the chicken from the refrigerator and let stand at room temperature for 1 1/2 to 2 hours, or until it comes to room temperature.
  3. Preheat oven to 475 degrees.
  4. Remove the neck and innards if they are still in the cavity of the chicken.  Cut out the wishbone with a paring knife to make carving easier.  Generously season the inside of the cavity with salt and pepper, add 3 of the garlic cloves and 5 of the thyme sprigs, and massage the inside of the bird to infuse it with the flavors.  Truss the chicken (see video link above).
  5. Combine all the veggies and the remaining garlic and thyme in a large roasting pan or iron skillet.  Toss with 1/4 cup of the oil and season with salt and pepper.
  6. Rub the remaining oil all over the chicken.  Season generously with salt and pepper.
  7. Make a nest in the center of the vegetables and nestle the chicken in it.  Cut the butter into 4 or 5 pieces and place over the chicken.
  8. Put the chicken in the oven and roast for 25 minutes.  Reduce the oven temperature to 400 degrees and roast for an additional 45 minutes, or until the temperature registers 160 degrees in the meatiest portion of the bird — the thighs, and under the breast where the thigh meets the breast — and the juices run clear.  If necessary, return the bird to the oven for more roasting; check it every 5 minutes.
  9. Transfer the chicken to a carving board and let it rest for 20 minutes.
  10. Just before serving, set the pan of vegetables over medium heat and reheat the vegetables, turning them and glazing them with the pan juices.
  11. Cut the chicken into serving pieces, arrange over the vegetables, and serve.

Weekend Round Up

18 Feb
 

Don’t you hate it when you finally have a day off and you still wake up at 6:30 AM?  Today is my first day off after 12 days straight of nursery rounds, office hours, and after-hours calls and I was looking forward to snoozing until at least 8!  Oh well.  I got up and ate my usual Nutella toast and decided to let y’all know the things I’ve been working on over the past few weeks.  I have to run out for a new pair of fabric shears today but hopefully after that I will get some of these unfinished projects wrapped up!

From the Sewing Room

Here are some of my current fabrics under construction:

 
This was my first time scanning fabric. I promise there isn’t a stain in the middle.
  This Marc Jacobs stretch cotton will involve this cute peplum — that’s all I’m telling you for now!  It’s ready to be finished now that my wonderful alterations expert, Lisa, helped me finish fitting it.


This stretch Tahari suiting has shades of fuschia, coral, and green on a peachy background.  I am practicing lining and seam finishes with this one.  I hope to wear it to work one day this week so I will show you pics when it is done.  Please notice my lovely fuschia serging thread.  I finally got brave enough to change the thread on my serger all by myself! 🙂


These dots have been underway the longest.  They are the skirt for my Bombshell Dress from the Sew Retro class on Craftsy.  I am having fitting issues with the bodice so I may go ahead and finish the skirt to wear until I can get some professional help with the bodice.

From the Kitchen 

On the cooking front, I made three really good recipes from the interwebs this week but didn’t have a chance to snap a pic of any of them.  The first one is a regular in my rotation.

 I like Tiny Urban Kitchen‘s method of steak preparation because it eliminates all the guess work.  While my husband is usually in charge of cooking the steaks in our house (he is the steak whisperer, after all), occasions arise where I may be called on to complete the task.  Enter steak prep method for the immensely OCD :O

 To accompany our steaks, I tried Ina Garten’s roasted asparagus.  It was perfect for a weeknight meal (and would also be a great low maintenance side for a big dinner party).  This is super easy and involves tossing trimmed asparagus with olive oil, seasoning with salt and pepper, and roasting on a pan at 400 degrees for 25 minutes.  There.  Now you don’t even need to click the link.

Photo look too good to be taken by me? You're right -- it's from Bo's Bowl.

Finally, I made Bo’s Bowl’s Strawberry Cream Cheese Muffins to use up some waning strawberries from the farmer’s market — delish!  I took the leftovers to the nurses at the hospital and they were gone within minutes.  Be sure to check out Bo’s blog — he also hails from the Heart of Dixie.

So that’s it for this week.  Stay tuned for a fully-loaded Mardi Gras recipe just for you in the next few days, as well as some fun Mardi Gras trivia.  Have a good Saturday!