Tag Archives: cotton

Hot Patterns 1196 | Metropolitan Urban Gypsy Blouse | Or a Tibi Knock-Off

11 Sep

katrina-2

Hi, friends! I’m back with a new top, a new haircut, and some fancy professional photos for you! I’ve had this Hot Patterns Metropolitan Gypsy blouse sewn up for several months but never could coordinate photos of it. When I scheduled a photo shoot for my stepson’s casual senior (!!!) portraits, I had the photographer capture a few of my top to use on the blog. She did such a great job! Any locals looking for great wedding/family/baby/senior photographs, check out Haley Budlong.

katrina-7

I was inspired by Erica Bunker’s version of this top so I just blatantly copied hers — with her permission, of course :-). This pattern is also a pretty accurate ringer for the Tibi off-the-shoulders blouse that retails for around $300. I checked one of these out in Nordstrom last month and I’m happy to report that it wasn’t constructed any better than mine.

katrina-4

I cut a straight size 12 but probably could have gone with the 10. I omitted the shelf bra, although I may try it on the next version to see if it helps to keep the elastic down and prevent it from riding up on my shoulders.

katrina-8

That being said, this top fits way better in the shoulders than any RTW off-the-shoudlers tops I have because I was able to select the right amount of elastic for my broad shoulders — 27″ to be exact, 3/4 of my shoulder circumference.

katrina-10

I opted for the tie detail on the sleeves and next time may try the elasticated sleeve opening. I used my narrow hem foot to finish the sleeves edges and just put a dab of Fray Chek at the very tips as that was a tricky place to get neat (thanks for that suggestion, Erica!)

katrina-9

My fabric was a lovely cotton French dot jacquard from Emma One Sock. I was able to get this shirt out of less than 2 yards, much less than the pattern’s recommended 2 3/4 yards.

katrina-3

The pattern sewed up quickly in a single Saturday and the directions were brief but sufficient. I would definitely make this again and have a gorgeous green snake print silk set aside for just such an endeavor.

katrina-6

For this photo shoot, I kept my look simple and paired my top with my crisp white slim jeans, a Kendra Scott necklace and bracelet, and some tan platform wedges. What do you think about off-the-shoulders tops? Would you wear or sew one?

katrina-1

Vogue 1353 | Pleated Poppies Dress

22 Jul

IMG_3282

Hello, again! I am on a roll lately!! I’m back today to share with you my completed Vogue 1353, a great pleated fit-and-flare dress with a full lining by Kay Unger. I was inspired by Margo’s recent review of this pattern (isn’t she gorgeous?!?), and bought it next time Hancock’s had a sale and started sewing almost immediately.

V1353

The pattern is the perfect silhouette for an everyday, ladylike dress. And when you make it up in a washable fabric, it works well in your day job as a pediatrician. Where, yes, sometimes you do get peed on but thankfully not often — happened for the first time in ages this week just not to this dress :)-

IMG_3286

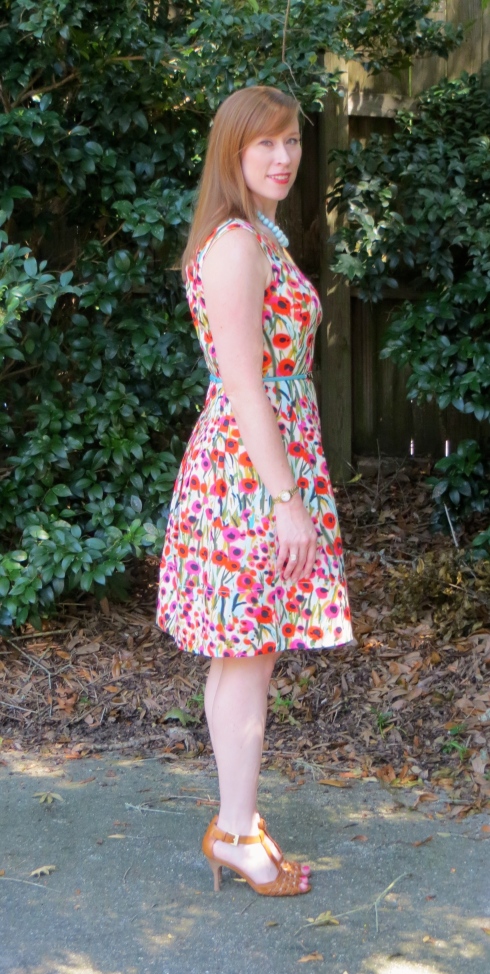
I made this beauty up in a great poppy print stretch cotton sateen from Sawyer Brook Fabrics.

V1353 poppies lining

I lined it with a creamy yellow polyester pongee from Fabric Mart Fabrics that I think I paid $1/yd for… Cotton sateen is a dream to sew with after you’ve been doing nothing but knits and silks. It actually does what you ask it to!

IMG_3291

I started with a straight size 14 then I made a few alterations:

  • 3/4″ FBA
  • lowered bust dart 5/8″
  • lowered bust point of princess seam 5/8″
  • lengthened bodice 1/2″
  • took it in a smidgen in the princess seam above the bust
  • added 1/4″ under the arm at the bust front and back tapering to nothing at the waist
  • 1/2″ forward shoulder adjustment
  • took it in 3/4″ on each side of the zipper tapering to nothing at the waist for a gaping back neckline
  • reduced the width of the pleats because my fabric wasn’t 60″ wide

V1353 Poppies Hanging Detail

I strayed from the instructions only so far as to avoid hand sewing. I lined it completely by machine, including stitching the lining to the invisible zipper by machine with my invisible zip foot. I did hand sew the hook and eye in place as I couldn’t find any way around it. 🙂

IMG_3298

V1353 Poppies Hem

My favorite part of the dress is the hem with its facing and topstitching. I used the chainstitch function on my Juki MO-735 5-thread serger to create the textured line of stitching instead of the handstitching that is prescribed in the pattern instructions. I stitched with the hem facing up so the “wrong” side of the stitching shows on the outside of the dress, creating a nice, visible line of thread. I love finding new uses for my serger!

IMG_3293

The pattern calls for a purchased belt and here I’ve accessorized it with a cute little aqua leather belt with a silver buckle that I picked up at Gus Mayer department store in Birmingham. I think this is probably the only thing (at $38) that I could ever afford from that store but I do love it! I have also paired the dress with a bead necklace from Kluster Shop and some Franco Sarto strappy heel sandals.

This is my new favorite dress pattern and I think there will be another one soon. Stay tuned!

Butterick 6019 — A Polka Dot Bombshell Dress

21 Jul

Howdy, friends! I hope this missive finds you well. I have been doing some sewing and knitting lately and finally have something finished to show you!


IMG_2835


This is Butterick 6019, a bombshell dress by Gretchen Hirsch of Gertie’s New Blog for Better Sewing. I have been muslining a dress like this intermittently for the past 2 years — I finally bit the bullet and finished one!


B6019


I chose this pattern because it has a lot of visual interest with the fitted bodice with sash accent, sarong-style skirt, and shirring on the back bodice. I think the shirring is what attracted me the most.


IMG_2833


Alright, now for some wordy business about the process of creating this dress!

I started with the 14 D-cup pattern and made a muslin of the bodice. I ended up taking it in at the top and letting it out a smidge in the waist. I did a swayback adjustment on the bodice (but should have done one on the skirt, too). I also added about an inch to the bodice height to make the neckline more decent.

I found the cups to be waaaay too pointy for my taste so I tamed that down quite a bit also. I ended up shortening the bodice about an inch under the bust — I am accepting the fact that I am very short-waisted or my boobs are saggy…

That was all pretty straightforward stuff. The project got complicated when I decided to fully line the dress (the pattern only calls for partially lining the bodice — and for good reason I discovered) and then underline the bodice.


IMG_2826


The bodice underlining was simple enough. I just used corset mesh cut a little bigger than the shirred pieces to stabilize that area but still allow for some stretch. I used muslin for the rest of the underlining and added way more boning channels than the pattern’s prescribed two. I sewed a waist stay to a few points on the bodice. Next time I make a dress like this, I will extend the underlining layer down to my high hip to keep it from cutting into my waist.


IMG_2827


I also used bra foam for the cups instead of the batting that was called for.


IMG_2824


For the shirring, I marked lines perpendicular to the grain at 3/8″ intervals. Sewing all the shirring was one of the most tedious parts of the project but also one of the most rewarding. Look how beautiful!


IMG_2851


My dress is made from a navy and white polka dot silk cotton blend. It has a nice crisp hand but shows lint like it’s going out of style!


IMG_2848


To line the bodice, I used a luscious 4 ply silk satin remnant for the non-stretch sections and a scrap from the Gertie slip kit (not finished yet) for the areas under the shirring. I left small openings in the back bodice lining seams to allow the waist stay to pull through.


IMG_2850


Now, lining the skirt was a whole different monster. Since the skirt has a wrap front, I couldn’t just duplicate it and stick it inside. I decided to have the lining attached at the front vertical edges of both wrap panels which meant that something had to be stitched by hand — yuck! But hand stitch I did and don’t judge my really sloppy work.


IMG_2849


I did a machine hem on the lining and a hand stitched hem on the shell. For my skirt lining, I used a cute ivory polka dot silk charmeuse.


IMG_2846


I used my Threads #171 for inserting the lapped zipper with lining by machine, but as usual, I handpicked the overlap for greater control. Just like the method I used on my Rosy Elisalex.


IMG_2838


I guess that’s about it on this dress. It was definitely a journey as I initially planned to wear it to a wedding a few weeks ago but ran out of time to complete it so let it sit for a few weeks before getting up the gumption to finish it. But finish it I did!


IMG_2830

These photos were taken in the front yard of our eventual new house. I love our huge oak tree!

Sewaholic Gabriola Skirt in Silk Cotton Voile

15 Apr


IMG_2674


Howdy, friends! I hope you have had a good Tax Day (ha!). I have another finished sewing project for you today — the newly released Sewaholic Gabriola skirt.


1401_Sewaholic_Gabriola_skirt_front__65008.1391810470.1280.1280


Let me start off by saying how much I love my finished skirt. It is flowy and feminine and manages to be elegant and casual at the same time. The first chance I had to wear it was this past weekend when we took a mini vacation to New Orleans. I wore the skirt while strolling through the French Quarter and then eating the best brunch ever at Restaurant R’evolution — beer battered crab beignets, ’nuff said. Then we headed to the Audubon Zoo and I swished about in my fine skirt among all the animals. I am pretty sure I overheard some of the zebras singing its praises.


IMG_2676


I love the seam lines of this skirt — I wish Tasia had released this pattern a few months earlier as it is very similar to the self-drafted one I made in August for the Grand Summer Ball (that skirt has since been sacrificed to make other projects). Of course, I like her version better.


Georgia


My fabric is the delightful “Georgia” silk-cotton voile from Sawyer Brook Fabrics. It has a smooth hand and a great drape for a project like this. It is a bit sheer so I lined it with white Ambiance Bemberg, also from Sawyer Brook. Because both my shell and lining fabrics were only 43″ wide, I had to have 5 yards of each, meaning this was not the most economical project ever. But I know I will wear this skirt a lot this spring and summer. In fact, I am thinking about wearing it as part of my Easter outfit this Sunday.


IMG_2677


Now let’s talk construction — this was not the easiest make ever. Because many of the seams are cut on the bias, you have to be very careful to stabilize those edges before handling the pieces too much. I wish for the sake of beginning seamstresses that the pattern instructions called for this. I used extremely fine fusible woven stay tape from Emma Seabrooke on all my bias seams.

I also wish she had outlined other possible seam finishes for various fabrics. I used French seams for the shell and stitched and serged seams for the lining. The French seam caused a small hiccup at the point in the front but it was pretty easy to make work.


IMG_2679


I substituted the curved waistband from the Megan Nielsen Tania culotte pattern as several reviewers noted that the included straight waistband tended to gape. I also replaced the prescribed regular centered zip with an invisible one and I attached the lining to the zip by machine.


IMG_2678


For hemming, a very sweet local seamstress (who does alterations in her home), marked by hem for me and I stitched it up using 1/4″ Steam-A-Seam for a clean and even finish. I used the rolled hem on my serger to hem the lining about 1″ shorter than the shell.

Overall, I love my new skirt but beginning seamstresses should proceed with caution before cutting this pattern out.

Thanks for reading along and have a happy Easter!


IMG_2675

Violette Field Threads — Emmaline Dress

25 Nov

Girls at Bayfront


Last month, my sister got married. Being the wonderful sister and loving aunt that I am, I volunteered to make the flower girl dresses for my two nieces. I must say, sewing for someone else was very enjoyable, especially when the someone is kid-sized. Fitting for a child is so much easier than fitting for a grown woman.


Girls by fence

Plus, who wouldn’t want to make something for those two cute girls? They were so excited about their “long” dresses.


Emmaline1_large


The pattern I used was the Emmaline dress by Violette Field Threads. I originally found the pattern via a food blog that I follow (funny, huh?). When I first saw it, I didn’t have a specific plan in mind, other than it would be really cute on Mary Catherine and Sarah. Then my sister announced her engagement and the plan was born.


All the girls


To make matters even more simple, Katie chose navy and pink as her colors and the cover photo for this dress is shown in a cute pink and white chevron, exactly the same fabric Katie wanted (Riley Blake pink chevron fabric here). To tie in the navy, I added a grosgrain ribbon sash to each dress.


Mom and girls

This pattern is very straightforward. The sizes are true and the instructions are very clear with color photo illustrations. My only gripe was with the bulk and weight of all three layers of ruffle. Sewing two rows of basting stitches really isn’t a good method for this much fabric so next time I will zigzag over a piece of floss to gather.

I also found the skirt of the dress to be pretty heavy, pulling down on the bodice and causing the hem to drag. To fix this (partially), I put an elastic stay around the waist by sewing a piece of elastic a little smaller than the waist measurement to the waist seam of the dress. The sash also helped to hold the dress up.

Otherwise, this dress is quick and easy to sew up and little girls love the glamorous long length!

Misc Wedding Collage

I French braided both of my niece’s hair and Katie’s hair stylist added baby’s breath to the braids. I also helped my sister with her party favors — three batches of homemade peach jam in cute 1/4 pint jars, all made in a 3 hour sprint in my kitchen.

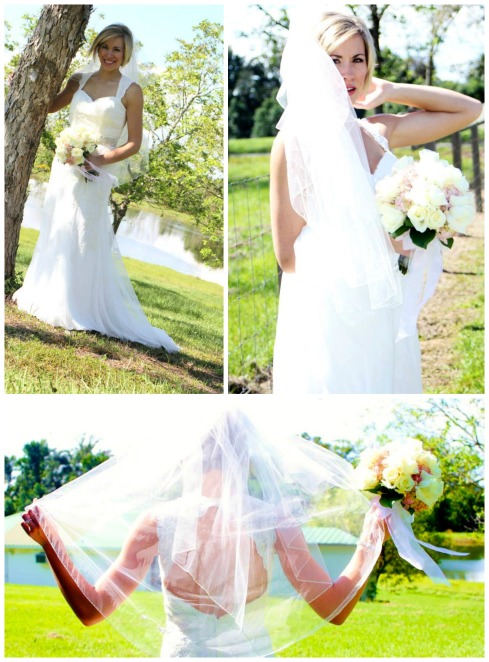
Beautiful Bride

And because I have a beautiful sister, a few photos to finish off the post. Don’t you love that dress?!?

Sewaholic Cambie — As a Blouse

11 Aug

Me at Nanette Lepore showroom, standing in front of the upcoming season. Of course I’m blocking the whole section of NL clothes that match the shirt I’m wearing.

This is my second attempt at Sewaholic Cambie.

My first attempt is the complete dress pattern with the gathered skirt and it is lacking only the lining to be finished.  The problem?  I’m not loving the fabric now that it’s all sewn up.  The fit is perfect and it is my first time to do a real full bust adjustment on a flat pattern but I just can’t see myself ever wearing the dress so it is sitting in the UFO pile.  But that didn’t stop me from moving forward with my great-fitting post-FBA bodice pattern and turning out a second version.  I decided I wanted a cute peplum blouse when I found this green Swiss dot fabric at Hancock and I am so pleased with the results.  I lined it in a soft, light aqua cotton that I picked up for a steal at a local fabric salvage store.  The pattern is well drafted and goes together smoothly.  I only have a few issues/suggestions/comments, so I will list those here:

1.  The sweetheart neckline doesn’t hug the body very well.  I understitched the lining to the seam allowance and this helped a little but on my next version (currently in the works), I am going to ease in a slightly shorter piece of twill tape to the seam allowance to get the neckline to hug my body better.

2.  Along the same lines, the instructions tell you to trim the seam allowances of the neckline before you insert the sleeves.  This makes it a little trickier to know exactly how far to pull the sleeves through before sewing.  Next time I will just wait to trim everything after I have pulled the sleeves through and sewn them in place.

Please pardon the I-just-pulled-it-out-of-the-dirty-laundry-to-take-photos wrinkles 🙂

3.  For my FBA, I used the Palmer/Plescht method and created a new dart in the side seam.  I chose my starting size based on some crazy theory that I came up with — basically I calculate what my bust measurement would be if I was a B-cup based on my band measurement.  So if my under bust measurement is 28.5″ and US bra sizing adds 4″ for the band size then a B cup is 2″ above the band size, my theoretical bust measurement would be 34.5″ which corresponds exactly to the pattern size 8.  I do these crazy measurements because my high bust measurement never seems to correspond well for me and the fit is always off if I go by that method.  Maybe most people don’t have that problem and you can ignore my psycho idea but it works for me 🙂

So I started with a pattern size 8 and made the slashes up and across according to the Fit for Real People book.  Since the pattern doesn’t have a side seam dart, I created one for better shaping.  According to my DD cup size (I can’t believe I just said that!), I needed to add 1″ between the vertical lines of the slash I made, opening up the waistline dart wider.   I trued up the length of the bottom of the bodice piece, made sure my bust point was still accurate, drew in my dart legs (kept the waist dart curved with my French curve ruler), and I was done.  I have to say, this is the best fitting bodice I have ever sewn!  Yay!!!

4.  Since I modified the dress in to a blouse and swapped out the two pattern skirt options for a peplum, I had to draft this myself.  No worries, though, because drafting a small full-circle peplum is pretty simple.  Just google “drafting a full circle skirt” and you will find plenty of great tutorials on how to do it.

5.  I moved the zipper from the center back to the left side seam.  

Tasia gives great instructions on her blog about how to sew the lining to the invisible zipper.  I will be using this technique from now on.  It is so professional and clean and I didn’t even need to sew in a hook at the top of the zip!

All in all, this is a stellar pattern and you should start working on your Cambie dress (or blouse) ASAP.  Stay tuned because I have another version coming up that is a good deal fancier than the one you see here… 🙂