Tag Archives: Maria Denmark

Maria Denmark Rachel Wrap Dress

22 Sep

Howdy, friends! I hope your week is off to a good start. I have a completed sewing project to share with you today but first I want to give you an update to let you know that my entry in the Pattern Review Sewing Bee was selected to move on to the next round! You can see my entry for Round 2 here and I will get a post about it up soon (but I have to do some traveling for work first).

I promised a giveaway if I moved on, so here it is. I have two Butterick patterns — 6019 and 5895 — both Patterns by Gertie. You can see my rendition of 6019 here. If you would like to be considered for the patterns, just leave a comment on this post below or on my Susie Homemaker, MD Facebook page. I will keep the contest open until September 30 at midnight CST. In your comment, tell me your favorite pattern and your favorite fabric to work with — they don’t necessarily have to go together. The contest is open to anyone 18 years of age and older worldwide. I will announce the winner within a few days after the close of the contest.

IMG_3610

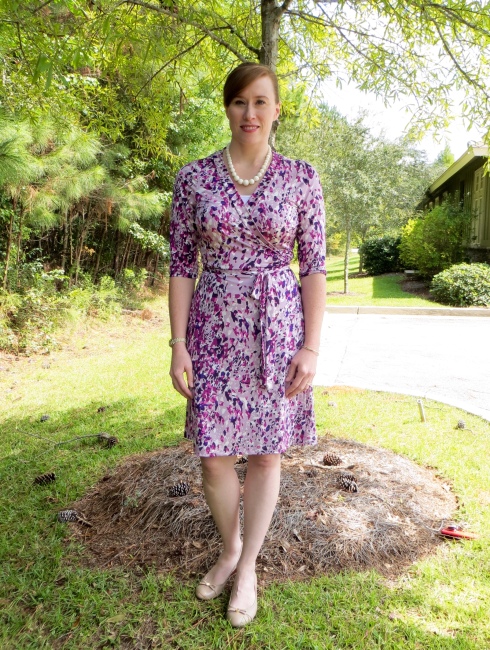
Now on to this garment! I have always been a fan of wrap dresses. I think many of us love the iconic style first brought to popularity by Diane von Furstenberg several decades ago. There is something universally flattering about the forgiving knit dress with a surplice neckline and cinched wrapped waist ties. I have long searched for the perfect pattern or RTW wrap dress. I have even tried on and purchased authentic DVF dresses only to find that they are anything but perfect for my body. They don’t come anywhere near close to covering my bust which isn’t conducive to a flattering look.

405

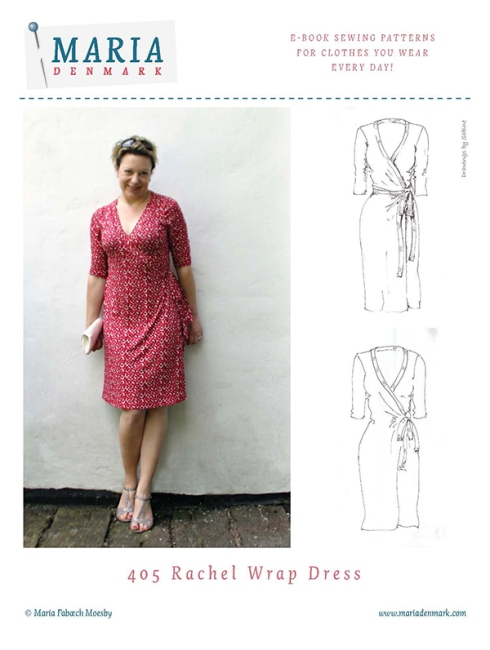
I have mocked up the popular modern Vogue 8379 but found the skirt to be too full. I have several other wrap style patterns in my stash but just haven’t had the gumption to sew any of them up. And a lot of cute indie wrap patterns have popped up on the market, too, but I have managed to resist. Until the Maria Denmark Rachel Wrap Dress came along. I am not sure why this dress won me over but it did and in a very quick fashion. I went from purchasing to printing to taping to cutting to sewing to wearing all in a matter of two days. That is unheard of in my world!

IMG_3614

I chose an inexpensive FabricMart ITY jersey for this first version just in case it was a flop. Thankfully it wasn’t even though my stepson’s first reaction was to tell me that it looked like a nightgown…

For my pattern modifications, I made an FBA since my biggest beef with wrap dresses is the gape-age in the bust. I created a side dart for a better fit and the added waist ease I removed at the side seam to keep the pattern true along the waist (there is no waistline so you have to cut the pattern in two to do the FBA then reattach the top and bottom).

IMG_3612

There is a FBA tutorial on Maria Denmark’s blog specifically for this pattern but I don’t recommend using it. She gives you a method that results in all dart intake being transferred to a waistline seam but since this dress doesn’t have a waistline seam, you end up with a bodice that won’t match back up with the skirt after the FBA. So take my advice, if you want to do an FBA on this dress, do the usual Palmer-Plescht method, not the one on Maria’s website.

My one other gripe with the pattern (well, other than the fact that it doesn’t include seam allowance, GRRRRR!!!), is that the shoulders are cut really narrow. I added 1″ to get to what you see in these photos and I could probably stand to add another 3/4″ to get the seam to fall where it should. My shoulders aren’t that broad!

IMG_3608

But overall I do love this dress. I love the figure skimming skirt and the neckline-hugging wide neckbands. I also love that it only has 4 pattern pieces so it’s easy to cut out and assemble.

I can definitely see myself making this dress up again after I tweak the pattern a little bit more. My goal is to modify it so that a camisole won’t be necessary for modesty at work. Let’s see if I can get the neckline just right! 🙂

Kirsten Kimono Tee HiLo Tunic Hack

19 Aug

IMG_3499

Howdy, folks! I hope you’re having a good Hump Day. Life is busy in these parts with back to school so sewing and knitting has been happening in waves around here. I have been on a mission to finish some knitting UFOs and I am pleased to report some nice progress in that department. I finished my Aiken pullover by Andi Satterlund (c. late 2014) last night and now just need to block it and I am down to the last sleeve on my Hi-Fi Pullover by Ruth Garcia Alcantud (c. late 2013). I find it easier to pull out knitting UFOs than sewing UFOs. What about you?

So for your viewing pleasure today I have another hack on the Kirsten Kimono Tee, a free pattern by Maria Denmark. You may remember my first blogged version here which involved combining a sequined knit fabric with a regular knit.

IMG_3501

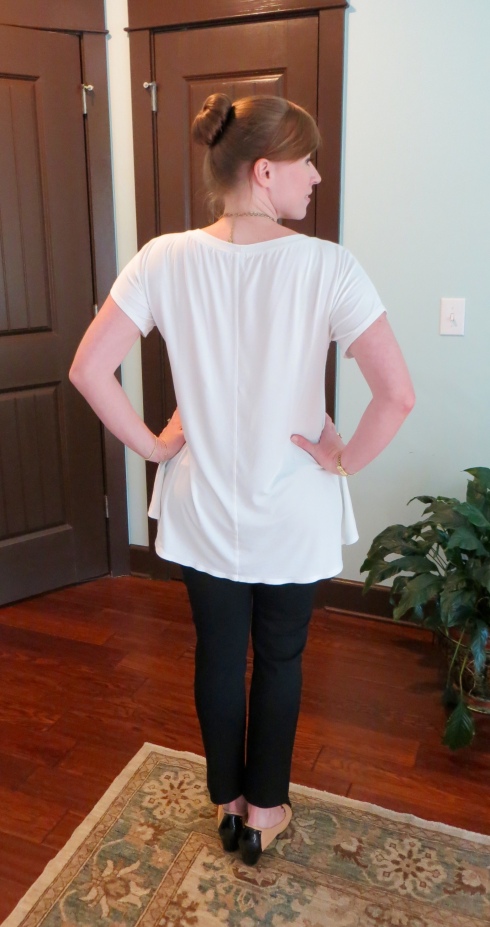
That wrinkle is just from movement — it isn’t a dart.

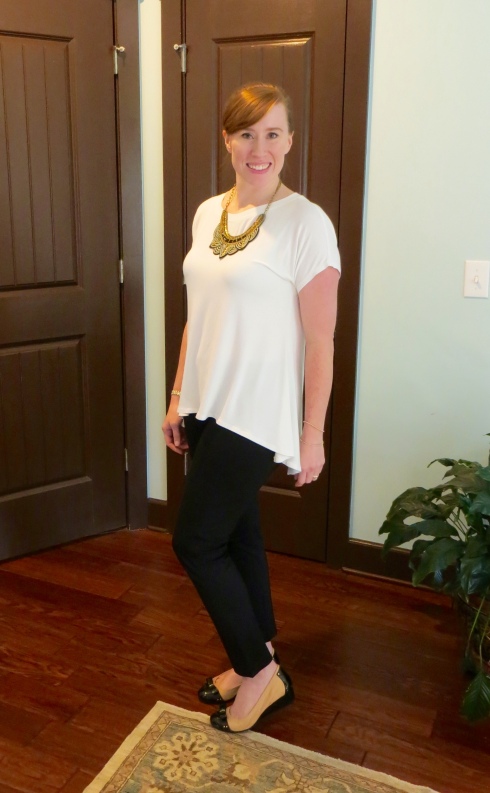
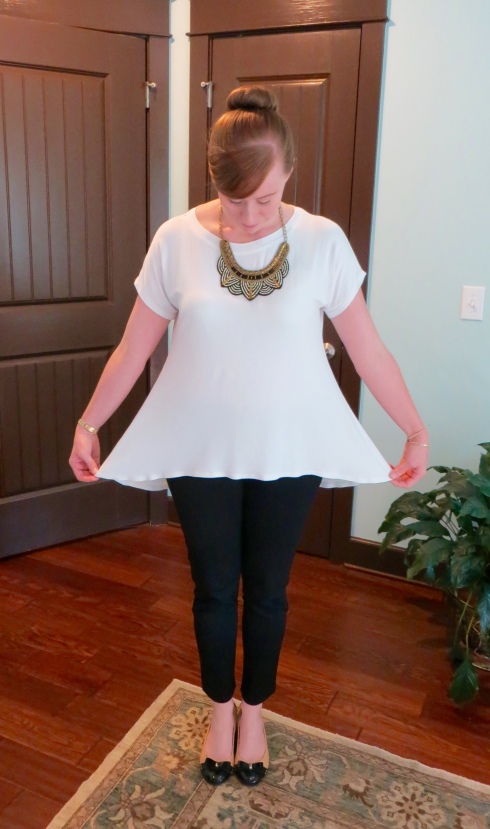
For this version, I was trying to replicate a friend’s top that I liked so I altered the side seams and hemline to give the top a more relaxed fit and a high-low hem. My friend was sweet enough to send me measurements from her shirt so I was able to use that information to decide how much to add to the side seams and how much difference to have between the center front and center back hem. I also lengthened the sleeves some. I think my top turned out similar but not identical — I wouldn’t want her to think I am trying to be her twin 🙂

IMG_3502

I used a silky soft modal knit from my stash. I purchased it at Hart’s Fabric a few years ago and I think this is the one. Please don’t hold me to it because it’s been a while.

I used my serger to sew it up and fused the hems with double sided fusible stay tape from Emma Seabrooke. While I love her tapes in general, I didn’t love it in this application because the hem looks rumpled unless I iron it every time I wear it. It doesn’t have stretch like the body of the garment so it tends to look bad unless pressed thoroughly. Although not necessary, I stitched over the hems with the coverstitch function on my serger.

IMG_3504

I finished the neckline with a wide band that I serged on. Next time I think I would use a binding instead but the band is quick and neat and you can’t beat that!

This is my third version of the Kirsten Tee and the most worn to date. I am not retiring the pattern any time soon but I do think I will move on to trying a new knit top for some variety, maybe the Plantain Tee by Deer and Doe. Do you have a favorite knit top pattern? I’d love to hear about it in the comments!

Maria Denmark Kirsten Kimono Tee — with Sparkles!

23 Sep
IMG_1958

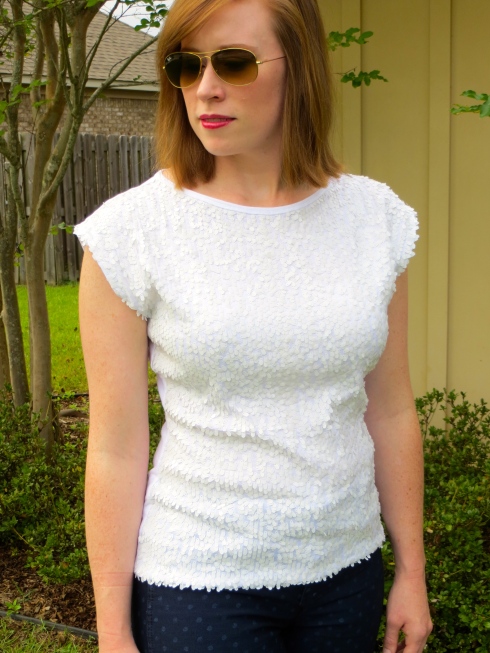
Me Made Kirsten Kimono Tee paired with reversible polka dot jeans from Nordstrom, hot pink patent Cole Haan heels, and Ray Bans.


Howdy, everyone! Here’s a quick and simple project for you — the Kirsten Kimono Tee from Maria Denmark. What’s even better than quick and simple? This pattern is a FREE download on Pattern Review Maria’s site just by signing up for her newsletter! It only involves taping together a few pages (and this one doesn’t require cutting — yay!) From start to finish, I spent maybe 3 hours on this project and that included assembling and cutting out the pattern.

I cut a base size M but graded out a bit at the bust and tapered it in a little at the waist. I added 1/4″ seam allowances as the pattern doesn’t include them. Next go around I may create a center back seam to address my swayback.


IMG_1961


For the fabric, I chose a white sequin knit from my local shop, Ely’s, and a basic white tee-shirt knit from Sawyer Brook for the back and neck binding. When I bought the sequin fabric, everyone seemed a little surprised that I planned to make a tee-shirt with it. But I think once they see my finished project, they may not think it was so strange after all. I purchased 3/4 of a yard at $29.95 a yard and only used about 1/3 to 1/2 of the fabric. So technically I could make another top.


IMG_1963


I used my serger for all parts of construction on this top. I finished the neckline according to this Megan Nielsen tutorial and sewed the neckline and hems with the coverstitch function on my 5-thread serger. This could have just as easily been made solely on a standard machine with a stretch or zigzag stitch and a double needle to finish the neck and hems. I will mention, though, that sewing over sequins does increase your chance of breaking a needle so use something that is sturdy but appropriate for knits and sew slowly or even drive the machine with the handwheel over parts that are two layers of sequined fabric.

Overall, I love my new top, even if it may be a tee-shirt that has to be dry cleaned! I have already worn this shirt out on the town (like in the photos), and to work tucked into navy slacks with a green cardigan and the pink shoes from these photos. If you have contemplated making a knit top, this would definitely be a great place to start as the sizing is true and the process couldn’t be simpler. And consider experimenting with unusual fabrics as this pattern’s simplicity lends itself to modifications. Happy sewing!