Tag Archives: rayon

Pattern Review Sewing Bee Round 1 | 80s Inspired Floral Peplum Blouse

7 Sep

IMG_3552

Howdy, friends! I hope you had a nice Labor Day. While I had to go in to the office for a while today, I did get lots of sewing in this weekend. Have you heard about the Sewing Bee going on over at Pattern Review? I didn’t think I would enter but then at the last minute, I decided I would move one of my to-sew objects up the queue and enter it in the contest.

1425

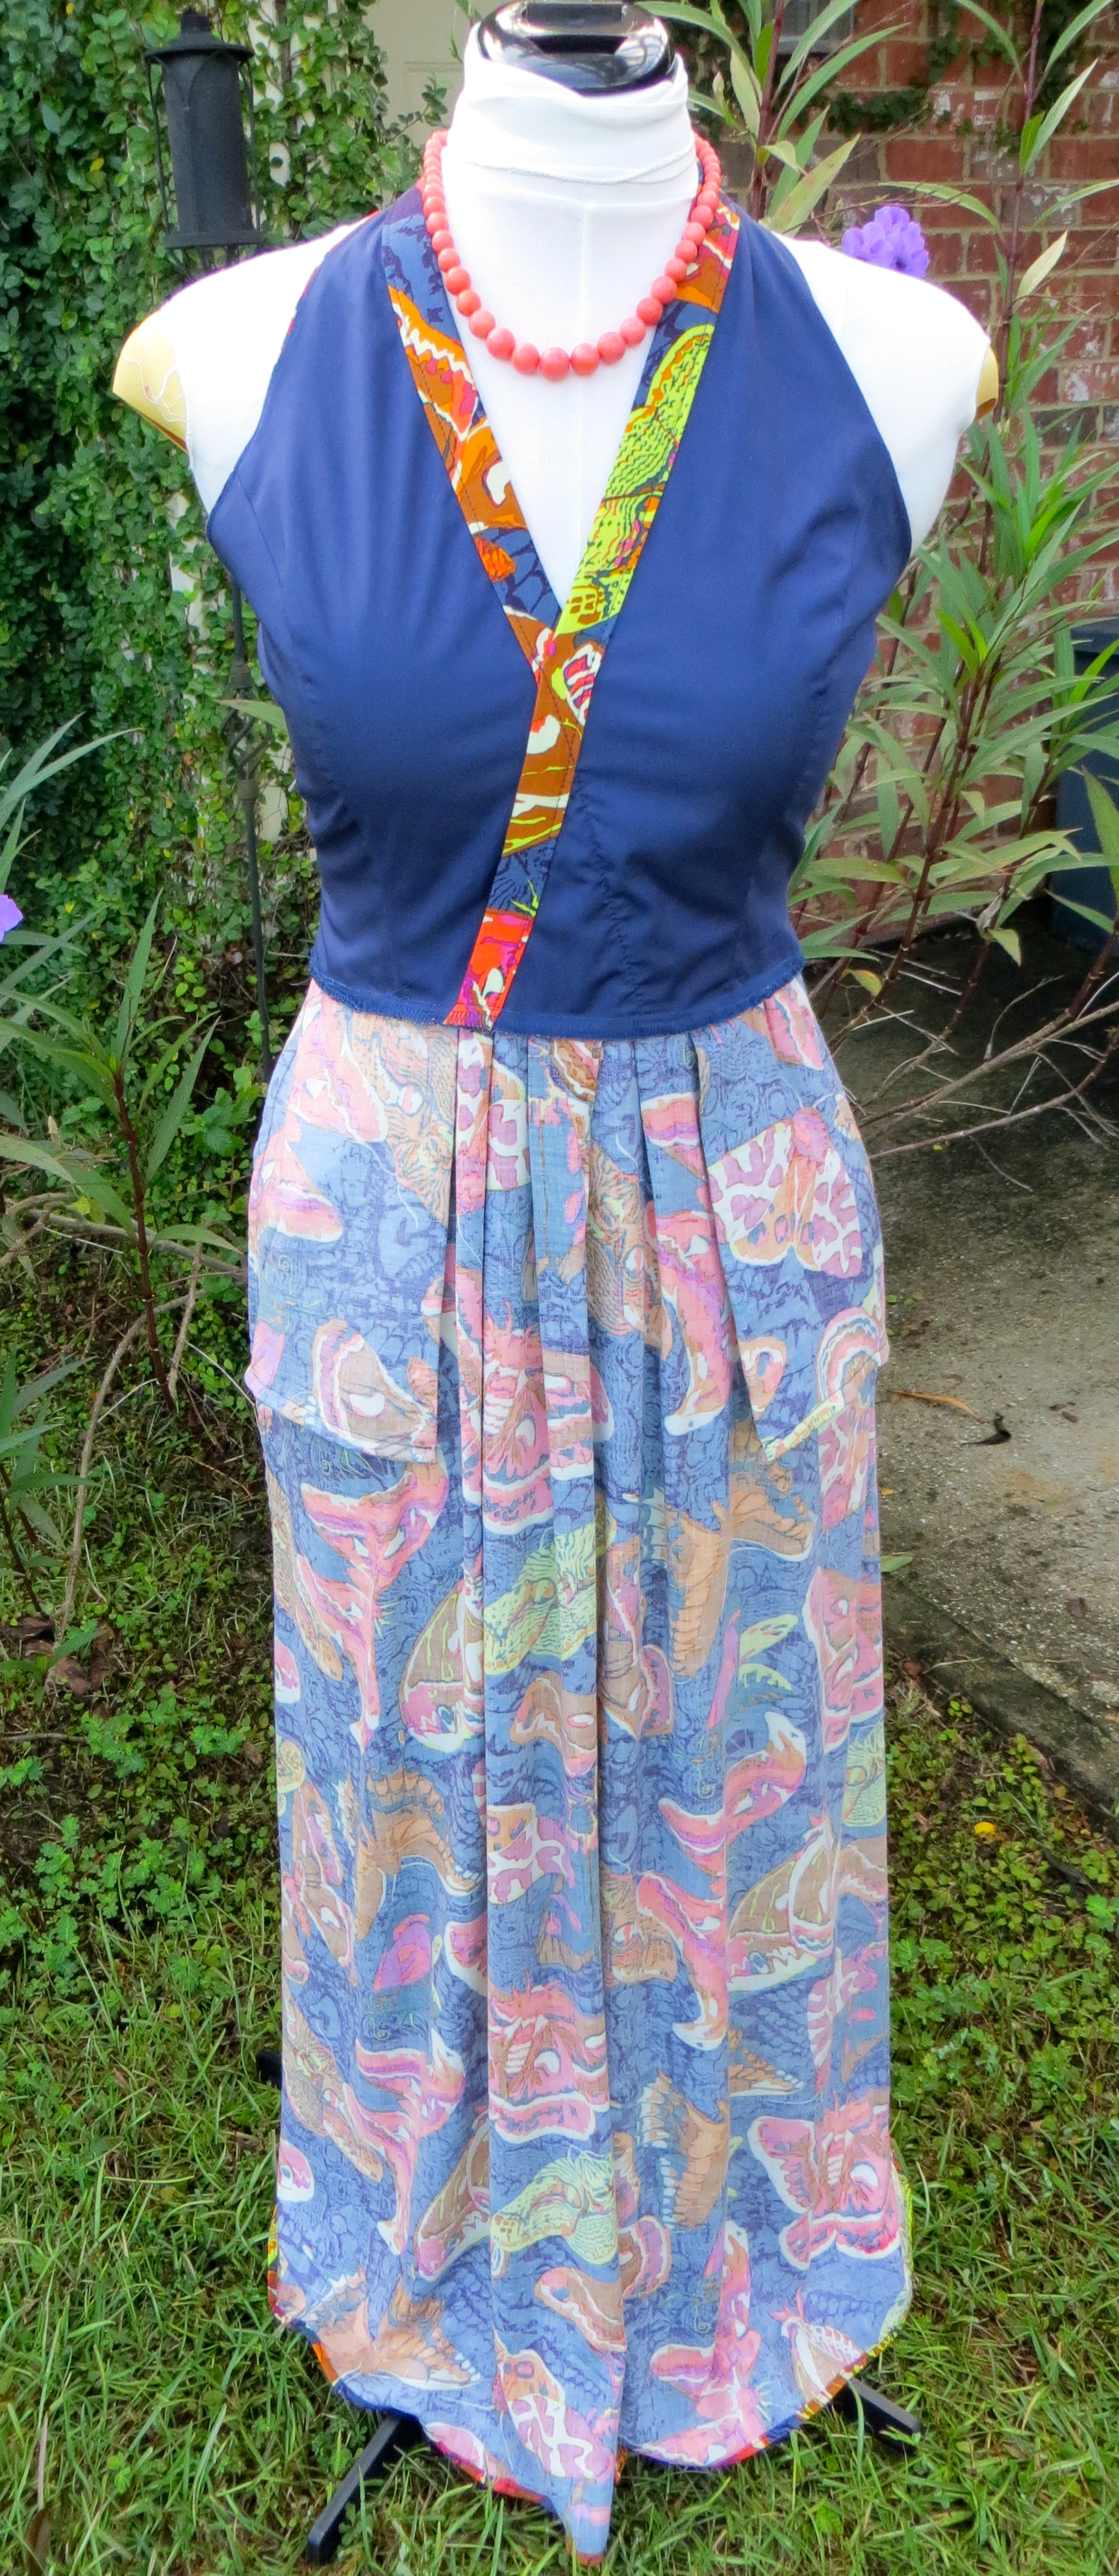
Let’s talk pattern first. I purchased Simplicity 1425 a while back. So long ago that I bought the wrong size pattern. Since I didn’t feel like going to Hancock for this project I decided to see if I could find another pattern to help me hack the over all look. Enter Simplicity 1913. The bodice of this dress has similar princess seams and neckline as well as offers a choice of sleeve options (a requirement of the Sewing Bee).

71aJp91MHhL._SY355_

So first up, I made a few standard adjustments to the bodice pieces — 1″ FBA and added 3/4″ to the shoulder width. Then I graded out the peplum pieces from S1425 to a size 14 to match my bodice pieces. Next, I made a muslin and checked the fit. I needed to lower the bust point 1″ and add 1/8″ of width under the arm at the side seam tapering to nothing at the waist. I also needed to readjust the pleat placement a little bit. Other than that, the fit was good.

IMG_3528

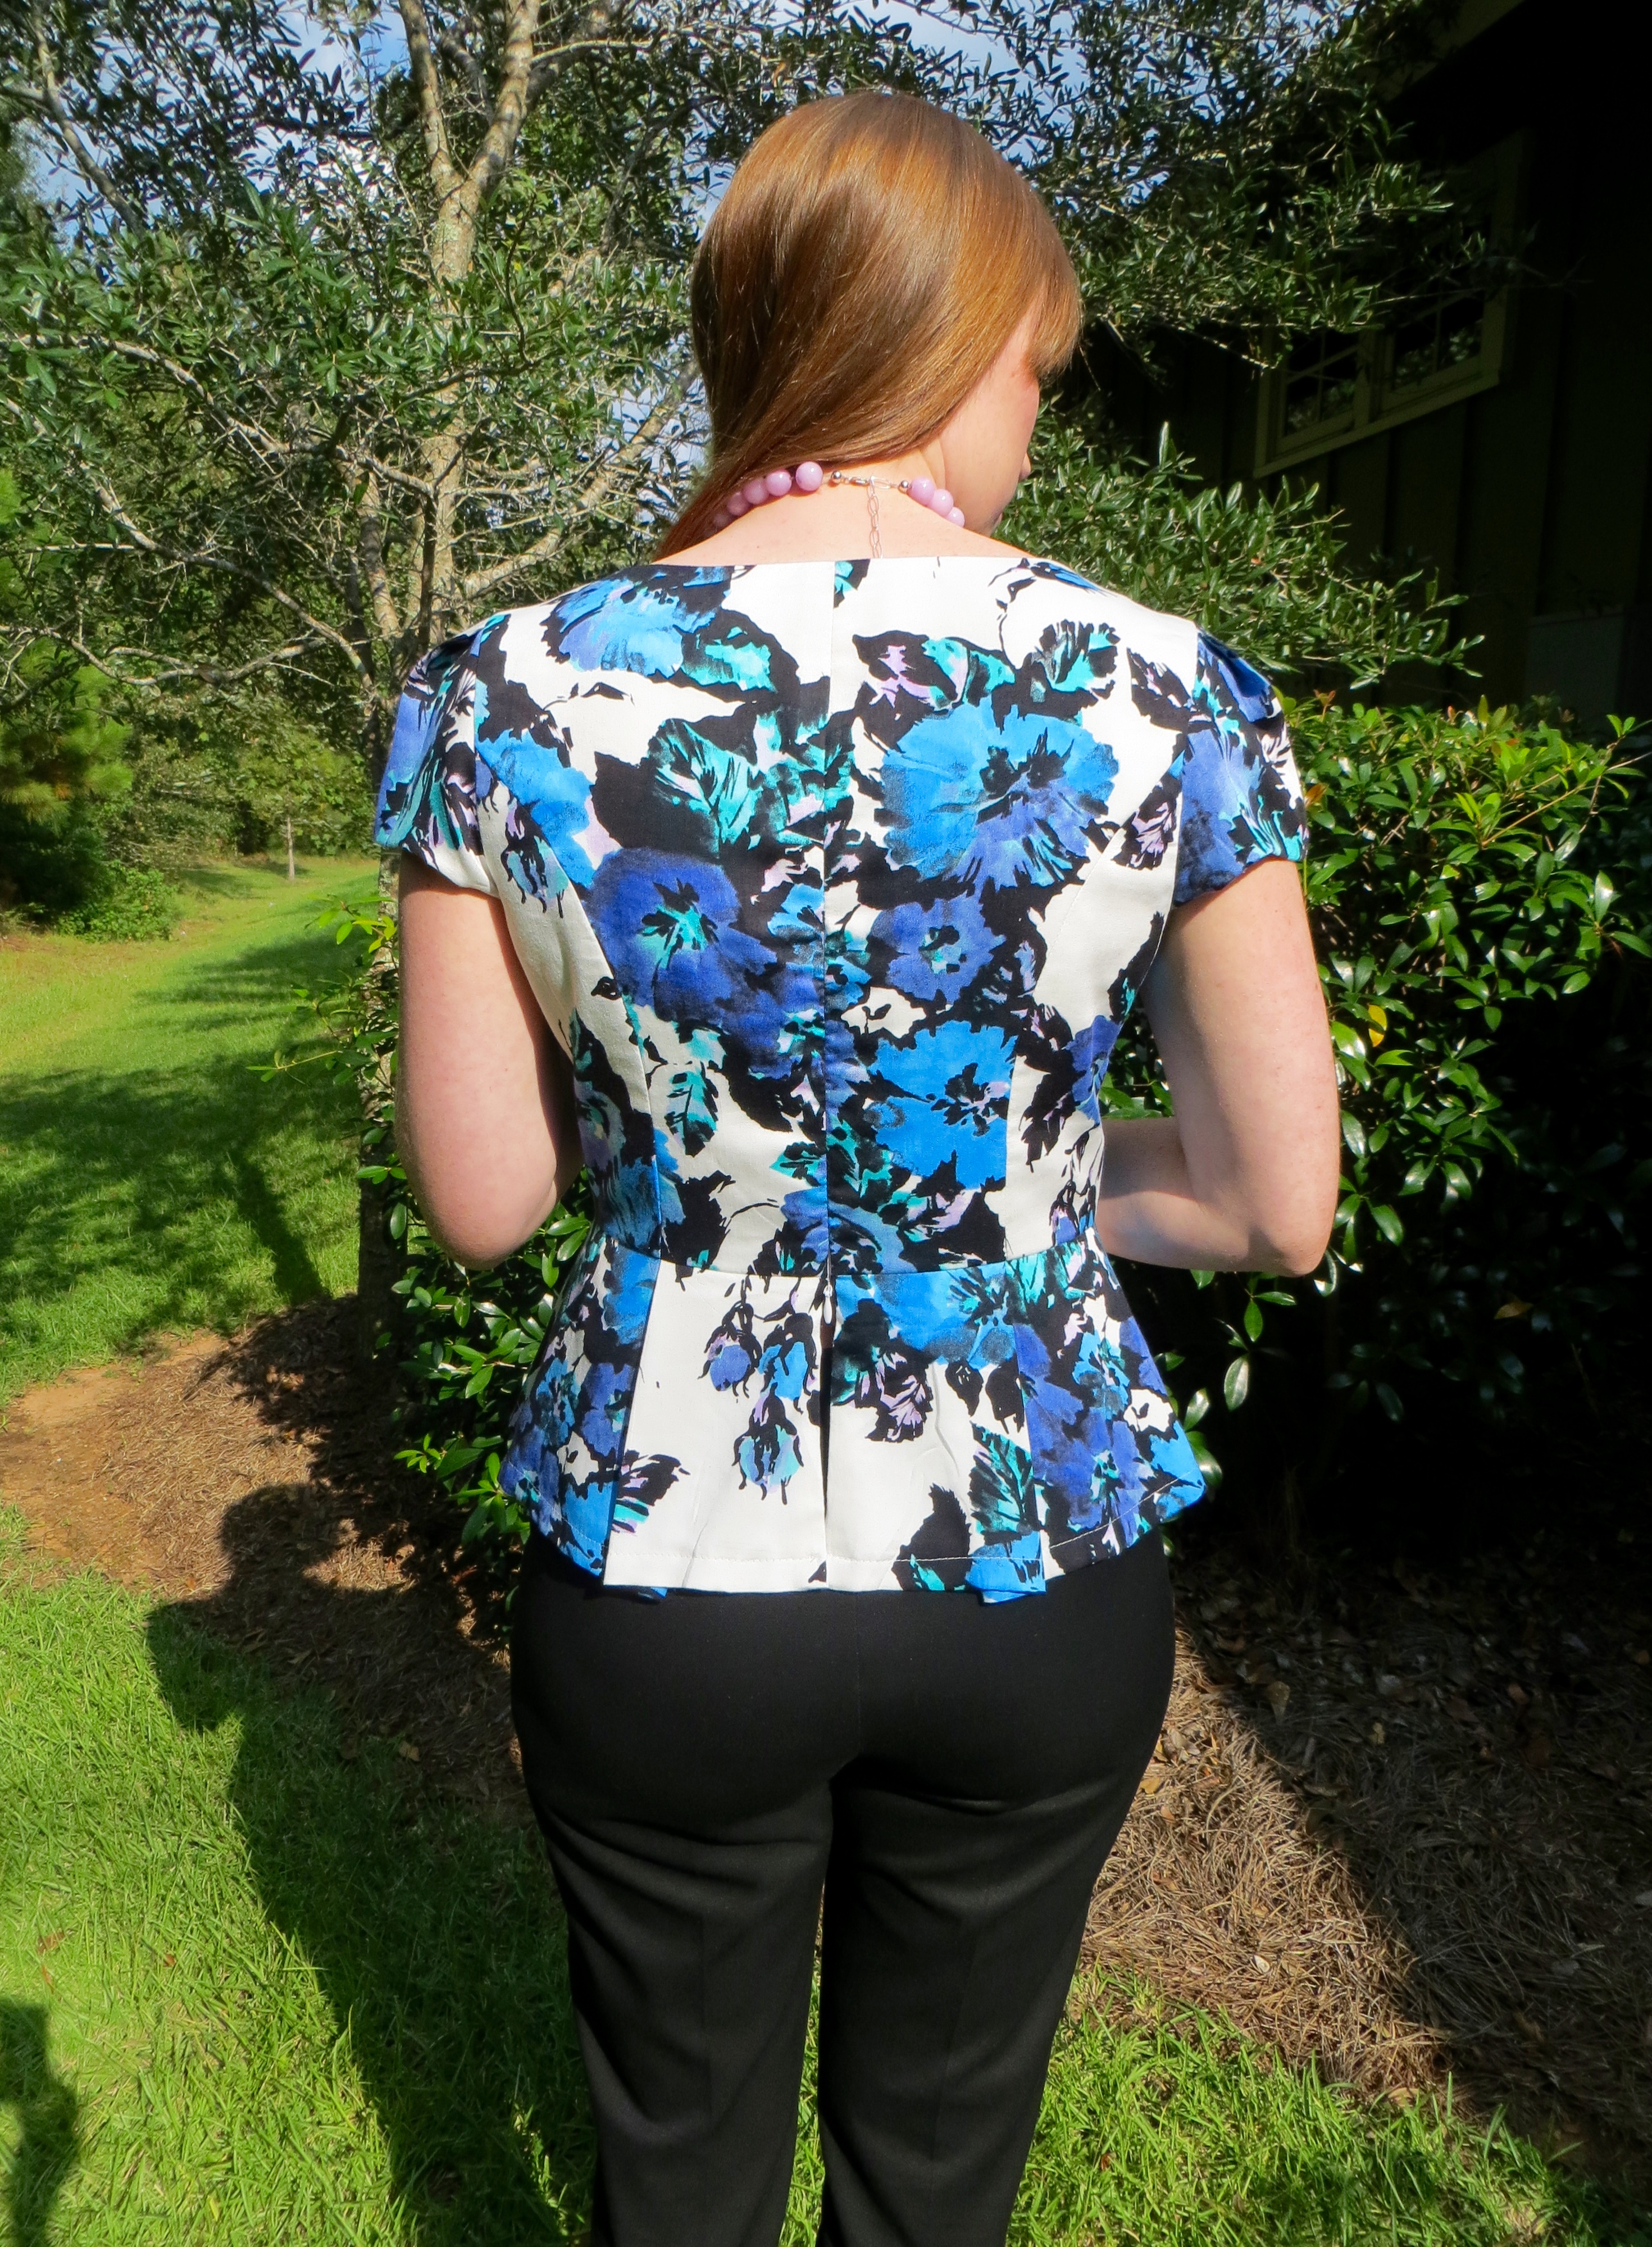
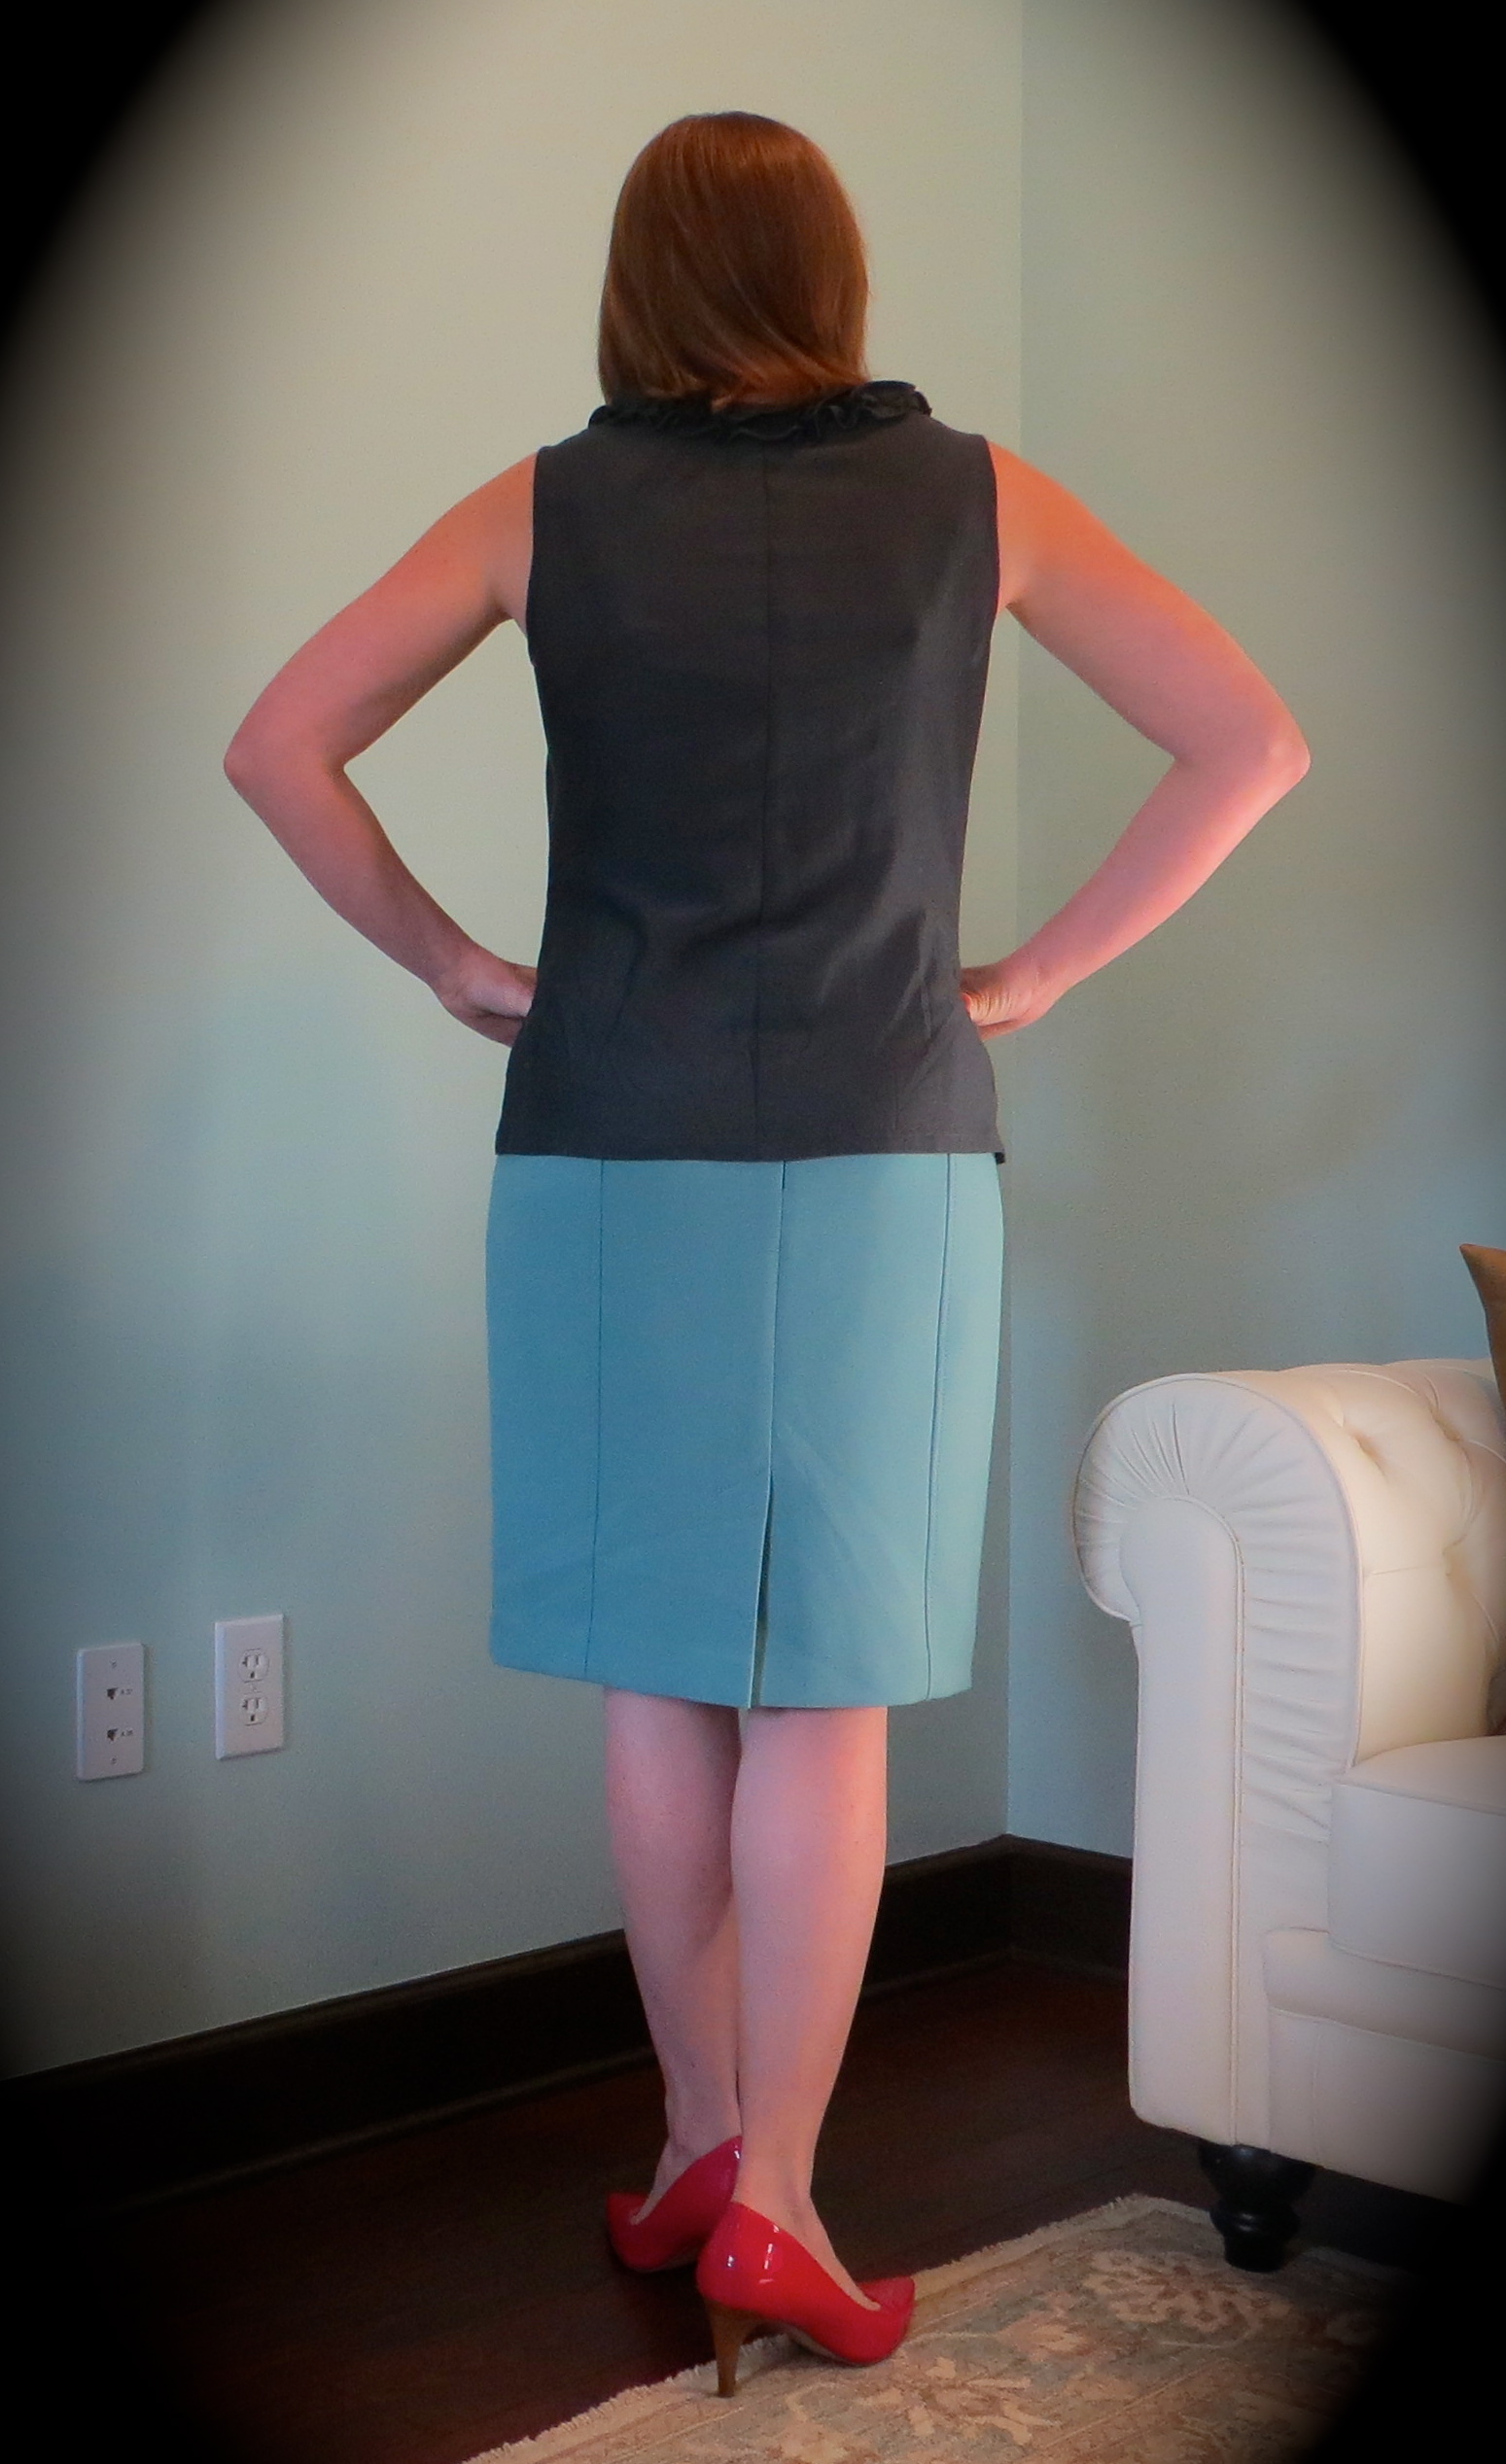
Next, I used my muslin to determine how I was going to get in and out of this top. The original pattern called for just three little buttons spaced down the back of the blouse. I don’t know about you, but I am not keen on the idea of exposing my entire back and bra to the world. So I contemplated using a full button placket, side zip, center back zip, etc. I finally decided that an upside down center back zipper would be best. I started the zipper at the waist seam and extended it up 7″ (it ends a little above my bra strap). This makes it easy to get on and off over my head but still keeps the zipper pull within easy reach when trying to operate the zipper.

IMG_3554

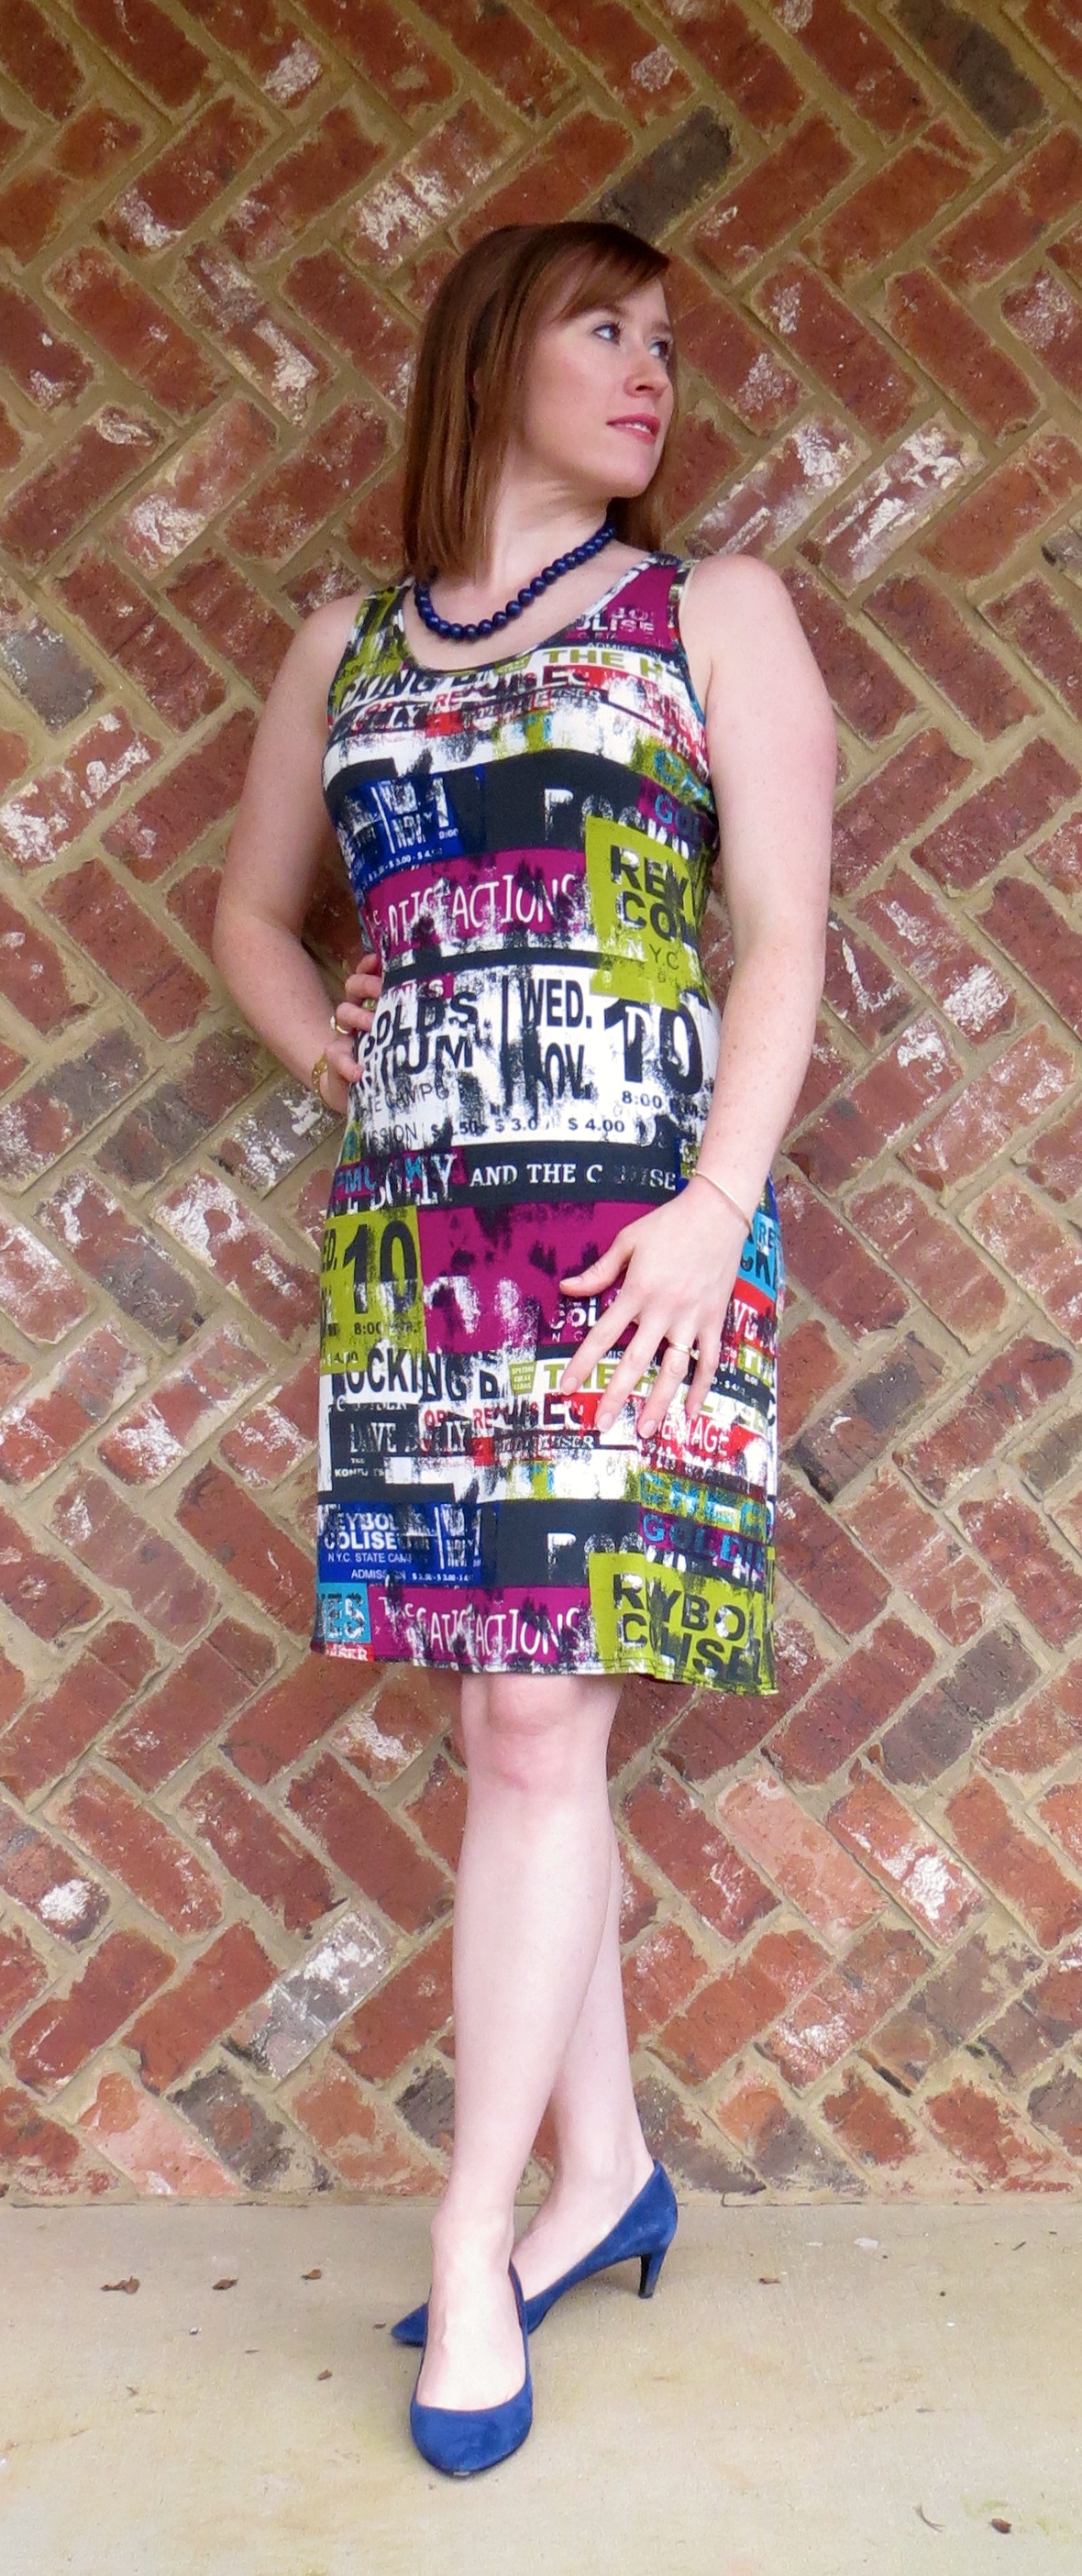
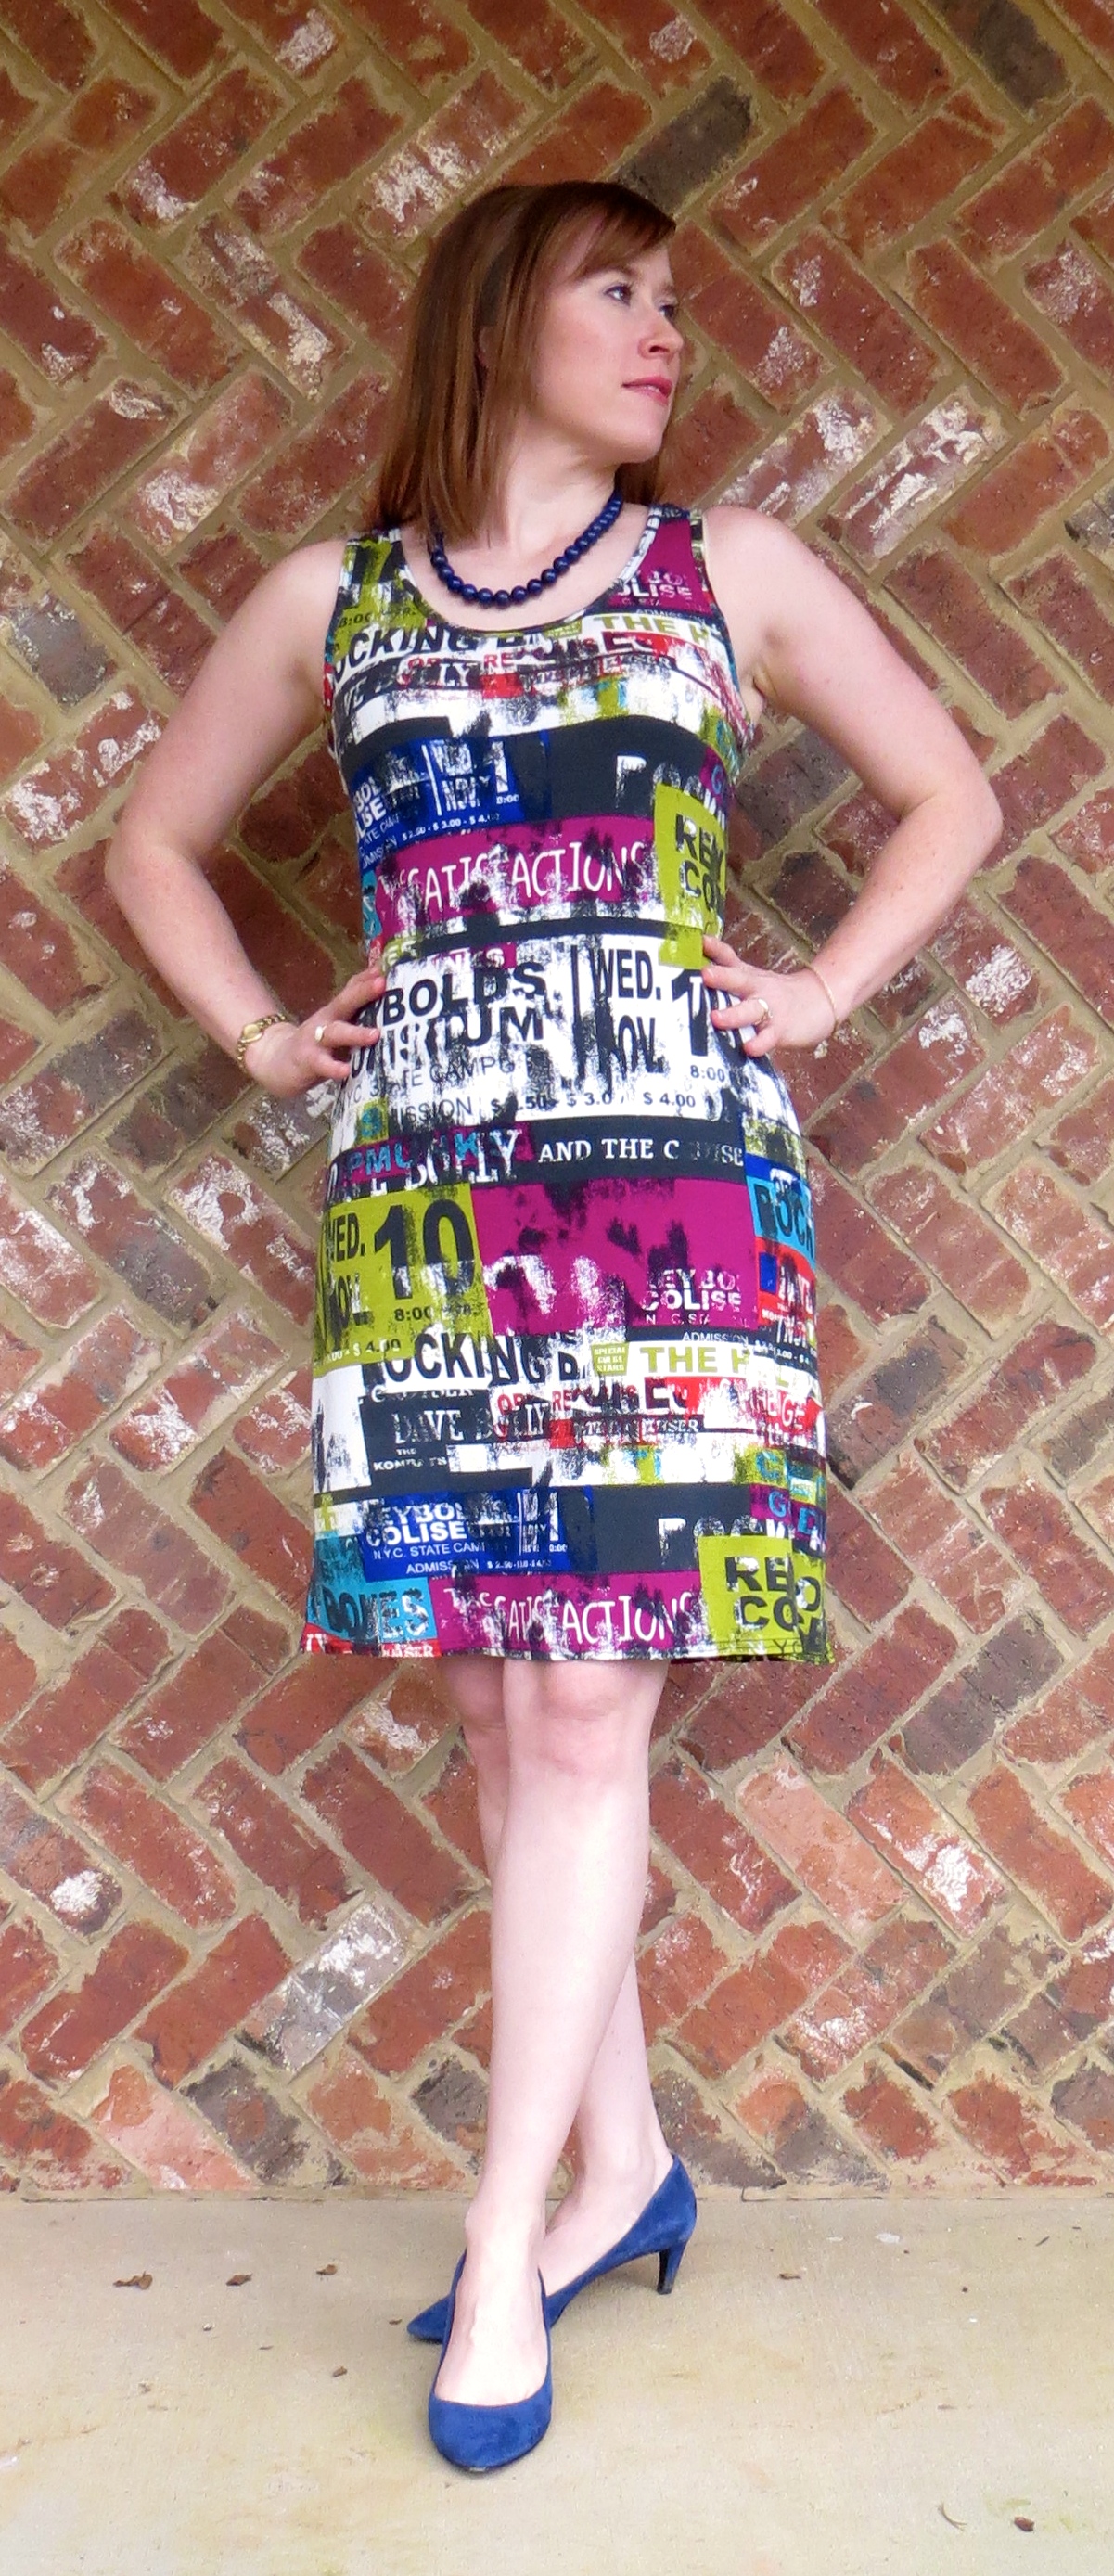
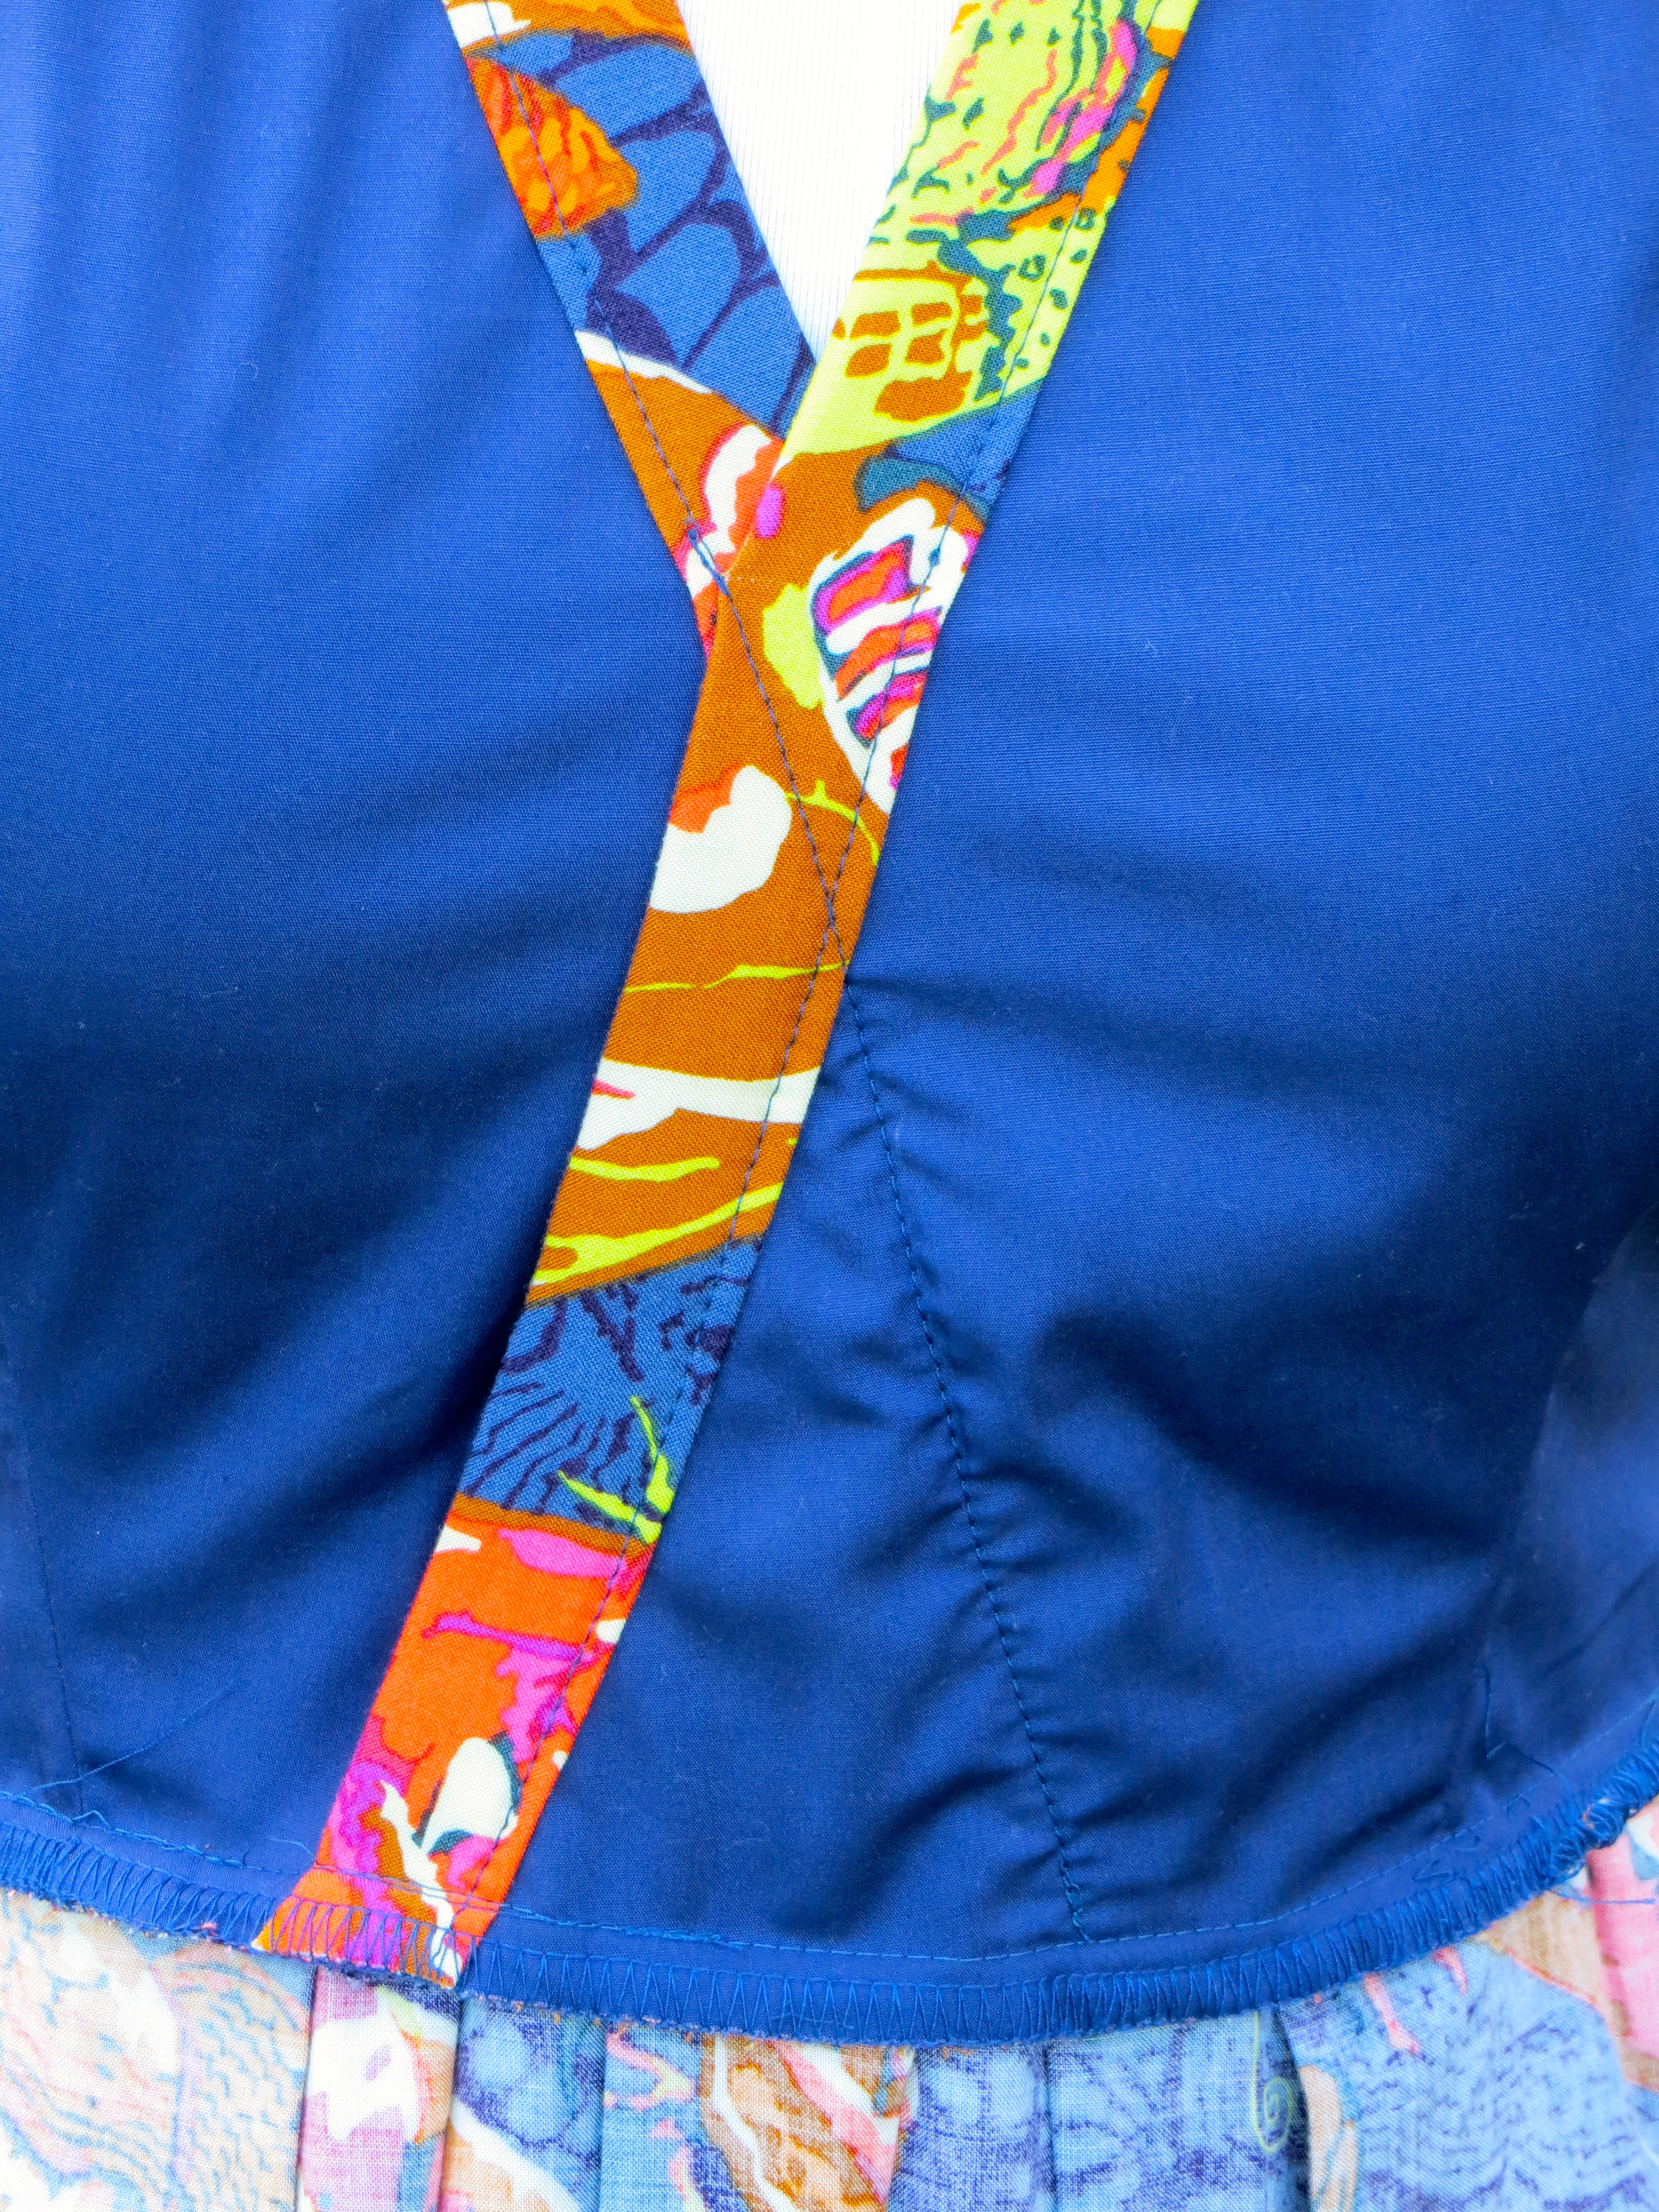
Finally, I made a few style changes from the original pattern. I cut a V neckline instead of the high round neckline because I felt like I needed to break up my floral fabric. I also added some pleats to the sleeves to echo the peplum pleats and to add a little more ease to the sleeve.

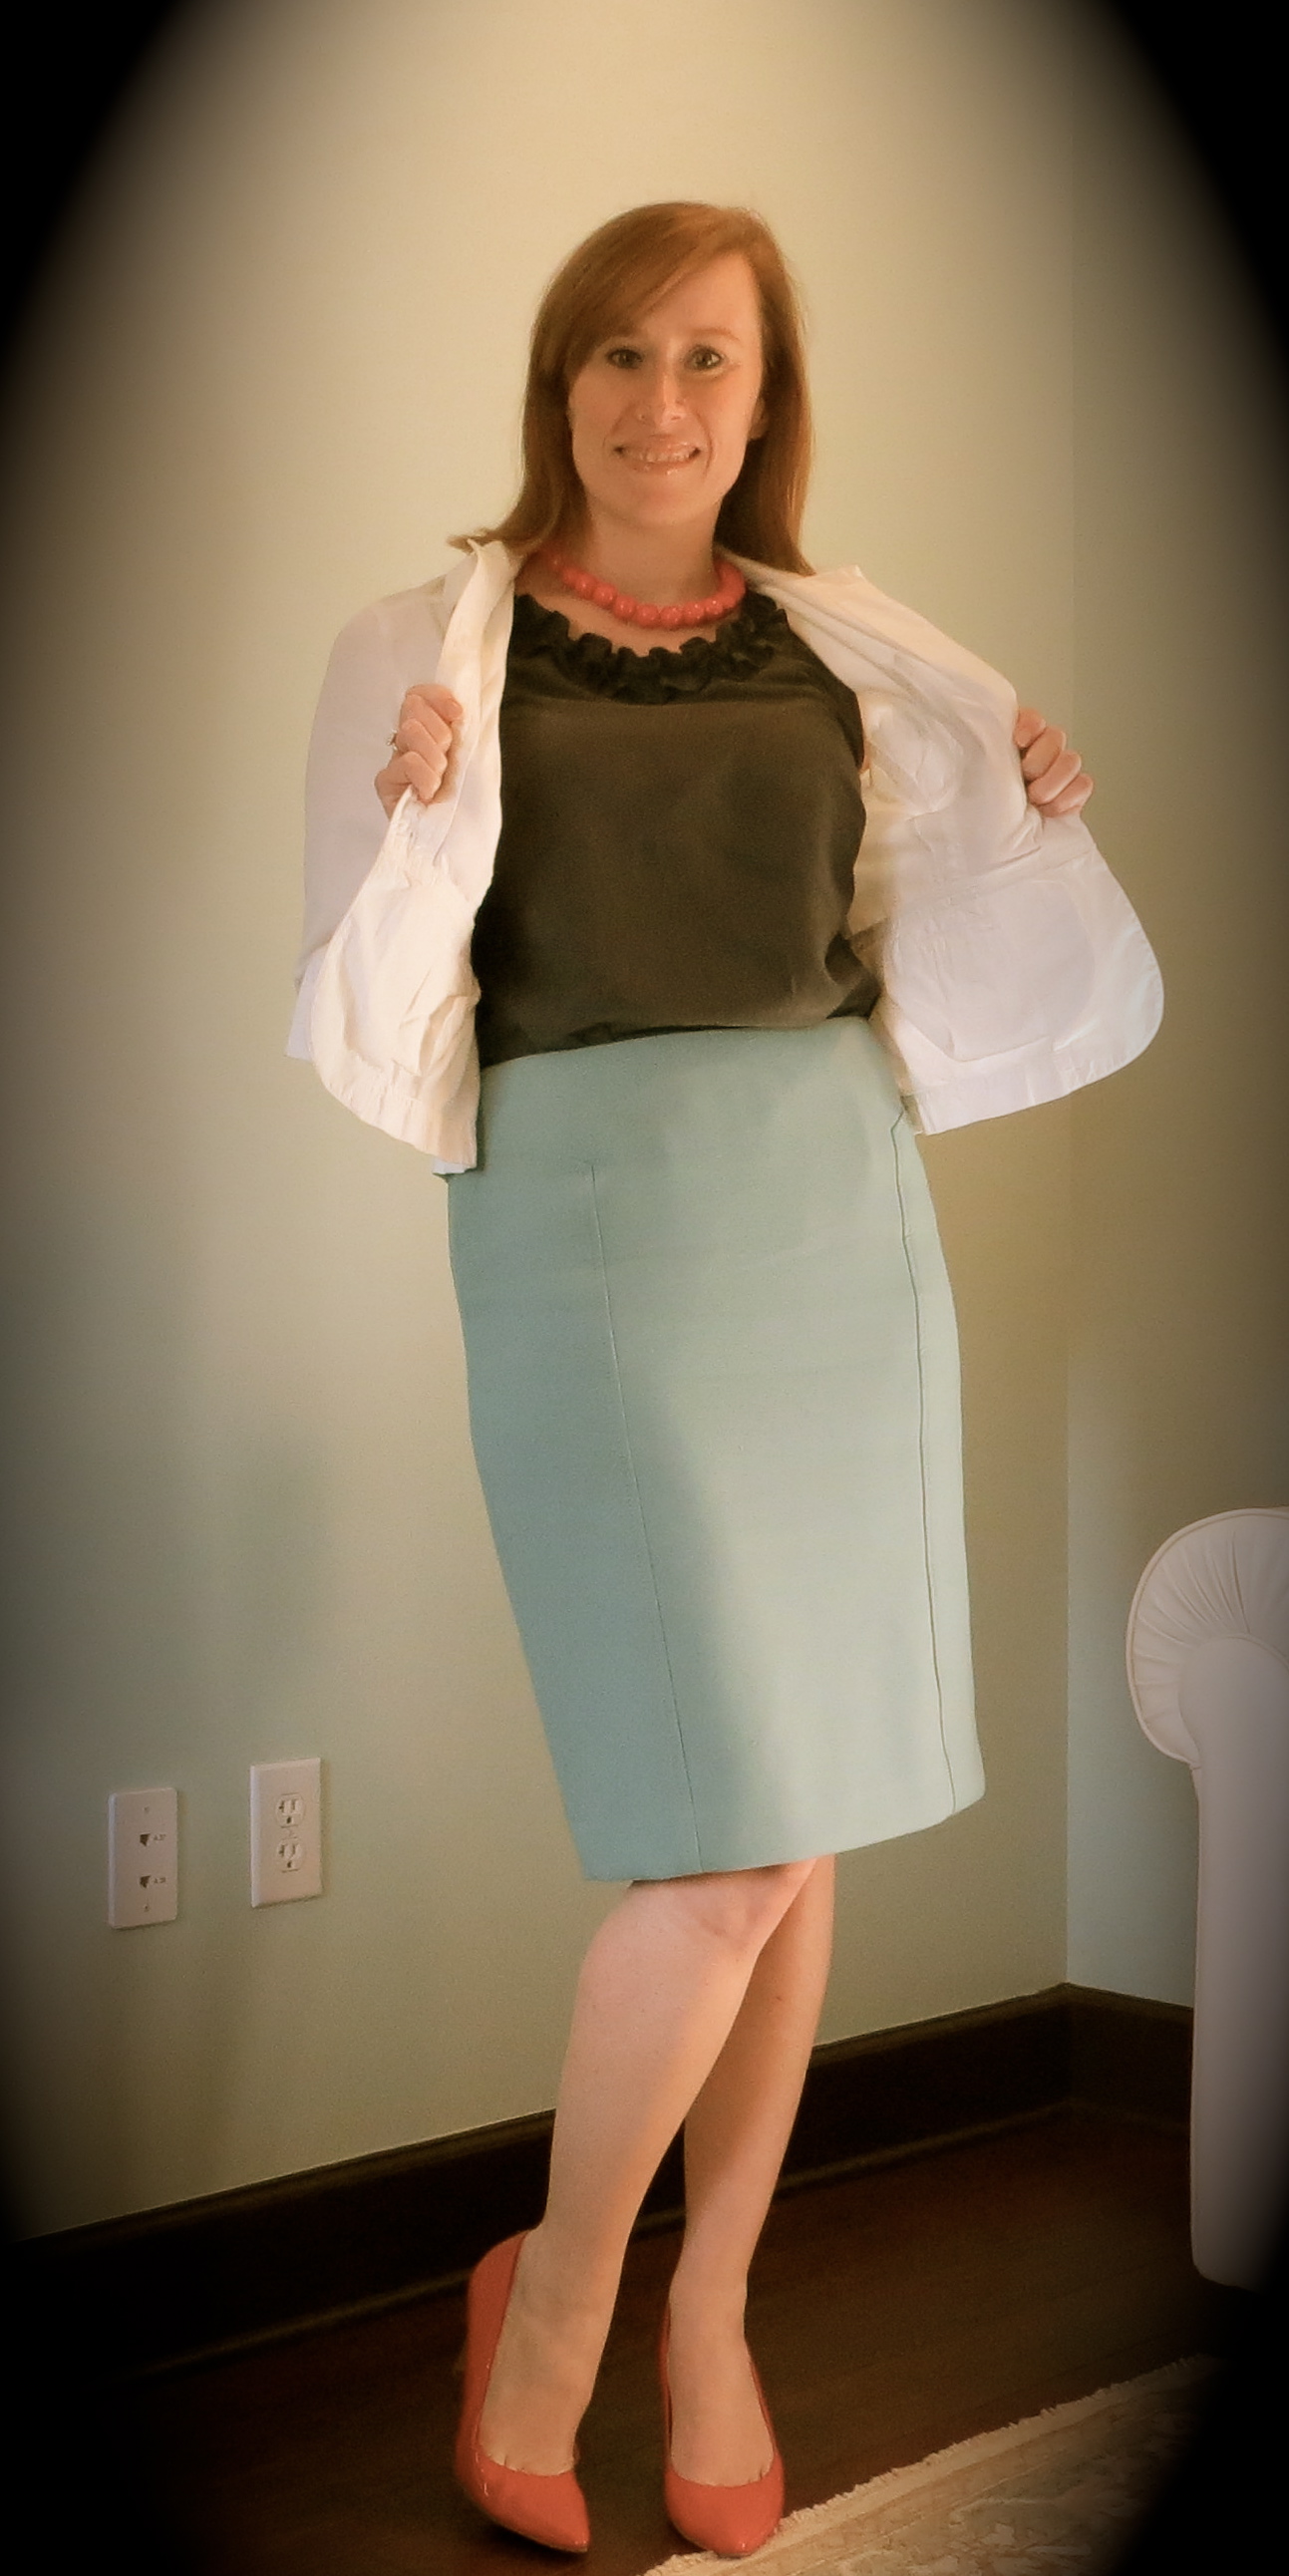
For my fabric I chose a rayon satin from Sawyer Brook (P. S. it’s now on sale!). It has the most luscious feel but is a little on the flimsy side so I decided to underline it with white cotton batiste which gave it the perfect hand. I lined the entire top in white rayon Bemberg. I love the colors in this top and I have a coordinating fabric picked out for the pencil skirt that I finally got the pattern worked out on.

IMG_3566

While sewing this top, I was methodical about grading, clipping, and pressing my seams and that was therapeutic for me. But I think the most rewarding part of sewing this blouse was the fact that I got it fully lined (even the peplum and sleeves), completely by machine. There was no hand sewing involved. I have always machined my lining to sleeveless blouses and dresses but my Google search was coming up empty on how to machine the armscye lining seam in a sleeved garment.

IMG_3568

But after sleeping on it and brainstorming about it while working on the other construction of the top, I figured out a way to do it very neatly and cleanly. I can’t wait to test my method out on something with a longer sleeve to see if it will still work. If it does, I will post a tutorial.

IMG_3544

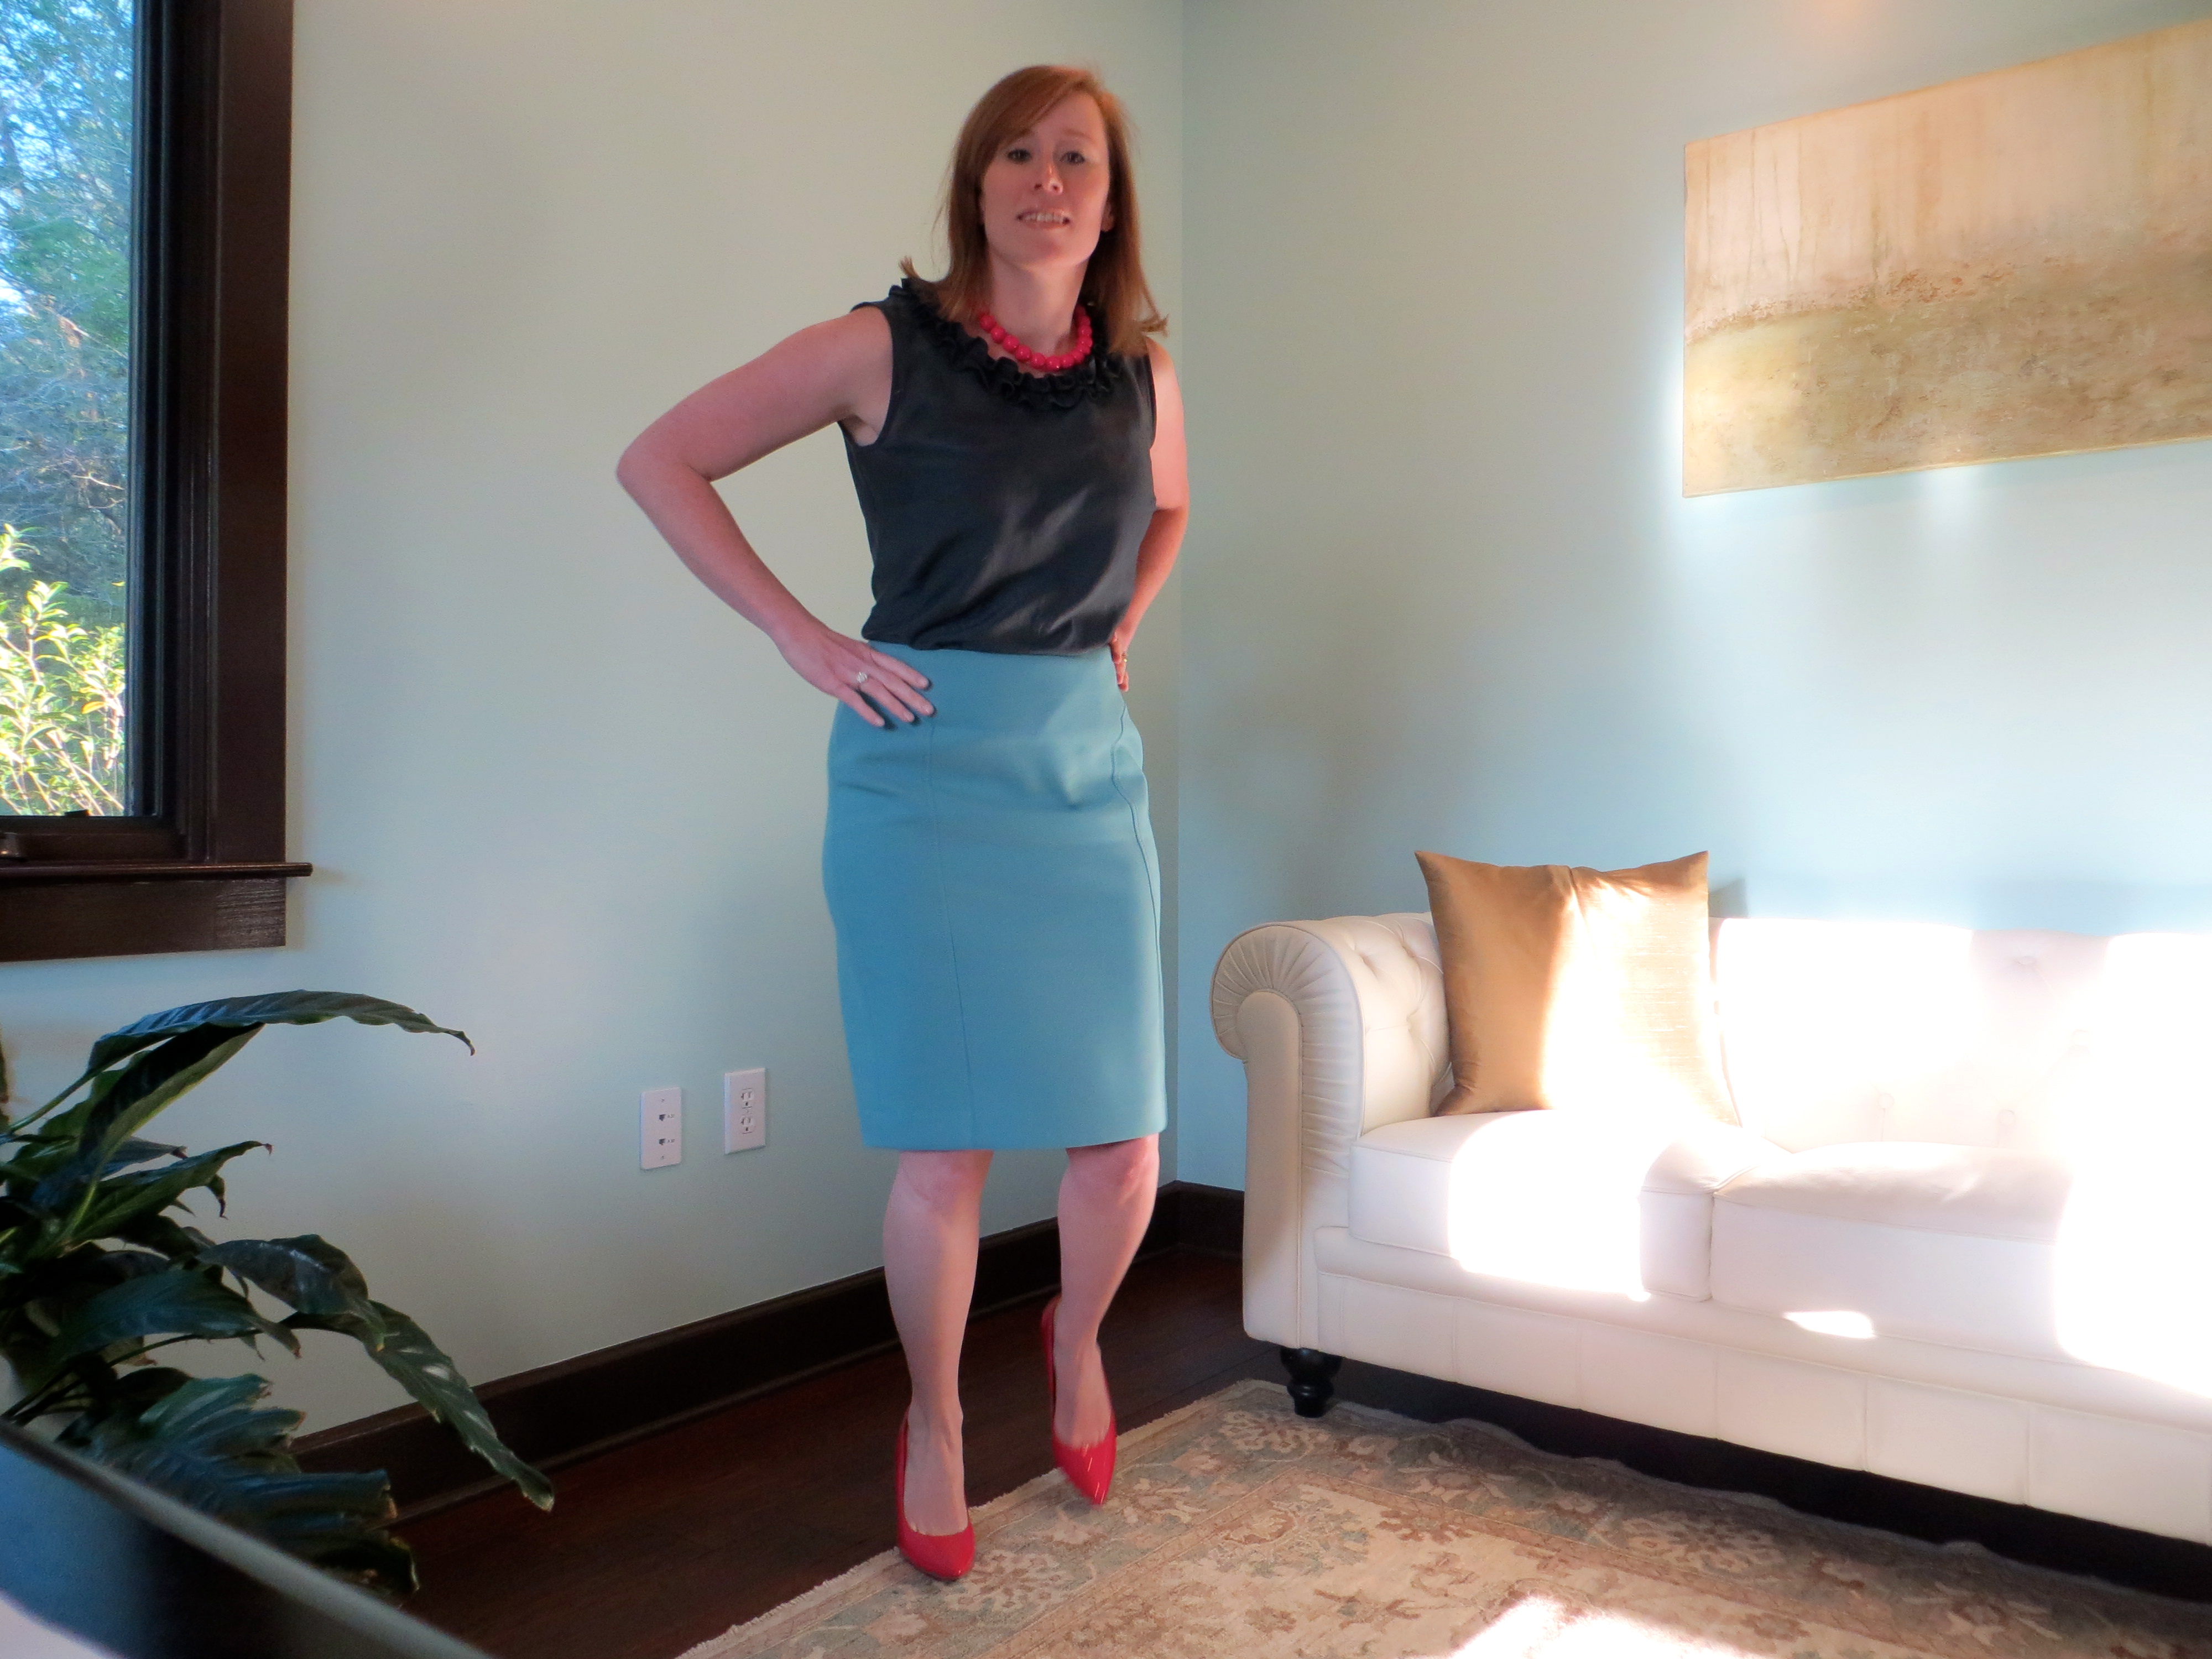
I am tickled pink with my top. I wore it to work today styled like the photos but I can also see myself wearing it with a black pencil skirt and heels or with jeans and booties.

Keep your fingers crossed that I will make it to the next round of the sewing bee. If I do, we’ll have a giveaway here to celebrate! 🙂

McCall’s 6559 Again — Poster City

2 Mar

IMG_2122

Hello, again! Are you shocked by my three posts in as many days? Can I just tell you what a backlog of things I have to share — both food and sewing related. But I digress…

This dress is the first installment in my “resort collection,” or the things I sewed up to go on a cruise at the beginning of February (a total of 5 things).

You have seen me in this pattern before but in the maxi length version.

images

I made only minor adjustments to this version beyond what I made in the last one — only widened the back armhole to normal instead of racer-style, raised the neckline 1″, and took another 1/2″ out for a swayback adjustment and added it back in over my derriere to keep the hem level. I also trimmed the seam allowances down to 1/4″ to make it easier to serge.

The fabric is an awesome rayon/lycra 4-way knit that I got from Emma One Sock a little while back — called “Poster City.” And this is your lucky day! She still has some in stock!!

IMG_2118

I constructed the entire thing on my serger, using a 4-thread overlock for the seams and my coverstitch function for the bands and hem. I used the elastic foot to insert elastic into the neckline for stability. This could also be used for the shoulder seam if sleeves were included.

IMG_2126

I don’t guess there’s much else to say about this one other than it won’t be my last!

IMG_2119

Flirty Skirt — McCall’s 6706

1 Mar

IMG_2106

Hi, friends! I am finally sharing a completed sewing project with you. It feels like it has been ages!! Want to know the best part? It’s been about 6 months since I made this but since I wore it to work recently, I decided to snap some pictures and share it with you.

IMG_2096

Be warned, though, this photo shoot took place after 10 hours at work and seeing 40+ patients. You will see wrinkles, stringy hair, and a tired face. And since I conducted this photo shoot with the timer on my camera, my head or feet may be missing in some photos 🙂

M6706

This skirt is made from McCall’s 6706, a great little pattern for a quick and satisfying project. I have not become a huge fan of the hi-low hems yet, but I thought this skirt made in some free fabric would be a great way to test it out. The fabric was a remnant given to me when I went fabric shopping in NYC. It came from Elliot Berman and I am guessing it is rayon challis. It was easy to sew and has a light, floaty feel.

IMG_2103

As for the pattern, it was very easy to sew up and required minimal fitting. All you have to do is select your size based off the finished waist measurement printed on the tissue. I looked for the size that was closest to my waist +1″ of ease. Since it is so full in the hips, adjustments there will likely not be necessary.

IMG_2111

I installed an invisible zipper and finished the waistband facing by stitching in the ditch from the right side. The hem is a narrow 1/4″ machine hem using this tutorial. No hand stitching on this baby!

IMG_2114

My only regret is that I should have used a sturdier interfacing in the waistband.

IMG_2116

And that I don’t look good from behind in this hi-low hem skirt 😦

Oh well. Live and learn!

Simplicity 1610 — The Moth Halter Maxi

4 Sep

IMG_1909


Happy National Sewing Month, friends! I hope everyone is enjoying the end of summer (or winter for you South of the Equator folks). Life has been busy in these parts with back to school (both at home and at the office). But don’t worry — I have found a little time for sewing and have a small backlog of projects to share with you.

First up, though, I had to share this maxi dress made from Anna Maria Horner Sinister Swarm rayon challis in tangerine. I ordered this from Hart’s Fabric a few months ago, and since they are hosting Sew Your Hart Out September, I thought this would be a great first post for the month.


IMG_1912


I have become a huge fan of rayon challis lately. It is soft and silky but not as slippery as silk. It isn’t quite as easy to work with as cotton but it is heaps better than charmeuse! You’ll hear more about my recent charmeuse shenanigans soon.

I love the large, bold print of this fabric. The background is a combination of two shades of blue and it is covered in huge moths in bright colors. It has a little bit of an 80s feel to me and right now I think this is the closest I am going to get to all the psychedelic colors I am seeing everywhere. I think I am still a bit too scarred by all those horrible 80s fashions we had to wear as children!


IMG_1914


For the pattern, I wanted something that would showcase the large-scale of the print, so I chose a maxi dress. I had been wanting to make up Simplicity 1610 because of the halter bodice with princess seams, so it was a perfect match. The skirt is shaped by several pleats along the waistline and this worked well with the soft drape of the challis.


1610


Instead of a traditional FBA, I decided to cut the shoulder and bust according to my full bust size and then just add some length to the front bodice. I did this because my upper bust and full bust measurements are less than 2″ difference (although I am a D cup) and commercial patterns recommend the B cup based on this. But since I know that commercial patterns made without adjustments are always too short in the bodice, I added length to account for that.

I have to say that I am not pleased with the results. The princess seam lines do not cross my full bust point and the neckline on this dress is a little boobalicious. And despite that, there is excess fabric above the bust. I guess I am just shaped weirdly and I should listen to my instincts when making pattern mods (i.e. note to self — you always need to do a FBA on commercial patterns).


IMG_1916


The pattern calls for a lapped centered back zip so I obliged and handpicked the overlap while I was getting a pedicure. It’s not my best work but it definitely gets the job done! I still have to attach the hook and eye at the top.


IMG_1917


I did stray from the pattern specifications on the neck strap closure. The pattern calls for buttons and fabric loops but because I cut my straps a little long and didn’t feel like altering them after they were sewn, I just hammered a snap onto the end of each snap to secure the halter. I think it turned out just fine.


IMG_1921


The pattern calls for lining the bodice only so I used some navy cotton batiste and serged the waistline seam to finish it. I used French seams to finish the pocket bags and skirt side seams. I finished the dress with a narrow 1/4″ machine stitched hem.


IMG_1922


I reinforced the zipper opening with some fusible interfacing — I just wish I had applied it to the wrong side of the bodice pieces so it wouldn’t be so visible. That’s not a deal breaker, though. The pattern also calls for running elastic along the upper edge of the back bodice. I did this step but did cut the elastic pieces shorter than directed because I find Big 4 patterns always leave the elastic too loose. If I ever make this dress again, I will redraft the bodice pieces so elastic is not necessary as I don’t really like the look and it doesn’t really help hold the dress up.


IMG_1929


I stitched the surplice wrap front so that it wouldn’t gape open and you can see the stitching from the wrong side (but not the right side). I also eased some clear elastic into the surplice seams to help them hug my body (it is hidden under the bands).


IMG_1927


Finally, you can see the dress on me but all I have are a few shotty iPhone pics. I am definitely pleased with the overall result of this dress. While there are a few things I would do differently next time, I will be wearing this dress often.


IMG_2096


For this “photo shoot” I paired the dress with a wide coral belt, my Cole Haan clutch, Reef flops, and my Kluster coral necklace.


IMG_2101

Perfect Shell — Simplicity 2599

2 Apr

IMG_1439


Here’s my most recently finished sewing project — and I actually just finished it this week!  This is Simplicity 2599, a great basic blouse pattern that includes sleeveless and short-sleeved versions as well as several different trim options.  It also features different pattern pieces for B, C, and D bust cups so you don’t have to do any adjustments for that department.  The blouse is quick and easy to put together once you work out any fitting issues.  And really, there can’t be too many fitting issues when there is just one main piece for the front and one main piece for the back 🙂


IMG_1436


As you can see, the neck in this version (E) features a cute ruffle which is created by gathering a single layer of bias cut fabric and attaching it to the neckline through the blouse and facing.  This technique is great because it keeps the facing from flipping out and because the facing adds an extra layer of sturdiness to anchor the ruffle.


IMG_1446


In this photo you can see what the shirt looks like untucked.  Please excuse the wrinkles since I had it tucked into my skirt all day.  I had to tweak the pattern to achieve the waist definition you see here.  When I first sewed up the shirt, it was a complete box.  I ended up grading the waist down two sizes from the size that I sewed in the bust and hips.  This makes it a little hard to get on over my head since I also omitted the button opening at the neck but it is possible.


IMG_1450


From the back view you can see that I did an awesome swayback adjustment — well, pretend like you can :).  It is wrinkly from being tucked in but before I made my swayback adjustment, the back of this shirt pooled like crazy.  Now it glides over my junk-trunk much more gracefully.  For finishing, the seams are all French seams and the armholes are finished with self-bias binding.


IMG_1456


And just to show you one of my favorite flowers and why this is my favorite time of the year.  Azaleas make me so happy.  These are some of the small azalea bushes outside my office.  When I left work yesterday afternoon, they were so full of blooms and the sunshine was so pretty, I just had to snap a picture for you.  Unfortunately azaleas grow really slowly so it will be many years before these bushes reach the massive size of the plants that I so admire in our surrounding neighborhoods, but at least my little babies make up for it in quality!


IMG_1433


And one last shot to show you the outtakes from my first attempt at self-photography.  Apparently 10 seconds isn’t as long as I thought it was.  Or we can pretend I was doing exercises in my skirt and heels.  In front of the camera.  I’m still amazed that I even figured out how to turn on the timer on my camera without having to consult the manual…


IMG_1430

Jacket–Loft
Blouse–Made by Me!
Skirt–Halogen from Nordstrom
Shoes–Cole Haan
Necklace–Tessyla on Etsy


Sewaholic Lonsdale

31 Mar

I’m still here!  Don’t worry I haven’t fallen off the planet!!  I have been traveling, sewing, and mostly working since we spoke last.  I have a cute sundress to show you today.  We are definitely getting into sundress-wearing weather here in the Deep South and the Sewaholic Lonsdale is the perfect pairing.  I stalked this pattern for a while before I actually convinced myself to buy it, but once I got it, I sewed it up almost immediately.  I love the cute knot at the front and the way the straps loop through the back and then tie.  I also like the breezy half (?) circle skirt.  Although I don’t think this halter style is the most flattering on my body, that’s not going to stop me from wearing my new cute dress or making this pattern up again 🙂

IMG_1399

For this version, I used a new rayon challis I picked up at Hart’s Fabric when I was in California last month.  I know I still have to show you all my fabrics and I promise I haven’t forgotten.  The fabric was easy to work with and it is wonderful to wear.  It does wrinkle a bit as you can see in the photos but it is not that bad.
IMG_1394

If you are not familiar with this pattern, the bodice is self-lined but the skirt is unlined.  I strayed from the pattern and decided to line the skirt as well.  I used a yellow batiste.  Because I sewed the batiste to the rayon all the way down the center back seam when inserting the zipper, I could not separate the two layers for hemming without doing some unpicking.  Since that is one of my least favorite tasks, I left it as it was and just hemmed the two layers together and the skirt lining became more of an underlining.  The downside is that my flowy rayon is now a bit more structured but the plus side is that I had a hidden layer to anchor my handstitched blind hem to.  This minor blooper is not going to prevent me from wearing this dress at all and I have already enjoyed wearing it on vacation, to church, and all day to our local arts and crafts fair (where the photos were taken).

IMG_1396

I love the consistent sizing of Sewaholic patterns.  I sewed my usual size 8 and did my usual 1″ full bust adjustment.  This FBA was a bit different since I didn’t want a waist or bust dart in the final dress.  I rotated the bust dart up to the knot gathers and the waist dart fullness was rotated to the center front seam.  You can see details of how this is done on the Sewaholic website’s tutorial.

IMG_1400

The only other alteration I made was to hem the skirt just above knee-length as I feel this is more flattering on me.

IMG_1401

If you are looking for an easy-to-sew and very wearable summer dress pattern, you should definitely consider the Lonsdale.  I am thinking about making the maxi version for the next go-around.  What do you think?