Hot Patterns 1196 | Metropolitan Urban Gypsy Blouse | Or a Tibi Knock-Off

11 Sep

katrina-2

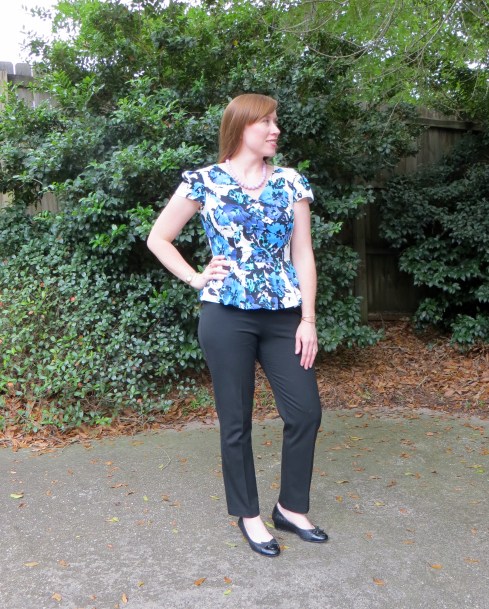
Hi, friends! I’m back with a new top, a new haircut, and some fancy professional photos for you! I’ve had this Hot Patterns Metropolitan Gypsy blouse sewn up for several months but never could coordinate photos of it. When I scheduled a photo shoot for my stepson’s casual senior (!!!) portraits, I had the photographer capture a few of my top to use on the blog. She did such a great job! Any locals looking for great wedding/family/baby/senior photographs, check out Haley Budlong.

katrina-7

I was inspired by Erica Bunker’s version of this top so I just blatantly copied hers — with her permission, of course :-). This pattern is also a pretty accurate ringer for the Tibi off-the-shoulders blouse that retails for around $300. I checked one of these out in Nordstrom last month and I’m happy to report that it wasn’t constructed any better than mine.

katrina-4

I cut a straight size 12 but probably could have gone with the 10. I omitted the shelf bra, although I may try it on the next version to see if it helps to keep the elastic down and prevent it from riding up on my shoulders.

katrina-8

That being said, this top fits way better in the shoulders than any RTW off-the-shoudlers tops I have because I was able to select the right amount of elastic for my broad shoulders — 27″ to be exact, 3/4 of my shoulder circumference.

katrina-10

I opted for the tie detail on the sleeves and next time may try the elasticated sleeve opening. I used my narrow hem foot to finish the sleeves edges and just put a dab of Fray Chek at the very tips as that was a tricky place to get neat (thanks for that suggestion, Erica!)

katrina-9

My fabric was a lovely cotton French dot jacquard from Emma One Sock. I was able to get this shirt out of less than 2 yards, much less than the pattern’s recommended 2 3/4 yards.

katrina-3

The pattern sewed up quickly in a single Saturday and the directions were brief but sufficient. I would definitely make this again and have a gorgeous green snake print silk set aside for just such an endeavor.

katrina-6

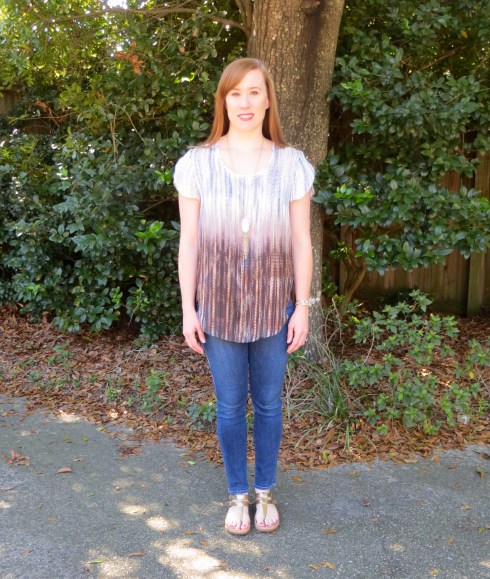
For this photo shoot, I kept my look simple and paired my top with my crisp white slim jeans, a Kendra Scott necklace and bracelet, and some tan platform wedges. What do you think about off-the-shoulders tops? Would you wear or sew one?

katrina-1

Thirsty Thursday — Classic Lime Margarita

24 Mar

IMG_3635

Well, hello there! How have you been? Things have been great in my neck of the woods even though I haven’t checked in in more than a few months to let you know. Sewing has been a little less frequent because of the sewing room situation but I have made a bathing suit coverup and drawstring shoe bag recently. I will try to share some pics soon if I can bring myself to model the coverup 😉

We’ve also been cooking more frequently but it’s been with the help of some meal kit services. So far we’ve tried out Plated and Blue Apron and we’re liking Plated better for our family of 3 adults — actually, the 17 year old eats more like 2 adults!

We took a little vacation last month and spent two weeks aboard the Celebrity Summit. I used a gallon of sunscreen but had the best time lounging on the deck or on the shores of countless Southern Caribbean beaches. I still dream about it every night and keep hoping I will have another opportunity to go back soon.

But at some point we’ve got to get the new house built. We are getting closer. I think we’ve settled on a contractor and the plans are done and the budget seems pretty finalized. Maybe by the end of the year I can have something to show you (fingers crossed until they’re blue!).

I guess that’s about it for catching up. How about a delicious libation to make up for my extended absence? Who doesn’t love a good classic margarita? Especially one without any artificial flavor or dyes? And, I’m getting it to you waaaaay before Cinco de Mayo so you will have plenty of time to prepare. You may also want to check out some Guacamole, Fish Tacos, or Pina Coladas. I also have some other margarita recipes here and here.

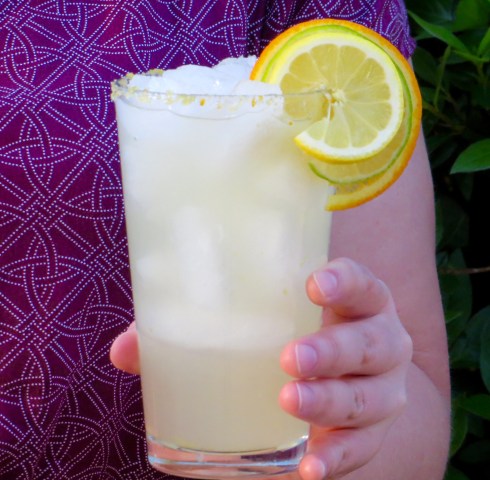
I think you will love this margarita recipe as much as I do because it has just the right balance of sweet, sour, and tequila. And the salt rim is great, too, because it has a little sugar and citrus zest to offset the harsh salinity of the salt.

Give it a try soon and let me know what you think of my concoction!

IMG_3634

Thanks to my beautiful friend, Jessica, for being the margarita model and taste tester!

Classic Lime Margaritas

  • 2 cups water
  • 1 cup sugar
  • 1 cup freshly squeezed lime juice
  • 1/2 cup freshly squeezed lemon juice
  • 1/2 cup freshly squeezed orange juice

Heat the water and sugar in the microwave on high until the sugar is dissolved, stirring every 1-2 minutes. Cool to room temperature then stir in the juices. Refrigerate until ready to use.

For salt rim:

  • 2 tablespoons kosher salt
  • 2 tablespoons sugar
  • zest of 1/2 lime
  • zest of 1/2 lemon
  • zest of 1/2 orange

Combine all ingredients in food processor or blender and pulse until well combined.

To make one margarita:

  • 2 oz silver tequila (I prefer 100% blue agave)
  • 1 oz orange liqueur (I usually use Cointreau or Grand Marnier)
  • 3 oz homemade margarita mix (recipe above)
  • salt rim (recipe above)
  • crushed ice

Fill a small saucer with a little bit of tequila. Fill another small saucer with a little bit of the salt mix. Prepare your glass by dipping the rim in the tequila then dipping it in the salt mix. Fill the glass with crushed ice.

Fill a cocktail shaker with ice and pour in tequila, orange liqueur, and margarita mix. Shake vigorously until the shaker is frosty. Strain the margarita over the ice in the prepared glass. Enjoy responsibly.


Giveaway Winner(s)!

4 Nov
IMG_3550

A Hometown Sunset

Howdy, friends! Sorry for going off the grid for the last month. I’m back with a quick post to let you know who won the giveaway I hosted on this post. Since it has taken me so long to get around to writing (travel and life happens, you know), I have decided to declare two winners. I am happy to announce that Rachel from Lavender Lane is the winner of the Gertie patterns and Kristy C. who posted on Facebook will be receiving copies of two of my favorite patterns. Ladies, please contact me (email address is over on the side bar or just leave a comment with your email address on this post) and I will get them out straight away!

I hope to be back soon to share some of my recent sewing and knitting adventures with you. I hope your creative pursuits are making you happy!

In-House Patterns | Chelsea Blouse and a Giveaway

30 Sep

Hi, friends! Happy Hump Day! Just a quick reminder that today is your last chance to enter my giveaway for two Butterick patterns. To enter, leave a comment on my last post here or my Facebook page and tell me your favorite fabric and pattern to work with. I will close the giveaway tonight and announce the winner in a few days.

IMG_3580

A little while back I shared with you my first version of the In-House Patterns Chelsea Blouse. My love for In-House Patterns is no secret on this blog. In my first version of the top, I told you the shoulders were a little wide, admittedly my fault because I added extra width to the pattern and cut a larger size than was probably needed. I knew I needed to give the pattern a second chance so here we are — take two.

IMG_3582

I sized down to a medium for this version and didn’t add any width to the shoulders. I think this time it is nearly perfect. I have concluded that one of my shoulders is wider than the other so I could probably alter my shirts for that, but on something this loosely fitting, I am not going to bother for now.

IMG_3590

I sewed this up in a Theory silk charmeuse earthtone ombre panel that I purchased from Emma One Sock. The fabric is gorgeous in person and of course feels wonderful against the skin. I cut it out in a single layer so I could place the pattern like I wanted it. My only gripe with sewing it was with the rolled hem foot (again) and you can see how the hemline is a little wavy. I find the rolled hem foot makes my bias edges stretch out some. Is this operator error or just a problem with that hemming method?

IMG_3585

Either way, I will still be wearing my top as we transition from hot hot to less hot here in the Deep South. It pairs well with many of my bottom pieces and I can’t wait until it is actually cool enough to pull out some boots and booties!

IMG_3575

Maria Denmark Rachel Wrap Dress

22 Sep

Howdy, friends! I hope your week is off to a good start. I have a completed sewing project to share with you today but first I want to give you an update to let you know that my entry in the Pattern Review Sewing Bee was selected to move on to the next round! You can see my entry for Round 2 here and I will get a post about it up soon (but I have to do some traveling for work first).

I promised a giveaway if I moved on, so here it is. I have two Butterick patterns — 6019 and 5895 — both Patterns by Gertie. You can see my rendition of 6019 here. If you would like to be considered for the patterns, just leave a comment on this post below or on my Susie Homemaker, MD Facebook page. I will keep the contest open until September 30 at midnight CST. In your comment, tell me your favorite pattern and your favorite fabric to work with — they don’t necessarily have to go together. The contest is open to anyone 18 years of age and older worldwide. I will announce the winner within a few days after the close of the contest.

IMG_3610

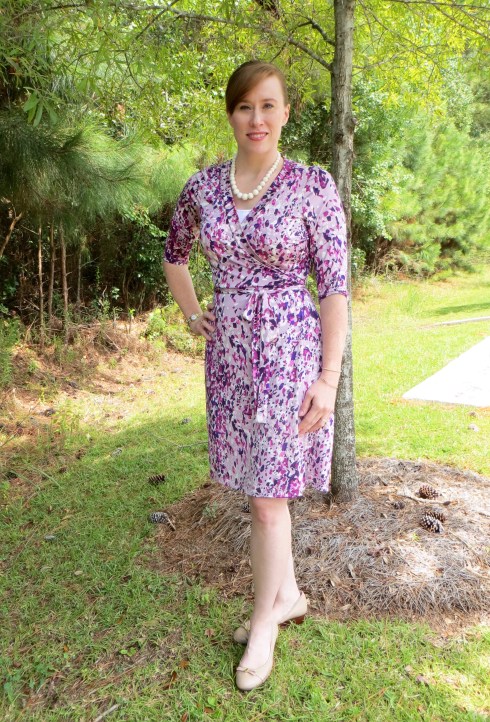
Now on to this garment! I have always been a fan of wrap dresses. I think many of us love the iconic style first brought to popularity by Diane von Furstenberg several decades ago. There is something universally flattering about the forgiving knit dress with a surplice neckline and cinched wrapped waist ties. I have long searched for the perfect pattern or RTW wrap dress. I have even tried on and purchased authentic DVF dresses only to find that they are anything but perfect for my body. They don’t come anywhere near close to covering my bust which isn’t conducive to a flattering look.

405

I have mocked up the popular modern Vogue 8379 but found the skirt to be too full. I have several other wrap style patterns in my stash but just haven’t had the gumption to sew any of them up. And a lot of cute indie wrap patterns have popped up on the market, too, but I have managed to resist. Until the Maria Denmark Rachel Wrap Dress came along. I am not sure why this dress won me over but it did and in a very quick fashion. I went from purchasing to printing to taping to cutting to sewing to wearing all in a matter of two days. That is unheard of in my world!

IMG_3614

I chose an inexpensive FabricMart ITY jersey for this first version just in case it was a flop. Thankfully it wasn’t even though my stepson’s first reaction was to tell me that it looked like a nightgown…

For my pattern modifications, I made an FBA since my biggest beef with wrap dresses is the gape-age in the bust. I created a side dart for a better fit and the added waist ease I removed at the side seam to keep the pattern true along the waist (there is no waistline so you have to cut the pattern in two to do the FBA then reattach the top and bottom).

IMG_3612

There is a FBA tutorial on Maria Denmark’s blog specifically for this pattern but I don’t recommend using it. She gives you a method that results in all dart intake being transferred to a waistline seam but since this dress doesn’t have a waistline seam, you end up with a bodice that won’t match back up with the skirt after the FBA. So take my advice, if you want to do an FBA on this dress, do the usual Palmer-Plescht method, not the one on Maria’s website.

My one other gripe with the pattern (well, other than the fact that it doesn’t include seam allowance, GRRRRR!!!), is that the shoulders are cut really narrow. I added 1″ to get to what you see in these photos and I could probably stand to add another 3/4″ to get the seam to fall where it should. My shoulders aren’t that broad!

IMG_3608

But overall I do love this dress. I love the figure skimming skirt and the neckline-hugging wide neckbands. I also love that it only has 4 pattern pieces so it’s easy to cut out and assemble.

I can definitely see myself making this dress up again after I tweak the pattern a little bit more. My goal is to modify it so that a camisole won’t be necessary for modesty at work. Let’s see if I can get the neckline just right! 🙂

Pattern Review Sewing Bee Round 1 | 80s Inspired Floral Peplum Blouse

7 Sep

IMG_3552

Howdy, friends! I hope you had a nice Labor Day. While I had to go in to the office for a while today, I did get lots of sewing in this weekend. Have you heard about the Sewing Bee going on over at Pattern Review? I didn’t think I would enter but then at the last minute, I decided I would move one of my to-sew objects up the queue and enter it in the contest.

1425

Let’s talk pattern first. I purchased Simplicity 1425 a while back. So long ago that I bought the wrong size pattern. Since I didn’t feel like going to Hancock for this project I decided to see if I could find another pattern to help me hack the over all look. Enter Simplicity 1913. The bodice of this dress has similar princess seams and neckline as well as offers a choice of sleeve options (a requirement of the Sewing Bee).

71aJp91MHhL._SY355_

So first up, I made a few standard adjustments to the bodice pieces — 1″ FBA and added 3/4″ to the shoulder width. Then I graded out the peplum pieces from S1425 to a size 14 to match my bodice pieces. Next, I made a muslin and checked the fit. I needed to lower the bust point 1″ and add 1/8″ of width under the arm at the side seam tapering to nothing at the waist. I also needed to readjust the pleat placement a little bit. Other than that, the fit was good.

IMG_3528

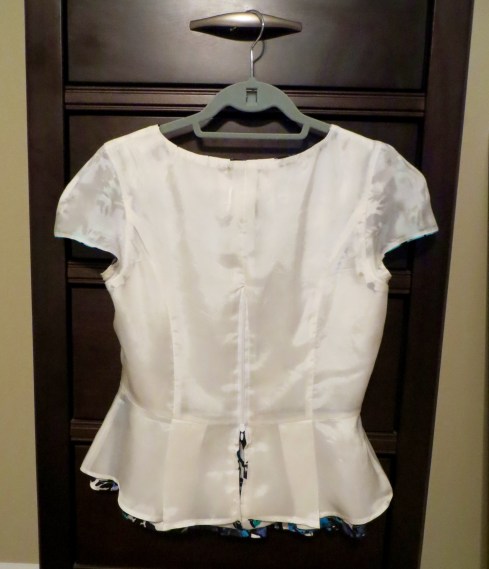
Next, I used my muslin to determine how I was going to get in and out of this top. The original pattern called for just three little buttons spaced down the back of the blouse. I don’t know about you, but I am not keen on the idea of exposing my entire back and bra to the world. So I contemplated using a full button placket, side zip, center back zip, etc. I finally decided that an upside down center back zipper would be best. I started the zipper at the waist seam and extended it up 7″ (it ends a little above my bra strap). This makes it easy to get on and off over my head but still keeps the zipper pull within easy reach when trying to operate the zipper.

IMG_3554

Finally, I made a few style changes from the original pattern. I cut a V neckline instead of the high round neckline because I felt like I needed to break up my floral fabric. I also added some pleats to the sleeves to echo the peplum pleats and to add a little more ease to the sleeve.

For my fabric I chose a rayon satin from Sawyer Brook (P. S. it’s now on sale!). It has the most luscious feel but is a little on the flimsy side so I decided to underline it with white cotton batiste which gave it the perfect hand. I lined the entire top in white rayon Bemberg. I love the colors in this top and I have a coordinating fabric picked out for the pencil skirt that I finally got the pattern worked out on.

IMG_3566

While sewing this top, I was methodical about grading, clipping, and pressing my seams and that was therapeutic for me. But I think the most rewarding part of sewing this blouse was the fact that I got it fully lined (even the peplum and sleeves), completely by machine. There was no hand sewing involved. I have always machined my lining to sleeveless blouses and dresses but my Google search was coming up empty on how to machine the armscye lining seam in a sleeved garment.

IMG_3568

But after sleeping on it and brainstorming about it while working on the other construction of the top, I figured out a way to do it very neatly and cleanly. I can’t wait to test my method out on something with a longer sleeve to see if it will still work. If it does, I will post a tutorial.

IMG_3544

I am tickled pink with my top. I wore it to work today styled like the photos but I can also see myself wearing it with a black pencil skirt and heels or with jeans and booties.

Keep your fingers crossed that I will make it to the next round of the sewing bee. If I do, we’ll have a giveaway here to celebrate! 🙂

Kirsten Kimono Tee HiLo Tunic Hack

19 Aug

IMG_3499

Howdy, folks! I hope you’re having a good Hump Day. Life is busy in these parts with back to school so sewing and knitting has been happening in waves around here. I have been on a mission to finish some knitting UFOs and I am pleased to report some nice progress in that department. I finished my Aiken pullover by Andi Satterlund (c. late 2014) last night and now just need to block it and I am down to the last sleeve on my Hi-Fi Pullover by Ruth Garcia Alcantud (c. late 2013). I find it easier to pull out knitting UFOs than sewing UFOs. What about you?

So for your viewing pleasure today I have another hack on the Kirsten Kimono Tee, a free pattern by Maria Denmark. You may remember my first blogged version here which involved combining a sequined knit fabric with a regular knit.

IMG_3501

That wrinkle is just from movement — it isn’t a dart.

For this version, I was trying to replicate a friend’s top that I liked so I altered the side seams and hemline to give the top a more relaxed fit and a high-low hem. My friend was sweet enough to send me measurements from her shirt so I was able to use that information to decide how much to add to the side seams and how much difference to have between the center front and center back hem. I also lengthened the sleeves some. I think my top turned out similar but not identical — I wouldn’t want her to think I am trying to be her twin 🙂

IMG_3502

I used a silky soft modal knit from my stash. I purchased it at Hart’s Fabric a few years ago and I think this is the one. Please don’t hold me to it because it’s been a while.

I used my serger to sew it up and fused the hems with double sided fusible stay tape from Emma Seabrooke. While I love her tapes in general, I didn’t love it in this application because the hem looks rumpled unless I iron it every time I wear it. It doesn’t have stretch like the body of the garment so it tends to look bad unless pressed thoroughly. Although not necessary, I stitched over the hems with the coverstitch function on my serger.

IMG_3504

I finished the neckline with a wide band that I serged on. Next time I think I would use a binding instead but the band is quick and neat and you can’t beat that!

This is my third version of the Kirsten Tee and the most worn to date. I am not retiring the pattern any time soon but I do think I will move on to trying a new knit top for some variety, maybe the Plantain Tee by Deer and Doe. Do you have a favorite knit top pattern? I’d love to hear about it in the comments!

Tutorial: How to Use Your Sewing Machine to Make Buttonholes in a Hand-Knit Garment

8 Aug

IMG_3366

I may be setting a posting record this week and I know I am setting a record by posting my first official tutorial. Yay!

When it got time to knit the button band on my Sunshower Cardigan, I knew I wasn’t crazy about the idea of knitted buttonholes. I have made cardigans like this before (unblogged), and I feel like the buttonholes always stretch. You can even see this in the model photos for the pattern. I have tried reinforcing the button band with grosgrain ribbon but even this is tricky because your machined buttonholes in the ribbon have to line up perfectly with your knitted buttonholes or your button band will bunch up or pull between the buttons.

So I did a little internet searching about machine sewing buttonholes into hand knit garments and most of the posts that came up had to do with knitting machines — not helpful. I found a few forum posts where people had talked about it but the general consensus among knitters was one of fear and trepidation when a sewing machine and hand-knit were mentioned together. But the way I look at it, my hand knit garment is just “fabric” so if I take the proper precautions for that type of fabric, I should be able to sew it with my machine.

Before you use your sewing machine on your hand knit fabric, you need to take into consideration the stability of the fabric and the loftiness of the fabric. So the steps I will present to you here will help you have sturdy and attractive buttonholes that don’t pull out of shape with a little negative ease and that give you the flexibility of choosing your buttons after the garment is completed and not having your button choice restricted by the size of the knitted buttonhole.

First, when you start to knit the button band of your cardigan, ignore the instructions for creating buttonholes and just continue to work in pattern until your button band is completed. Consider using a slightly stretchy bind off such as this one.

Then, block your cardigan according to your pattern schematic. This is very important. We don’t want to stabilize the bands to the wrong length.

IMG_3392

Next, it is necessary to stabilize the button band so it doesn’t stretch out. I used grosgrain ribbon for this and I think this is a pretty popular technique even with knitted button holes. Simply cut two lengths of grosgrain, Petersham, (or satin would probably work) ribbon that is no wider than the button band and slipstitch it to the back side of both bands. I trimmed the ends of my ribbon with pinking shears and sealed them with FrayCheck but you could also turn them under 1/4″ and sew them down.

solvy joined

Image source

Next, we need to prevent the top side of our knitted fabric from getting caught in the machine. We want it to glide smoothly through as your machine stitches your buttonholes. For this, I used a wash-away stabilzer called Solvy. You could also use tissue paper but I recommend keeping some Solvy around as it lasts a long time when you only use it for small projects like this and you will find other uses for it in your sewing. Cut a strip slightly larger than the button band.

IMG_3487

Now set your cardigan and Solvy strip aside for a minute and let’s practice some buttonholes on a swatch. Hopefully you knit a gauge swatch before you knit your garment. That will come in handy now. If you didn’t, I highly recommend knitting one up because picking a wonky buttonhole out of your hand knit is not a job I would want to undertake.

IMG_3495

Cut a 4″ piece of ribbon and baste it to the backside of the swatch. Now cut a little strip of Solvy and pin it to the top of your knit swatch. Now, set your machine to stitch a buttonhole. All machines are different but mine does an automatic all-in-one buttonhole with adjustable stitch width and length. I found a stitch width of 5.0 and length of 0.2 to work best for me. The shorter stitch length creates more of a satin like stitch which I think holds the yarn together better. But I suggest you do at least three test button holes on your swatch to test out different settings. And make sure you make them the same size you will need for your intended buttons because we will need to measure it for alignment purposes.
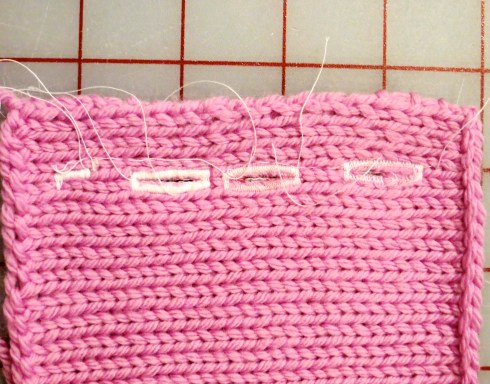
IMG_3488

From left to right: stitch length 0.2, 0.3 and 0.4. You can see the longer stitch length looks messier.

Once you have sewn at least three test buttonholes on different settings, tear away the Solvy and dab some FrayCheck along the front and back of the uncut buttonholes and steam it with your iron to help it dry softer. Once dry, carefully cut the buttonholes open, preferably with a buttonhole cutter.

IMG_3491

Now examine your sample buttonholes and maybe even pass your button through them a few times to see which one holds up and looks the best. Set your machine to those settings for stitching the rest of the buttonholes in the garment. Now take a measurement of the overall length of your buttonhole to aid you in determining alignment and placement of your buttonholes.

Now identify the side of the cardigan to sew the buttonholes in — usually the right front as you wear it, but this may vary depending on personal preference.

Pin the Solvy strip to the top of the buttonhole side of the button band. You may use pins and/or a fabric marking pin on the Solvy to center your buttonholes and you will use the measurement you just took from the buttonhole on the swatch to help with accuracy. I won’t describe that step in detail since it is not specific to sewing buttonholes in a hand knit garment. It is the same process as sewing buttonholes in any garment. Plus, other sewing machines may do buttonholes differently than mine and I don’t want to create confusion.

IMG_3353

Once you have decided on the placement and alignment of each buttonhole, take the garment to the machine and arrange it with the ribbon to the feed dogs and the Solvy under the presser foot. Make sure your settings are still correct. I prefer to start with one of the middle buttonholes.

IMG_3359

Stitch slowly. Provide just a slight amount of traction on the fabric to help it along — very slight, you are not pushing or pulling it but more trying to keep it from hanging up. But don’t fear, this really isn’t likely since we have stabilized and prepped properly. If you are worried, you could take the extra precaution of placing a piece of tissue paper or even printer paper between the garment and the feed dogs for more stability then tear it away after the buttonhole is sewn.

IMG_3364

Once all the buttonholes are sewn, repeat the same process as with the swatch and dab some FrayCheck on both sides then steam dry. Cut open carefully.

IMG_3358

Now admire your beautiful, professional, and sturdy handiwork! And if you are really enjoying using your sewing machine for finishing your hand knits, consider sewing your buttons on with your machine!

I hope someone will find this tutorial helpful. Please let me know if anything needs clarification or if you have a chance to try this out.

Vogue 1353 in Silk Twill

7 Aug

IMG_3435

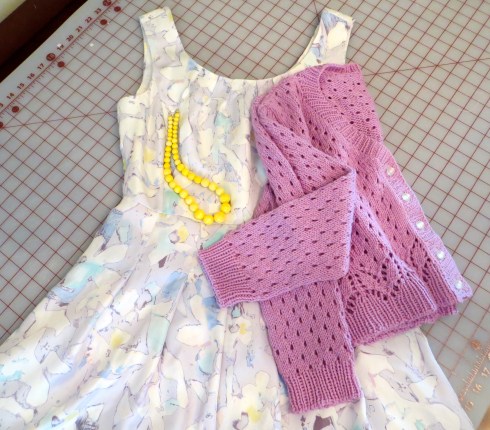
Howdy! I’m back today with the other half of my 2015 Outfit Along post. You can see more details on my cardigan here.

IMG_3419

As I mentioned to you in the first post, I decided pretty last minute to get started on this outfit, July 13 to be exact, and I didn’t start sewing the dress until the 24th. But since I had already made my chosen pattern, Vogue 1353, once before, I knew I could make it up pretty quickly.

silk_pastel

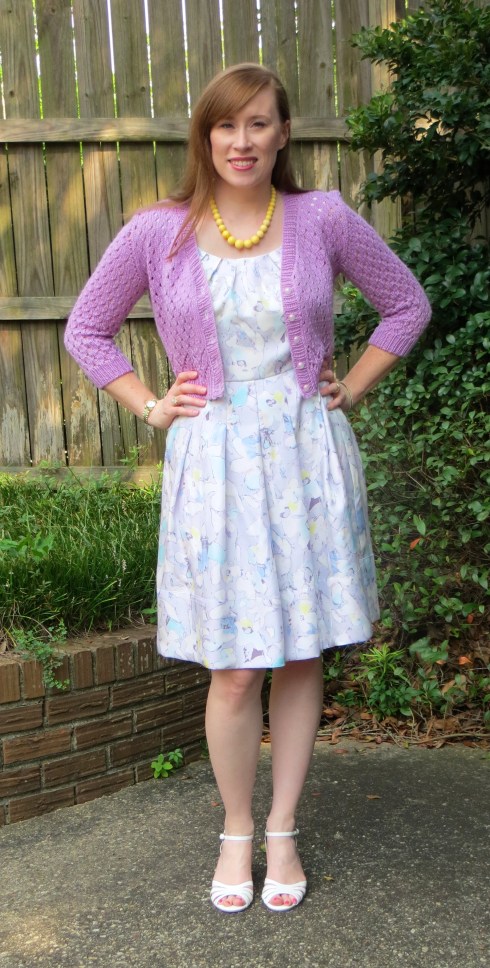
I chose this light purple colorway silk twill from my stash to match the cardigan. From the Emma One Sock website:

A very pretty silk twill print from a NY designer, this blouse/dress weight is opaque with a lovely drape and a pleasing soft sheen. The print is a floral collage with a 21″ repeat, in pastel tones of pale lavender, blue, yellow, pink and cream…

IMG_3439

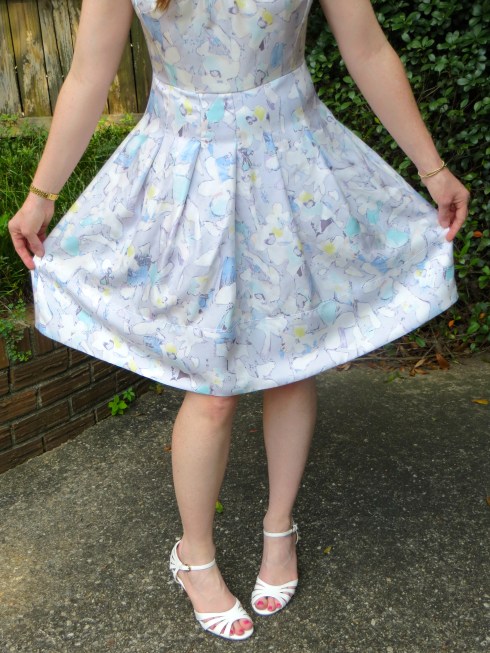
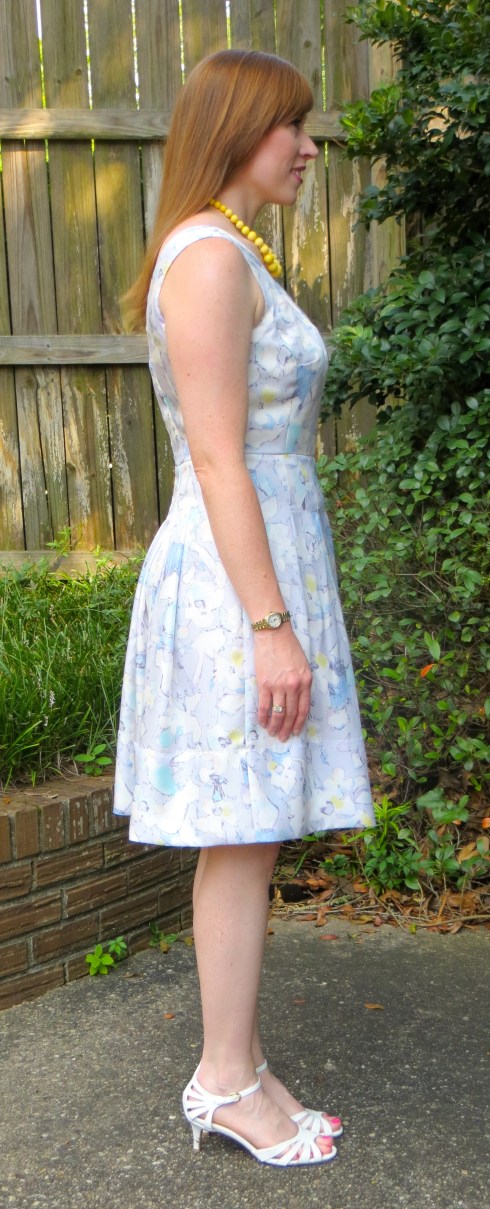
I love the soft purple base with irregular white flowers and splashes of soft blue and yellow. I think it would make a great dress for Easter or a baby/bridal shower. The twill fabrication gives the silk more body than a charmeuse although it is still very “silky” feeling. It is like the fabric of a necktie without all the interfacing. The fabric makes the dress very enjoyable to wear as it swishes really well. However, I do think a sturdier fabric, like the cotton sateen in my original version, is better for everyday interpretations of this dress. I will not wear this silk dress to work — it will be reserved for church, brunch, bridal showers, etc.

IMG_3380

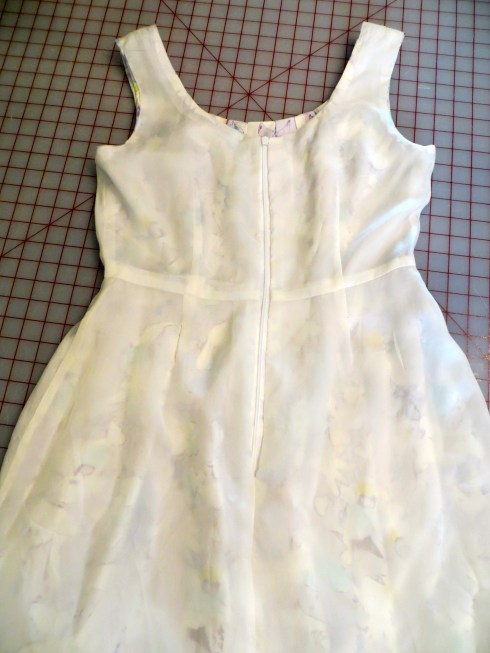
I lined the dress with white rayon Bemberg and used Siri sew in interfacing from Emma One Sock.

IMG_3431

I won’t belabor the alterations as those were covered in my last post. My only additional modifications were to shift the shoulder straps in by 1/2″ and to alter the lining pieces by trimming 1/8″ off the neckline and armhole edges to help the lining roll to the inside (and it did help). I had to draft separate lining pieces for the bodice back and bodice side front to do this but that was as simple as tracing the original piece then trimming the desired edges. I had enough fabric this time to cut the skirt pieces with the pleats full width so I removed the modification I had made last time but I think I may like it better with narrower pleats.

IMG_3443

Next time I will remember to add 1/2″ to the skirt length at center back and taper it to nothing at the side seam. Instead I had to cut 1/2″ off the front of the skirt after the fact before sewing on the hem facing.

IMG_3378

Like last time, I used self-fabric instead of lining to face them hem because I like this look better. I stitched the facing in place with the chainstitch on my coverstitch and let the wrong side of the stitching show on the outside of the dress.

IMG_3374

I used this tutorial on Pattern Scissors Cloth to fully line the dress by machine and I used this tutorial to get a precisely installed invisible zipper that doesn’t require a hook and eye. So this dress doesn’t have any handstitching in it — yay!
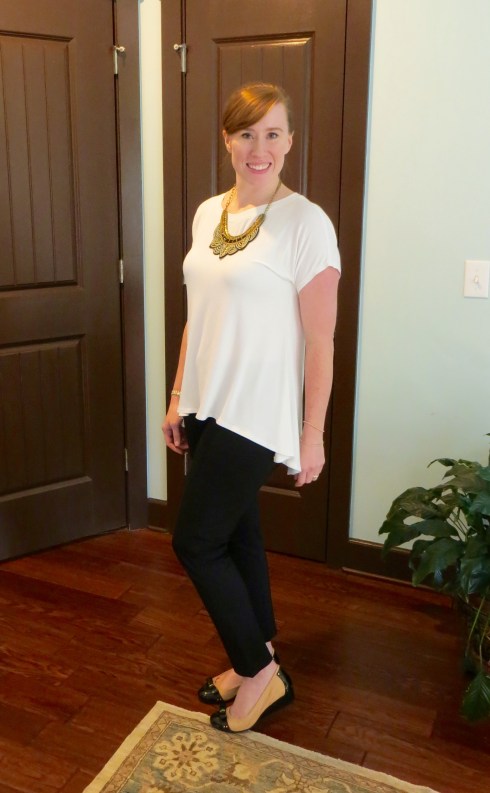
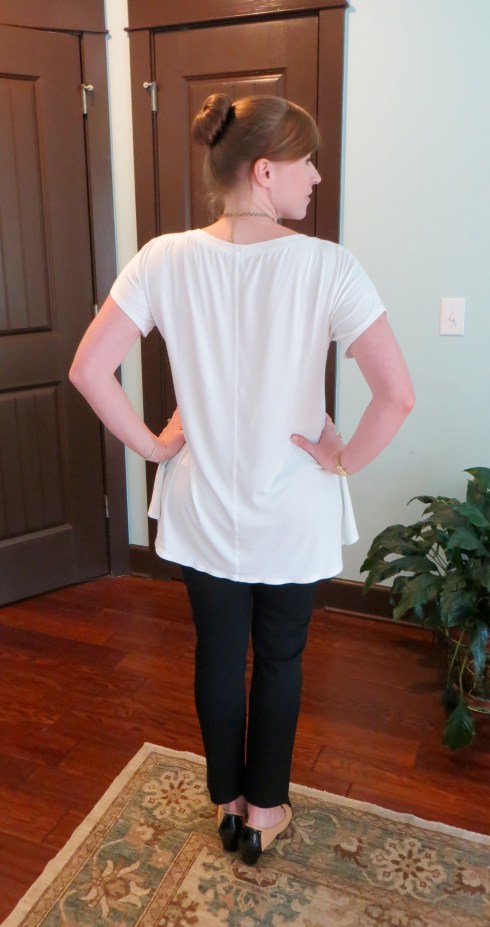
I don’t think there’s much else to say so I’ll sign off for today. I’ll be back tomorrow with the promised tutorial on using your sewing machine to make buttonholes in your hand-knit garments!
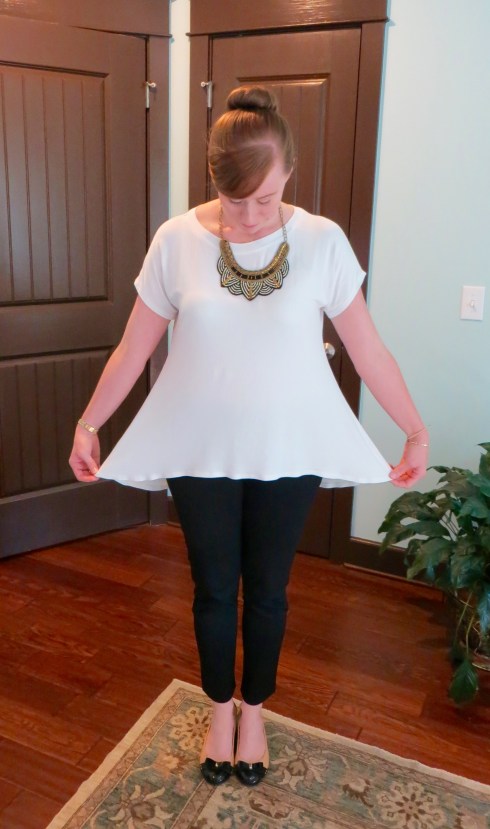
Sugar Plum Sunshower Cardigan by Andi Satterlund |Outfit Along 2015

6 Aug

IMG_3419

Hi, friends! I can’t believe I’m back with a second knitted garment in less than a month! I didn’t knit two things in less than a month but I did finish this one in about 2.5 weeks. I decided to participate in this year’s Outfit Along hosted by Andi Satterlund of Untangling Knots and Lauren Taylor of Lladybird but it took me a while to decide what to make.

First, I knit my Aures Lace Tank but I couldn’t decide what to sew to go with it. Then I sewed the Vogue 1353 Poppies Dress and couldn’t decide what to knit to go with it. So at the last minute (July 13 to be exact with a deadline of July 31), I decide to start from scratch and create two completely new things, so enter the Sunshower Cardigan by Andi and another Vogue 1353 (which I will share later this week).

13229220

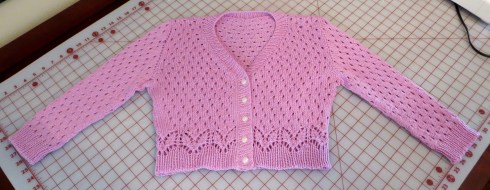
The Sunshower Cardigan is a new release as part of a collection of Andi’s patterns from KnitPicks. It immediately caught my attention because of the polka dot like lace pattern. And for some reason when I saw it I immediately envisioned it in a lilac shade. Luckily the recommended KnitPicks Swish Worsted came in the perfect color — Sugar Plum — and was a reasonable price, too.

25142

The pattern wasn’t difficult to knit, especially if you have knit a few of Andi’s patterns before. They are all pretty similar in techniques. I did have a problem with the lace pattern not lining up once I joined the front and back pieces but I decided not to worry about it because I don’t think anyone will be looking in my armpits 🙂

IMG_3395

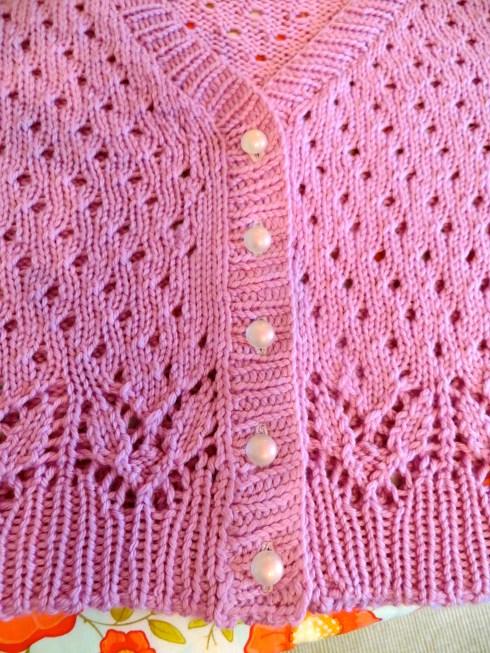
I am also a little aggravated that the lace motif isn’t symmetrical at the front button band and I noticed the model’s cardigan is the same way. If I ever make this cardigan again, I would correct the pattern for both of these problems. On top of that, it took me a little while to get the hang of the lace pattern so my “polka dots” aren’t perfectly lined up in some places but I don’t think it’s noticeable and it’s not going to stop me from wearing it.

IMG_3388

As for sizing, I went with the 38.25″ bust and find the bust to fit well but the waist is a bit big. I will try to block it smaller next time I wash it.

As for any helpful construction techniques, I have never found “bind off in pattern” to work for 1×1 rib on openings that need to stretch so I rely on this method. I used it on the waist and sleeve cuffs. I don’t think the tubular bind off is necessary for the neckline but I would use something a little more stretchy than “bind off in pattern,” maybe this one. I didn’t do this here but wish I had as my neckline binding is a little tight.

IMG_3392

I think the most interesting thing I did with this cardigan is my button bands. I followed Lauren’s idea for adding a grosgrain ribbon facing for stability but I did the buttonholes differently. I have learned quickly in my short knitting career that I don’t like the look or functionality of knitted buttonholes, even when they are reinforced with a ribbon band. Plus it is tricky getting the ribbon band buttonholes to line up perfectly with the knitted buttonholes.

IMG_3366

So I decided to omit knitting them and to stitch them in with my sewing machine instead. I will be bringing you more details on this process later this week so stay tuned.

IMG_3424

I think that’s about it for this cardigan. You can see my Ravelry project page here and check out the winners of the 2015 OAL here.

IMG_3385