Perfect Shell — Simplicity 2599

2 Apr

IMG_1439


Here’s my most recently finished sewing project — and I actually just finished it this week!  This is Simplicity 2599, a great basic blouse pattern that includes sleeveless and short-sleeved versions as well as several different trim options.  It also features different pattern pieces for B, C, and D bust cups so you don’t have to do any adjustments for that department.  The blouse is quick and easy to put together once you work out any fitting issues.  And really, there can’t be too many fitting issues when there is just one main piece for the front and one main piece for the back 🙂


IMG_1436


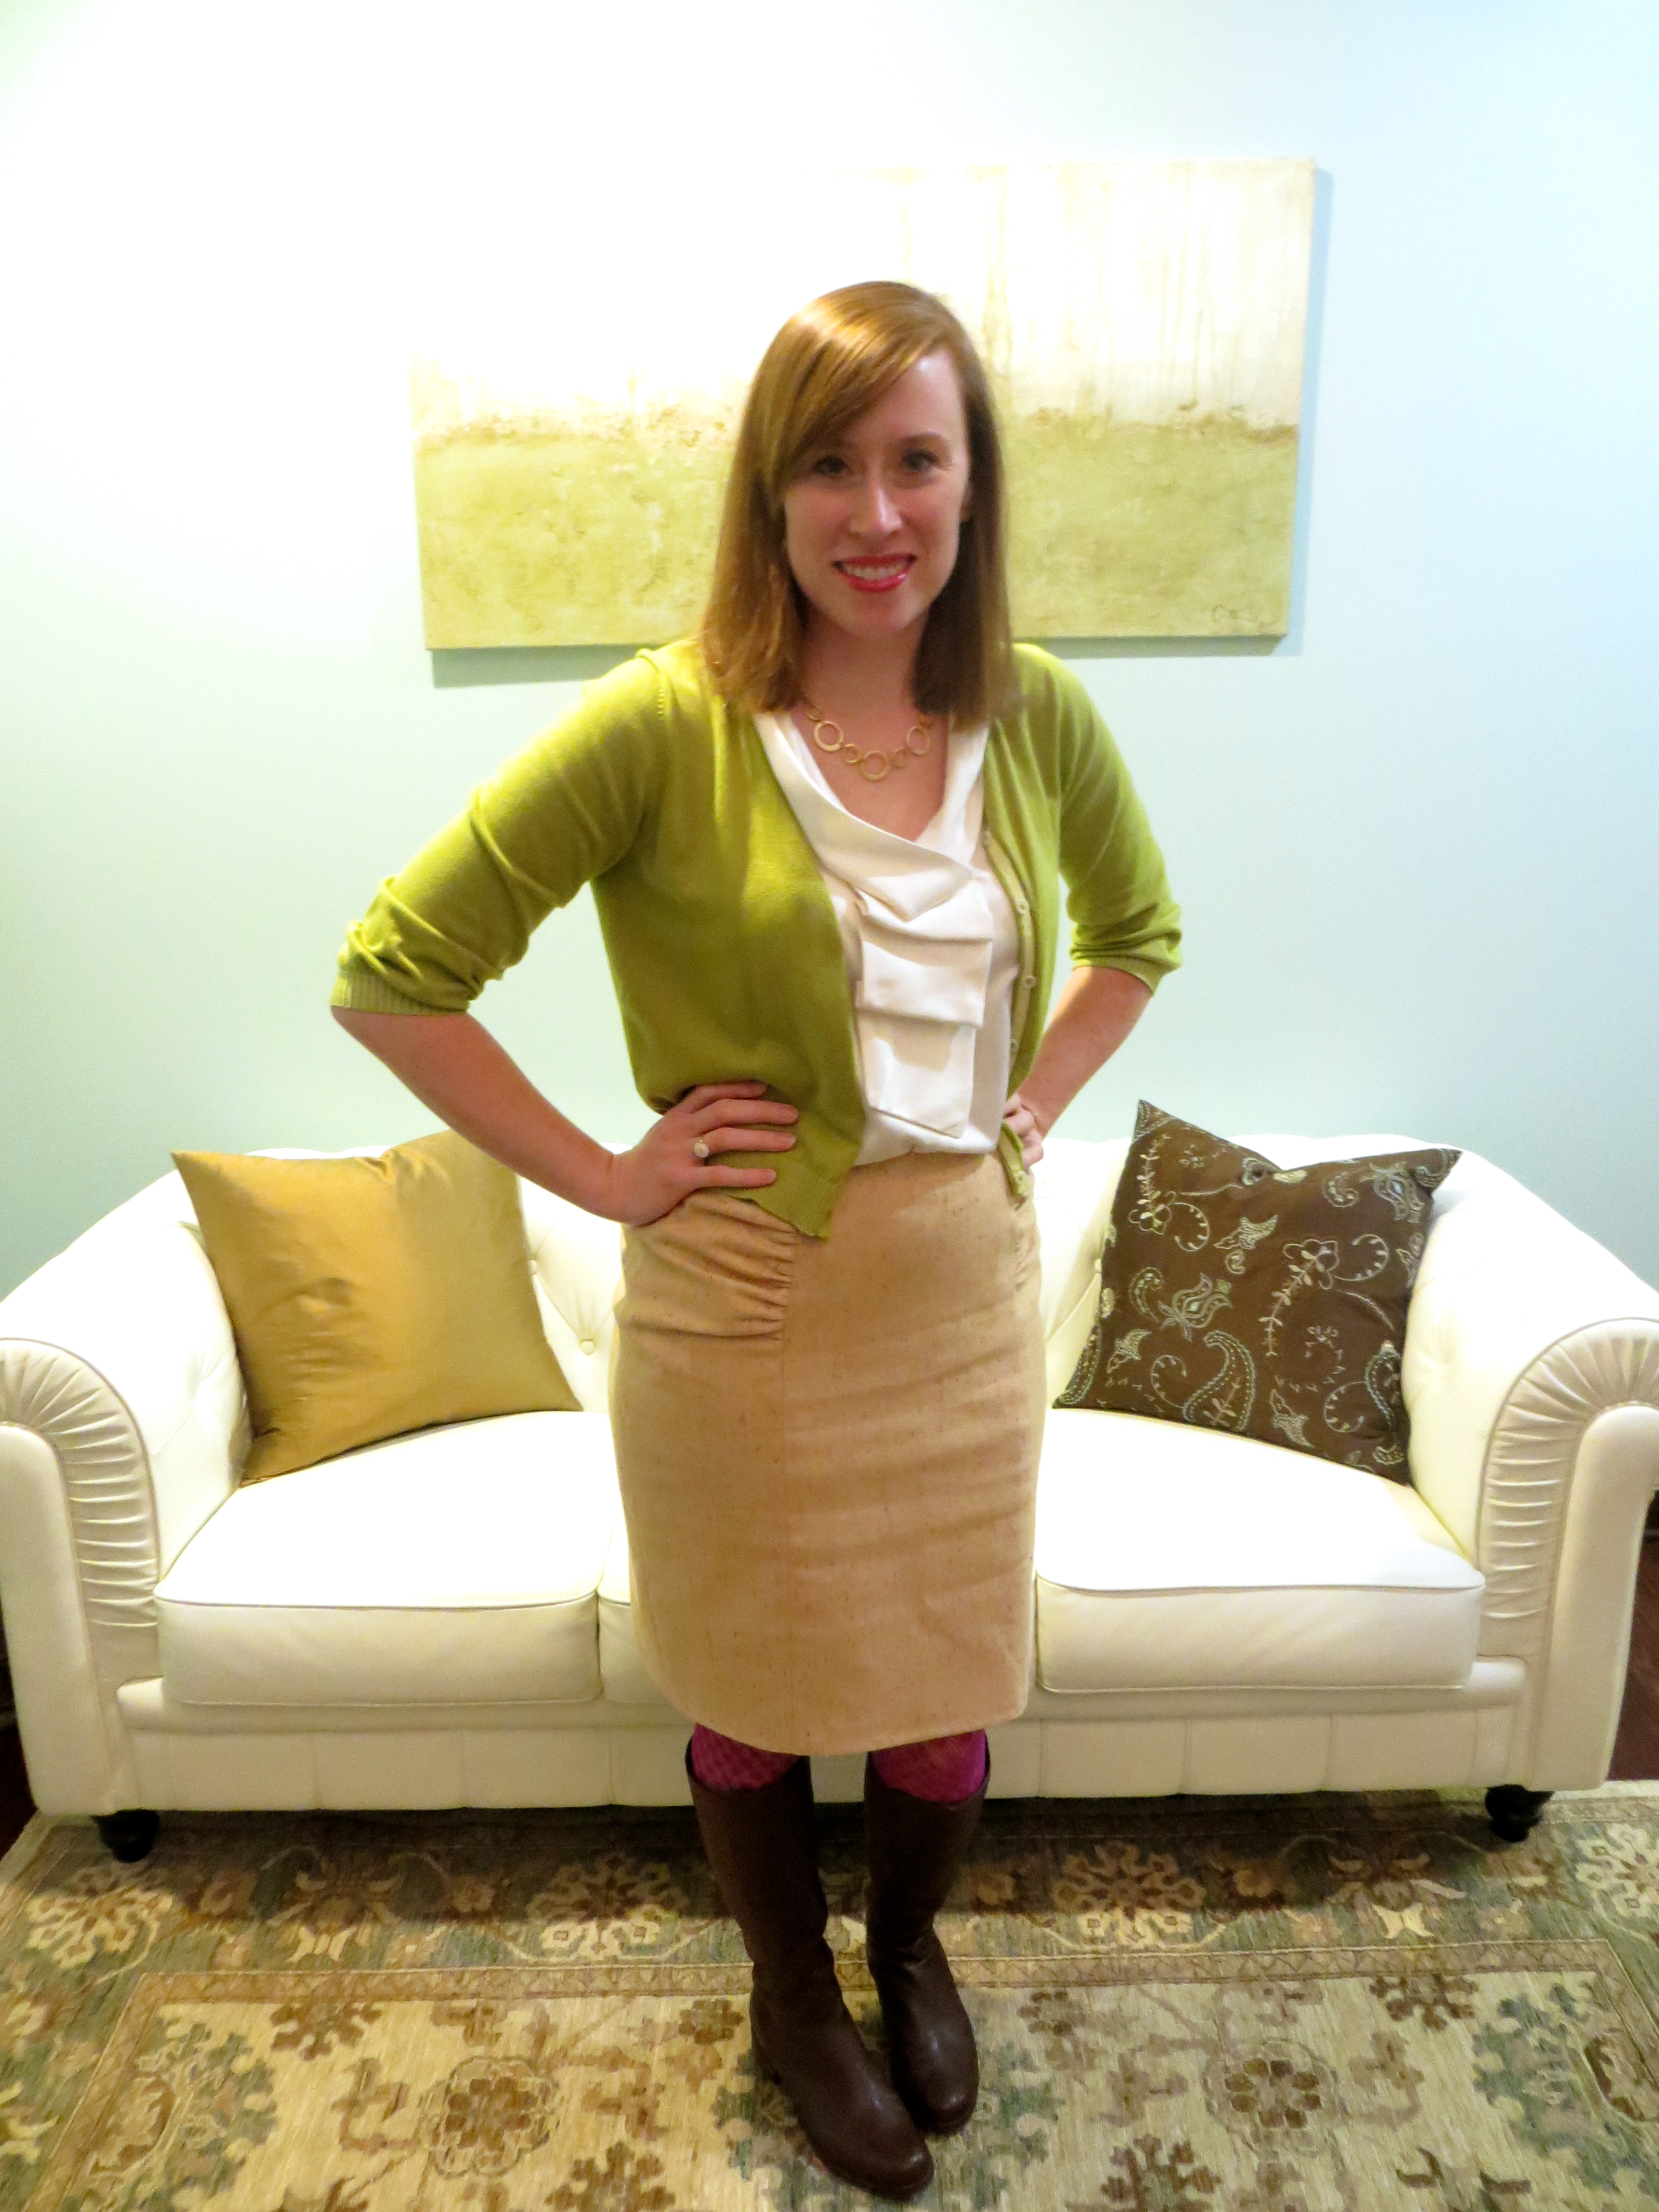
As you can see, the neck in this version (E) features a cute ruffle which is created by gathering a single layer of bias cut fabric and attaching it to the neckline through the blouse and facing.  This technique is great because it keeps the facing from flipping out and because the facing adds an extra layer of sturdiness to anchor the ruffle.


IMG_1446


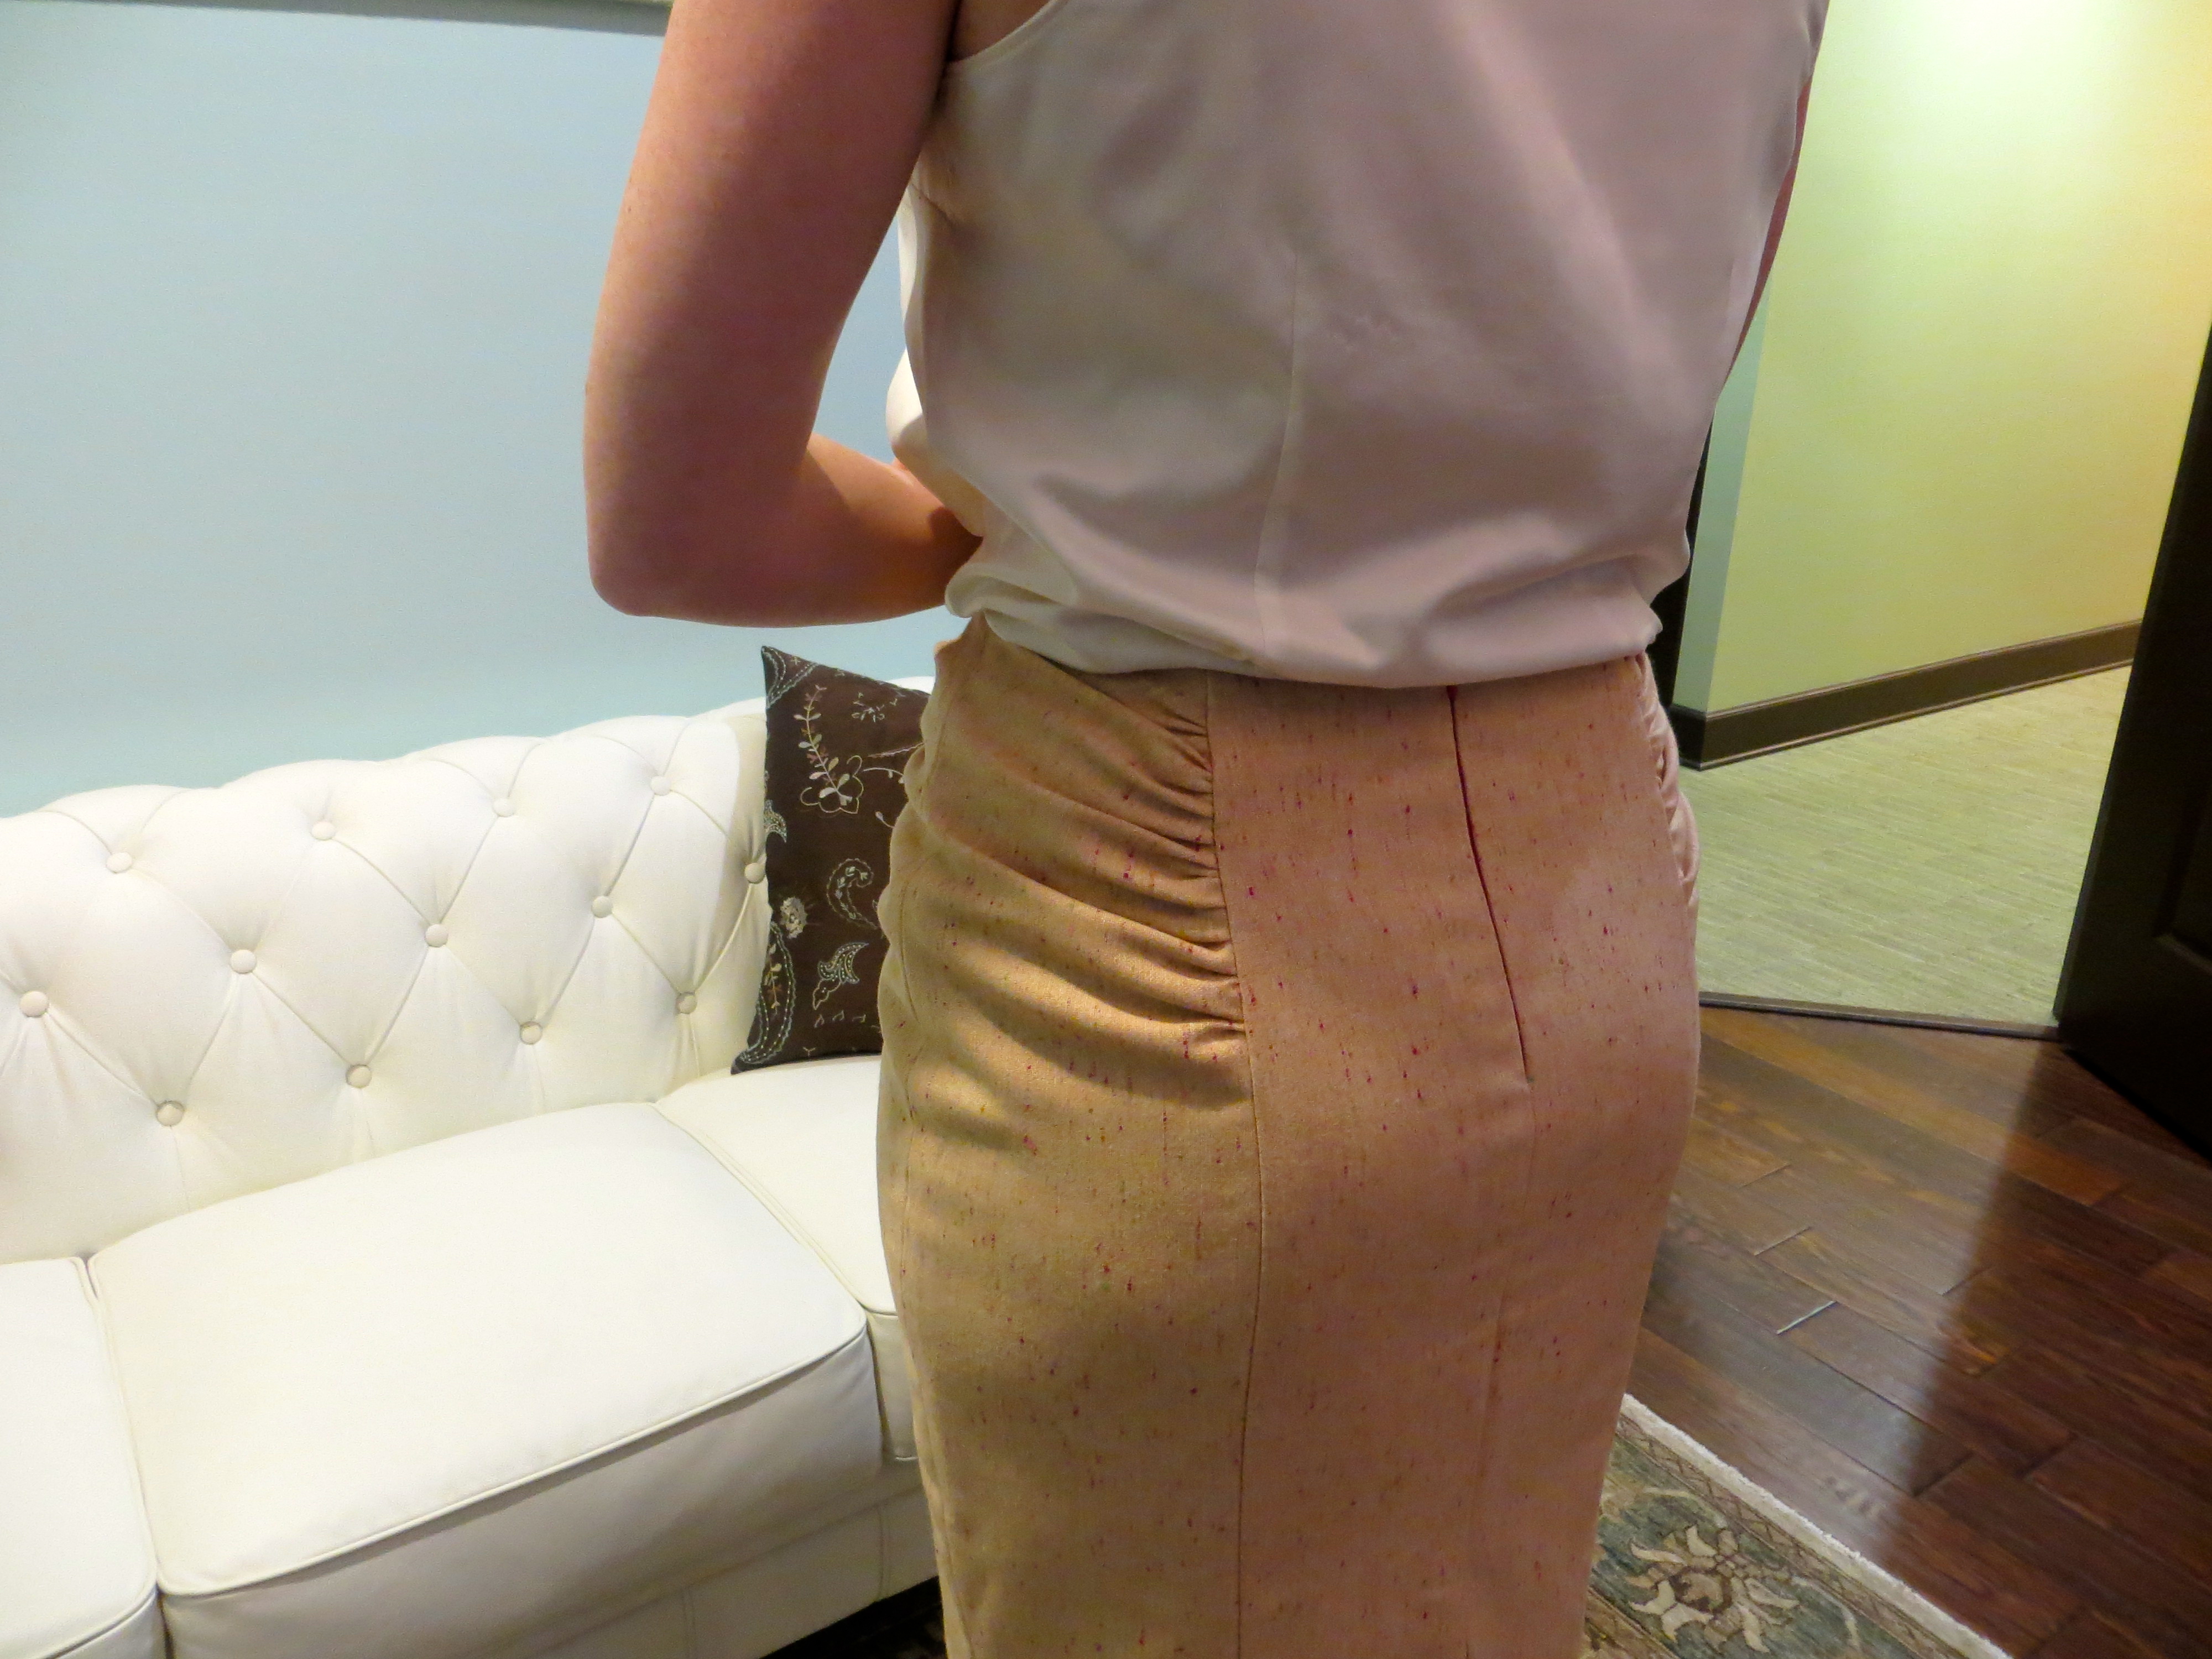
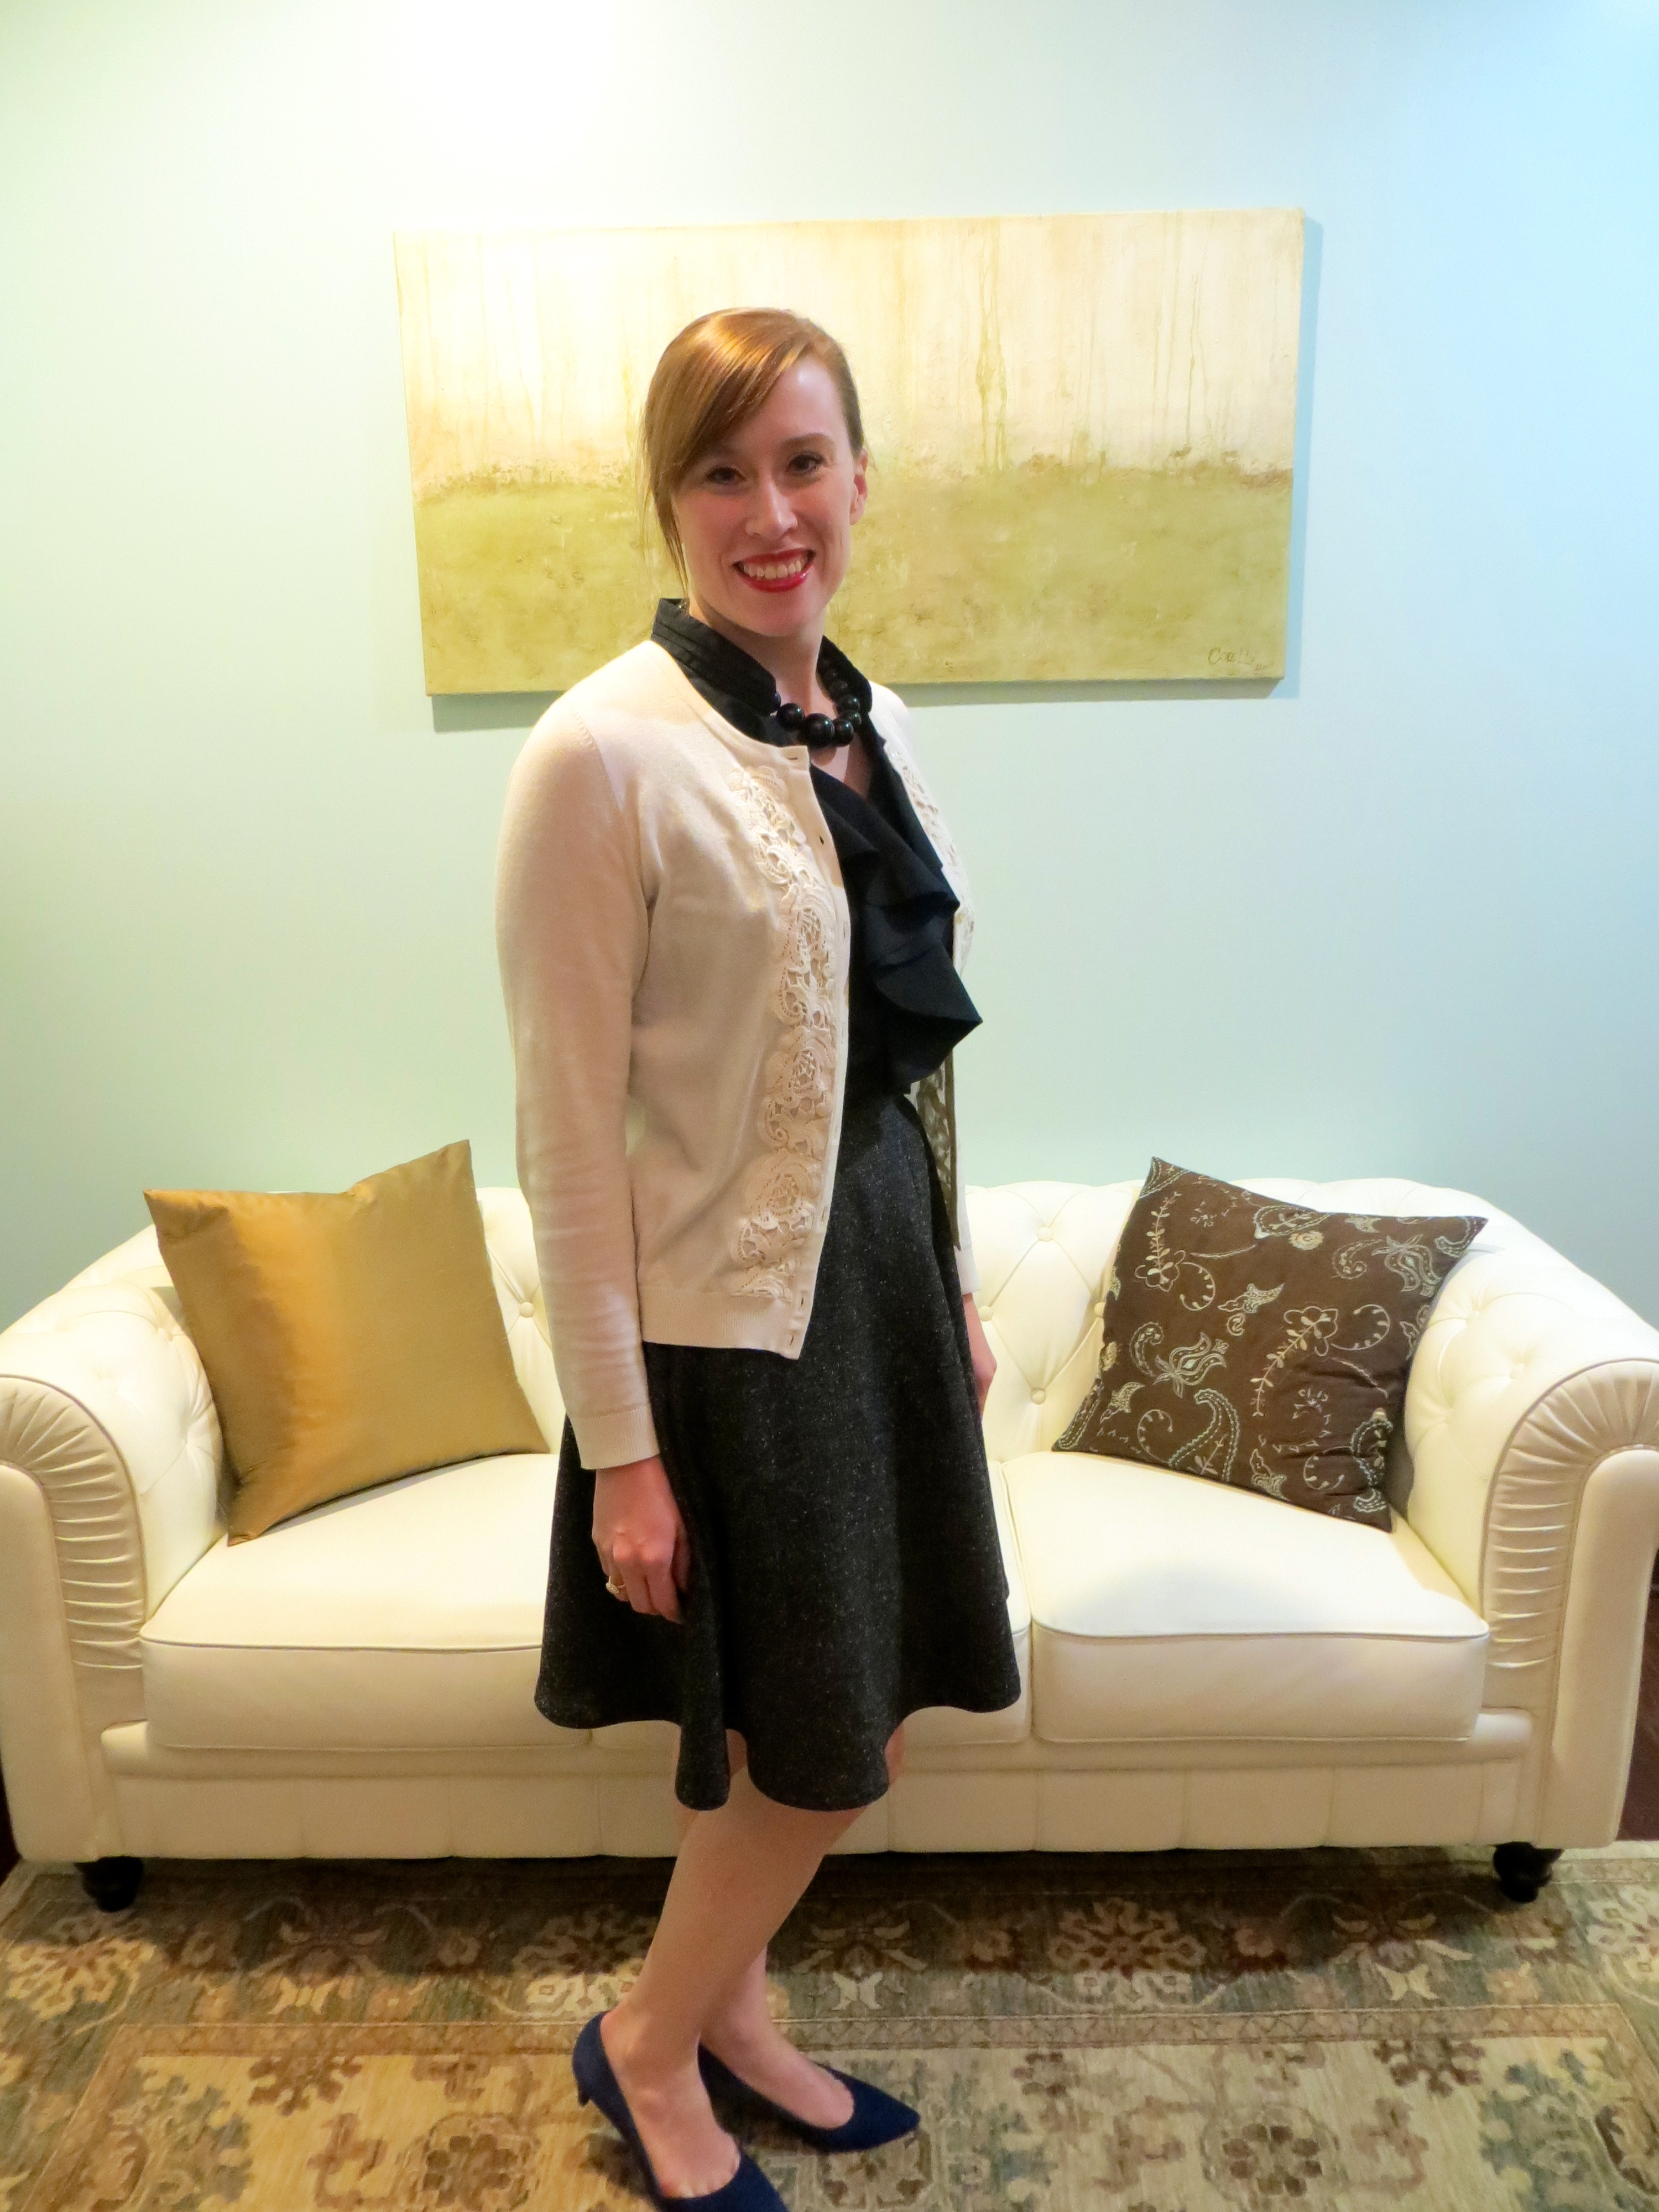
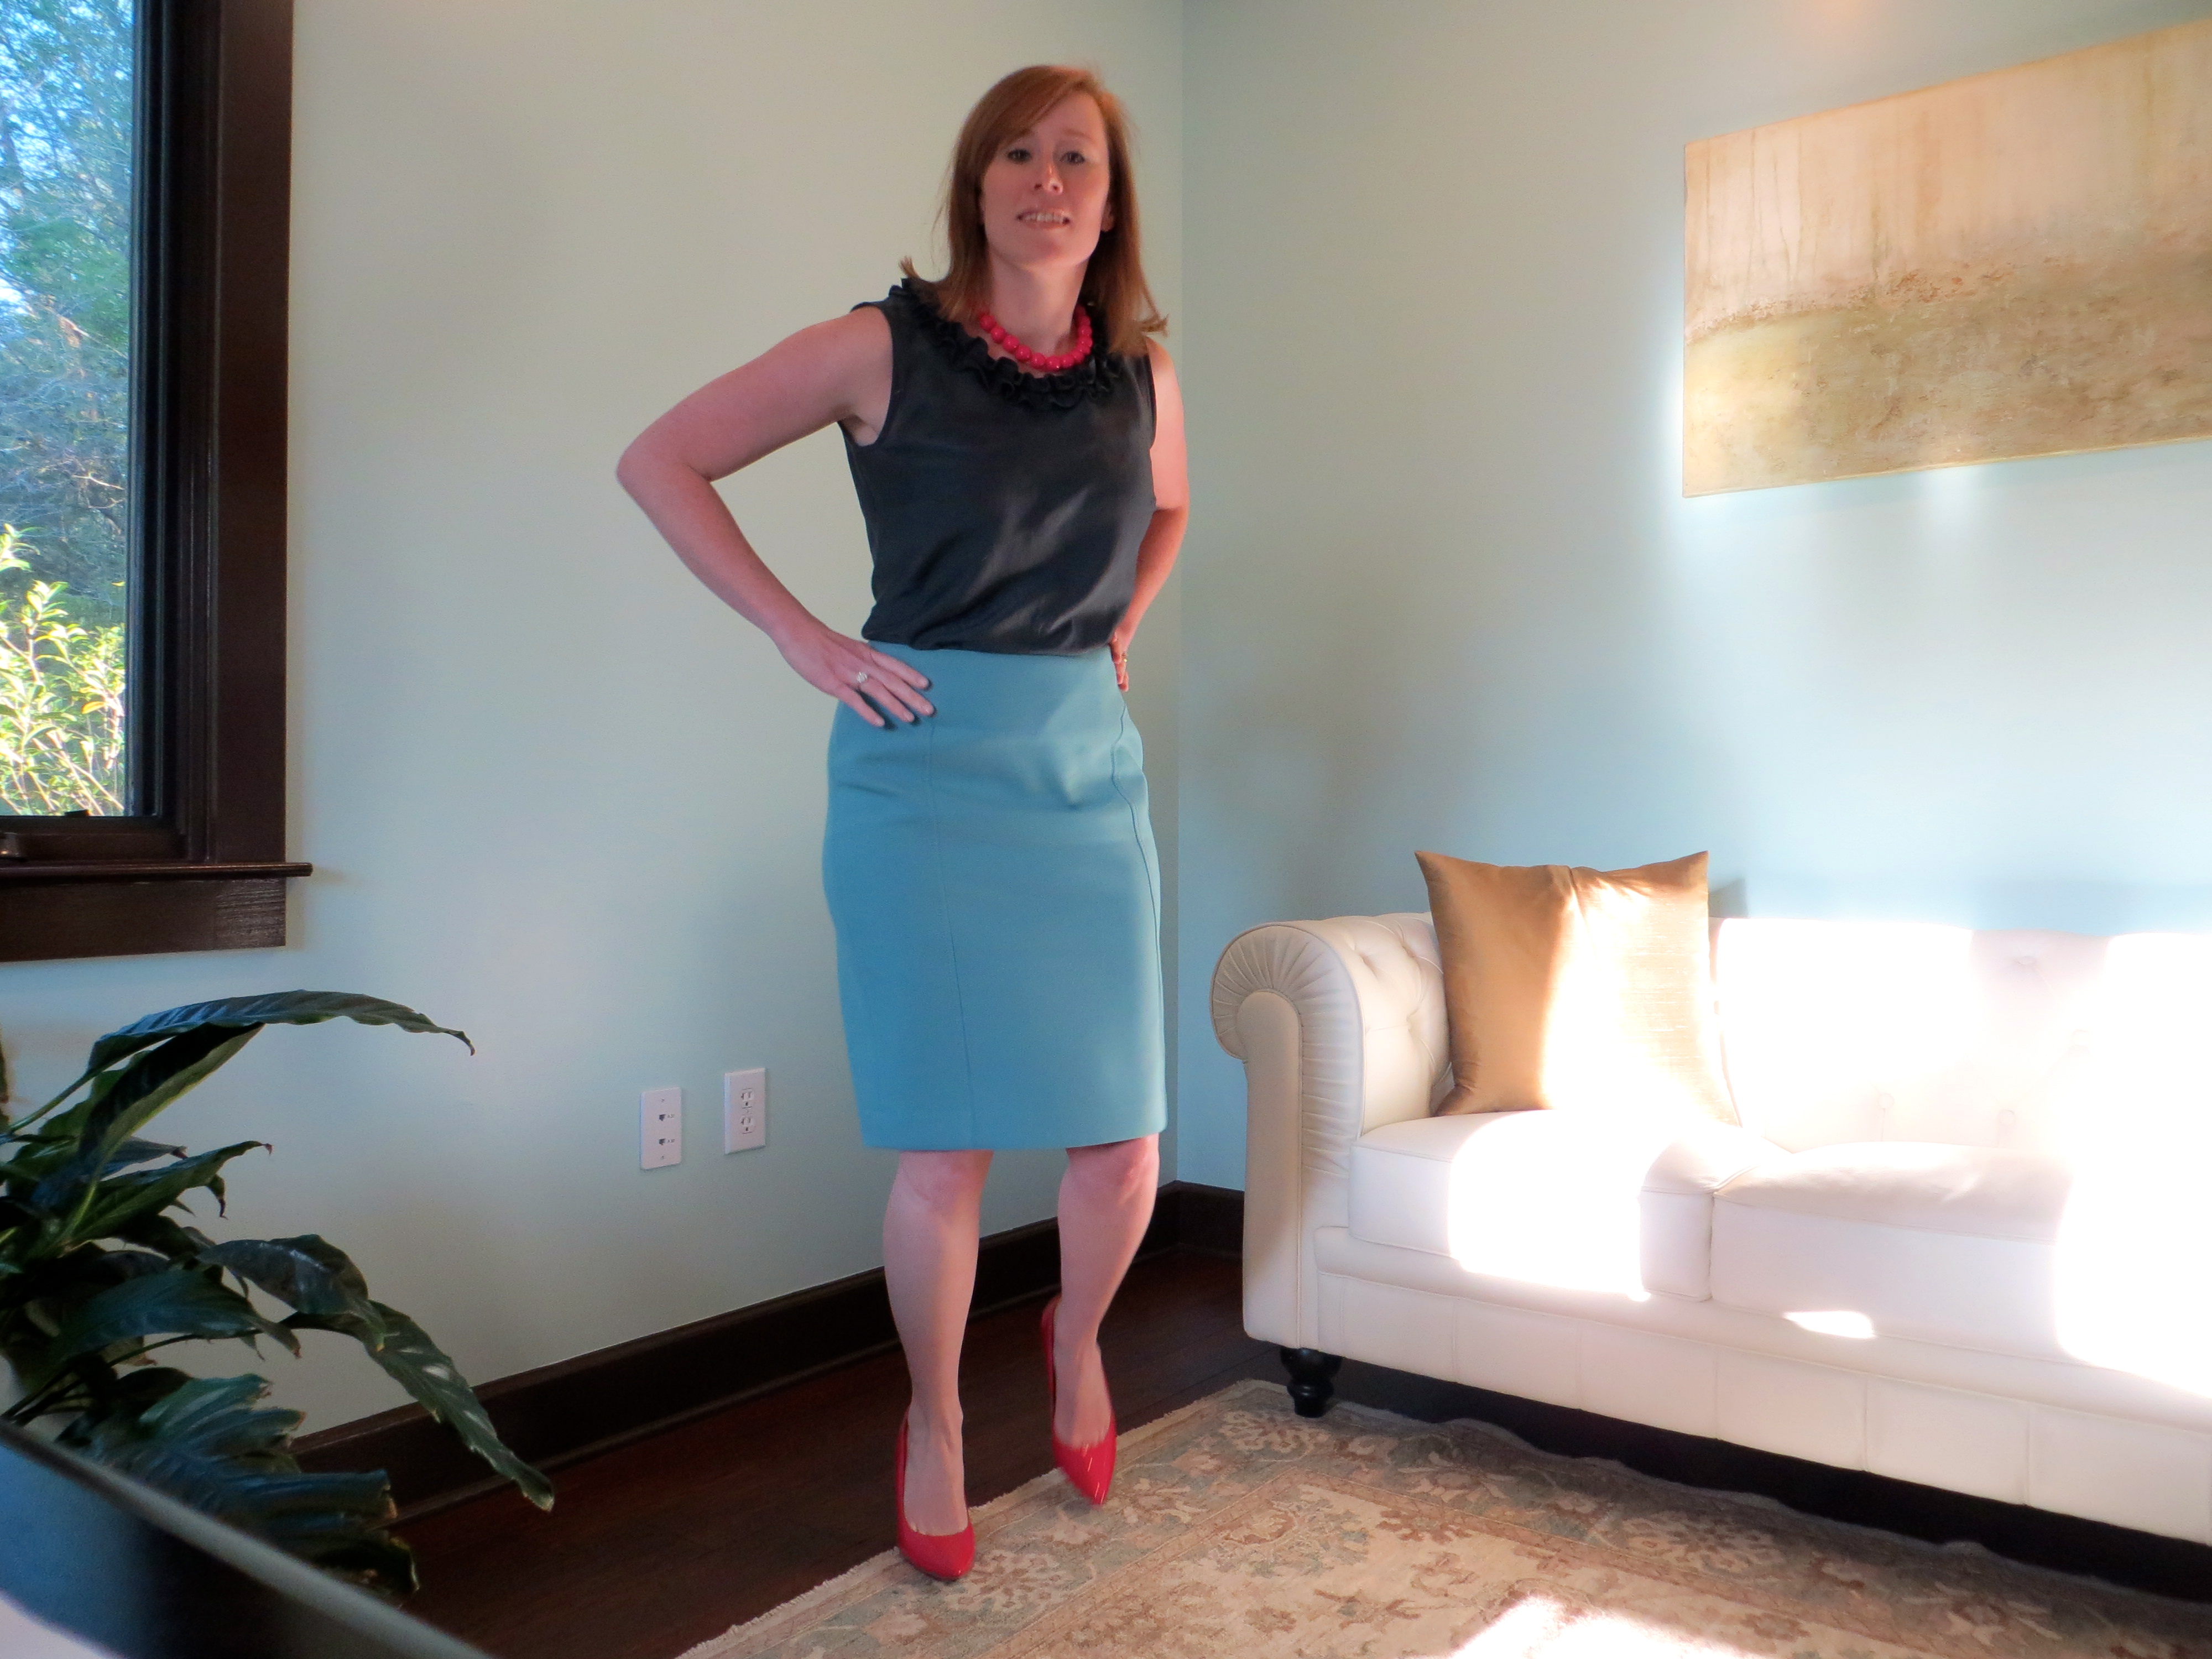
In this photo you can see what the shirt looks like untucked.  Please excuse the wrinkles since I had it tucked into my skirt all day.  I had to tweak the pattern to achieve the waist definition you see here.  When I first sewed up the shirt, it was a complete box.  I ended up grading the waist down two sizes from the size that I sewed in the bust and hips.  This makes it a little hard to get on over my head since I also omitted the button opening at the neck but it is possible.


IMG_1450


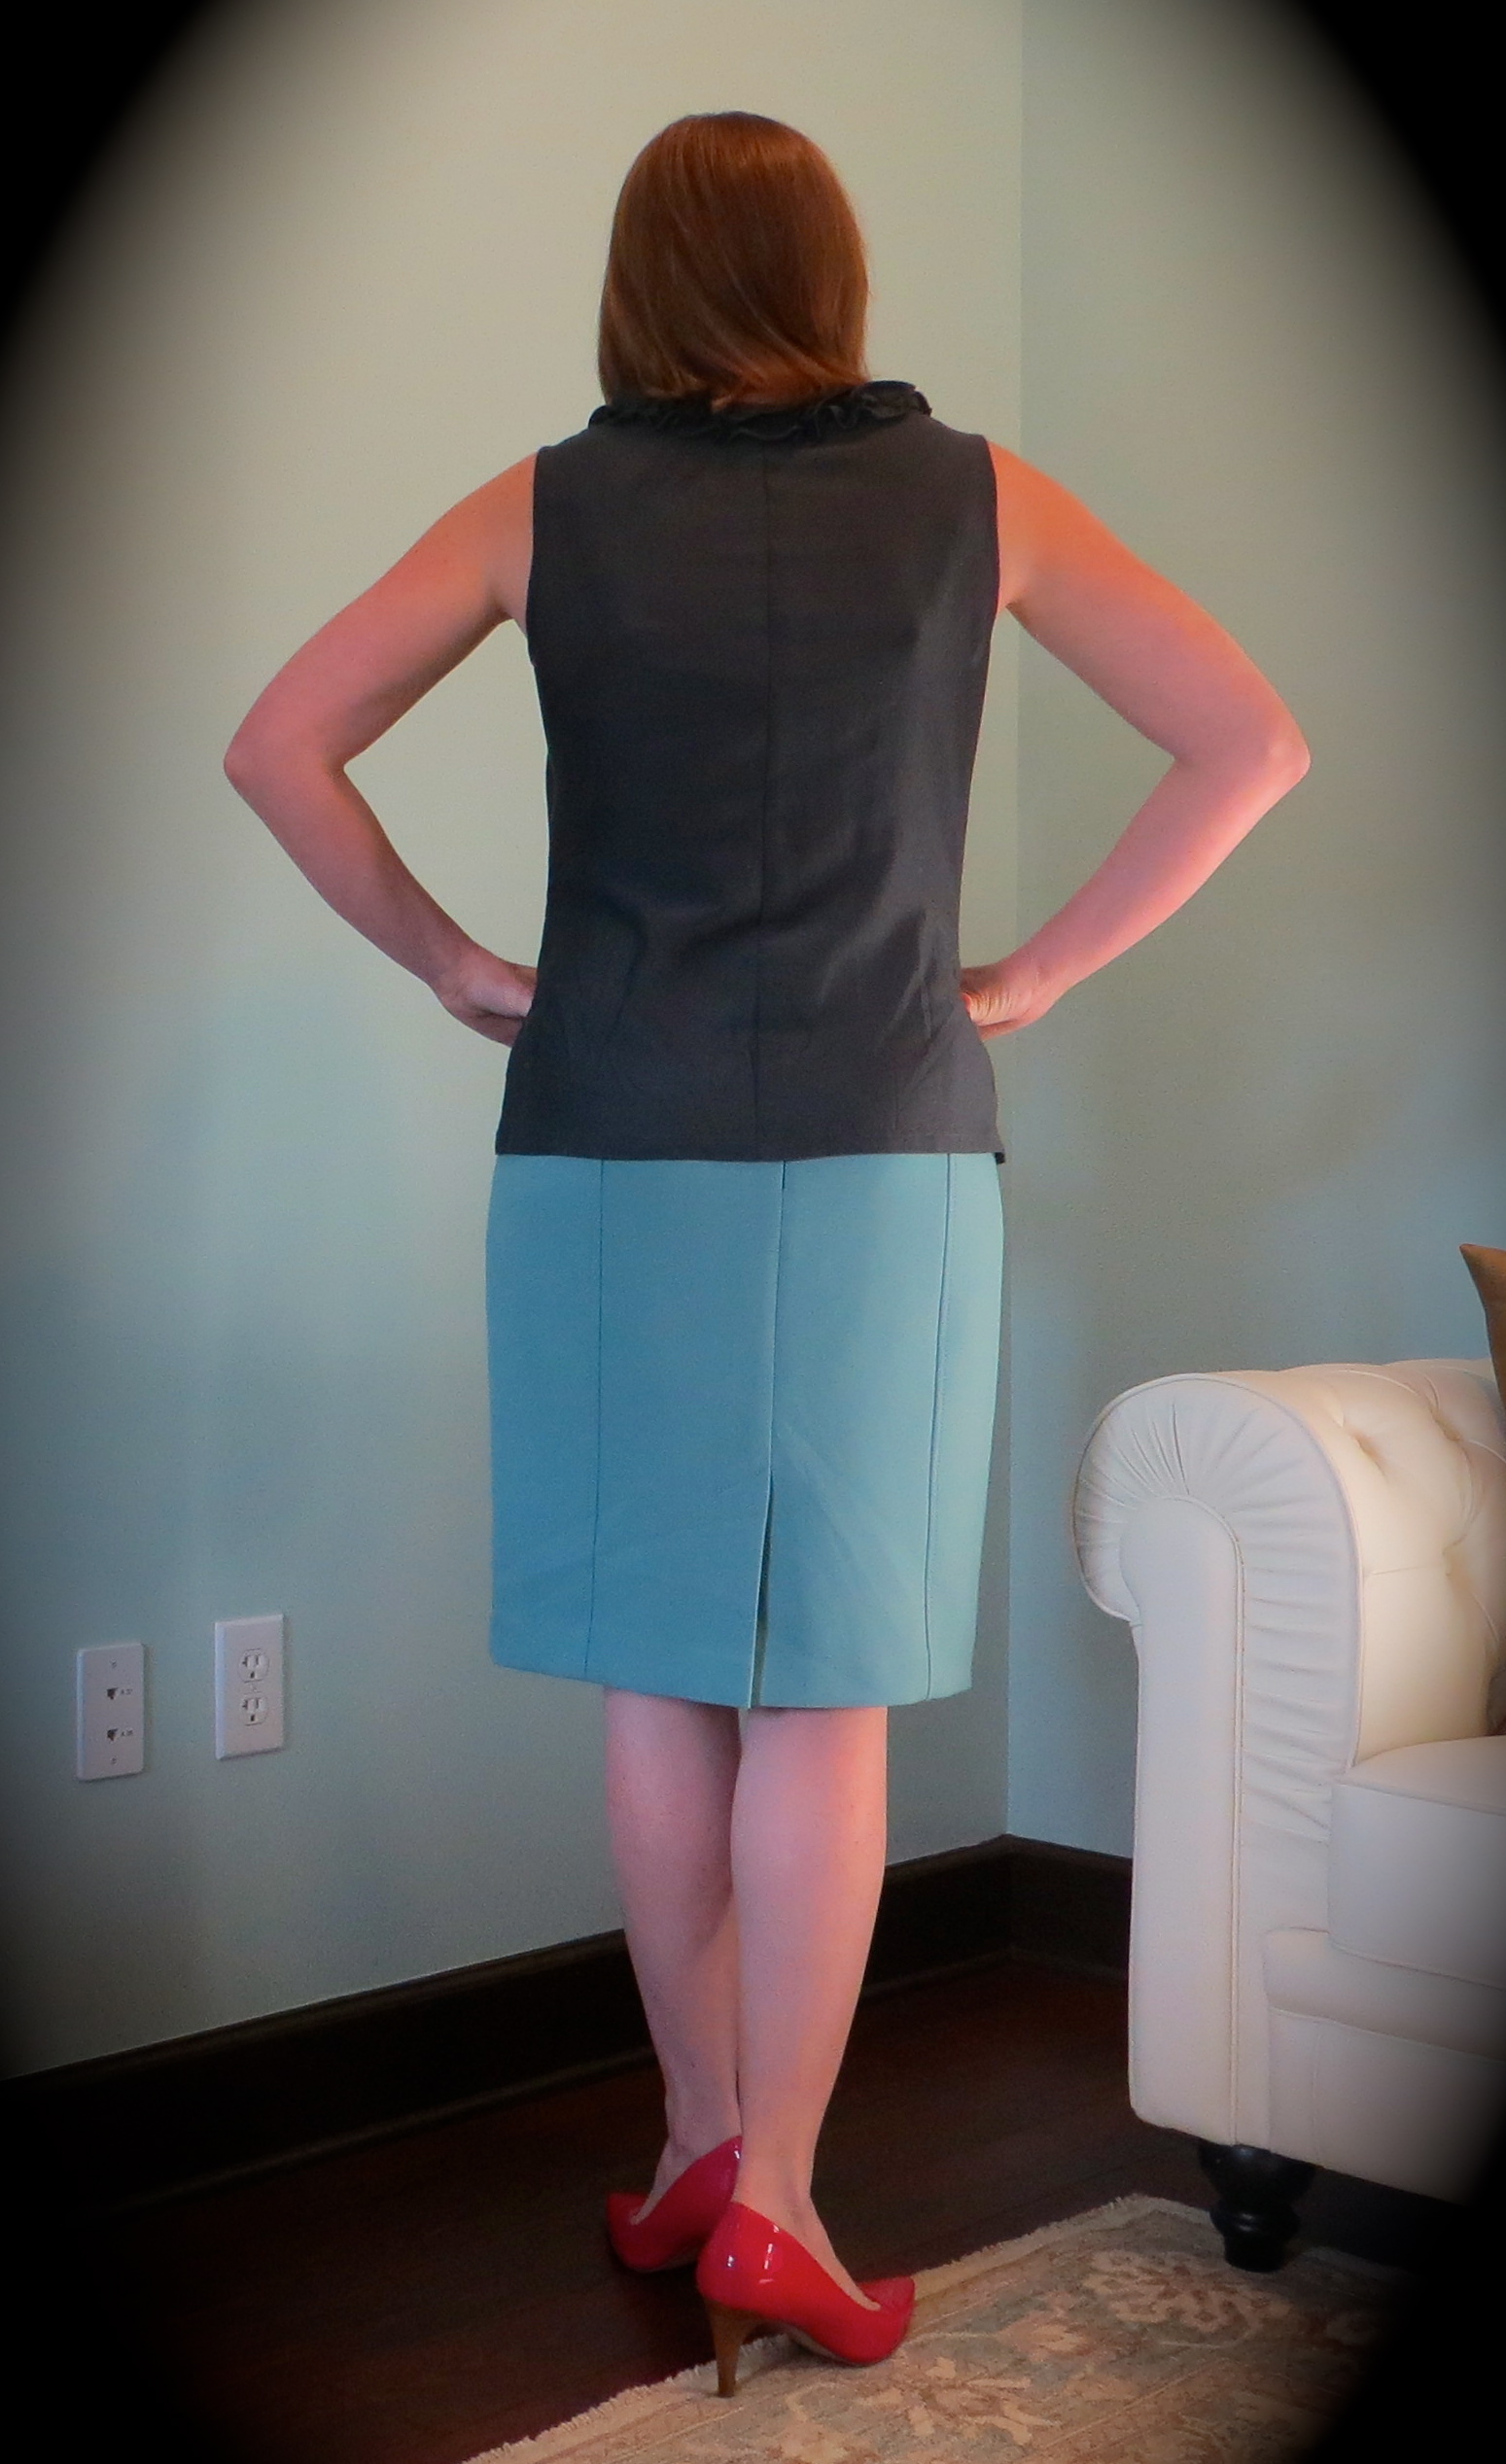
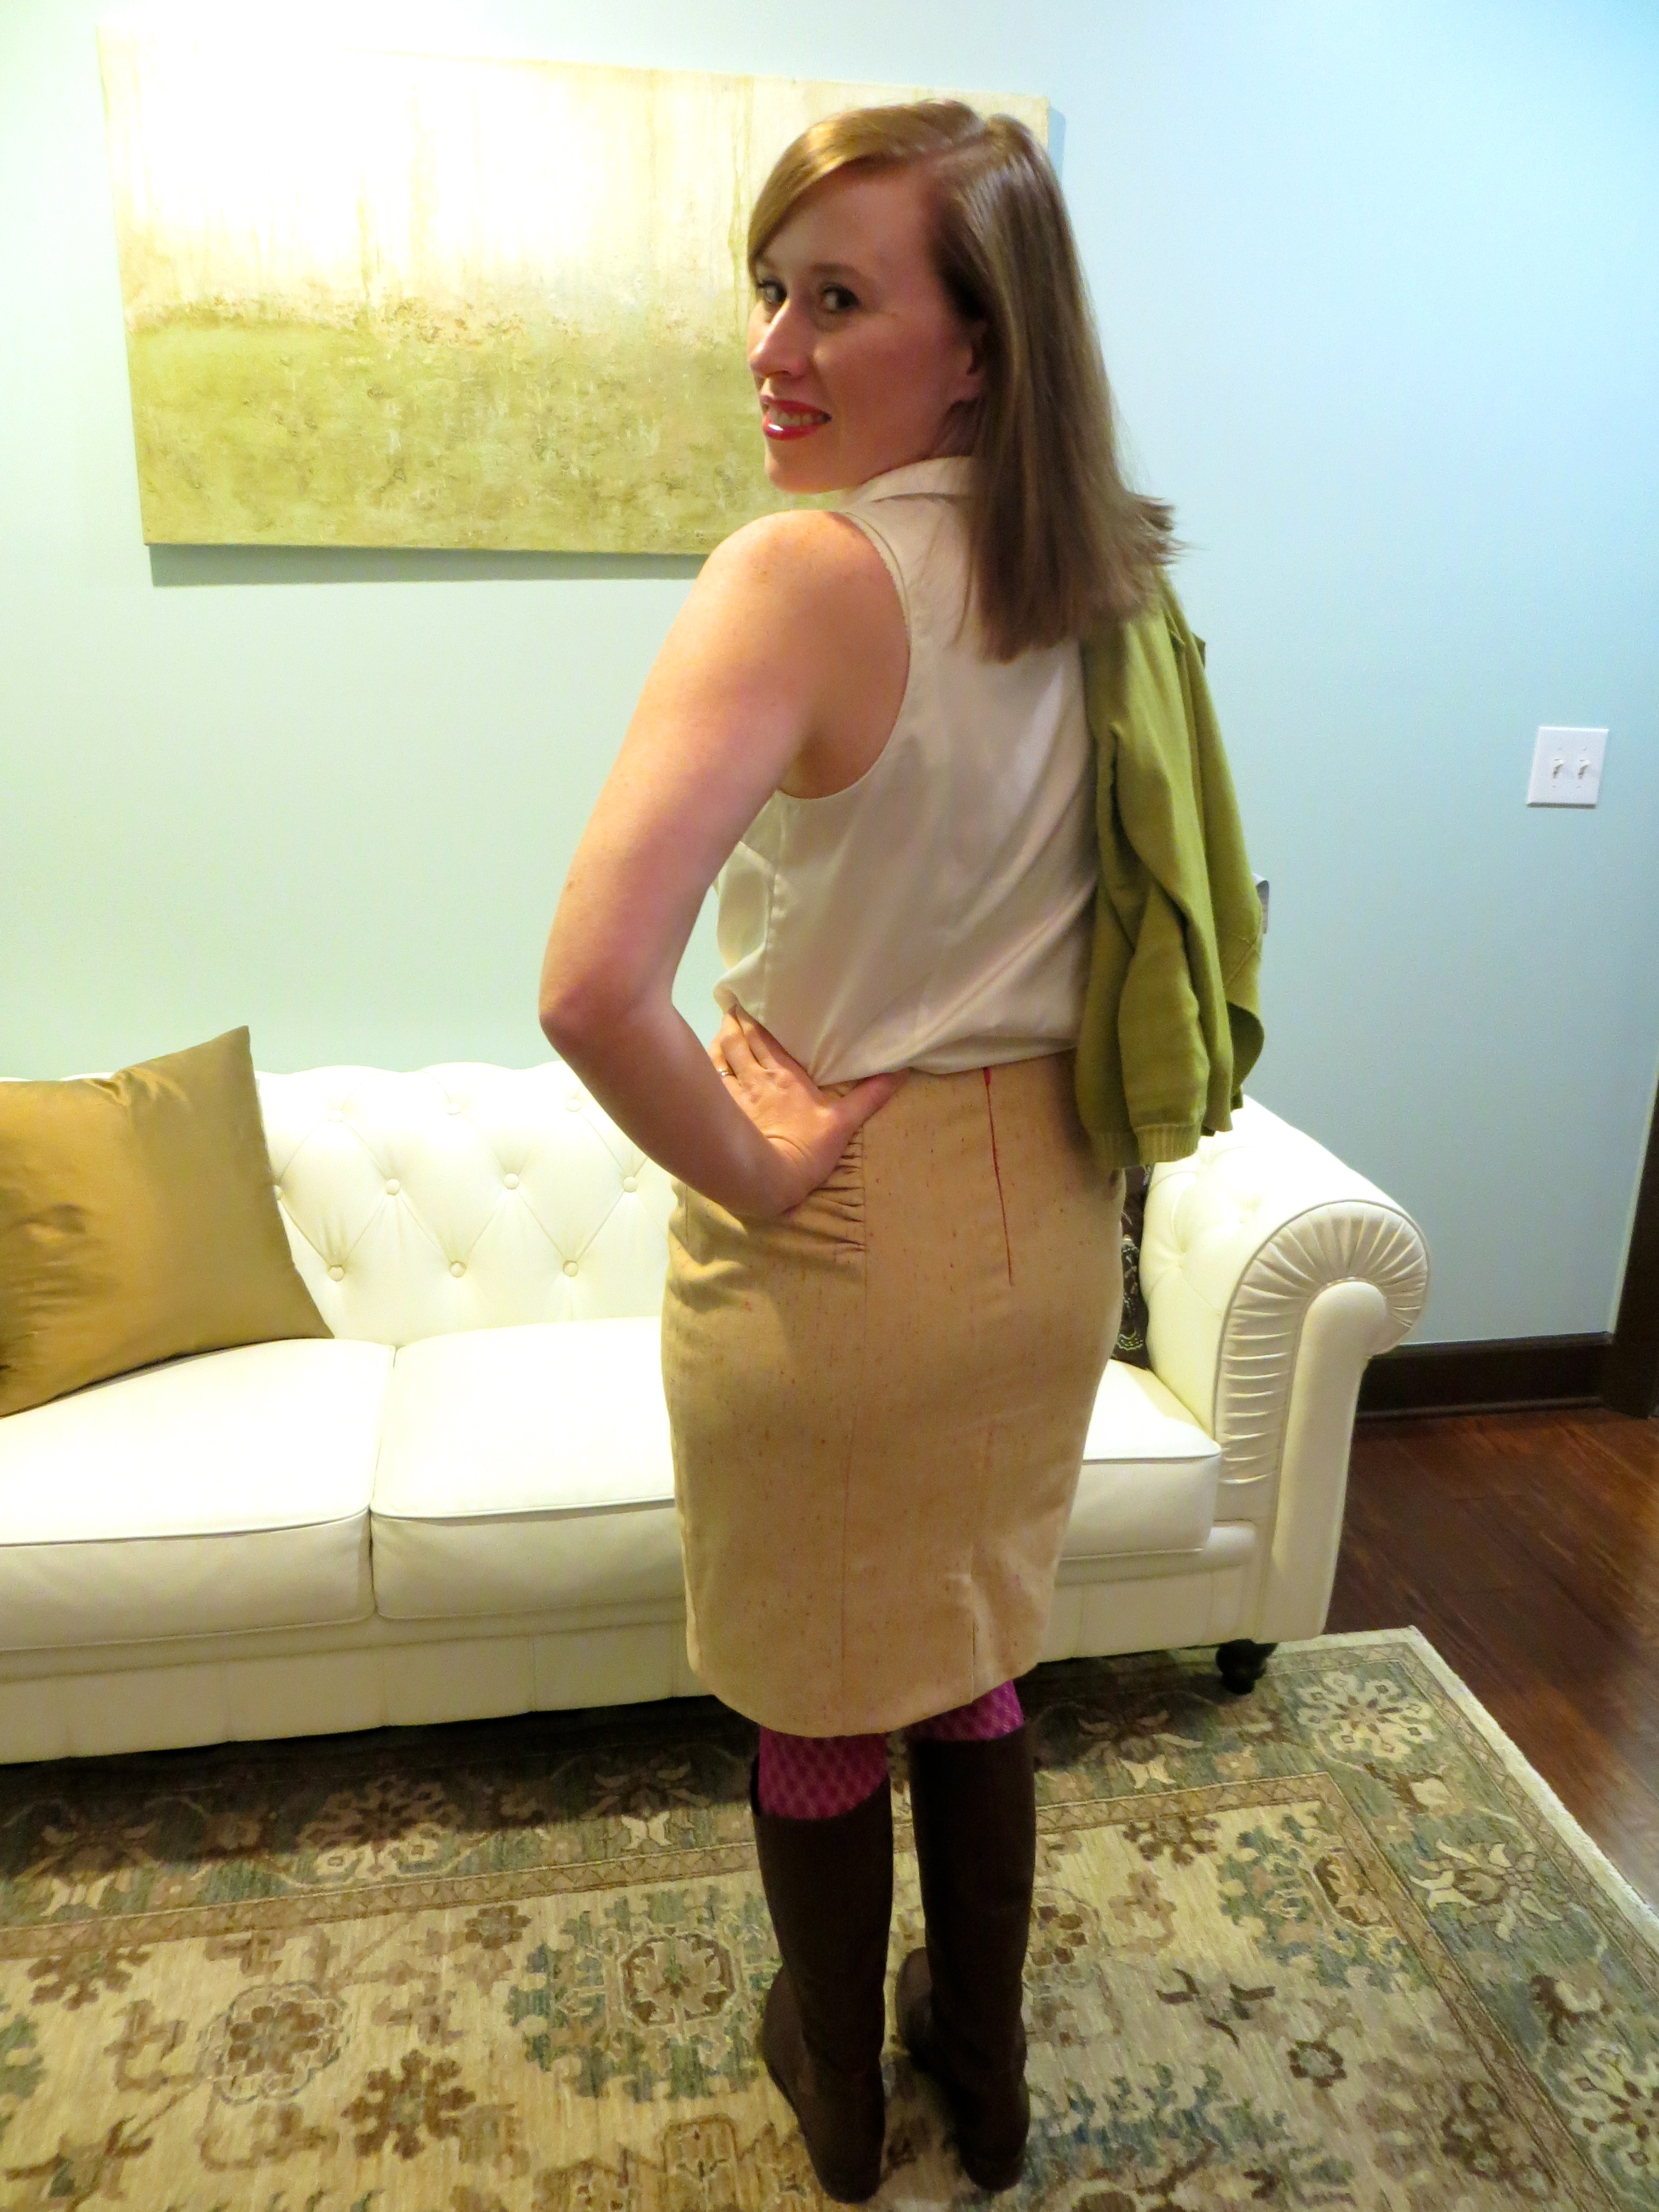
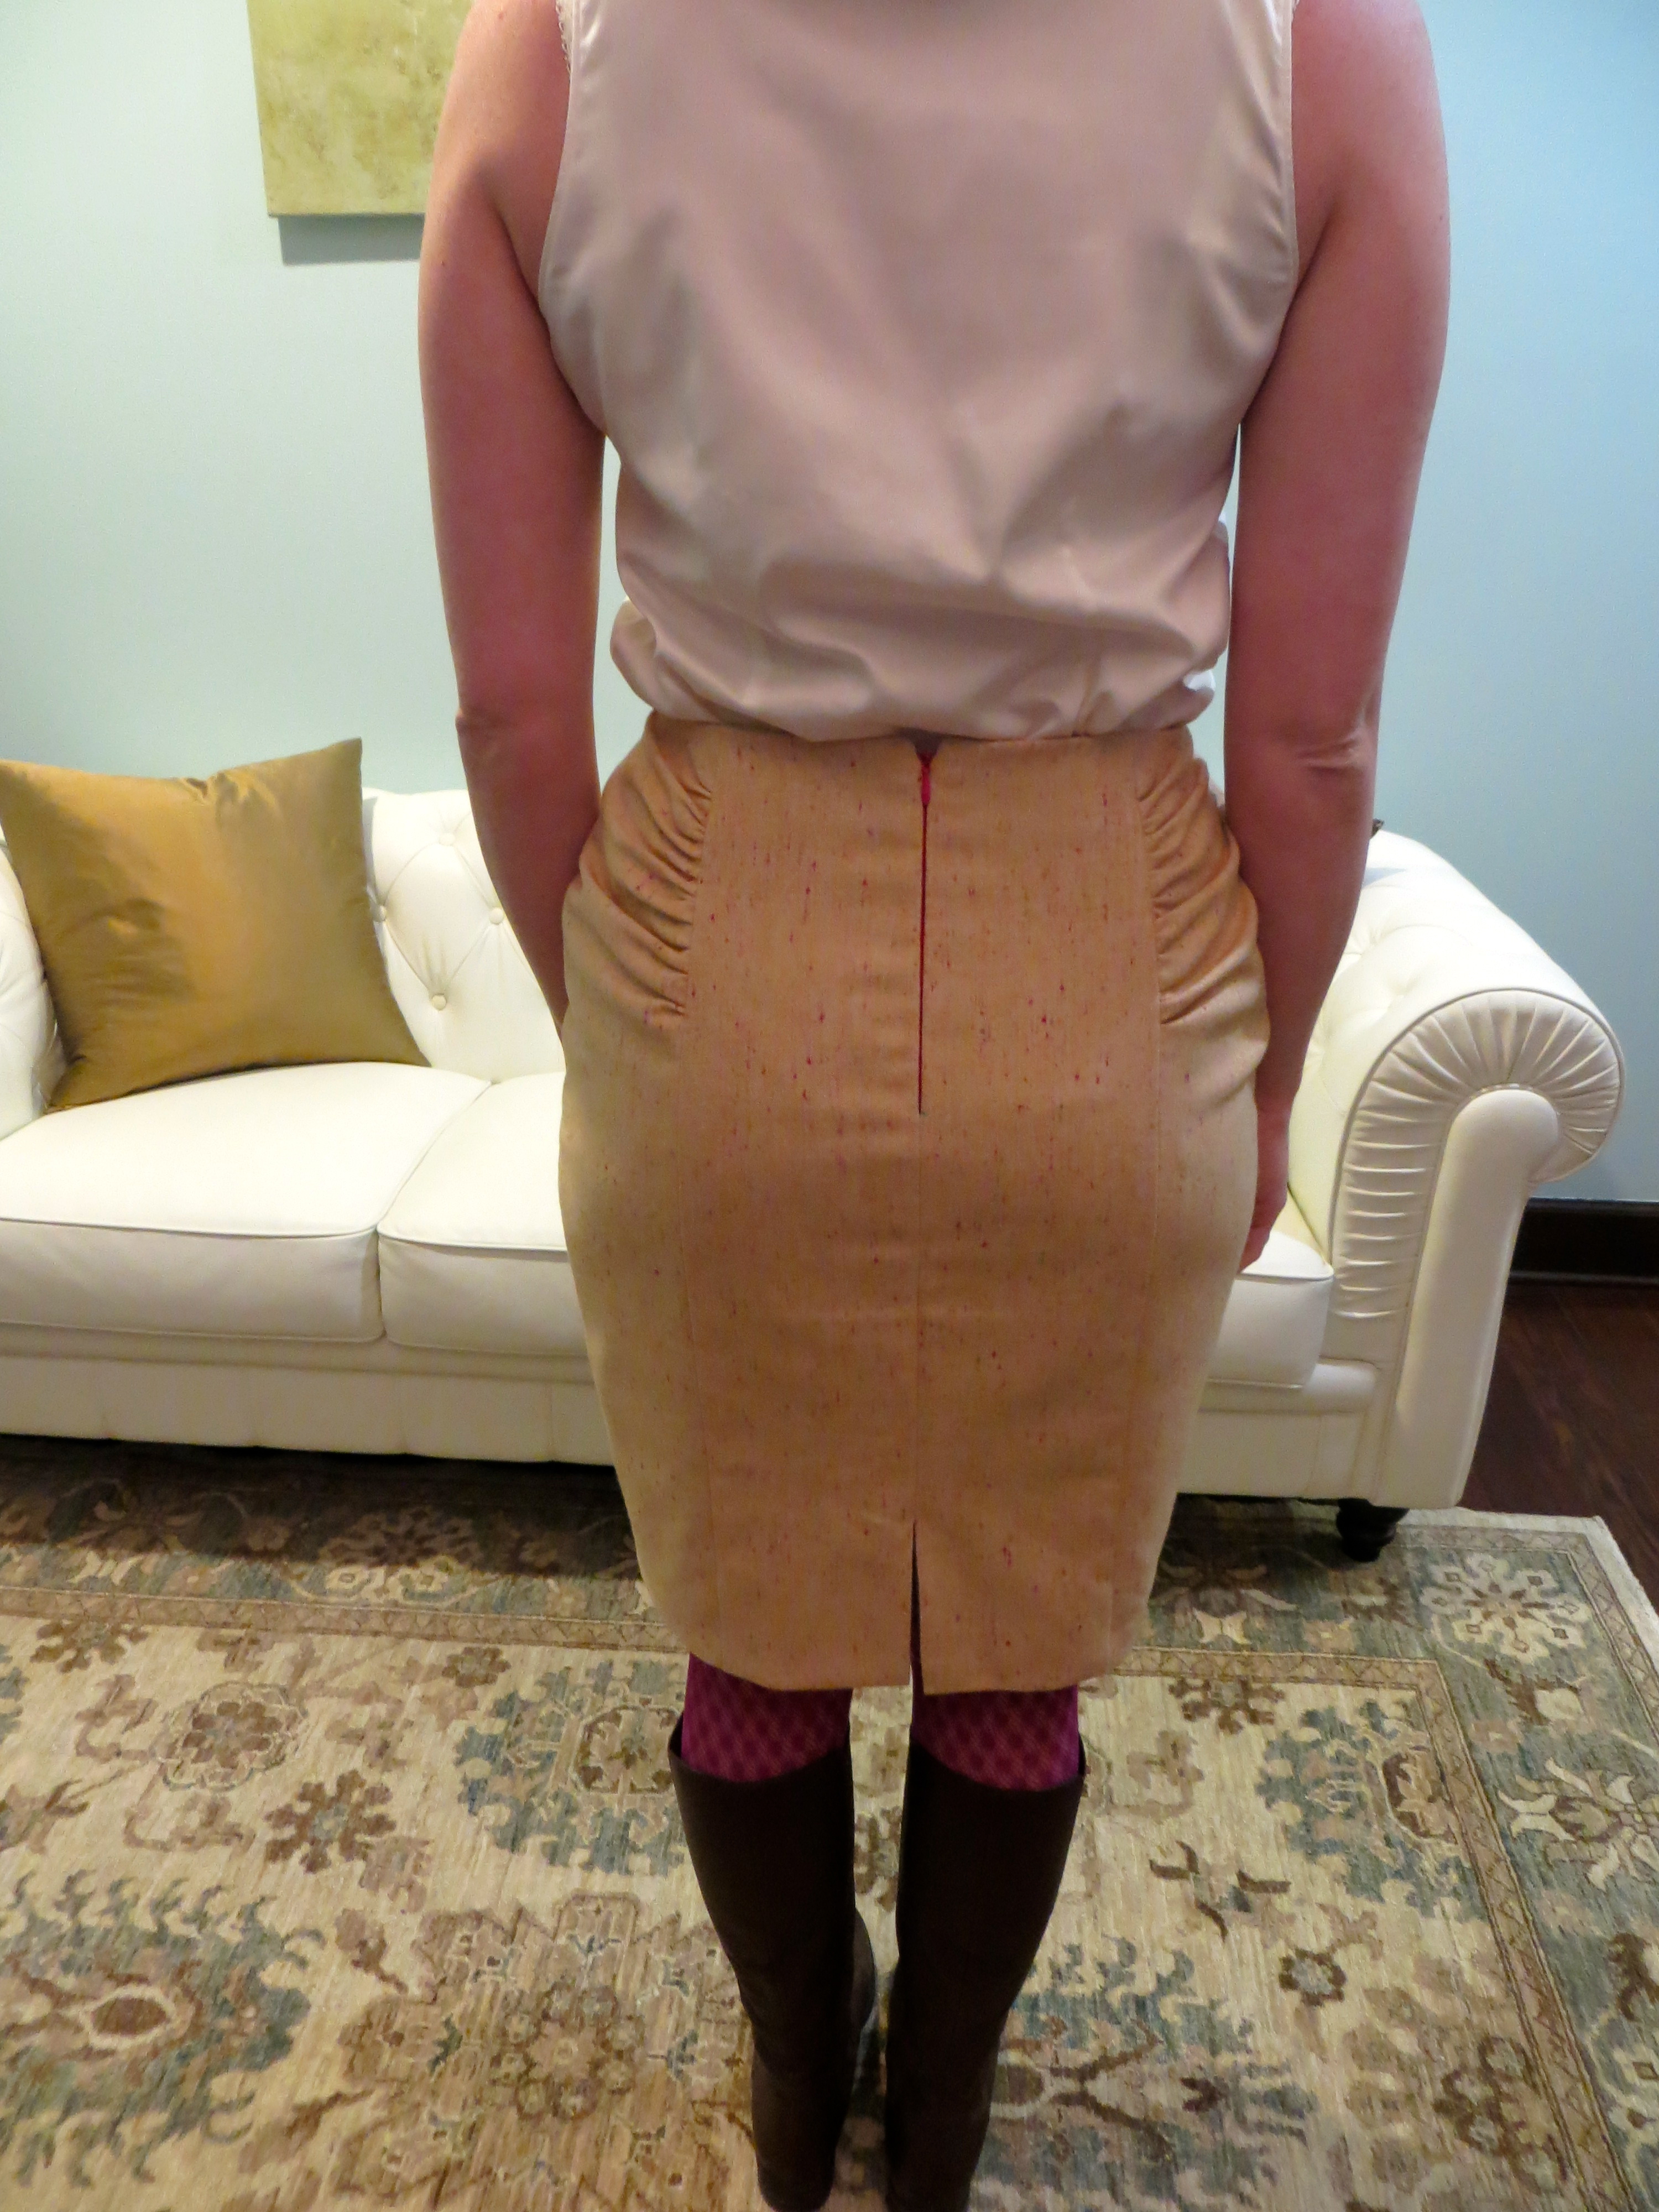
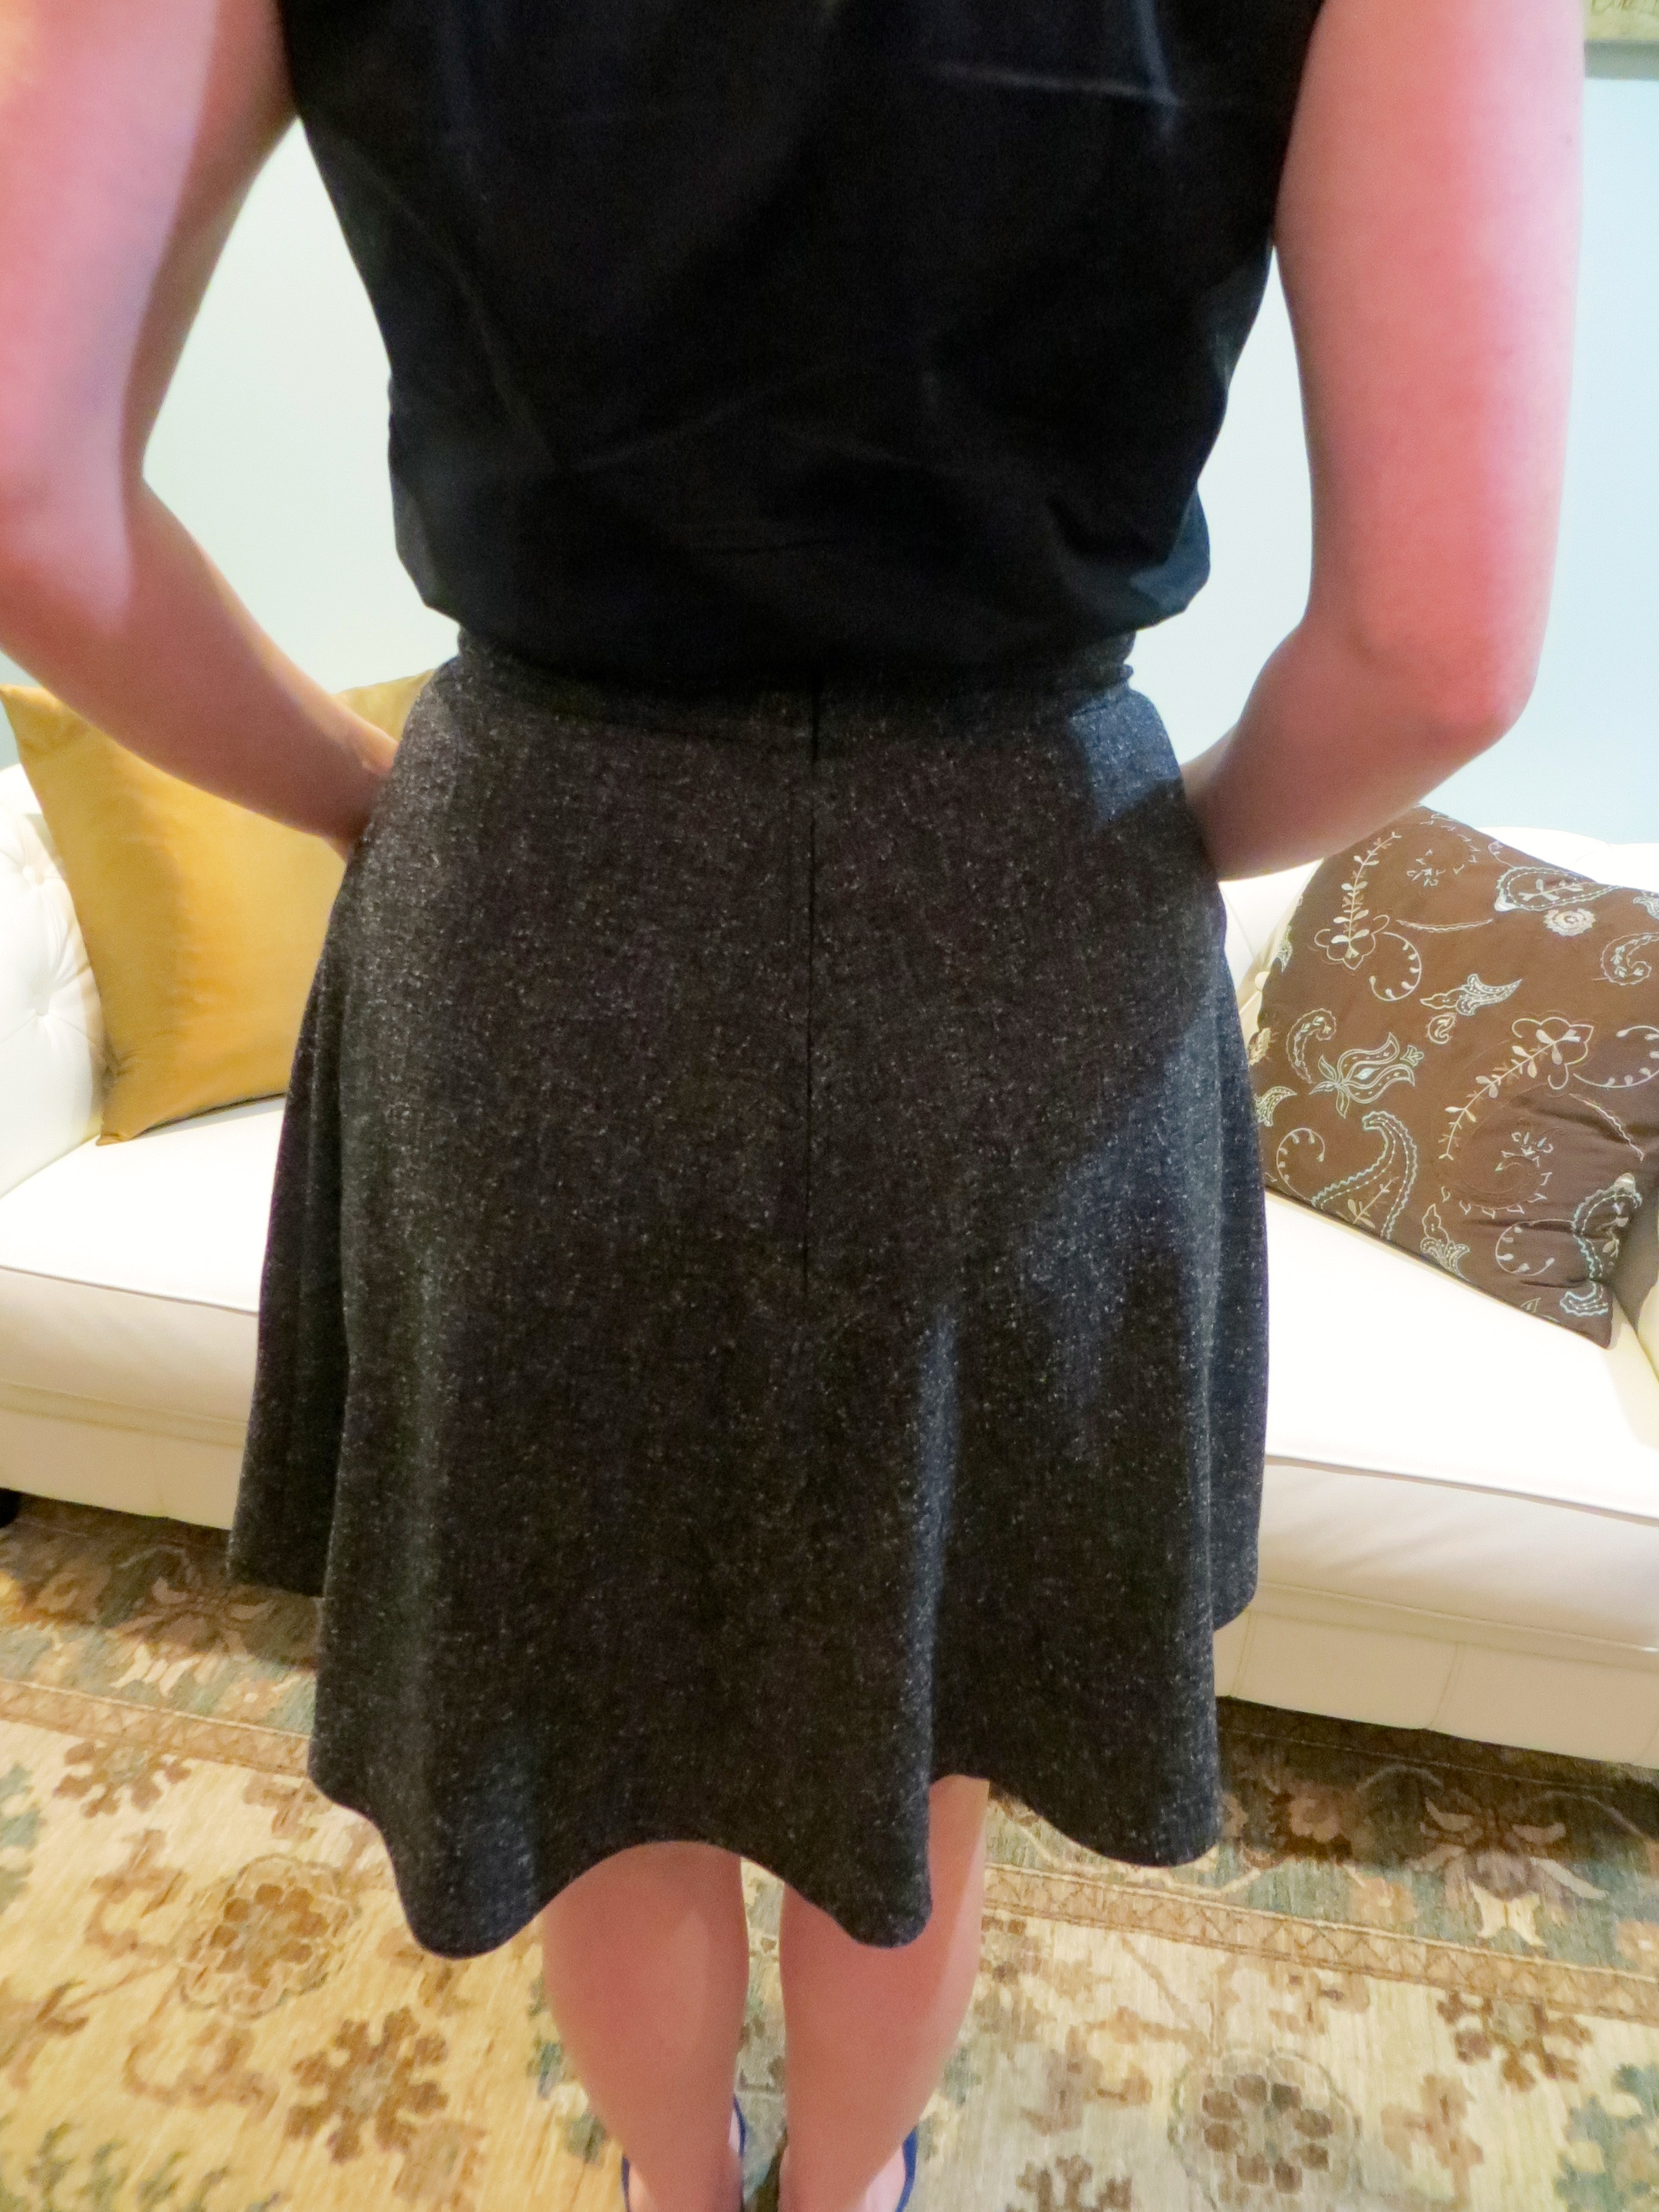
From the back view you can see that I did an awesome swayback adjustment — well, pretend like you can :).  It is wrinkly from being tucked in but before I made my swayback adjustment, the back of this shirt pooled like crazy.  Now it glides over my junk-trunk much more gracefully.  For finishing, the seams are all French seams and the armholes are finished with self-bias binding.


IMG_1456


And just to show you one of my favorite flowers and why this is my favorite time of the year.  Azaleas make me so happy.  These are some of the small azalea bushes outside my office.  When I left work yesterday afternoon, they were so full of blooms and the sunshine was so pretty, I just had to snap a picture for you.  Unfortunately azaleas grow really slowly so it will be many years before these bushes reach the massive size of the plants that I so admire in our surrounding neighborhoods, but at least my little babies make up for it in quality!


IMG_1433


And one last shot to show you the outtakes from my first attempt at self-photography.  Apparently 10 seconds isn’t as long as I thought it was.  Or we can pretend I was doing exercises in my skirt and heels.  In front of the camera.  I’m still amazed that I even figured out how to turn on the timer on my camera without having to consult the manual…
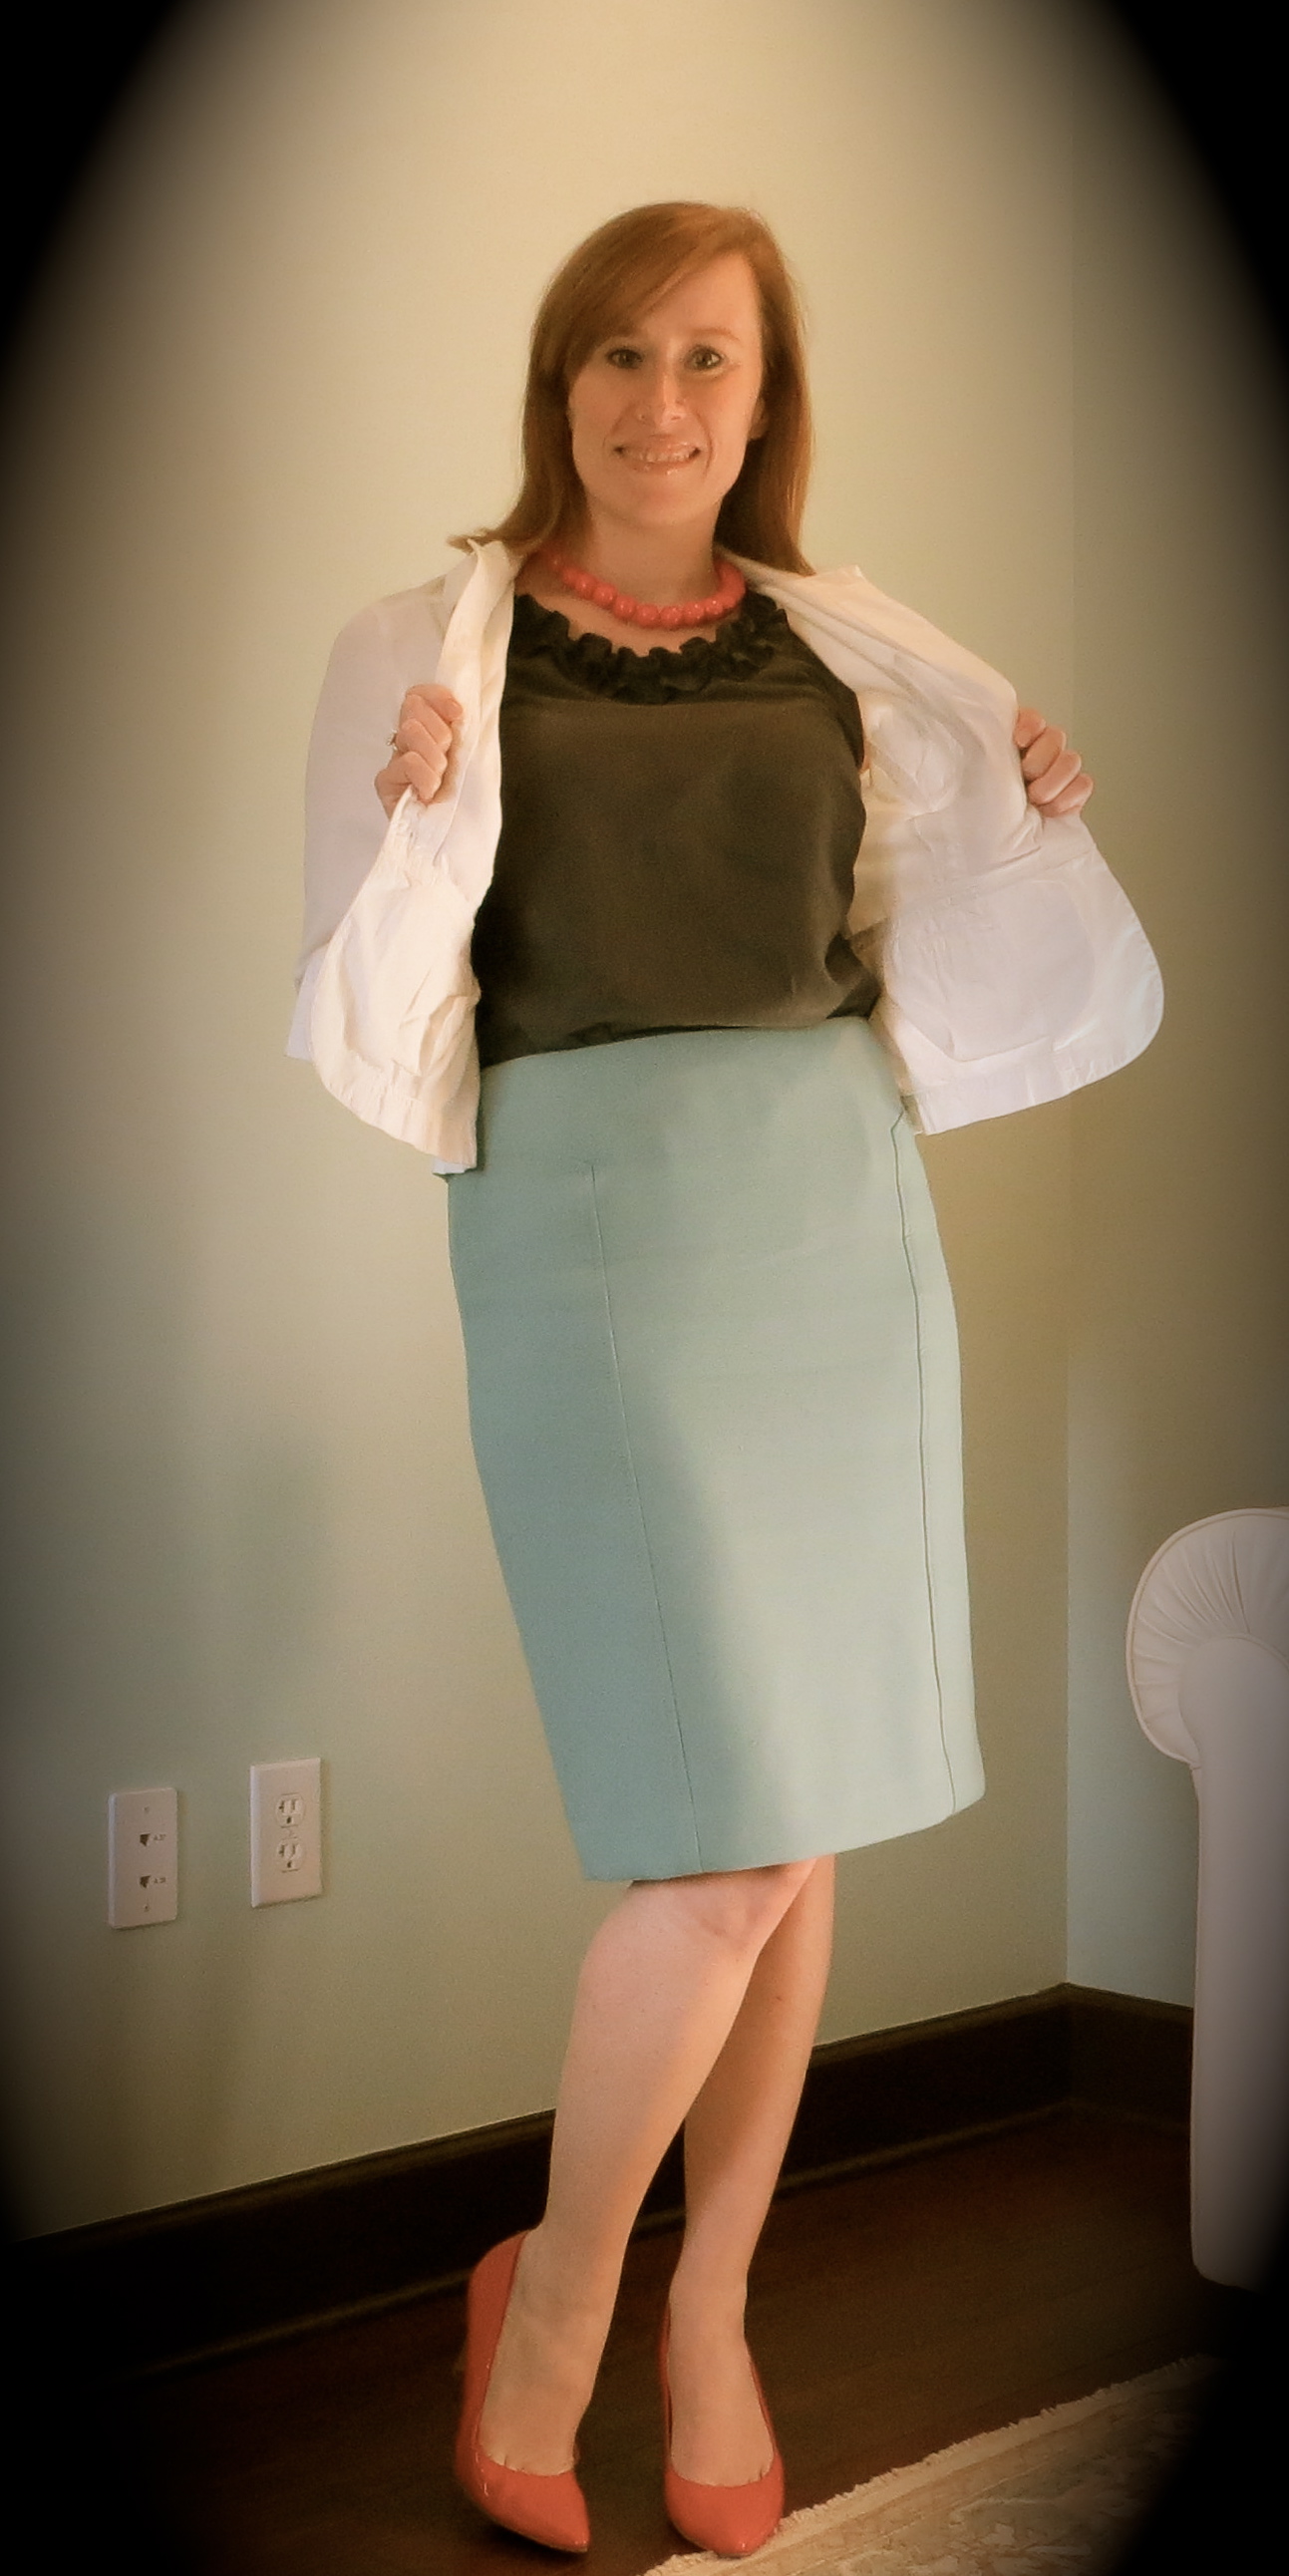
 

IMG_1430

Jacket–Loft
Blouse–Made by Me!
Skirt–Halogen from Nordstrom
Shoes–Cole Haan
Necklace–Tessyla on Etsy


Sewaholic Lonsdale

31 Mar

I’m still here!  Don’t worry I haven’t fallen off the planet!!  I have been traveling, sewing, and mostly working since we spoke last.  I have a cute sundress to show you today.  We are definitely getting into sundress-wearing weather here in the Deep South and the Sewaholic Lonsdale is the perfect pairing.  I stalked this pattern for a while before I actually convinced myself to buy it, but once I got it, I sewed it up almost immediately.  I love the cute knot at the front and the way the straps loop through the back and then tie.  I also like the breezy half (?) circle skirt.  Although I don’t think this halter style is the most flattering on my body, that’s not going to stop me from wearing my new cute dress or making this pattern up again 🙂

IMG_1399

For this version, I used a new rayon challis I picked up at Hart’s Fabric when I was in California last month.  I know I still have to show you all my fabrics and I promise I haven’t forgotten.  The fabric was easy to work with and it is wonderful to wear.  It does wrinkle a bit as you can see in the photos but it is not that bad.
IMG_1394

If you are not familiar with this pattern, the bodice is self-lined but the skirt is unlined.  I strayed from the pattern and decided to line the skirt as well.  I used a yellow batiste.  Because I sewed the batiste to the rayon all the way down the center back seam when inserting the zipper, I could not separate the two layers for hemming without doing some unpicking.  Since that is one of my least favorite tasks, I left it as it was and just hemmed the two layers together and the skirt lining became more of an underlining.  The downside is that my flowy rayon is now a bit more structured but the plus side is that I had a hidden layer to anchor my handstitched blind hem to.  This minor blooper is not going to prevent me from wearing this dress at all and I have already enjoyed wearing it on vacation, to church, and all day to our local arts and crafts fair (where the photos were taken).

IMG_1396

I love the consistent sizing of Sewaholic patterns.  I sewed my usual size 8 and did my usual 1″ full bust adjustment.  This FBA was a bit different since I didn’t want a waist or bust dart in the final dress.  I rotated the bust dart up to the knot gathers and the waist dart fullness was rotated to the center front seam.  You can see details of how this is done on the Sewaholic website’s tutorial.

IMG_1400

The only other alteration I made was to hem the skirt just above knee-length as I feel this is more flattering on me.

IMG_1401

If you are looking for an easy-to-sew and very wearable summer dress pattern, you should definitely consider the Lonsdale.  I am thinking about making the maxi version for the next go-around.  What do you think?

Vogue 8603, Washington DC, and G Street Fabrics

4 Mar

IMG_1358

So I have to apologize to my email and RSS feed readers who may have noticed that my last post went up a few days prematurely. I guess I will just blame it on the lack of time awareness that goes along with being on a cruise. I actually scheduled the post for Thursday but the WordPress app on my iPad had different ideas. Regardless, now you definitely know that I am spending the week bobbing around the Caribbean aboard the beautiful Celebrity Reflection.

IMG_1359

I’m sorry for not posting this skirt sooner — I initially stitched it up about a year ago but a series of events have kept it from making an introduction before now. Initially, the skirt was complete save for the hemming. Then, I lost a little weight and it got a bit big in the waist. I ended up taking it to my local alteration shop for the modifications because I decided if it was up to me, it would never get done. She also helped me mark the hem. By then it was summertime and I just didn’t feel like working on the skirt any more so it has sat in my UFO pile until now. I decided to finally finish the hem and wear the skirt on a recent work trip to Washington DC a few weeks ago.

IMG_1360

While I was in DC, I made a trip out to G Street Fabrics that all of the DC area sewing bloggers talk about. I had to take the Metro out of the city into Maryland and then walk 5-10 minutes to get there. They have a decent selection of fabric but some of it is hard to peruse because of the way all the bolts are piled on top of one another and their prices are ridiculous! Their silk charmeuses were $60-$70 per yard! I also saw an exact cotton that I purchased in NYC for $6 per yard selling in G Street for $25 per yard. They did have a nice selection of trims and buttons and I did manage to find a few things to bring home. I will show them in an upcoming post along with the Hart’s Fabrics buys that I mentioned not long ago.

IMG_1352

I love the ruching on the hips of this skirt. It reminds me of a skirt I have by one of my favorite designers, Nanette Lepore.

IMG_1365

Unfortunately, I have forgotten many of the details of the construction of this skirt because I made it so long ago. I do know that I cut the lining from the pieces that did not include ruching — no sense in having double the bulk in that area.

IMG_1366

My fabric is a lovely stretch suiting from Emma One Sock with a peachy nude background and green, magenta, and coral tweed-like flecks in it. It is hard to see the details of the fabric from these photos. I will try to update when I get home.

IMG_1368

I lined the skirt with a silky and slightly stretchy pale green satin. I used hot pink for all of my serger threads.

IMG_1367

My mother and grandmother joined me on my trip to Washington. While we were there, we had the opportunity to visit my cousin at work at the Pentagon!

IMG_1348

Thirsty Thursdays — Absolute Stress (Reliever)

4 Mar

IMG_1383

Since you now know I am away slacking in the Caribbean, I thought it only appropriate that I share with you a recipe for a drink to help transport you to an equally tropical state of mind. Enter the Absolute Stress (Reliever). I first tried one of these cocktails in New Orleans and I must say, I was hooked and had to find the recipe for myself. As originally made, the drink called for peach schnapps. You can use this, but I have found that as I have gotten older, my taste buds are not such a fan this overly sweet liqueur. I have substituted peach-flavored vodka here.

So don’t delay, gather your ingredients and transport yourself to a wonderful, tropical place this weekend, even if it is only in your living room 🙂

Absolute Stress (Reliever)
Serves 1

1/2 ounce coconut rum
1/2 ounce vodka
1/2 ounce peach vodka (or peach schnapps)
1 ounce orange juice
1 ounce pineapple juice
1 ounce cranberry juice

Pour all ingredients into a shaker filled with ice. Shake well and strain into cocktail glass filled with fresh ice. Garnish as desired and enjoy!

6 Airplanes, 3 Days, and 1 Gertie!

6 Feb

Drumroll, please!  The winner of my One Year Blogiversary Giveaway is… Breenie!!! Breenie, please contact me at susiehomemakermd [at] gmail [dot] com so I will know where to send your Craftsy gift certificate for a free course of your choice.  Congratulations and thanks to everyone who commented!

You may recall me mentioning last week that I was going to a workshop with the lovely and talented Gretchen Hirsch of Blog for Better Sewing and Gertie’s New Book for Better Sewing fame. Bright and early Friday morning I boarded a plane for Monterey, California, and three flights and nine hours later I arrived on the beautiful and sunny west coast. I let the rental car agent talk me into upgrading to a convertible and I headed with the top down to the peaceful and wooded grounds of Asilomar Conference Center, a state park that was built in the 1910s as a women’s camp. After unpacking and resting for a bit, everyone met in our sewing lab for introductions.

IMG_1299

There were about 24 workshoppers in all plus our excellent instructors, Gretchen and Heather Ross. Heather was an amiable hostess and was a natural at making everyone feel welcomed and like an old friend. We were also assisted by another Katrina (how often does that happen?!?), who worked at Hart’s Fabrics in Santa Cruz, and she was kind enough to tell us all about their Super Bowl Sunday sale. So not only did we gets lots of sewing and socializing done, we also got to go on a field trip to an awesome fabric store!

IMG_1313

Me and Lauren in our mid-construction shirtwaists

Before the workshop most of us introduced ourselves via email. Through those communications, I met Lauren and realized that we had similar sewing interests and were both planning to work on the shirtwaist dress from Gretchen’s book. We chatted back and forth about our muslins and fabric choices in the weeks leading up to the workshop and we were neighbors in the sewing lab. I am so glad I had the opportunity to meet Lauren and hope one day I can make pretty bound buttonholes like hers!

IMG_1303

Mid-construction fitting check

I chose to work on the shirtwaist dress from Gretchen’s book during the workshop because I have always loved the look of a classic shirtdress but have had a hard time finding one to fit off the rack. I worked on a muslin prior to the workshop and only had to make a few tweaks once I got to California. My alterations included a FBA, lowering the darts (a lot!), shortening the bodice (a tad), a forward shoulder adjustment, bringing in the shoulders, and lowering the armscye. I also shortened the hem. I didn’t quite finish the dress during the workshop so I will wait until I complete it to give you my official review.

IMG_1317

Please excuse my darts — we didn’t have a tailor’s ham!

But here’s you a sneak peek. If you look closely, you will see I only have one sleeve sewn on! 🙂

Gretchen was so nice to work with — she is the reason I chose to attend the workshop.  The week before I left for California, I emailed Gretchen to see if she would bring the actual shirtwaist dress from the book and she graciously agreed.  We all oohed and ahhed over her beautiful creation and teased to stick it in our suitcases when she wasn’t looking.  Her fitting advice was spot on and she made sure to spend time with each sewist in the room over the course of the weekend.  And, yes, the pink hair is awesome in person!

IMG_1311

IMG_1308

Do you see the beach deer?!?

On Sunday afternoon we took a tour of the grounds with the park ranger and actually looked at the ocean (we had all been way too busy sewing!).

IMG_1323

That’s my cute little rental car there in the middle of the picture.

It was a gorgeous day so after our final goodbyes, I put the top down on my little car and headed to Santa Cruz for the sale at Hart’s fabrics. I ran into Gretchen, Lauren, and at least a half-dozen of the other ladies while I was there. I doubt Mr. Homemaker reads this far down so let’s talk about what I bought. I racked up on some awesome solid color knits, cotton/silk blend, rayon challis, and silk chiffon.

IMG_1322

Thankfully Hart’s was willing to ship my fabrics home for me, so when they come in later this week, I will show you what I got.

Once I closed down Hart’s, I headed to San Jose to visit my favorite department store, Nordstrom. I picked up a few shirts, belts, and shoes, and they, too, were willing to ship. Thank goodness because I otherwise would have had to buy a new suitcase!

I finished off the night with a delicious and decadent dinner for one at a charming little restaurant in Pacific Grove called Passionfish. I had a scallop appetizer, crab and avocado salad, Wagyu beef brisket entrée, and Meyer lemon panna cotta for dessert. I was stuffed!

IMG_1320

I thoroughly enjoyed my time on the beautiful Monterey peninsula. Traveling across the country by myself to spend the weekend with like-minded women who don’t mind talking about sewing over dinner or who will gladly pin you into your dress and give you fitting advice was refreshing and a needed change of pace. Heather Ross puts on a great retreat and I can’t wait to join her and Gretchen again soon!

Check out my Flickr set for more photos.

Thirsty Thursdays — Coffee Punch

31 Jan

Don’t forget to enter my One Year Blogiversary Giveaway!  The giveaway will end tonight at midnight CST.  Click here to leave a comment on the giveaway post and be entered to win a free Craftsy class of your choice!!!


IMG_1282


Let’s just start out by saying that I warned you — this punch is going to rock your world.  Coffee drinkers and non-coffee drinkers alike will beg you to make this again and again.  Honestly, the only people who aren’t going to like this punch are the ones who aren’t breathing.  So go ahead and make a batch.  Don’t have an excuse to make a 2 gallon bowl of punch?  I’ll give you a scaled down version, too.  Just because I’m nice like that 🙂

I’ve been making this punch for almost 10 years and it is a favorite at baby/bridal showers and family gatherings.  It is cold, creamy, sweet, and has a hint of coffee.  I don’t like coffee but I can drink this punch all day long.  There’s ice cream floating in it.  Need I say more?


IMG_1280


Coffee Punch

Makes about 2 gallons

2 cups water

1 cup granulated sugar

1/2 cup instant coffee

1 gallon whole milk

1/2 gallon vanilla ice cream, slightly softened

1/2 gallon chocolate ice cream, slightly softened

In a large glass measuring cup combine the water and sugar.  Heat on high in the microwave in 60 second intervals until all the sugar has completely dissolved.  Stir in the instant coffee and set aside to cool to room temperature.  At this point you can refrigerate the coffee syrup for later use if you are prepping for a party.

Pour the coffee syrup into a large punch bowl.  Stir in the milk.  Scoop in the vanilla and chocolate ice cream then stir to combine.  Continue to stir occasionally as the ice cream will start to melt into the punch.  YUM!!!


Coffee Punch for Two

1 ounce water

1 tablespoon granulated sugar

1 1/2 teaspoons instant coffee

1 cup whole milk

1/2 cup vanilla ice cream, slightly softened

1/2 cup chocolate ice cream, slightly softened

Follow the instructions above to combine water, sugar, instant coffee, and milk.  Pour mixture into blender and add ice cream.  Blend until smooth.  Alternately, you can stir mixture and ice cream together in a glass for a less smooth texture.  Enjoy 🙂


Hot Goat Cheese and Spinach Dip

29 Jan


Don’t forget to enter my One Year Blogiversary Giveaway!  The giveaway will end Thursday, January 31 at midnight CST.  Click here to leave a comment on the giveaway post and be entered to win a free Craftsy class of your choice!!!


IMG_1277


Last weekend I prepared the food for a friend’s baby’s first birthday party.  There were 25 adult guests and the menu included a few already-blogged recipes like Spinach Blues Salad and Cheez-It Crack, a few I have yet to share with you but will soon, and this Hot Goat Cheese and Spinach Dip.  I first had this dip at a wonderful little restaurant in Napa, California in 2010.  Unfortunately, I don’t remember the name of the restaurant, but the chef was kind enough to jot the recipe down on a piece of register tape for me.  I am entering it here on this blog now for all of posterity 🙂

This dip is warm and creamy and satisfying like spinach dip usually is but it has the added tang of goat cheese, one of my favorite flavors.  It is also enhanced by the addition of fresh herbs and roasted garlic.  Finally, using fresh spinach instead of frozen sets this dip apart, as it keeps the spinach from being a mushy mesh and less likely to make your dip watery (in my opinion).

So while this recipe may involve a few more steps than the traditional spinach dip, I think you and your guests will be quite pleased with the results.  I know I have never received any complaints and the empty serving dish always speaks for itself 😉


Hot Goat Cheese and Spinach Dip

Yields 1-9″ x 13″ shallow dish


1 head garlic

1 teaspoon olive oil

1/4 teaspoon salt

3/4 cup blanched and squeezed spinach (you will need a large bag of fresh spinach to achieve this amount, see directions)

1 1/2 cups mayonnaise

1 1/2 cups sour cream

12 ounces goat cheese, softened

3 Tablespoons fresh parsley, chopped

6 Tablespoons fresh chives, chopped

1 teaspoon fresh tarragon, chopped

1 teaspoon garlic powder

Salt and pepper to taste


Preheat oven to 350 degrees F.  Slice off top 1/4 of head of garlic.  Drizzle with olive oil and sprinkle with 1/4 teaspoon salt.  Wrap in foil and roast in oven for 1 hour.  Let stand until cool enough to handle then squeeze garlic from skin, reserving garlic and discarding skin.

While the garlic is roasting, bring a large stockpot of water to a boil.  Place a large bowl of ice water next to the stove.  Have a strainer with a handle ready.  Put an entire large bag of spinach leaves into the boiling water and stir to immerse all of them.  You may not think they will all fit but they will if you give it a stir.  After 30 seconds, remove the spinach with the strainer and immediately immerse it in the ice water bath.  Once the spinach is completely cool, remove from the ice water and squeeze the excess water out.  Place the spinach in a clean kitchen towel and continue to squeeze until very dry.  The more water you get out of your spinach at this stage, the less likely you will be to have runny dip later.  Measure out 3/4 cup of spinach and chop it with a knife a few times to break up the leaves.

In a mixing bowl, combine the mayonnaise, sour cream, and goat cheese, and beat with an electric mixer until well blended.  Stir in roasted garlic, parsley, chives, tarragon, and garlic powder.  Stir in spinach.  Add salt and pepper to taste.  Spread into shallow baking dish and bake at 350F for 25 to 30 minutes, or until starting to bubble around the edges.  Serve with tortilla chips or toasted baguette slices.


Sewaholic Hollyburn Skirt

27 Jan

Don’t forget to enter my One Year Blogiversary Giveaway!  The giveaway will end Thursday, January 31 at midnight CST.  Click here to leave a comment on the giveaway post and be entered to win a free Craftsy class of your choice!!!

IMG_1261

This Hollyburn skirt is my most recently finished sewing project and I have to tell you what a joy it was to stitch up.  I was in the middle of muslining the shirtwaist dress from Gertie’s New Book for Better Sewing because I’m going to a workshop in California with Gertie (!!!) next weekend.  I needed something quick and easy with no fitting issues to cleanse my sewing palate and this skirt was just the thing.  Simply make sure you pick the right waist measurement, confirm with the finished garment measurement and start cutting and sewing.  I chose a poly blend suiting from my stash (from Joann’s) and used a silky royal blue cotton sateen for the pocket and waistband lining (from the NYC trip).  The interesting thing about the fabric from Joann’s is that I have a pair of pants from The Limited in the exact same fabric!

IMG_1259

I was originally going to participate in the Hollyburn Sewalong being hosted by Rachel at My Messings but once I got started on this pattern I couldn’t wait to finish it up.  I have come to the conclusion that Tasia of Sewaholic Patterns is a very gifted pattern designer/drafter.  I have now made 3 of her patterns (Renfrew x 2, Cambie, and this skirt),and they are all very well-drafted and the instructions, while succinct, are very well-written.

1206_Sewaholic_Hollyburn_Envelope_Front.jpg

This skirt is a simple half circle with slash pockets, center back zipper, and three length variations.  I chose to make the shortest version as I recently read that my ideal skirt length is a little above my knee — never knew I had short shins!  I made a size 8 but I did cut the length at the size 16 line.  I sewed a 5/8″ hem.

IMG_1263

While this pattern is suitable for beginning sewers, I decided to make a few small modifications to fancy it up a bit.  I split the pocket piece into two to create a separate pocket lining piece.  I also sewed the skirt/pocket lining seam at 1/2″ so that the apparel fabric would roll to the inside a little bit and the blue wouldn’t be visible from the outside of the garment.

IMG_1264

Until the Date Night Dress, I have only ever done invisible zippers.  This skirt was my first time doing a centered zipper.  I probably ripped and basted this thing a half-dozen times before I was satisfied.  I finally got it close and steamed the life out of it to make it look decent.  I have to say I am quite satisfied with it now.  I departed from the directions as written a bit and sewed the back seam up to the notches and backstitched.  Then, I basted the rest of the seam closed to make pressing the seam allowances back easier.  I took the basting out after pressing and before pinning the zipper but I think if I had left the basting in while pinning, I wouldn’t have had to rip the zipper out so many times.  Any more experienced zipper-installers have a say about this?

IMG_1258

You can do anything but lay off of my blue suede shoes — Elvis Presley

Here’s how I wore it to work.  Same old Talbots cardigan (I love this thing!), and my Via Spiga pointy-toe, low-heel pumps.  You can’t really see it in the photos but they are blue suede that matches the lining fabric.

IMG_1285

I also modified the waistband piece to be able to line it with my blue fabric.  I split the waistband piece in half lengthwise, then added a 5/8″ seam allowance.  I then cut one piece each from fashion and lining fabric.  I interfaced the fashion fabric only with a lightweight woven interfacing from Emma One Sock.  I sewed the pieces together along one long edge, trimmed and edgestitched, then treated the pieces as one per the instructions for the remainder of the construction process.

IMG_1289

I finished all my raw edges with my serger.  I guess I could’ve changed to black thread but I kind of like the white contrast since the fabric has little white flecks in it.

IMG_1292

To finish the waistband, I stitched in the ditch all the way around and this worked out perfectly.

IMG_1288

For my hem, I bound it in double fold bias tape.  This served two purposes.  First it provided a clean finish.  Second it added a little structure to the hem so it has a bit of flare.  I normally handstitch or machine blind hem all my hems but I decided to just machine straight stitch this one since the stitches blend into the fabric so well.  It was so much easier that way!  🙂

IMG_1257

Top: Ann Taylor
Cardigan: Talbots
Skirt: Made by Me!
Shoes: Via Spiga
Necklace: Tessyla from Etsy

Belle Bow Blouse — In House Patterns

26 Jan

Don’t forget to enter my One Year Blogiversary Giveaway!  The giveaway will end Thursday, January 31 at midnight CST.  Click here to enter a comment on the giveaway post and be entered to win a free Craftsy class of your choice!!!

IMG_1245

In my office at work.

This is a finished object that has been hanging in my closet for quite a few months now (since the summer).  Sorry it has taken me so long to get some decent pictures of it.  This blouse is the Belle Bow Blouse by In House Patterns, an indie pattern company that was new to me until I came across their downloadable offerings on Pattern Review.  The blouse features a neck tie, button front, waist tucks in front and back for shaping, and gathers at the shoulder yoke with sleeveless dropped shoulders.

IMG_1248

I must say I am very impressed with In House Patterns so far.  This pattern was very well-drafted, the instructions are excellent and create a very clean, professional finish, and the seam allowances are already reduced to keep you from having to trim everything.  To top it all off, these patterns are drafted for a D-cup so I didn’t have to spend time doing a full bust adjustment (FBA).

IMG_1246

I can tell you from personal experience that the top fits very true to the size chart without excess ease.  I was one size bigger in the hips than the waist and bust but I thought it wouldn’t be a big deal so I didn’t grade up.  Mistake — I ended up having to let my tucks out a little bit to accommodate my hips.  Next time I will know to go ahead and grade out at the side seams.

IMG_1249

I made the shirt from a cheap polyester that I picked up at the Vogue Fabrics booth at the Sewing Expo in Atlanta last year.  It took right at 1.5 yards.  It gets staticky like crazy.  I used tricot fusible for the button placket.  I used the buttons I picked up in England for the closures.

IMG_1243

Shirt: Made by Me!
Cardigan: Talbots
Jeans: AG
Shoes: Via Spiga
Necklace: Kluster on Etsy

When I wore it to work this week, I layered my favorite ivory cardigan over it.  This shirt also looks great tucked into a pencil skirt.  The pattern includes a collared version without the tie and I am thinking about making that one up next…

IMG_1250

I love how it just skims the hips.  The tucks are so easy to sew and are also great for alterations when you ignore the size chart 🙂

IMG_1252

A view of the inside.

As far as the finishes called for, the facing edges are serged.  The front bodice/yoke seam is clean finished so no exposed edges show.  The back yoke seam is finished with the serger.  The side seam edges call for a serged finish.  The sleeves and bottom have a narrow machine hem.

IMG_1256

Front yoke seam — inside view.

All in all, I can’t recommend this pattern enough.  If you haven’t seen In House Patterns before, go check them out.  And if you’re concerned because you aren’t a D bust cup, Alexandra has a lot of great information on her website about how to alter her patterns for larger and smaller sizes.  I am looking forward to new patterns from this great designer!

IMG_1247

1 Year Blogiversary Giveaway!

24 Jan

As I mentioned yesterday, I am celebrating one year of blogging about my cooking and sewing adventures.  I am amazed that I have accomplished all that I have — I have baked fancy cakes, perfected roasted chicken, whipped up some tasty cocktails, made some cute tops, conquered a princess seam sloper, and sewed a boutique-worthy dress.  I have also enjoyed “meeting” other bloggers, helping me broaden my sewing skills and exposing me to things I may not have otherwise come across.

In the coming weeks/months, I hope to share with you all the finished projects that have been hanging in my closet for a while now as well as the ones that are just getting finished up.  My life is pretty hectic, so finding time to sew is hard enough, but finding time to get good photos and blog about them is even harder.  I hope with longer days ahead, this will not be as much of an issue.  Right now I have about 6 unblogged garments to show you.  Perhaps I will aim to present 1 every two weeks?


IMG_1241


In the kitchen, Mr. Homemaker and I have recently subscribed to an organic produce delivery service and receive a box every other week.  So far we have been very pleased and find ourselves eating at home a lot more often.  I will try to share more recipes with you that involve fresh produce from our box as well as go through some of my entertaining essentials.


craftsy-logo


Well, enough of that.  Now for the giveaway I mentioned yesterday.  I am giving away, compliments of me, a gift certificate for a free Craftsy class to one lucky reader.  All you have to do is comment on this post and tell me which of my posts in the past year has been your favorite and what you would like to see me post in the upcoming year.  This giveaway is open to readers anywhere in the world (the prize will be provided via e-mail).  If you aren’t familiar with Craftsy, it is an online learning platform that provides video courses for many different crafts (baking, cake decorating, sewing, knitting, jewelry making, gardening, etc.).  You can watch the classes at your convenience and on your own time and they never expire.  Even if you don’t win, they offer several free mini classes, so it’s worth checking out.

Please note, this giveaway is not being sponsored by Craftsy.  I am purchasing this prize myself to celebrate my one year Blogiversary.  Yay!!!

The giveaway will close next Thursday, January 31, and I will announce the winner shortly thereafter.  Good luck and thanks for reading!