Don’t forget to enter my One Year Blogiversary Giveaway! The giveaway will end Thursday, January 31 at midnight CST. Click here to leave a comment on the giveaway post and be entered to win a free Craftsy class of your choice!!!

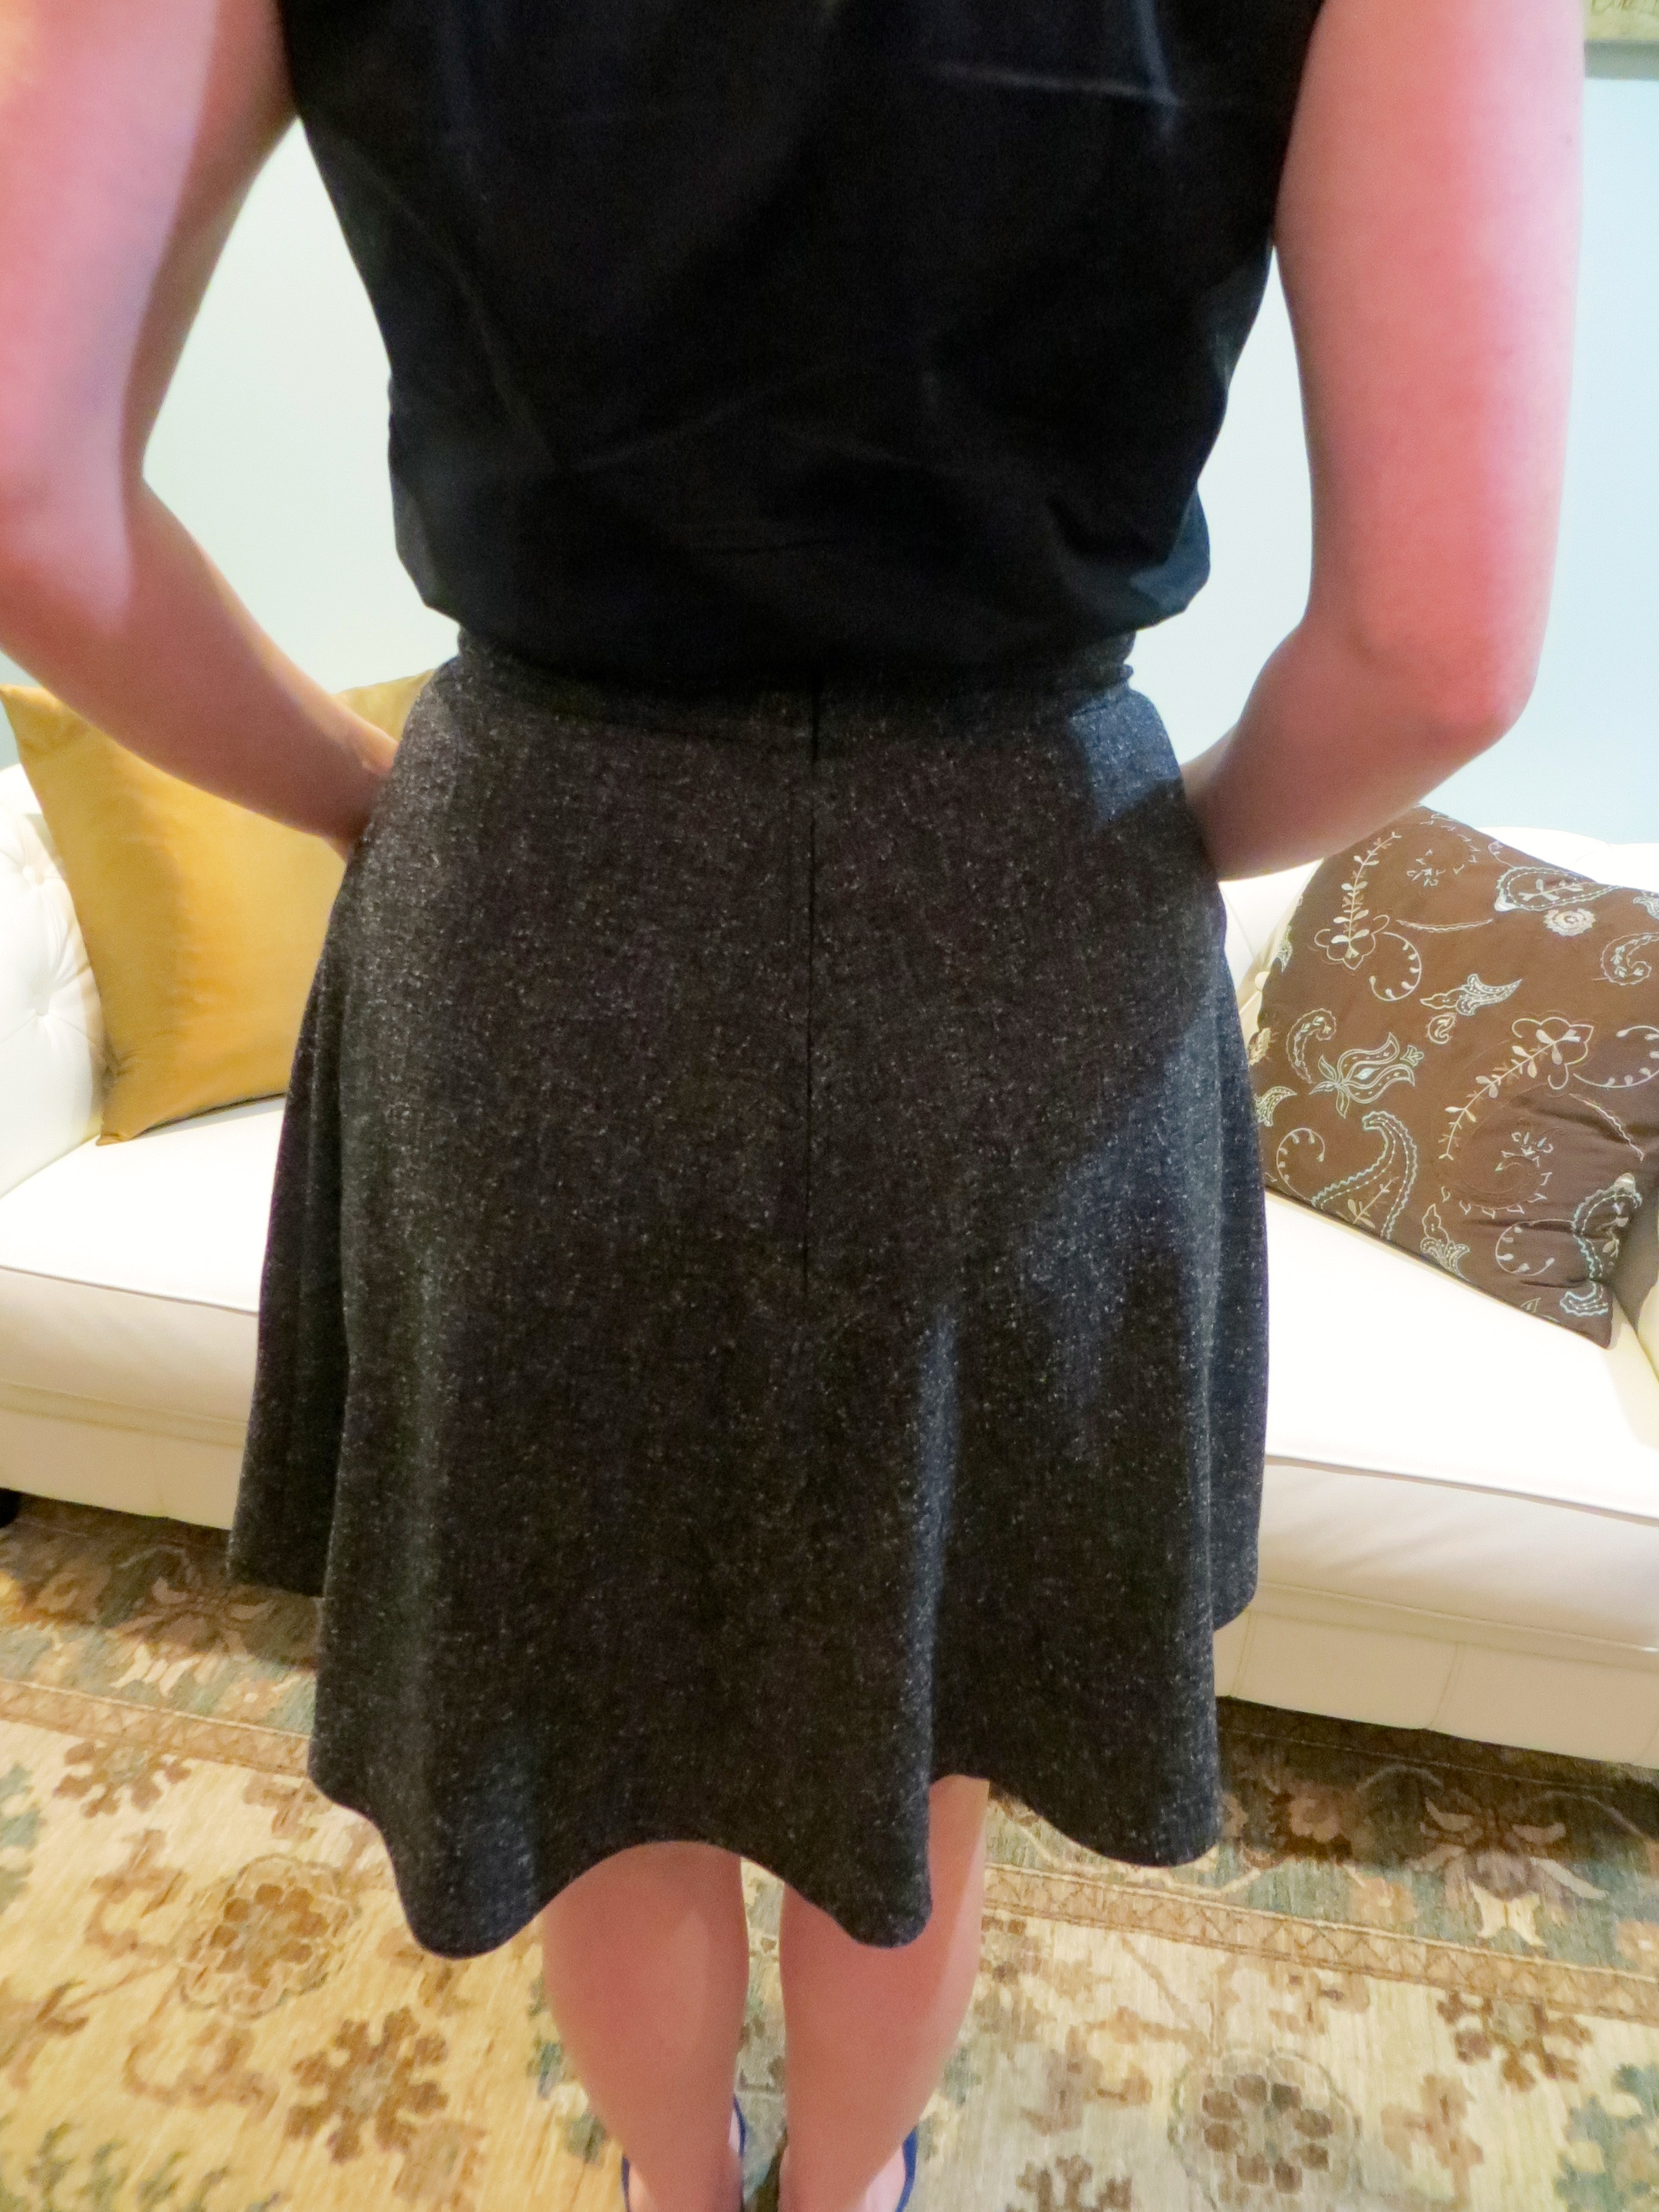
This Hollyburn skirt is my most recently finished sewing project and I have to tell you what a joy it was to stitch up. I was in the middle of muslining the shirtwaist dress from Gertie’s New Book for Better Sewing because I’m going to a workshop in California with Gertie (!!!) next weekend. I needed something quick and easy with no fitting issues to cleanse my sewing palate and this skirt was just the thing. Simply make sure you pick the right waist measurement, confirm with the finished garment measurement and start cutting and sewing. I chose a poly blend suiting from my stash (from Joann’s) and used a silky royal blue cotton sateen for the pocket and waistband lining (from the NYC trip). The interesting thing about the fabric from Joann’s is that I have a pair of pants from The Limited in the exact same fabric!

I was originally going to participate in the Hollyburn Sewalong being hosted by Rachel at My Messings but once I got started on this pattern I couldn’t wait to finish it up. I have come to the conclusion that Tasia of Sewaholic Patterns is a very gifted pattern designer/drafter. I have now made 3 of her patterns (Renfrew x 2, Cambie, and this skirt),and they are all very well-drafted and the instructions, while succinct, are very well-written.
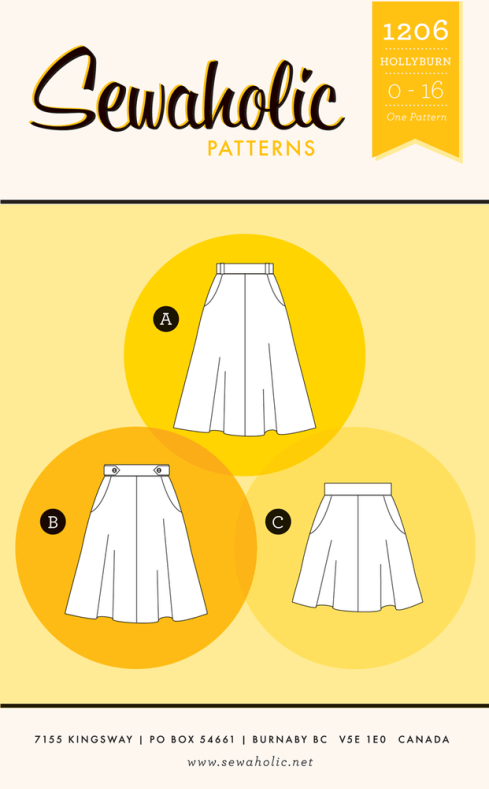
This skirt is a simple half circle with slash pockets, center back zipper, and three length variations. I chose to make the shortest version as I recently read that my ideal skirt length is a little above my knee — never knew I had short shins! I made a size 8 but I did cut the length at the size 16 line. I sewed a 5/8″ hem.

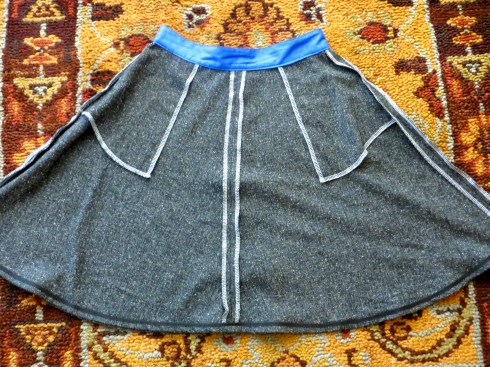
While this pattern is suitable for beginning sewers, I decided to make a few small modifications to fancy it up a bit. I split the pocket piece into two to create a separate pocket lining piece. I also sewed the skirt/pocket lining seam at 1/2″ so that the apparel fabric would roll to the inside a little bit and the blue wouldn’t be visible from the outside of the garment.
Until the Date Night Dress, I have only ever done invisible zippers. This skirt was my first time doing a centered zipper. I probably ripped and basted this thing a half-dozen times before I was satisfied. I finally got it close and steamed the life out of it to make it look decent. I have to say I am quite satisfied with it now. I departed from the directions as written a bit and sewed the back seam up to the notches and backstitched. Then, I basted the rest of the seam closed to make pressing the seam allowances back easier. I took the basting out after pressing and before pinning the zipper but I think if I had left the basting in while pinning, I wouldn’t have had to rip the zipper out so many times. Any more experienced zipper-installers have a say about this?

You can do anything but lay off of my blue suede shoes — Elvis Presley
Here’s how I wore it to work. Same old Talbots cardigan (I love this thing!), and my Via Spiga pointy-toe, low-heel pumps. You can’t really see it in the photos but they are blue suede that matches the lining fabric.
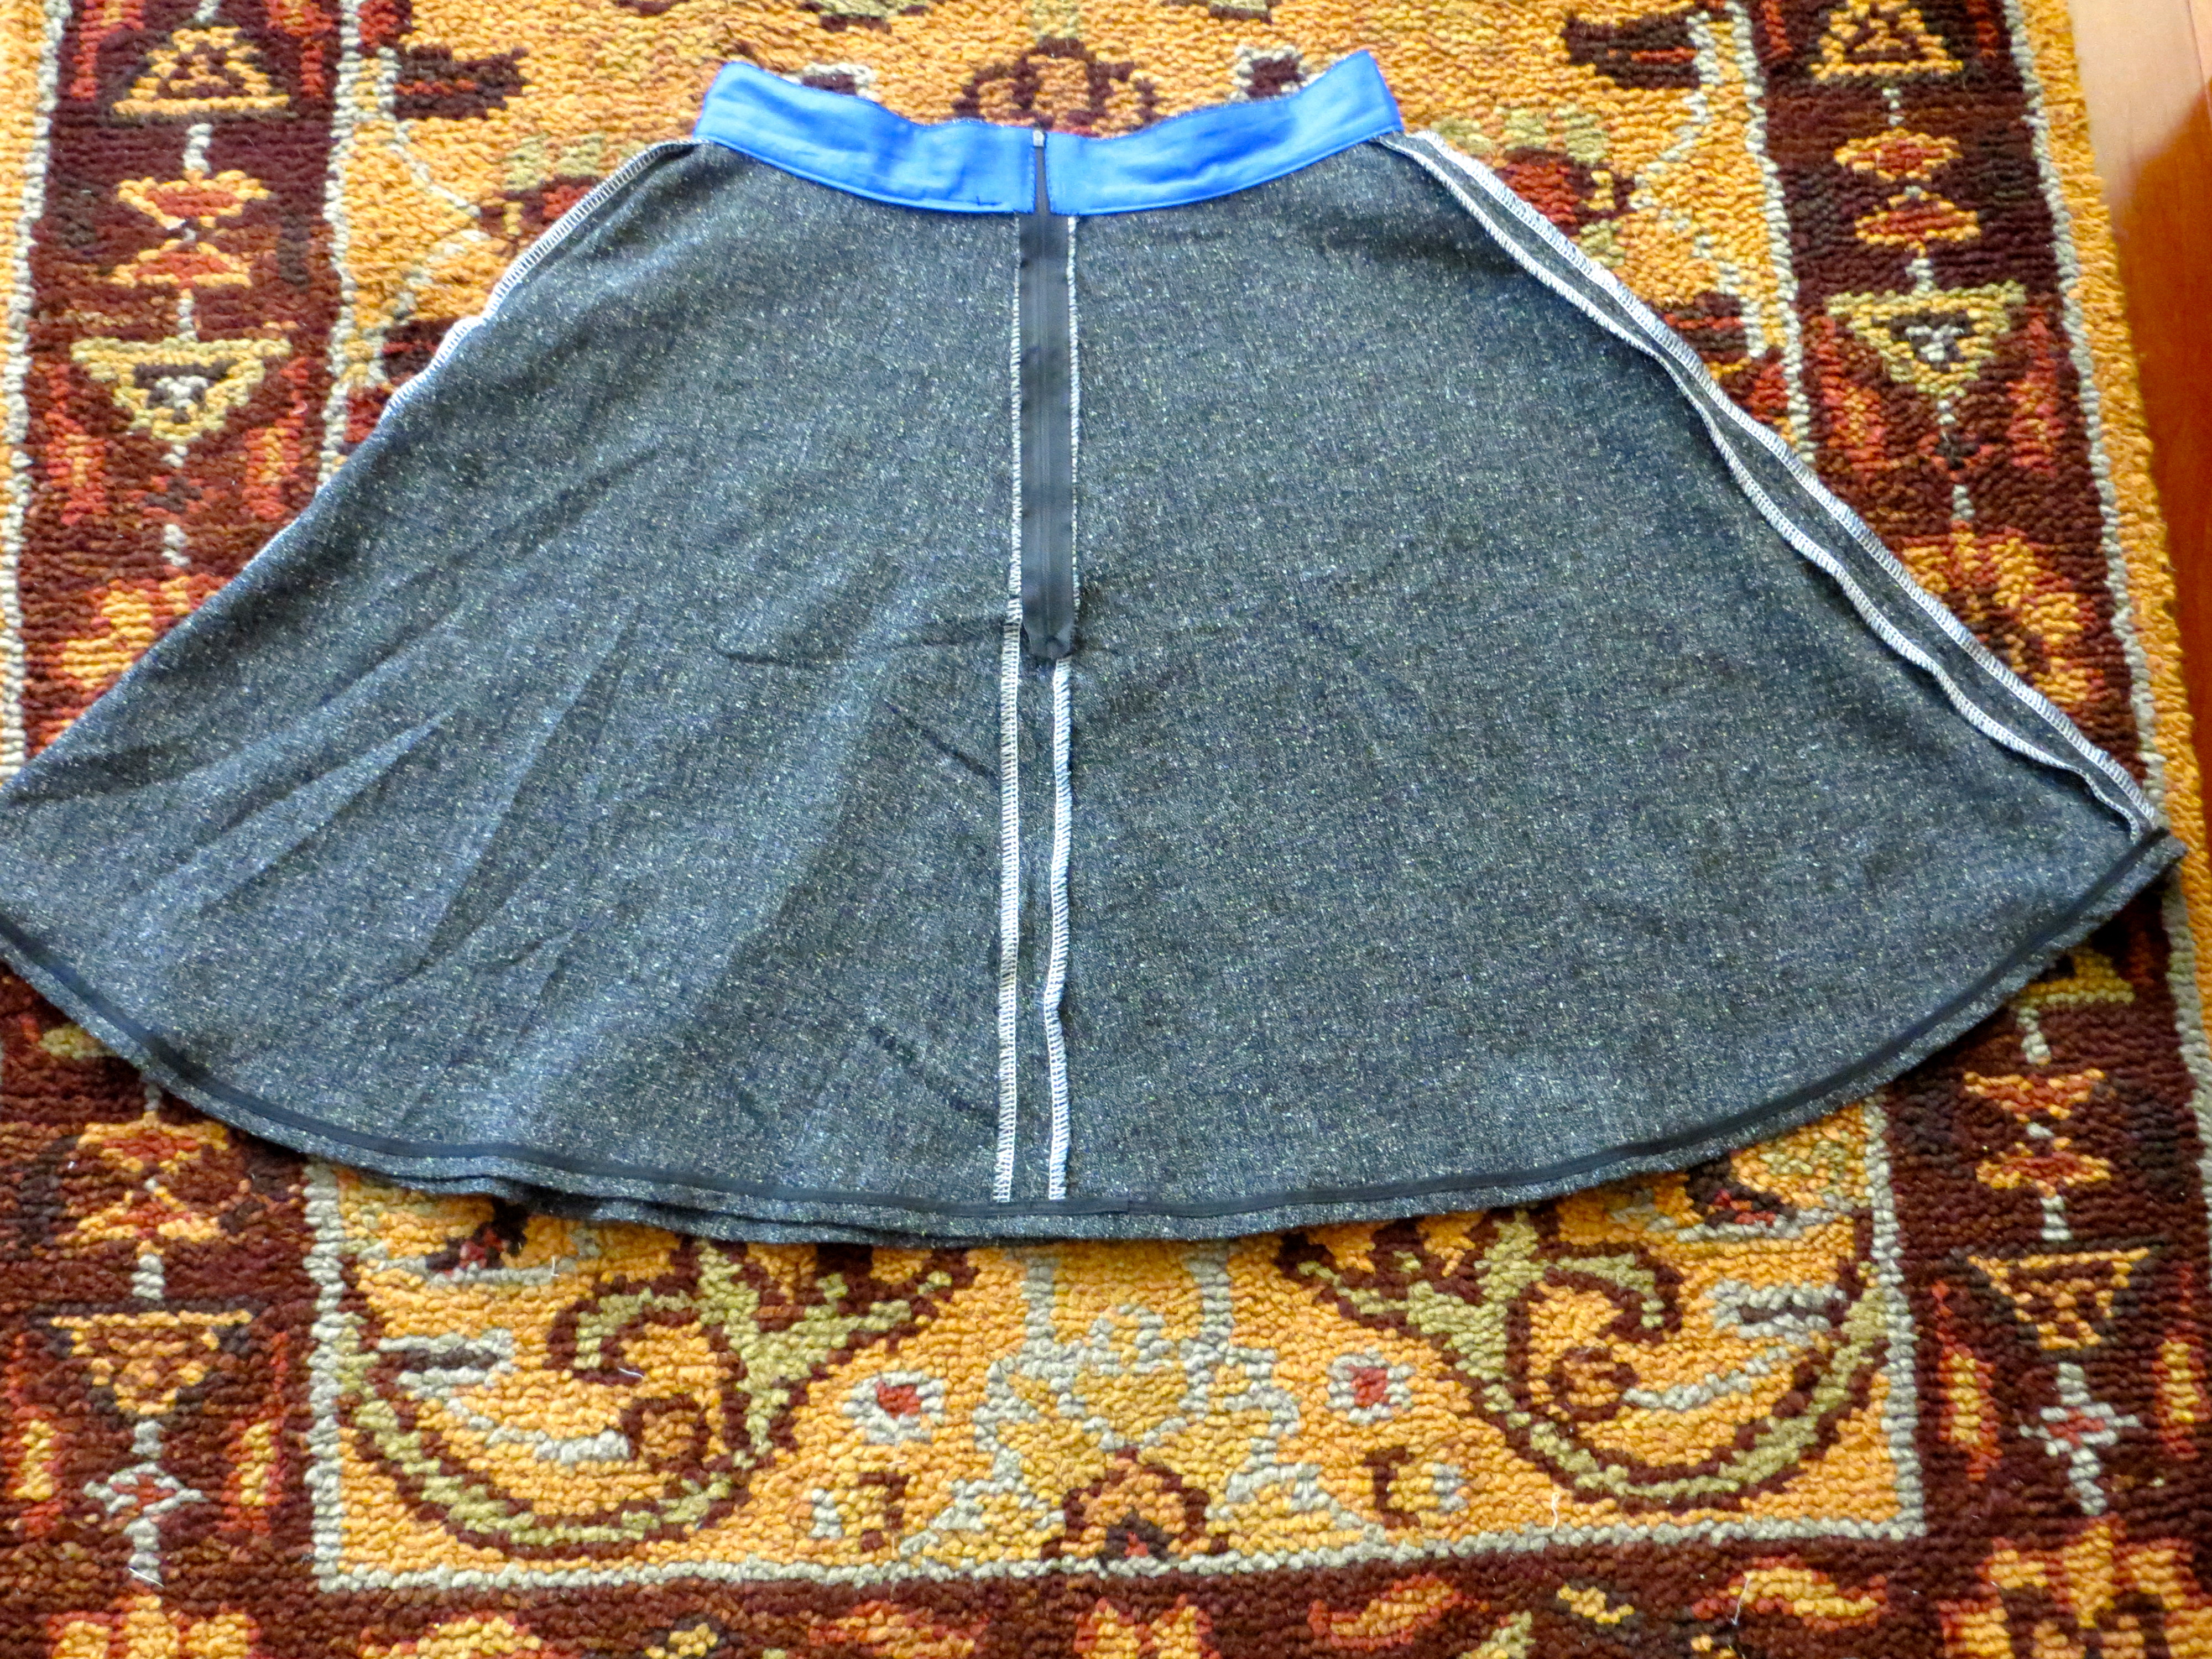
I also modified the waistband piece to be able to line it with my blue fabric. I split the waistband piece in half lengthwise, then added a 5/8″ seam allowance. I then cut one piece each from fashion and lining fabric. I interfaced the fashion fabric only with a lightweight woven interfacing from Emma One Sock. I sewed the pieces together along one long edge, trimmed and edgestitched, then treated the pieces as one per the instructions for the remainder of the construction process.
I finished all my raw edges with my serger. I guess I could’ve changed to black thread but I kind of like the white contrast since the fabric has little white flecks in it.

To finish the waistband, I stitched in the ditch all the way around and this worked out perfectly.

For my hem, I bound it in double fold bias tape. This served two purposes. First it provided a clean finish. Second it added a little structure to the hem so it has a bit of flare. I normally handstitch or machine blind hem all my hems but I decided to just machine straight stitch this one since the stitches blend into the fabric so well. It was so much easier that way! 🙂

Top: Ann Taylor
Cardigan: Talbots
Skirt: Made by Me!
Shoes: Via Spiga
Necklace: Tessyla from Etsy


Love this outfit! And I’m jealous you get to go to a sewing workshop. Now I’m off to find Via Spiga shoes…
Thanks, Lynn! Take off Friday and come with me!!
As for the shoes, I got them a week or two ago from the Nordstrom website. They were on sale. I normally wear an 8.5 or 9 but had to go up to a 9.5 in these, FWIW.
Very flattering! Love the top with it, looks very put together.
Thanks, Christy! I think you would look cute in this skirt, too 🙂
I definitely leave the seam basted shut when I’m putting in a centered zipper, for what it’s worth. That’s the only kind of zipper I knew how to put in for decades, so I’ve had a bit of practice with them. 😉
Thanks, that’s good to know. I am definitely going to try it that way next time. Would have save me a lot of headache!
It looks awesome! Great job! And i totally understand about not waiting for the sewalong, it’s a nice quick and easy pattern to sew up isn’t it!
Thanks, Rachel! It is definitely an easy pattern to sew. I can’t wait to see all the other versions that everyone else makes 🙂
I really love this version – you have done such a lovely job and I love your top too
Thanks, Lizzy. It really is a very quick make and versatile, too. Will I be seeing you in a Hollyburn skirt eventually?
No doubt I’ll give into the urge sooner or later. I’m just trying to refrain until after my overseas trip… that will no doubt involve fabric tourism!
That’s a great skirt, Katrina! So flattering!
Thanks, Romy! It was so nice meeting you this weekend and I really enjoyed seeing everything you have sewn!!
Looks great! And thanks for the tip about finding the right hem length, I’m still struggling with mine (hem is just basted – shh!).
Thanks for stopping by! Good luck with your hem 🙂
This is a great skirt! (and outfit too)
Thank you!!