Tag Archives: quick

McCall’s 6654 — Knit Maxi Skirt

19 May

IMG_1547


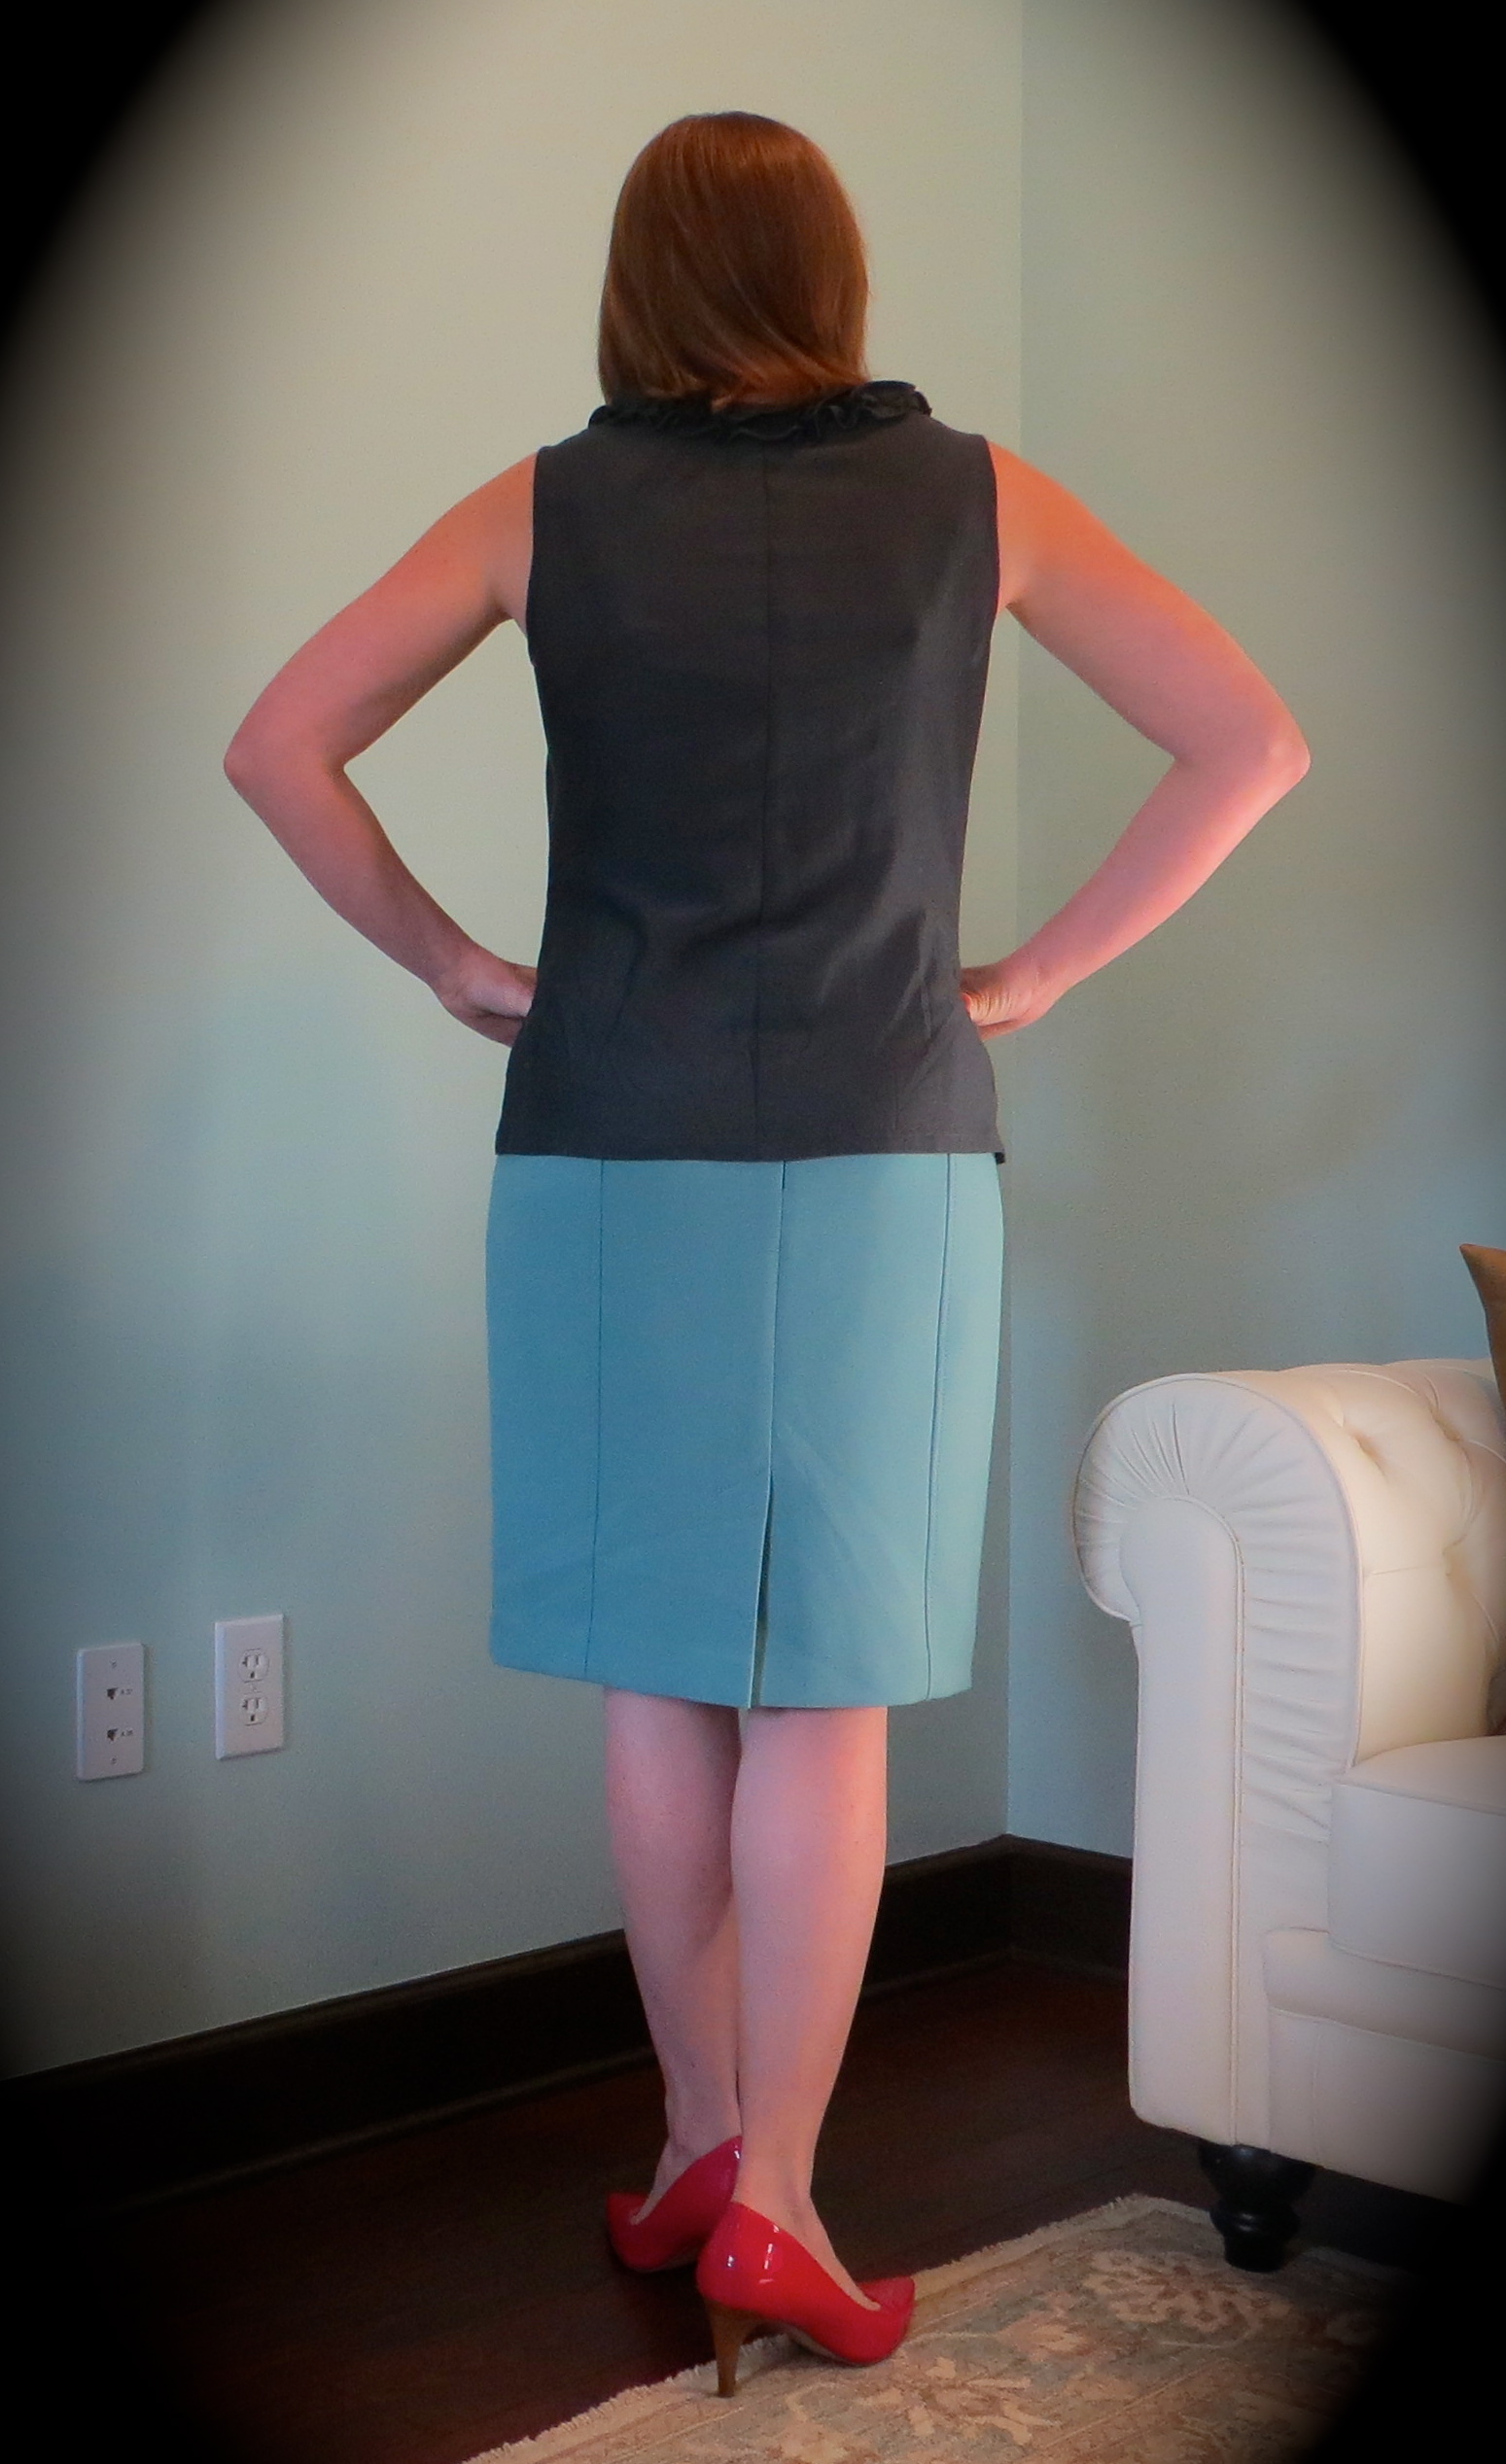
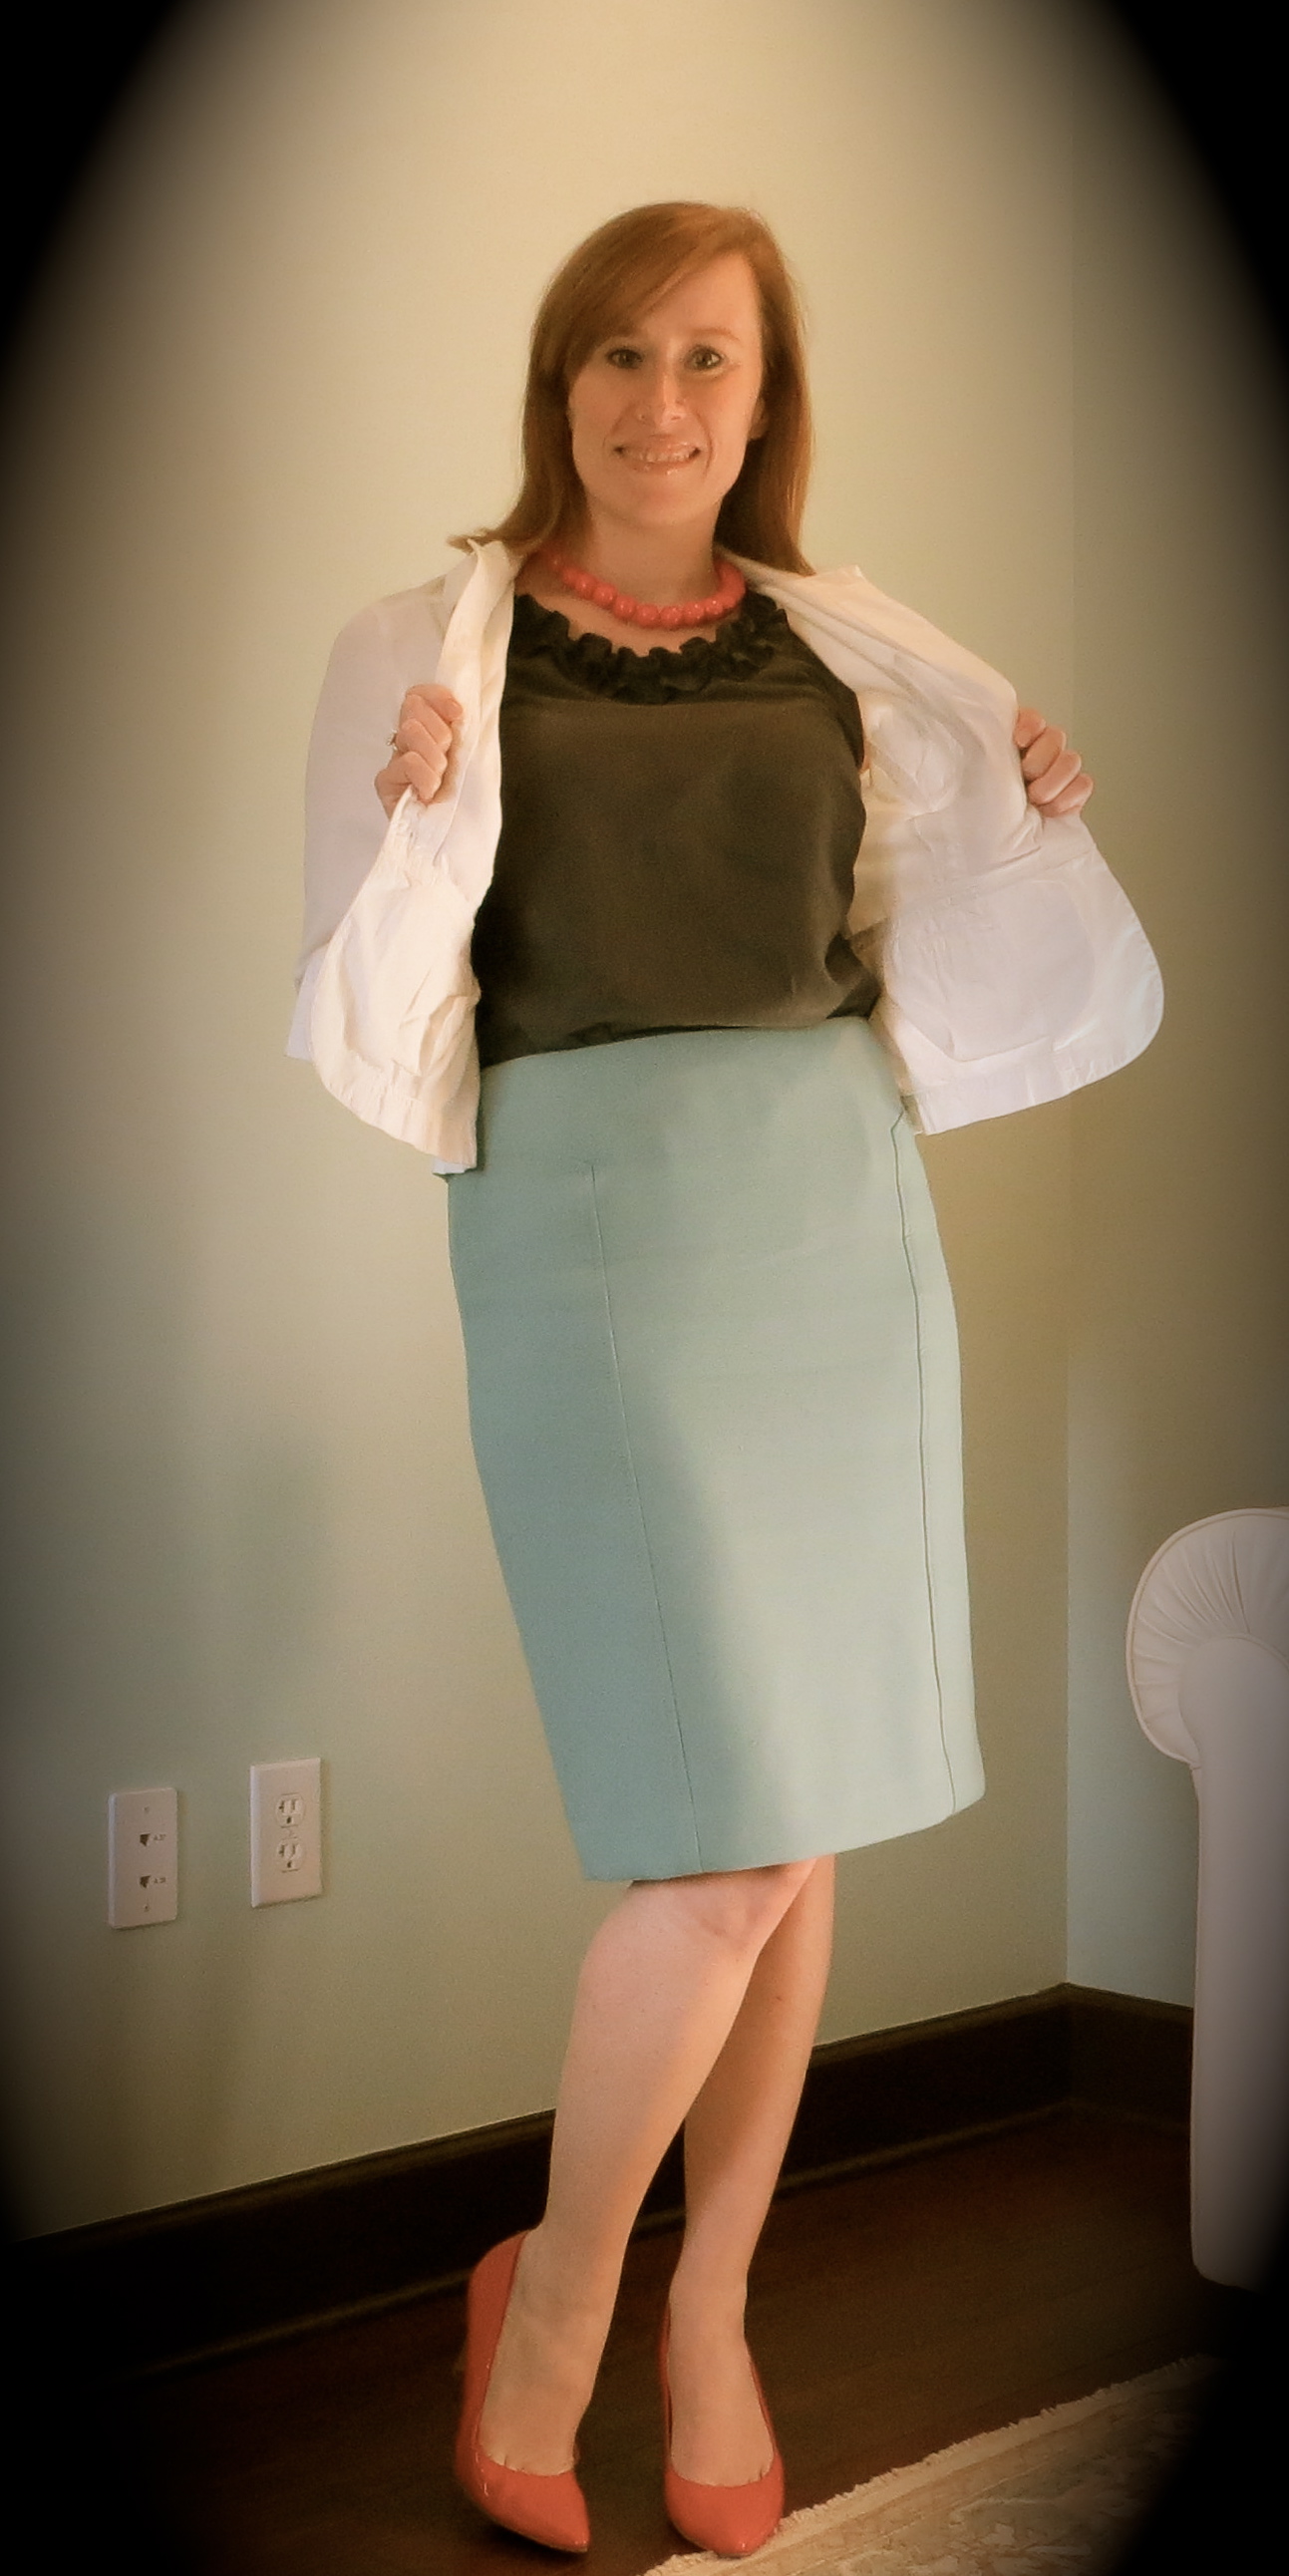
Well, friends, I have been on a sewing spree this week!  Me Made May has been Motivate Me May for me!  I have completed three projects this week, this skirt being the most recent.  I think I have been so eager to complete projects because I have made it 18 days into the month without repeating an item.  While that wasn’t part of my original pledge, I am amazed that I have made it this far with no repeats.  I am afraid I will have to show some reruns this week, though, but I will try to style them differently.  Aside from this skirt, I have also made two shirts, one of which you can get a sneak peek of on my Flickr stream and I will have reviews forthcoming for both tops.


IMG_1548


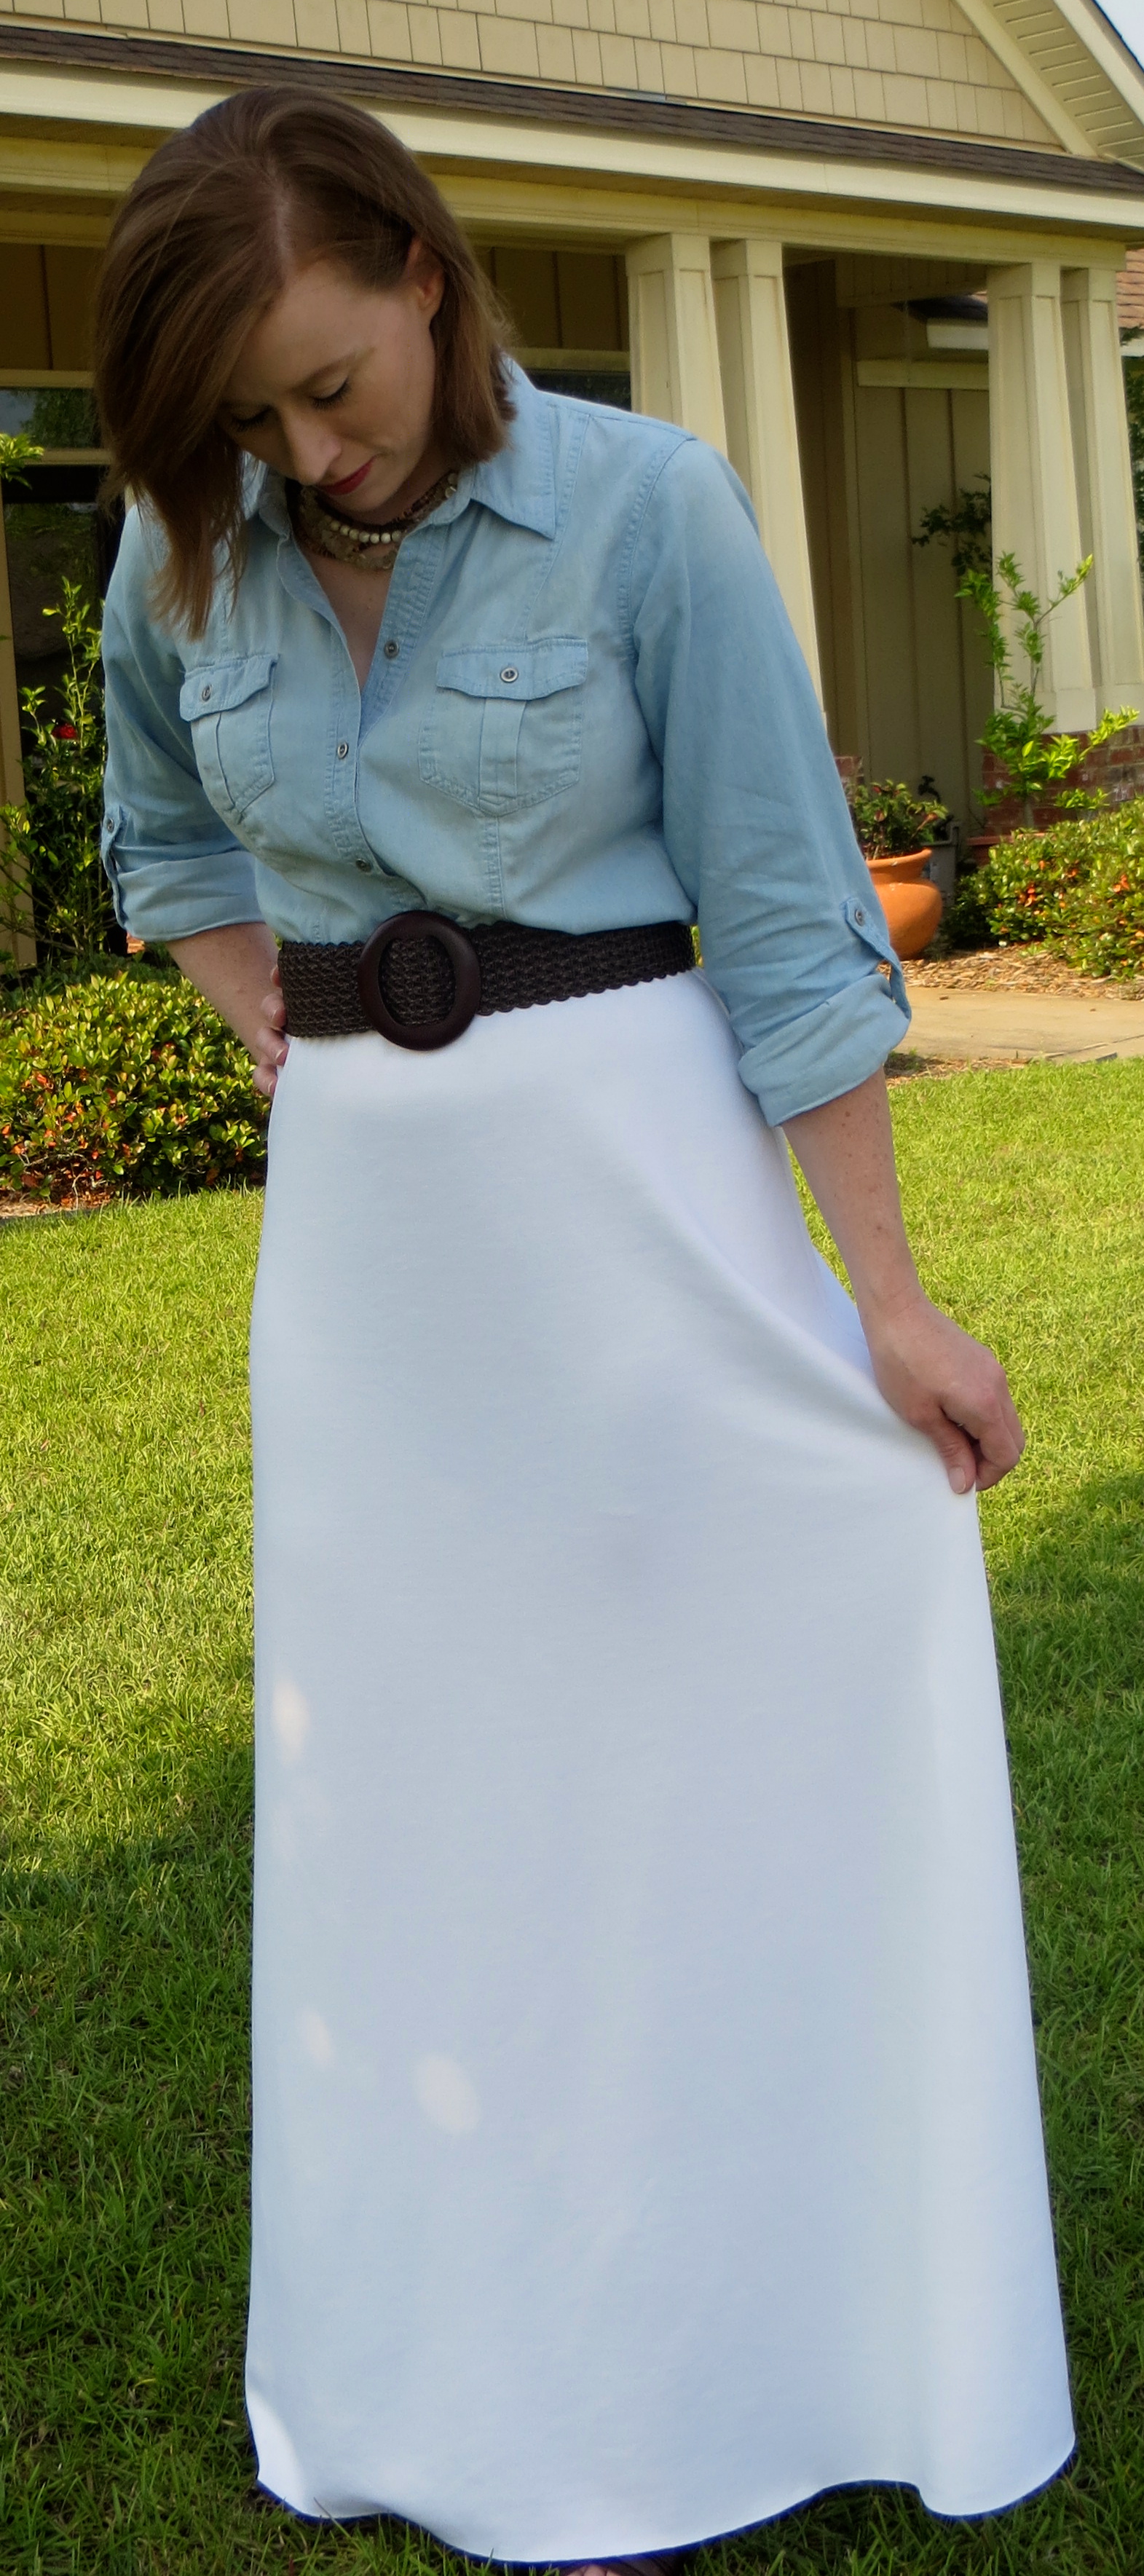
This skirt (McCall’s 6654) is one of the simplest things I have ever sewn — it is three straight seams plus a waistband casing with a piece of elastic inside.  I didn’t even bother to hem it.  It is really quick and easy if you have a serger but I can’t imagine that it would take much longer with a regular machine — just remember to use a narrow zig zag stitch so your stitches won’t break, especially on the waist.


IMG_1550


My only beef with this pattern is that it runs HUGE!  But I find this to be the case with all Big 4 knit patterns.  I suspected this going in so I did a little preparation before I started cutting.  I first looked at the pattern pieces to see what the finished measurements were for each size.  Unfortunately, the finished waist measurements weren’t given so I measured the waistband casing piece and subtracted the seam allowances.  I then realized that if I cut my size according to the size chart, this skirt would be GIGANTIC, so I decided to see which size corresponded to the waistband size I wanted.  Basically, I looked for the size that most closely matched my waist measurement plus seam allowances so there would be zero ease at the waist.  I didn’t want a bunch of excess fabric gathering at the waist of this skirt that is supposed to have an A-line silhouette.  I then checked the finished hip measurement for that size, and saw that it was only 1″ smaller than my hip measurement so I decided that I could live with that.  But honestly, there is no way this is 1″ smaller than my hips — do you see any negative ease?  My final skirt ended up being 2 sizes smaller in the waist and 4 sizes smaller in hips than what the size chart recommended!


IMG_1553


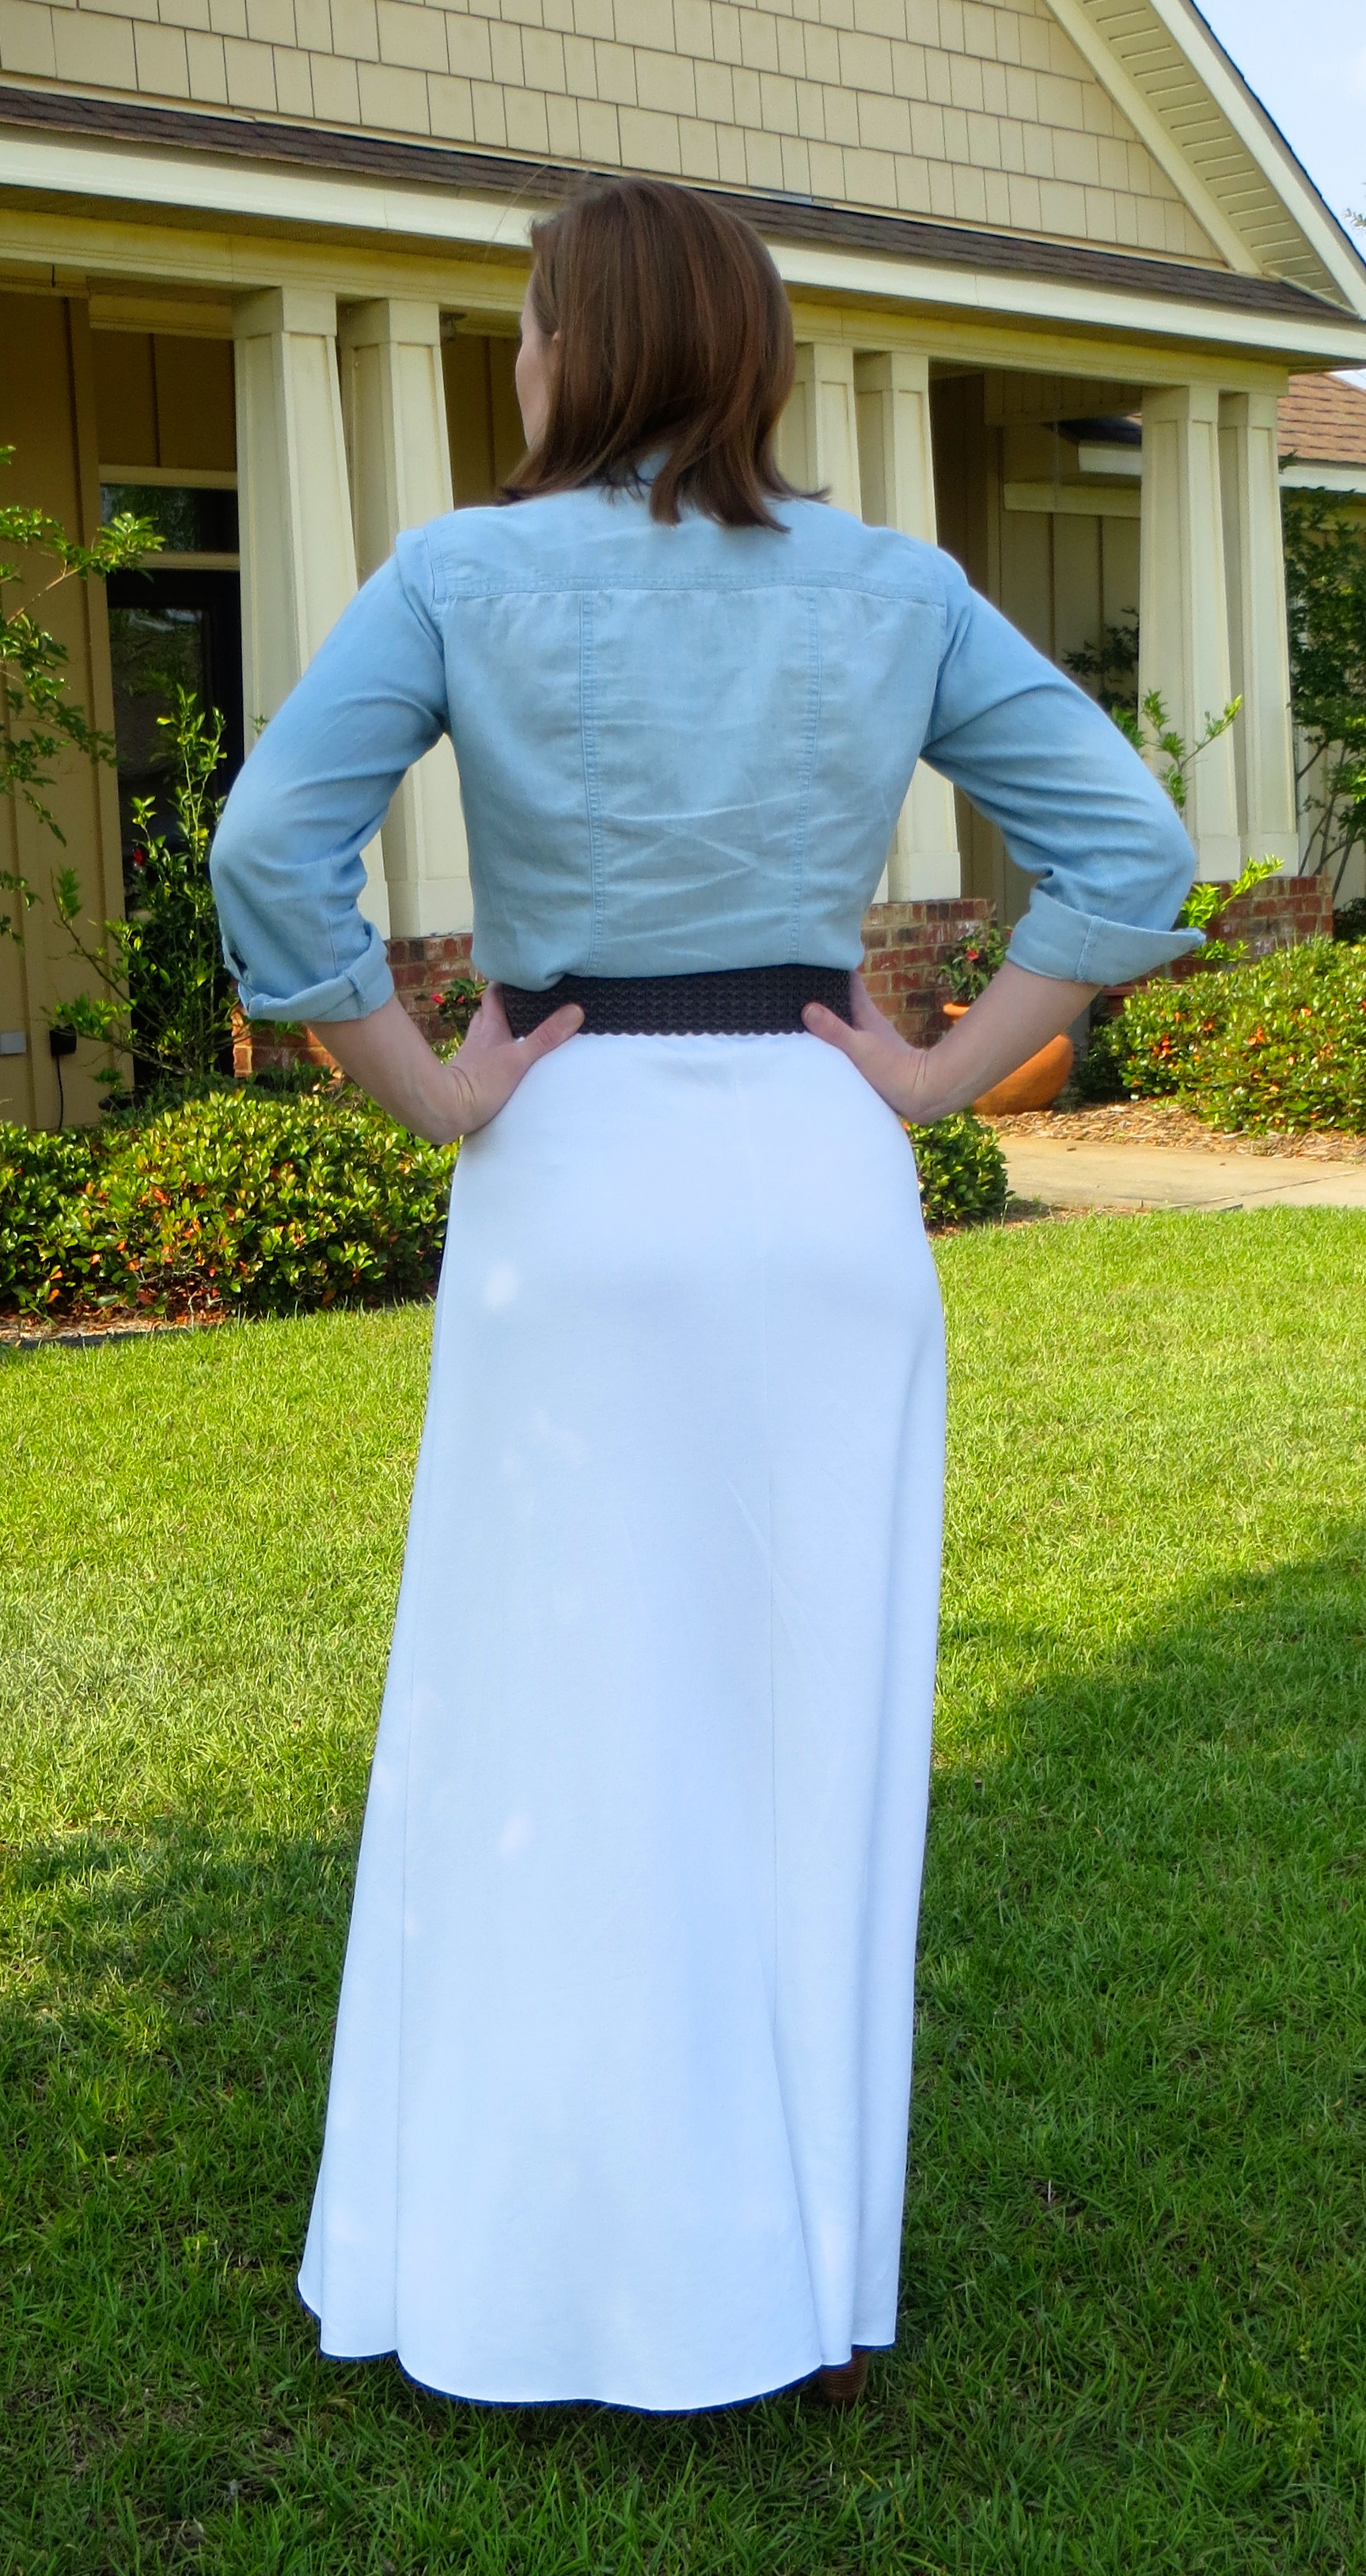
Overall, I highly recommend this pattern for anyone.  Seasoned sewists will find it a breeze and a great palate cleanser after more complicated projects.  Beginning stitchers will boost their confidence with the 2 simple seams and elastic waistband.  What do you think, should I shop my stash for a floral knit for my next version?


IMG_1556


For more details on the construction, visit my post on Pattern Review.

Perfect Shell — Simplicity 2599

2 Apr

IMG_1439


Here’s my most recently finished sewing project — and I actually just finished it this week!  This is Simplicity 2599, a great basic blouse pattern that includes sleeveless and short-sleeved versions as well as several different trim options.  It also features different pattern pieces for B, C, and D bust cups so you don’t have to do any adjustments for that department.  The blouse is quick and easy to put together once you work out any fitting issues.  And really, there can’t be too many fitting issues when there is just one main piece for the front and one main piece for the back 🙂


IMG_1436


As you can see, the neck in this version (E) features a cute ruffle which is created by gathering a single layer of bias cut fabric and attaching it to the neckline through the blouse and facing.  This technique is great because it keeps the facing from flipping out and because the facing adds an extra layer of sturdiness to anchor the ruffle.


IMG_1446


In this photo you can see what the shirt looks like untucked.  Please excuse the wrinkles since I had it tucked into my skirt all day.  I had to tweak the pattern to achieve the waist definition you see here.  When I first sewed up the shirt, it was a complete box.  I ended up grading the waist down two sizes from the size that I sewed in the bust and hips.  This makes it a little hard to get on over my head since I also omitted the button opening at the neck but it is possible.


IMG_1450


From the back view you can see that I did an awesome swayback adjustment — well, pretend like you can :).  It is wrinkly from being tucked in but before I made my swayback adjustment, the back of this shirt pooled like crazy.  Now it glides over my junk-trunk much more gracefully.  For finishing, the seams are all French seams and the armholes are finished with self-bias binding.


IMG_1456


And just to show you one of my favorite flowers and why this is my favorite time of the year.  Azaleas make me so happy.  These are some of the small azalea bushes outside my office.  When I left work yesterday afternoon, they were so full of blooms and the sunshine was so pretty, I just had to snap a picture for you.  Unfortunately azaleas grow really slowly so it will be many years before these bushes reach the massive size of the plants that I so admire in our surrounding neighborhoods, but at least my little babies make up for it in quality!


IMG_1433


And one last shot to show you the outtakes from my first attempt at self-photography.  Apparently 10 seconds isn’t as long as I thought it was.  Or we can pretend I was doing exercises in my skirt and heels.  In front of the camera.  I’m still amazed that I even figured out how to turn on the timer on my camera without having to consult the manual…


IMG_1430

Jacket–Loft
Blouse–Made by Me!
Skirt–Halogen from Nordstrom
Shoes–Cole Haan
Necklace–Tessyla on Etsy


Crack(er) Candy

23 Dec

IMG_0981

Merry Christmas, everyone!  I am going to keep this post short and sweet and will just tell you that you should add this to your holiday sweets table ASAP.  And that will be easy to do because all of the ingredients will probably be on hand and it takes no time to throw together.  Plus, it is the most delicious and addictive stuff.  Trust me, I have been getting requests for this candy and the recipe left and right.  This candy is the perfect combination of crunchy, salty, and sweet.  No one can believe that it all starts with Saltine crackers!!

I hope everyone enjoys some relaxing time with their loved ones over the next week and safe travels to those who will be on the road.


Crack(er) Candy

1-2 sleeves Saltine crackers

2 sticks unsalted butter

1 cup packed brown sugar

1/2 teaspoon vanilla extract

generous pinch salt

12 ounce bag semisweet chocolate chips

coarse sea salt for garnish (or toasted nuts or crushed pretzels if you prefer)


Preheat oven to 350F.  Line the bottom and sides of a 11″ x 17″ or 12″ x 18″ jelly roll pan with foil then lay a piece of parchment paper cut to fit in the bottom of the pan.  Arrange the Saltine crackers in straight rows and columns in a single layer in the pan, making sure they are all touching.  (My 12″ x 18″ pan holds about 48 crackers.)  In a medium saucepan heat the butter and sugar to a boil.  Boil and stir continuously for 3 minutes.  Remove from the heat and stir in the vanilla and pinch of salt.  Immediately spread the sugar mixture evenly over the crackers.  Bake in the preheated oven for 12-15 minutes, until bubbly but not starting to burn.  Remove from the oven and spread the chocolate chips evenly over the crackers.  Allow to set for 2 to 3 minutes then use an offset spatula to spread the melted chips over the crackers.  If desired, used a fork to swirl a pattern into the chocolate.  Sprinkle the coarse sea salt (or nuts or crushed pretzels) over the top and allow to set at room temperature overnight for the chocolate to harden before breaking or cutting into squares.  If you can’t wait that long (and honestly, who can?), chill the pan in the fridge until the chocolate is set, then return to room temperature for 30 minute before cutting or breaking into squares.  Now share with your friends before you eat the whole batch yourself.


Adapted from Smitten Kitchen.

Cheez-It Crack

28 Nov

Howdy Friends!  I hope everyone has been well and had a wonderful Thanksgiving holiday (if that is the tradition in your country).  I am sharing a quick recipe with you today that will revolutionize your snacking habits — it will cause you to have the most intense cravings and desires at strange hours of the day — hence the name Cheez-It Crack.

You might think Cheez-It crackers are kind of plain.  You got over those when you were a kid.  Well, with the addition of a select few spices and some olive oil and a brief stint in a low oven, your lowly childhood crackers will be turned into your adulthood snacking drug of choice.  This salty-tooth satisfier takes about 3 minutes to put together and another 20 to bake.  Your friends will beg you to make them more and you won’t deny them because you know you need more yourself.  So go ahead and whip up a batch for yourself this weekend and find out what all the fuss is about!

Cheez-It Crack

2 boxes Cheez-It crackers

2/3 cup olive oil

1 packet dry Ranch dressing mix

1/2 teaspoon garlic powder

1/2 teaspoon lemon pepper seasoning

1/2 teaspoon cayenne pepper

Preheat oven to 250F.  Combine all ingredients in a large bowl and toss well to coat.  Spread crackers on a large cookie sheet and bake in the preheated oven for 20 minutes, stirring halfway through.

Source:  An addict never tells… Really, though, my friend Lee gave me the recipe 😉