Tag Archives: cake

Chocolate and Peanut Butter Layer Cake

26 Jun

As I was looking at my last several posts, I realized y’all must be starving! All we’ve been talking about is sewing and I have been a bad hostess by not offering you something to eat or drink 🙂


IMG_2769


I am going to remedy that today and then some with this decadent chocolate and peanut butter layer cake. I could probably stop with that and give you the recipe and we would be in good shape. However, I will tell you a little more about it so your resistance will be even further weakened.

I made this cake two weeks ago for an employee’s going away party. A little bird told me she liked the chocolate/peanut butter combination so I pulled out this recipe that I had made once or twice before several years ago. Everyone at the office really enjoyed the cake and we ate over half of it at the party (9 of us girls there).

The recipe comes from the cookbook Sky High: Irresistible Triple-Layer Cakes. It is a great cookbook to have in your collection because many of the recipes look like something you would want to try (I have made several so far and all have been delicious).

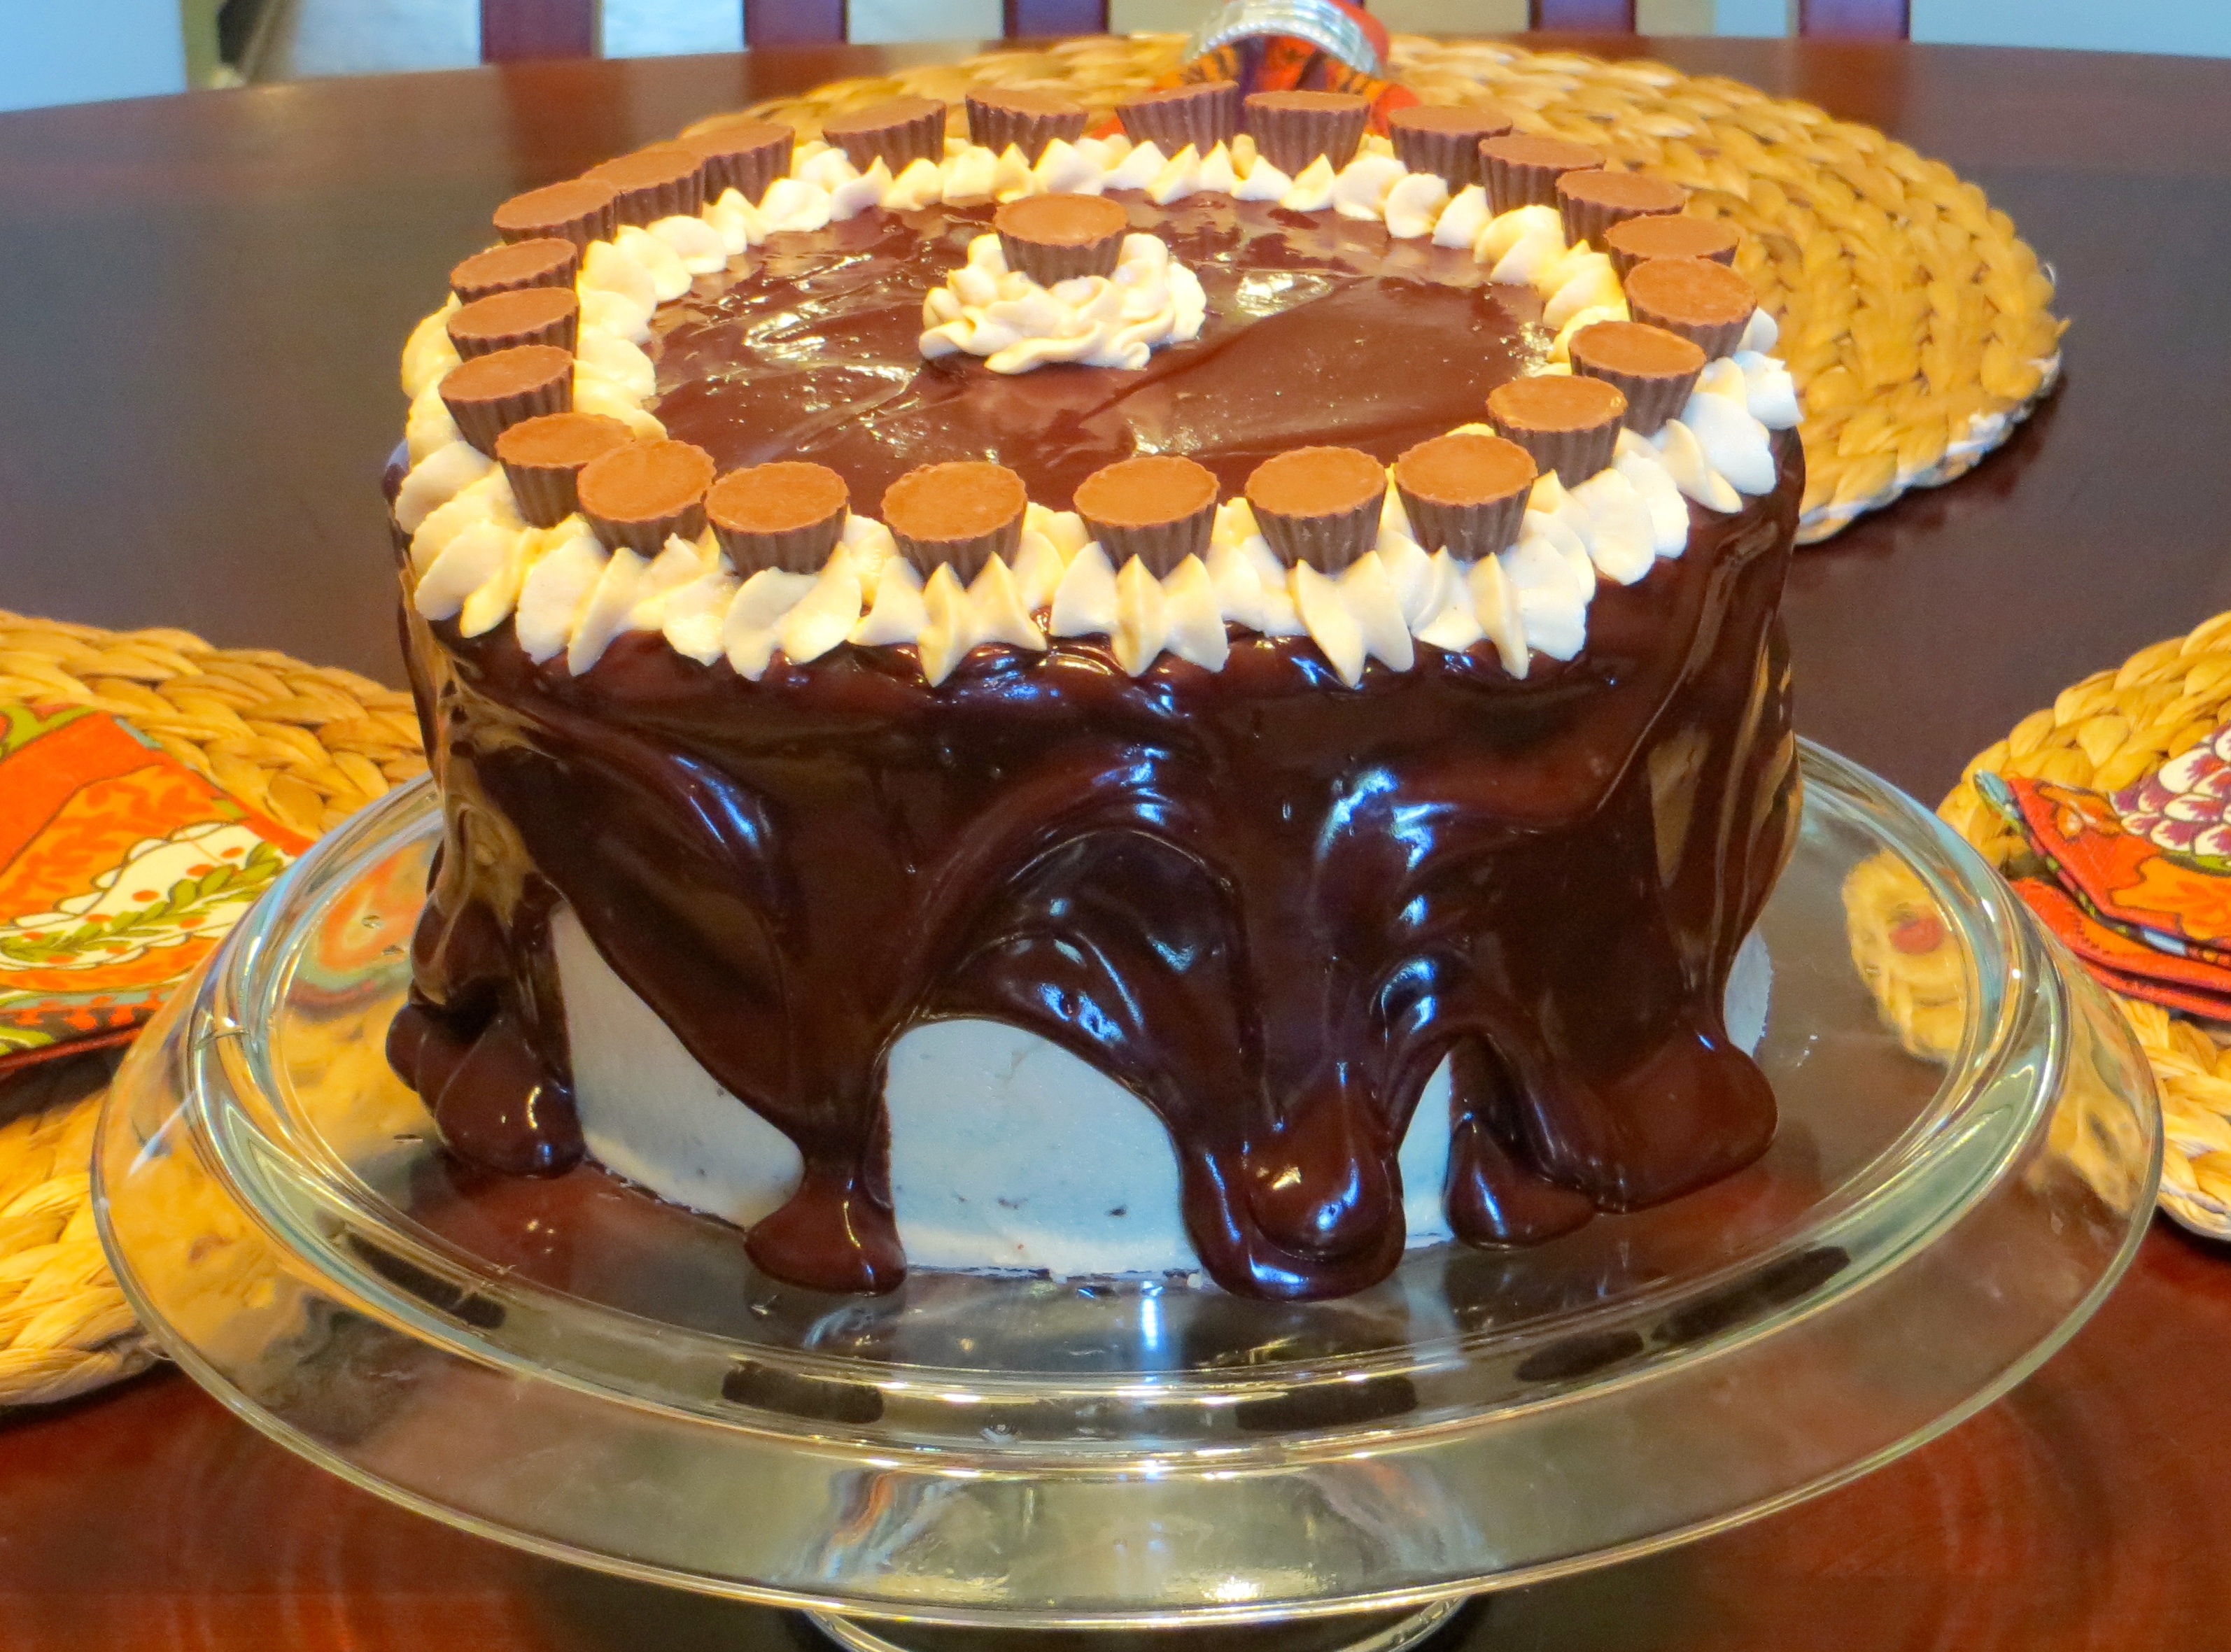
It starts with sour cream and chocolate cake layers that mix up easily in a single bowl and without an electric mixer if you don’t want to use one. You then fill and frost the layers with a cream cheese peanut butter frosting that reminds me of decadent peanut butter cheesecake — YUM! Finally, you top it with a thick layer of chocolate and peanut butter glaze.

This cake is great because you don’t have to be a professional cake decorator to make it look impressive. And if you keep a decently stocked pantry, you probably already have all the ingredients on hand. Cake for supper? Absolutely!


IMG_2771


Sour Cream-Chocolate Cake with Peanut Butter Frosting and Chocolate-Peanut Butter Glaze

  • Servings: one 8-in triple layer cake, serves 16-20 generous slices (the author states 12-16 but I think you can get more out of it because it is so rich)
  • Print

 Cake:

  • 2 cups all-purpose flour
  • 2 1/2 cups sugar
  • 3/4 cups unsweetened cocoa powder, preferably Dutch processed
  • 2 teaspoons baking soda
  • 1 teaspoon salt
  • 1 cup vegetable oil (I used canola)
  • 1 cup sour cream
  • 1 1/2 cups water
  • 2 Tablespoons distilled white vinegar
  • 1 teaspoon vanilla extract
  • 2 eggs

Preheat the oven to 350F. Prepare three 8″ round cake pans (I used Baker’s Joy spray, but the recipe suggests buttering the pans then lining with buttered parchment).

Combine the dry ingredients in a large mixer bowl and whisk together to combine. Add the oil and sour cream and whisk by hand or blend with an electric mixer. Gradually beat in the water then blend in the vanilla and vinegar. Whisk in the eggs and beat until well-combined. Divide evenly among the three prepared pans.

Bake for 30 to 35 minutes, or until a cake tester inserted in the center comes out almost clean. Cool in the pans on a wire rack for 20 minutes then turn the cakes out on the rack to finish cooling.

To finish the cake, spread 2/3 cup of the frosting between each layer and use the rest to frost the top and sides. You can also save a little to decorate the top after you apply the glaze. Next, spread the glaze over the top, allowing it to drip down the sides. Decorate with remaining frosting, if desired. Enjoy!

Frosting:

  • 10 ounces cream cheese, softened
  • 1 stick (4 ounces) unsalted butter, softened
  • 5 cups confectioners’ sugar
  • 2/3 cup smooth peanut butter (not natural type)

Combine cream cheese and butter in a large mixing bowl and beat with an electric mixer until light and fluffy. Gradually blend in the confectioners’ sugar, mixing thoroughly for 3 to 4 minutes. Add the peanut butter and beat until thoroughly blended.

Glaze:

  • 8 ounces semisweet chocolate, coarsely chopped
  • 3 Tablespoons smooth peanut butter
  • 2 Tablespoons light corn syrup
  • 1/2 cup half-and-half

In the top of a double boiler (or in the microwave like I did), combine the chocolate, peanut butter, and corn syrup and heat until melted and smooth, whisking frequently. Remove from the heat and whisk in the half-and-half, beating until smooth. Use while still warm.


Adapted from Sky High: Irresistable Triple-Layer Cakes.


IMG_2494

Tips for Successful Cakes

20 Mar

I have so many posts waiting to be written that I don’t know where to start!  I even have a few finished sewing projects to show you!!  I will start with something that is already photographed, though, and since I will have a few cakes recipes for you in the upcoming weeks, I will share some of my cake baking tips with you in preparation.  Some of these tips have been picked up from various internet sources, some from cake decorating instructors, and some from learning the hard way 🙂

I hope you will find these tips useful and if you have any good tips of your own, feel free to leave them in the comments section.

P.S.  The cake photographed above was made a while back for my aunt’s mother-in-law’s 90th birthday.  I had the cake layers and frosting made up and then got food poisoning.  My wonderful mother came over at the last minute to finish assembling and decorating the cake and delivered it to the party.  Thanks again, Mom!


1.  Pan Preparation

Most butter or oil based cake recipes will instruct you to grease and flour your pans.  I don’t know about you, but I always get flour everywhere when I do this.  When I took a cake decorating class at a local community college a few summers ago, the instructor presented this brilliant technique.


Easy Peasy Nonstick Cake Pan Coating

1 cup shortening
1 cup all-purpose flour
 

Combine both ingredients in a small bowl and beat with a hand mixer until thoroughly combined.  Scrape into an airtight, resealable container and store in the pantry.  Using a paper towel or pastry brush, spread a generous amount in cake pans to prepare for baking.

No need to shake flour in and then tap it out.  This also prevents that cake-y, flour-y mess on the outside of chocolate cakes.  This paste will keep stored in the pantry indefinitely (at least for as long as your shortening and flour would have been good for).

In recipes that call for buttering, lining with parchment, then buttering and flouring the pans, I have found that just a good coating of this stuff is sufficient.  But note that this paste should not be used for cakes that do not call for greased pans.


2.  Insure level tops

I do several things to make sure my cake layers are level.  First, I use insulating strips around my cake pans.  Wilton makes these and you can buy them at Hobby Lobby or Michael’s.  You can also use wet strips of dish towels wrapped in aluminum foil.  The theory is that by insulating the edges of the cake pan, the edges of the cake do not cook as fast, therefore, they will rise higher and be level with the center of the cake.

Rotate your pans partway through baking to make sure your layers bake and brown evenly.

Another tip I learned from my cake decorating instructor — press down gently on the top of your cake layers with a clean kitchen towel or paper towel immediately after removing them from the oven to level any high spots.

After cooling my cake layers in the pans for 10-20 minutes, I turn them out (top-side down) onto parchment-lined cardboard cake boards and leave them there for about 10 minutes.  I then slide the cake and parchment off of the cake board onto the cooling rack to finish cooling completely.  This is a trick I discovered myself that makes the top super smooth and flat and the edges very square.

Using these tricks, I haven’t had to level a cake layer with a knife in a very long time.


3.  Crumb coat

If you have gone to all the trouble of making your cake beautiful and level, you don’t want stray crumbs in your frosting.  Once you have filled and stacked your layers, apply a thin coat of frosting on the sides and top of your cake then place it in the fridge or freezer for 15 minutes or so to allow the frosting to set up.  This will seal in crumbs and make it less likely for them to escape into your outer coat of frosting.  This is especially important if you are frosting a darker cake (like chocolate or red velvet) with lighter frosting (like cream cheese).


4.  Don’t point out your mistakes

If you have gone through the motions to make a filled, frosted, and decorated layer cake, chances are you are much more talented in the kitchen than most of the folks who will be eating your cake.  So don’t point out the minor imperfections that you may notice about it!  Smile quietly and politely thank everyone for their praises about your divine creation 🙂